When we moved into our house in May we knew one of the first projects was going to have to be a back door. You see the house is a duplex and our upstairs home is actually a 1 bedroom, 1 bathroom. Arya got the “master” if you can call it that and we put our bed in the 2nd living room. With that being the case, our room isn’t very private. It doesn’t have a door separating it from the kitchen and the only back door to the house goes in and out of our room. Not particularly private, especially since we use the back door far more than we use the front.
On top of all that, the only view out to the expansive backyard was this little window at the back of the kitchen. Oh yeah and that absolutely outrageous pantry that went a foot and a half back behind the wall on either side of that narrow door, talk about losing food!
And you can see that back door that goes to our bedroom and that small window to the right of it in this exterior shot taken before we moved in.
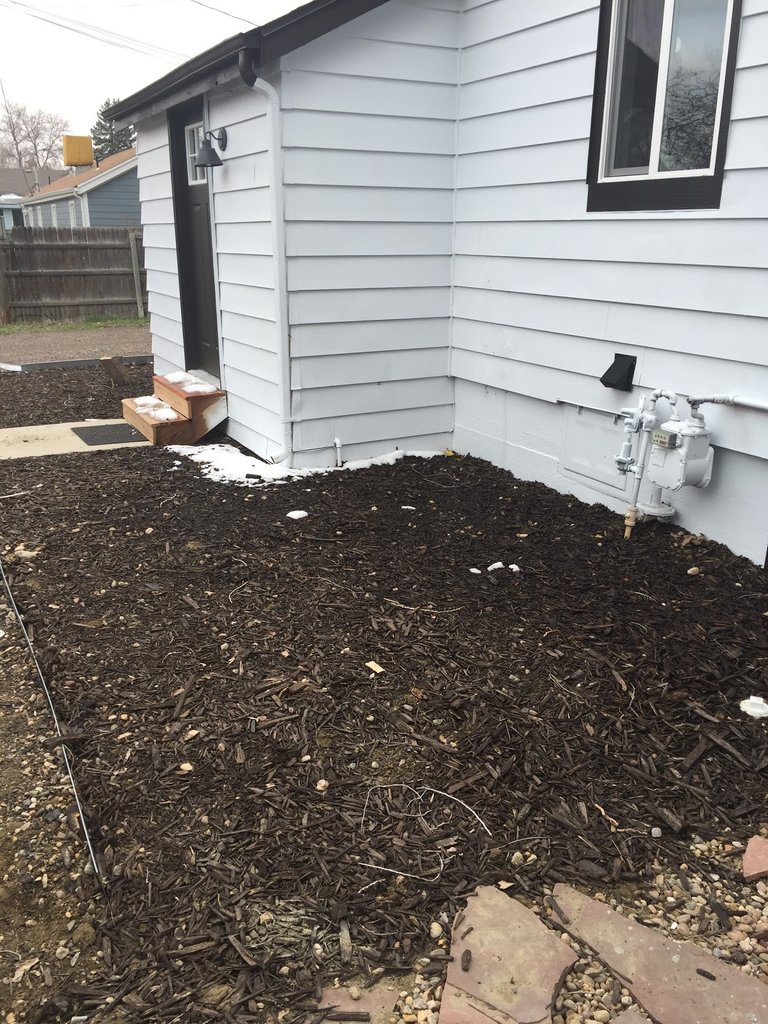
This is the kind of eye-sore-ish area to the North of the house, great shade in the summer, great view of the yard, but who wants to hang out next to the gas meter and laundry exhaust in a pile of mulch?
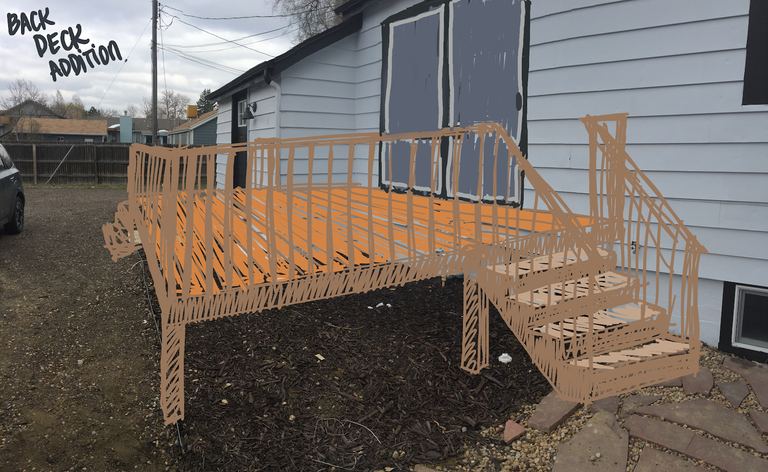
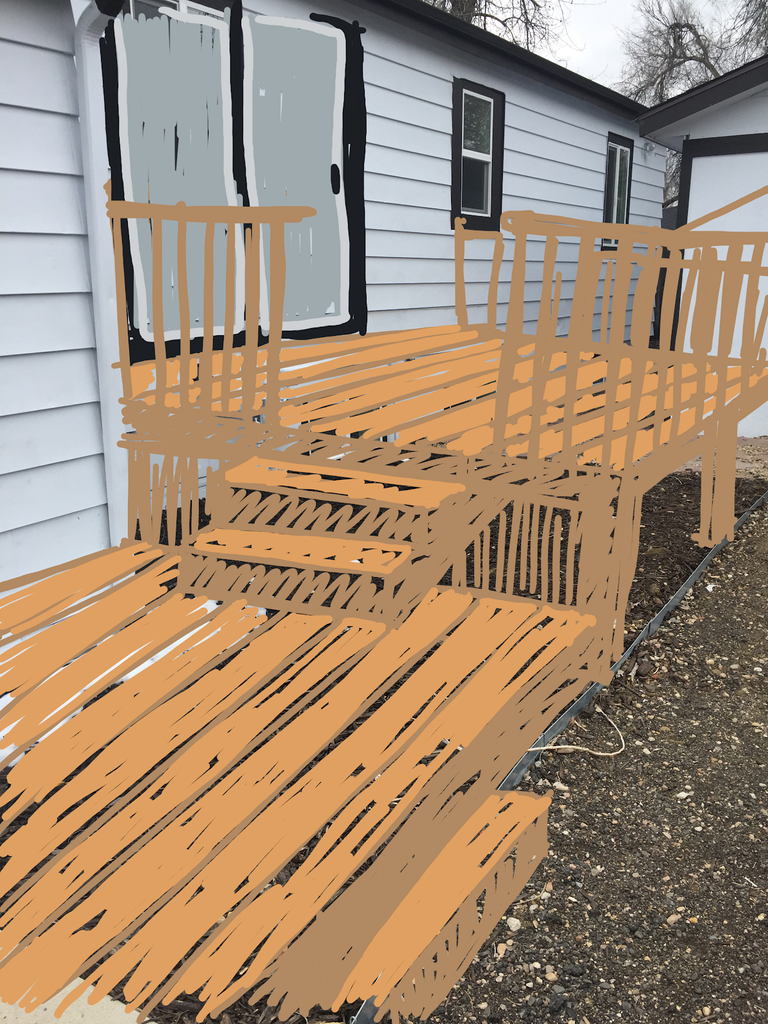
And so I decided to sketch up a solution to all these problems right after moving in. Actually it could have been right before we moved in. I drew up ideas for many of the homes we made offers on. We looked for over 2years and made offers on maybe 7 houses. It’s a hot market and we tend to be low ballers. Several of the homes went for over the asking price. Colorado’s Front Range is a nice place to live.
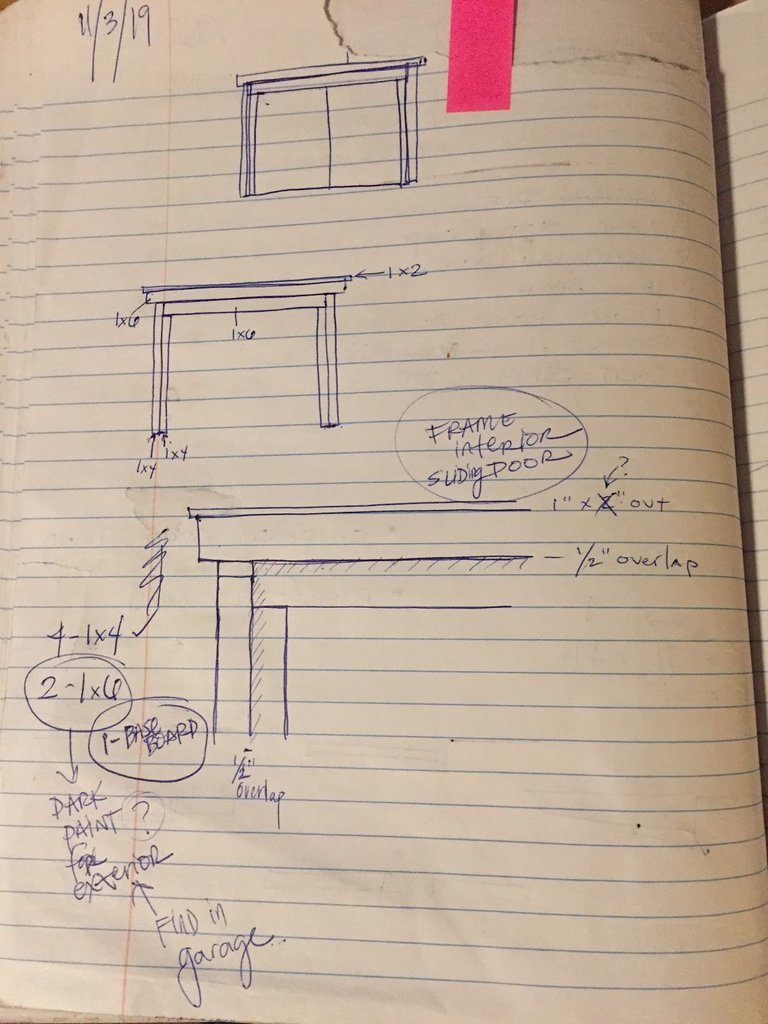
These were my rough sketches done of the sliding glass door and deck:
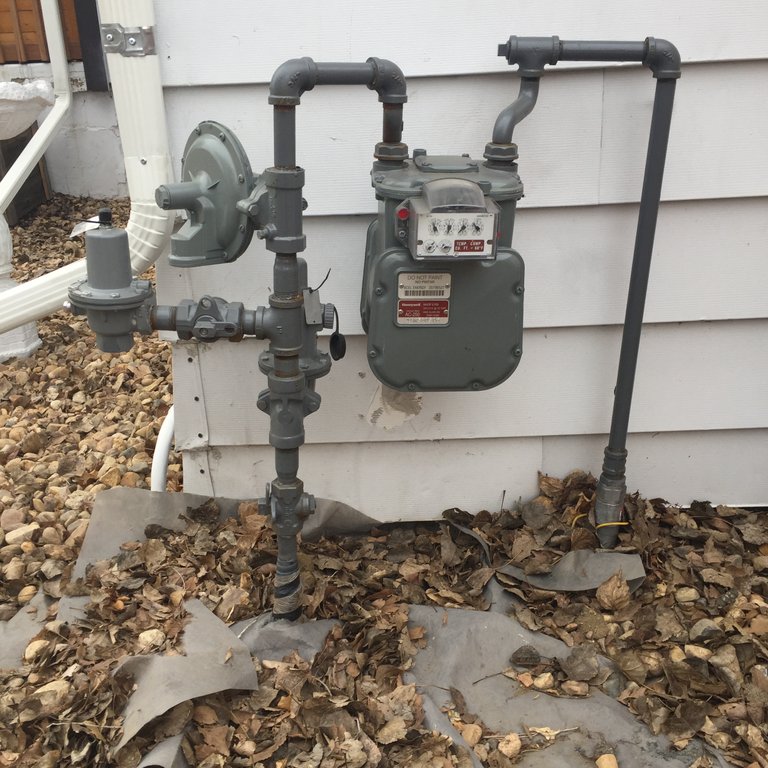
But when we moved in another layer of difficulty was added. They installed the radon system right where we wouldn’t want it. Like, exactly where we didn’t want it.
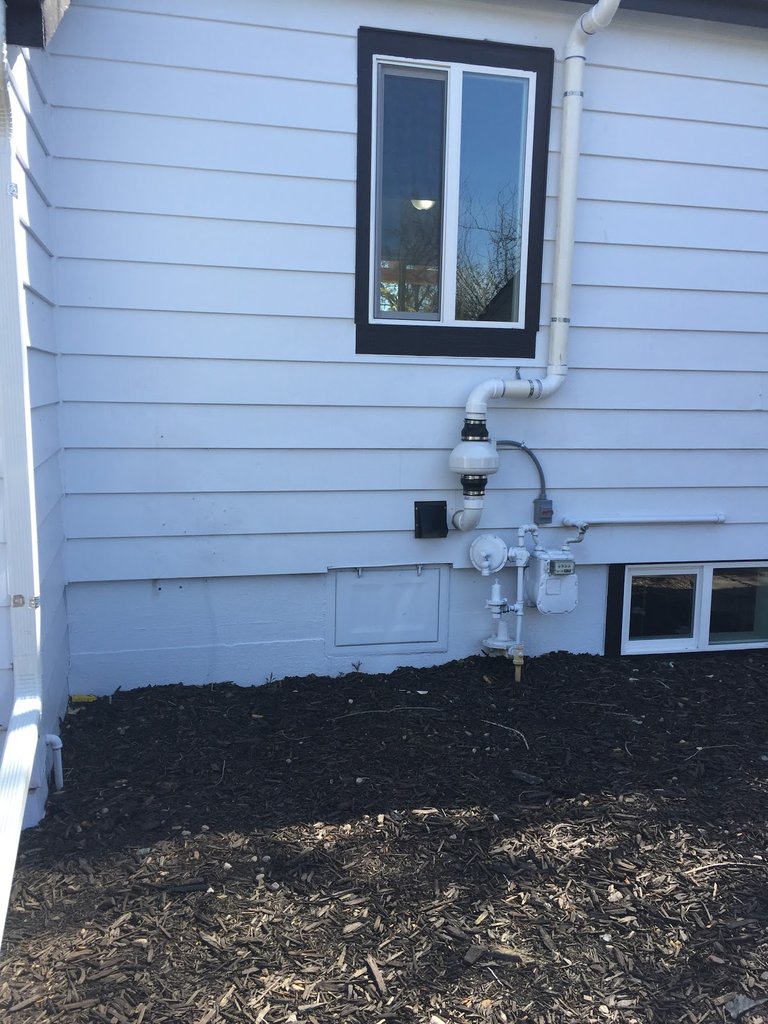

I looked into the code and their placement of the radon exhaust was actually illegal. You can’t put anything that close to the gas meter, our deck included. To realize our dream we’d need to move both the gas meter and the radon…
So I went to work contacting our gas company and for around $2000 we could get the meter both moved and upgraded. We believed this door and deck would be an integral part of the home and decided moving the meter was worth it.
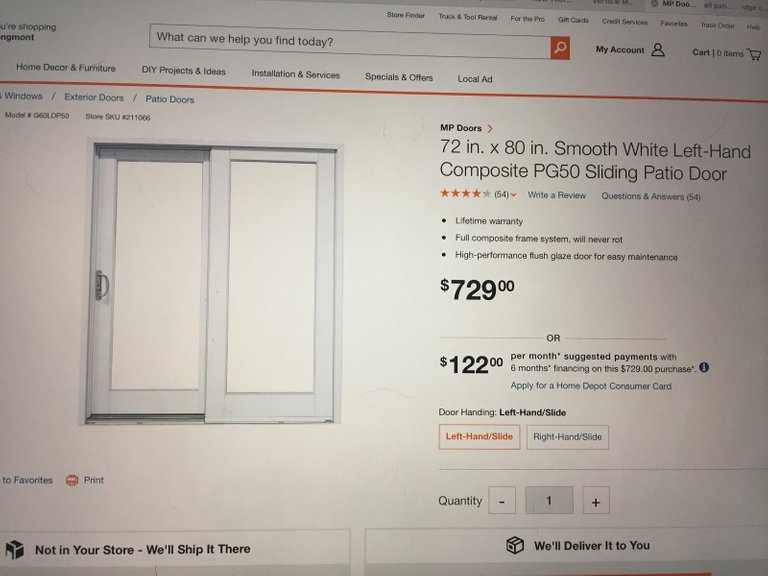
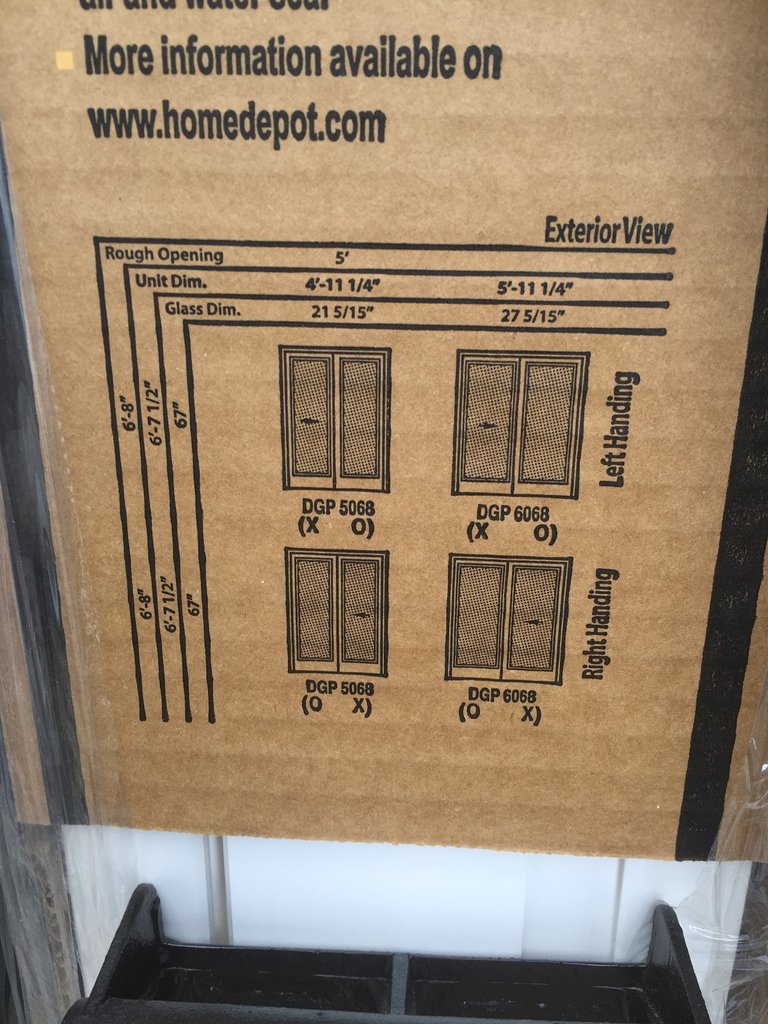
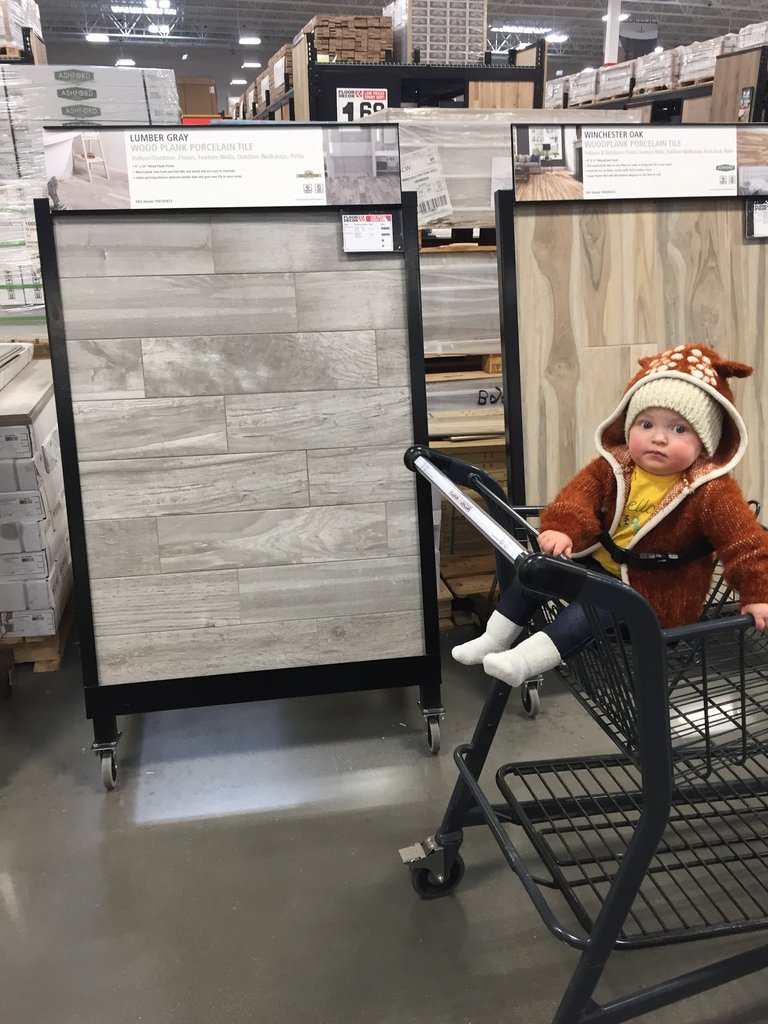
I researched a door after we confirmed the project with the gas company. They wouldn’t begin work for 2 months so we got to work on other things in the meantime. A Pella or Anderson door would have been nice but for the money we found this door which had good reviews and a good price. We wanted it to be composite (longest lasting with least maintenance), six feet wide, and paintable in case I wanted it black like the rest of the doors and windows of the house (very modern farmhouse which is all the rage right now).
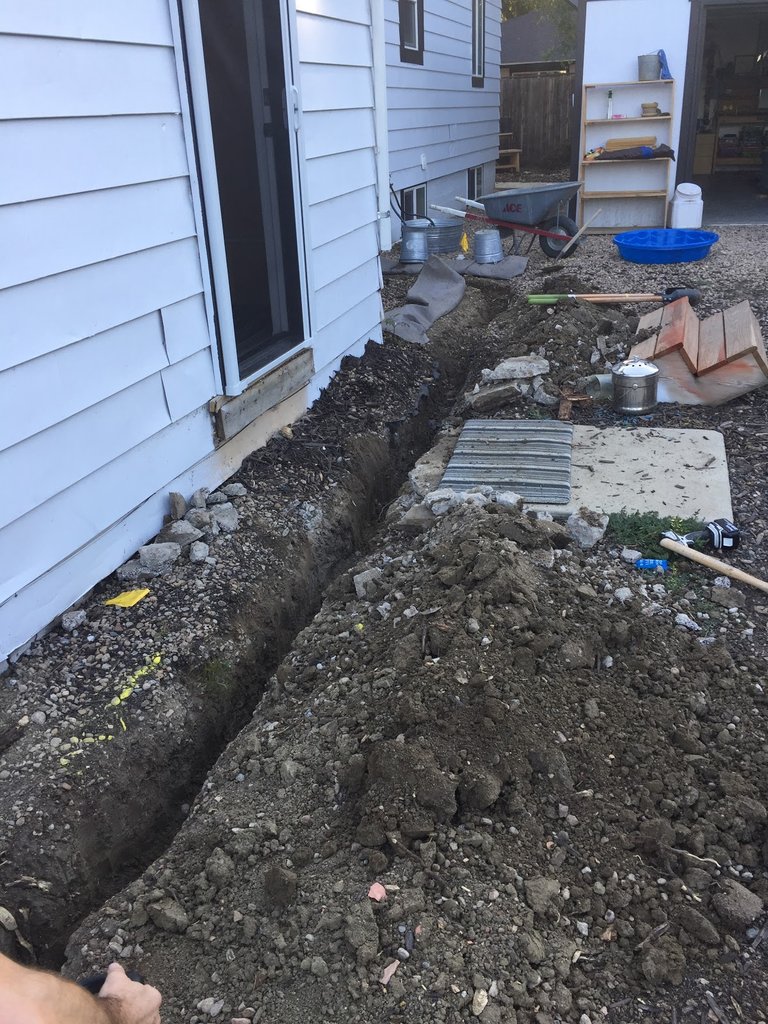
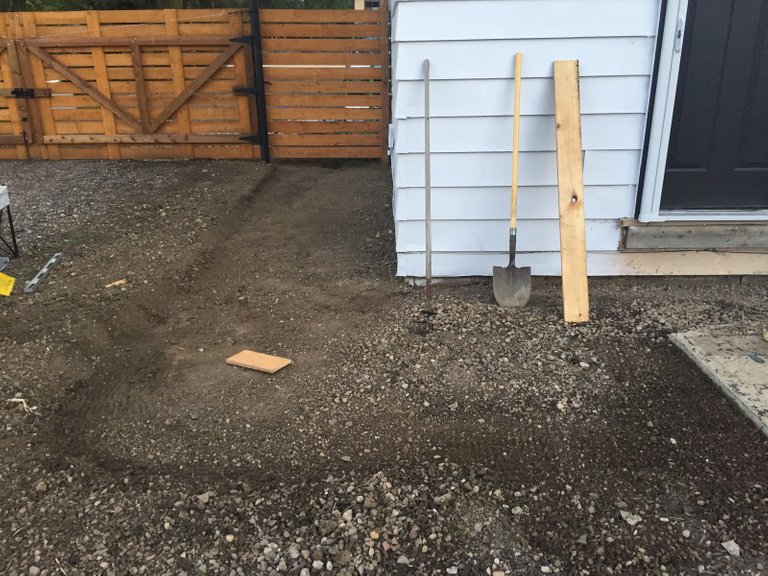
As it got closer to the meter moving day we were required to dig a trench from where the new meter would be, to where the line enters the house (where the old meter was). To be fair they would have done this for an extra thousand dollars… but we have shovels that cost a lot less than that. The soil was SO compacted it took us some time to dig the 18’’ deep trench by hand.
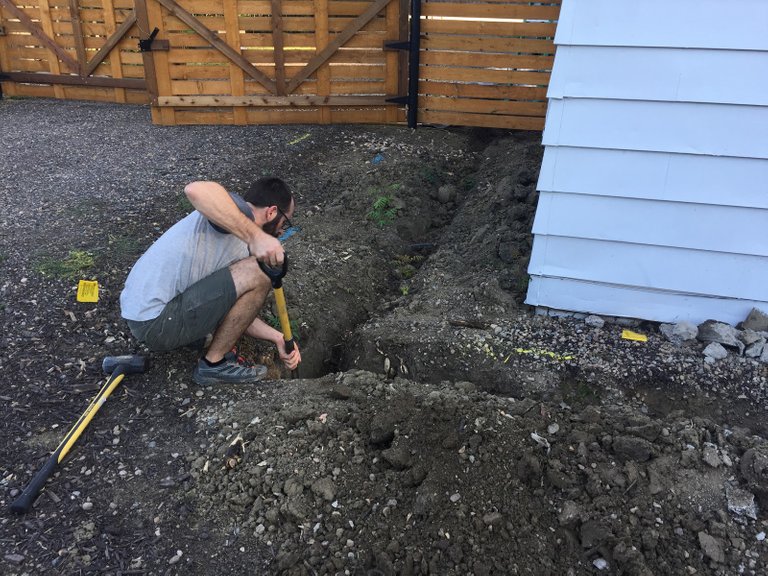
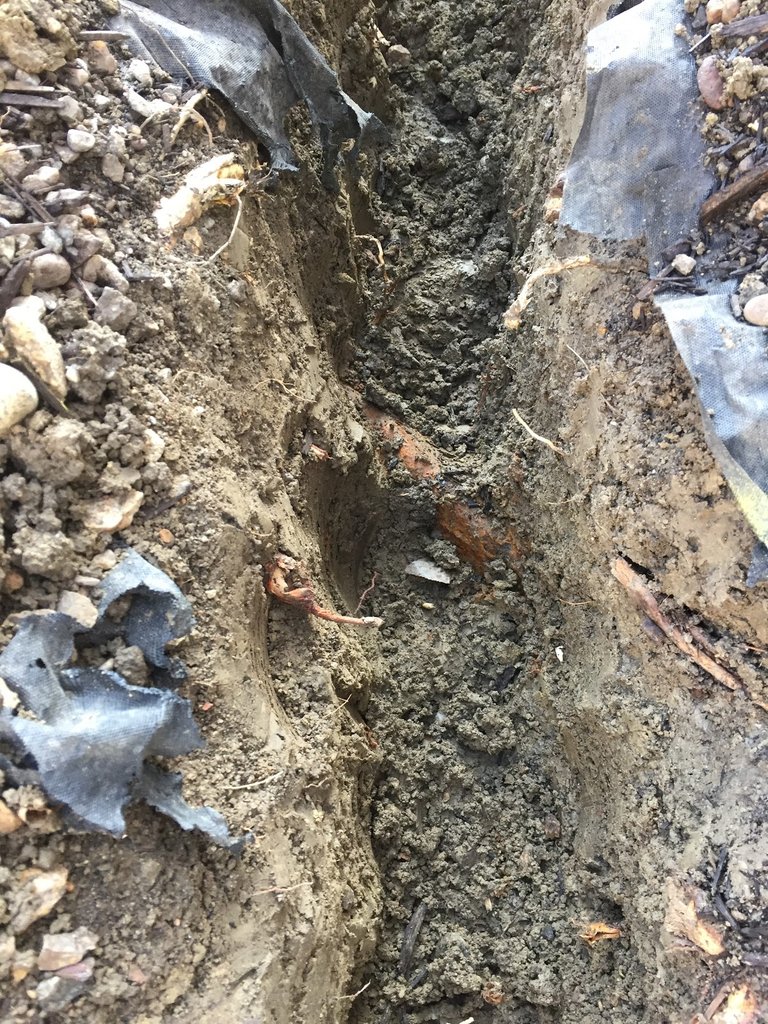
We had to carefully cross the old iron gas line that existed (We were sure to call 811 before digging).
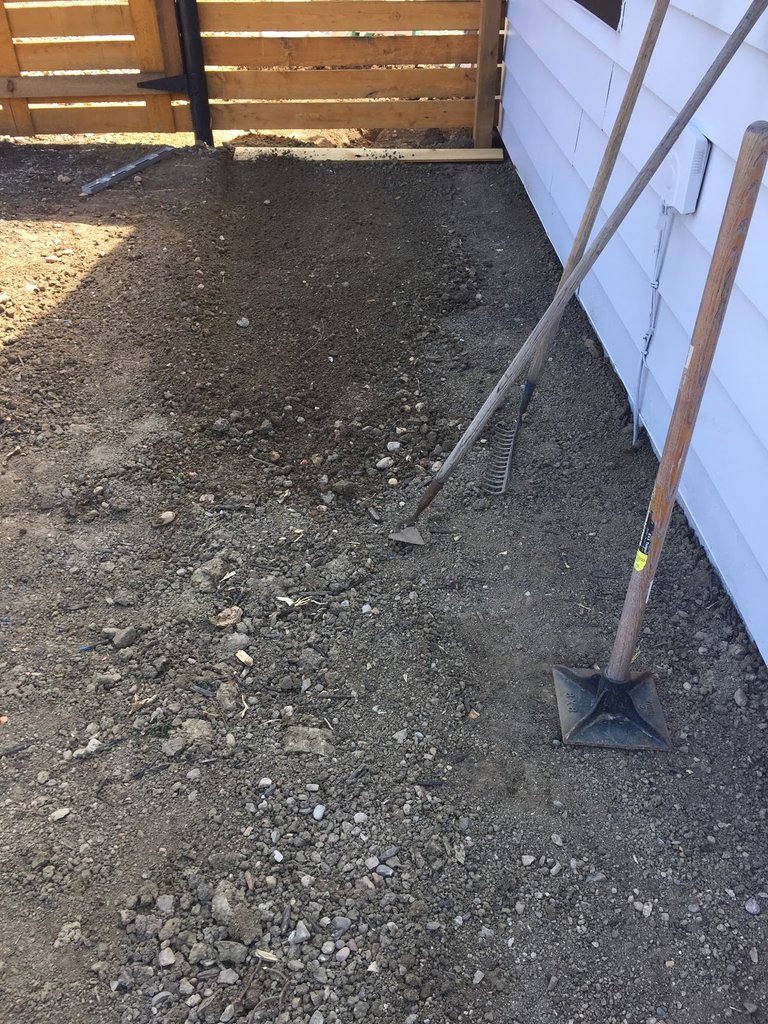
But after the new pex line was laid, we got to close it back up. Nice to clean up that mess. And finish up grading the soil around the house.
While we waited for the next step on the gas company’s timeline we began the inside demo. You see there was a radiant heat register right on the wall where the door was going to go so we had to remove that, turn off the boiler, cut the copper pipes and resweat them back together under the floor. Thankfully we had good access to this in the utility room downstairs and Rob had done this kind of work at our old house. We decided to use “Shark Bites” this time instead of soldering and it was so much more enjoyable to do it that way.
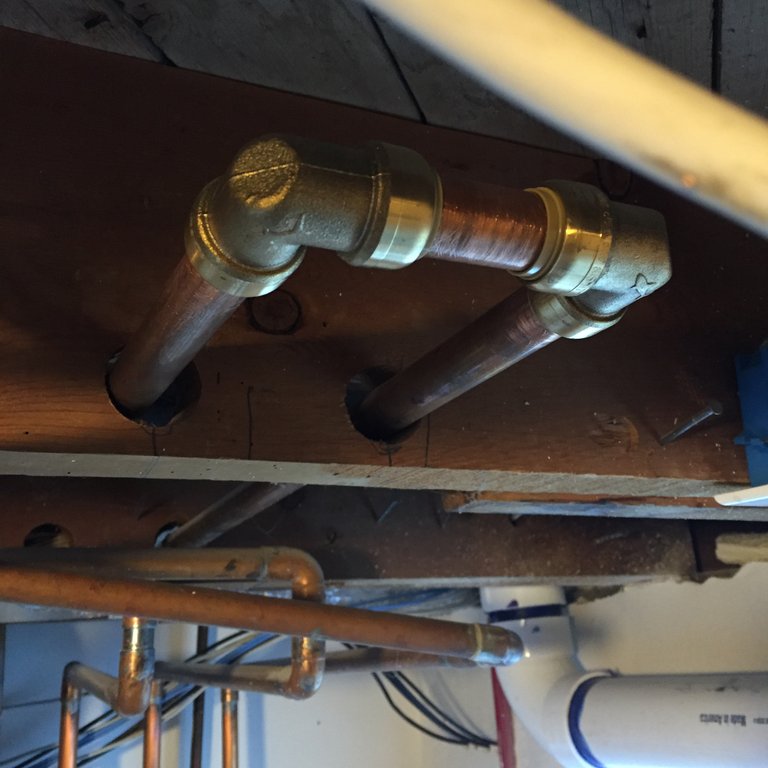
This is what it looked like from above after removing the register:
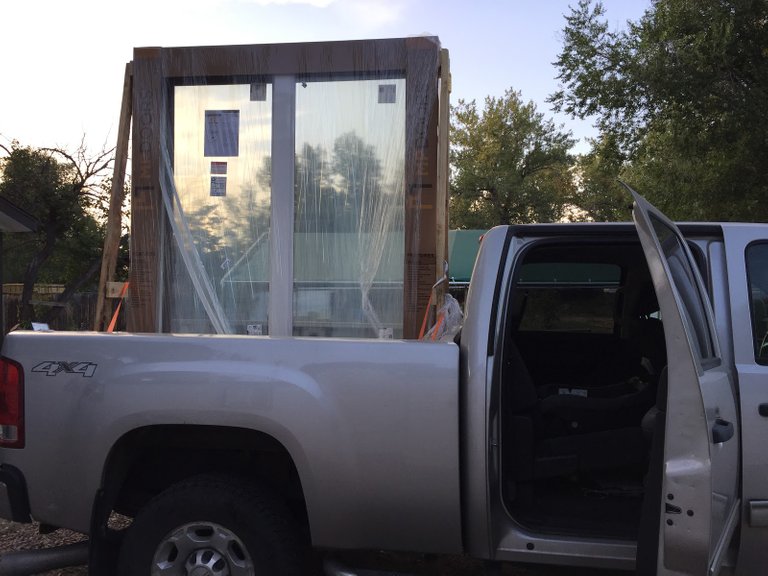
And then the door we ordered from Home Depot arrived and we brought it home. Removing it from the pickup without a forklift was a feat that we’ve gotten pretty good at over the years. (I drive a forklift at my day job so I miss it when I come home!)
And then we waited for the big day a little torn apart…
Soon enough the day came for the construction crew to come out and they worked into the night tearing the street up…

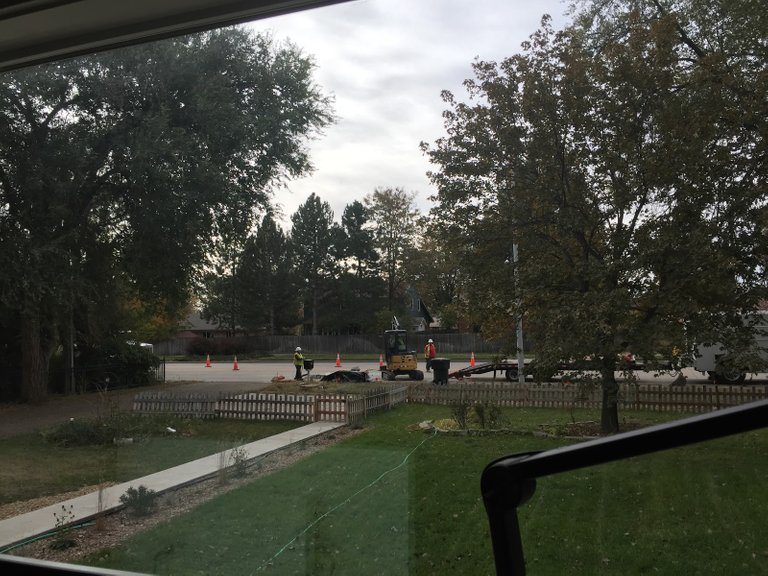
… tearing our driveway up…
… and then all the other steps and people involved…
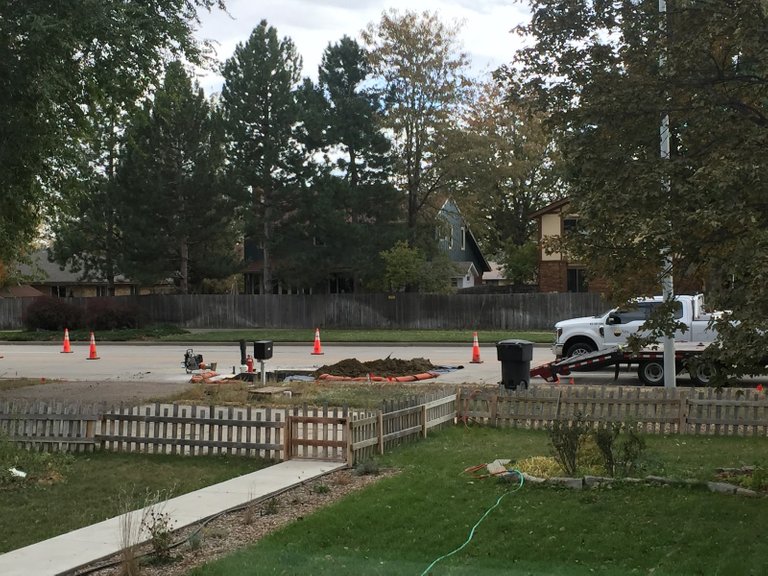
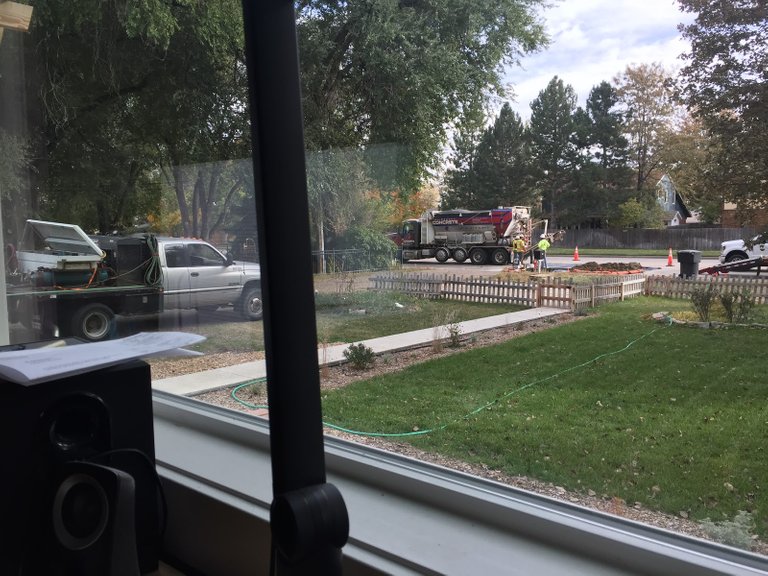
I’m pretty sure they underquoted us for all that work but that’s okay with me. It was done!
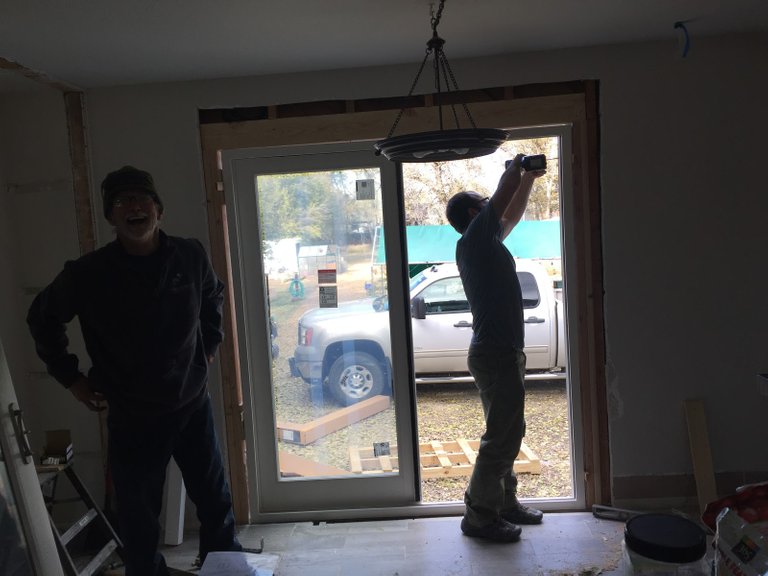
That was a Thursday and on Friday we set up for the door install:

Now we looked all over the internet to find someone, anyone who could give us a good demo of how to install this sliding door but the closest we found was, This Old House’s video “How To Install A Sliding Glass Door”.
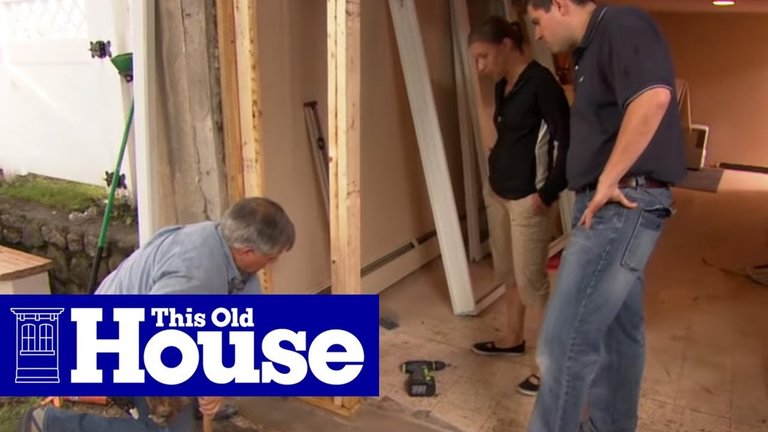
Our situation was different in that it wasn’t at ground level, our house was made of a different substrate and, well, it was just a different project. Most everything we found on YouTube or anywhere else for that matter was about replacing an existing door. So we were really on our own with this.
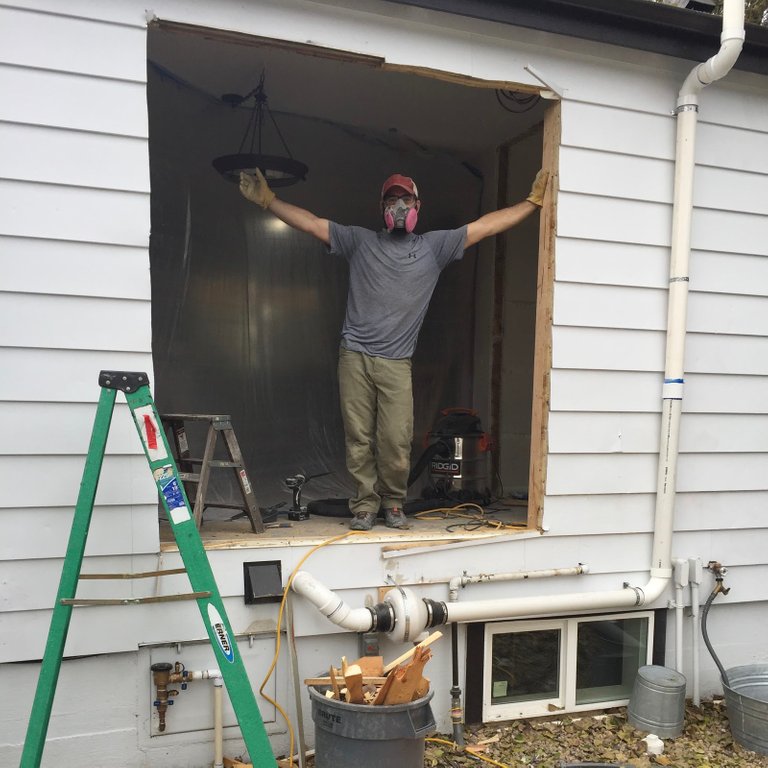
Oh and speaking of safety, there were of course 2 main concerns. One, it’s an exterior wall and probably structural and second the house was built in 1950 so we were a little worried about asbestos or lead paint. For that we ordered a testing kit on Amazon, took samples from all the places we were worried about from insulation to sidling to drywall and the results all came back negative. And structurally I was fortunate enough to have my uncle come visit who has been a general contractor for over 30 years. He gave us the thumbs up and a few pointers… and so with all that info collected we felt confident enough to move forward and do what we always do. We “winged it.” I tend to be on the side of “read the directions and follow the steps” so I made sure we cut the opening to the right size.
Rob removed the window and we put it aside for the tiny guest house we’re dreaming of building.
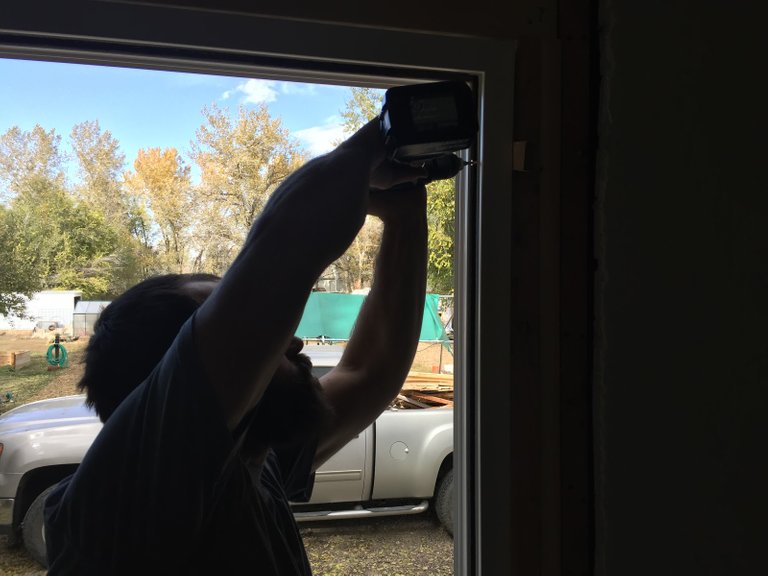
You can see he also moved the radon system. PVC is pretty easy to work with but we learned that the fan can’t be mounted horizontally so he had to fix this later.
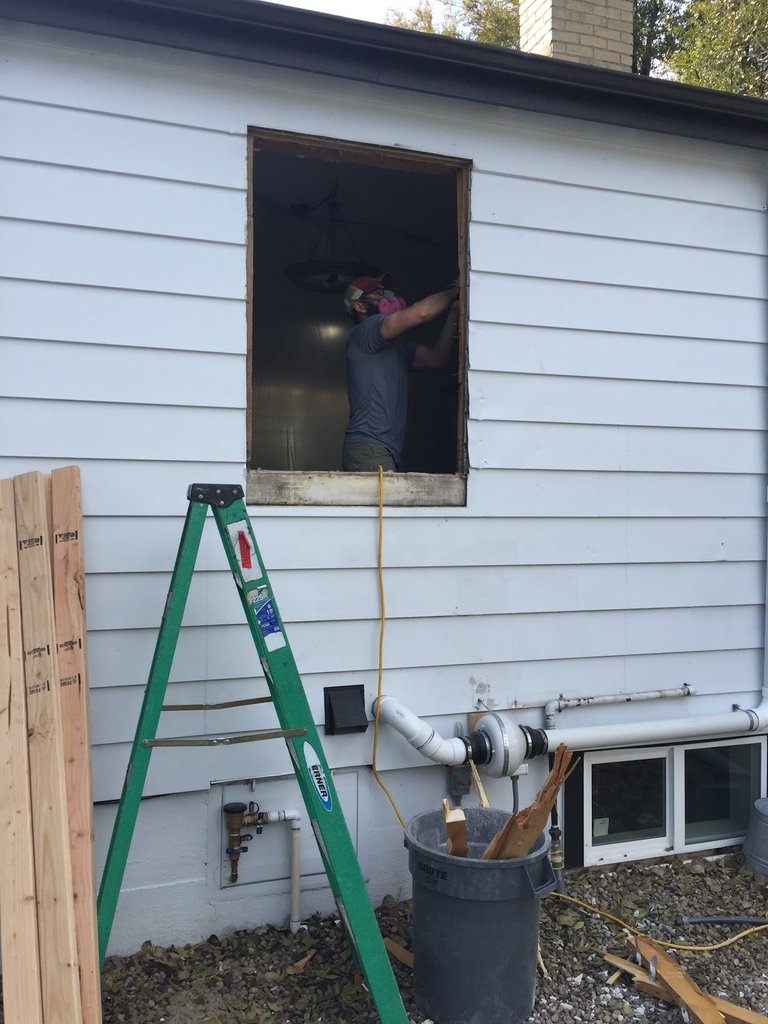
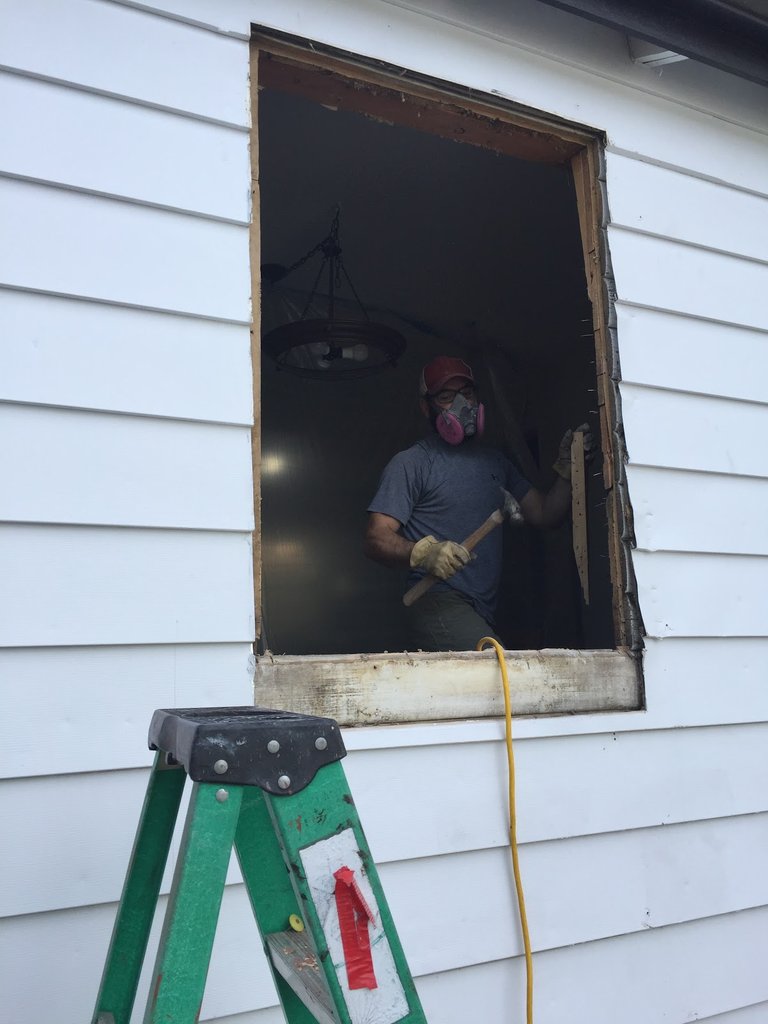
A good blade, my measurements marked, and our good old Makita reciprocating saw, and we made ourselves a hole! It was also cool to see how the house was built and the layers of siding that had been used over the last half century (70 years actually).
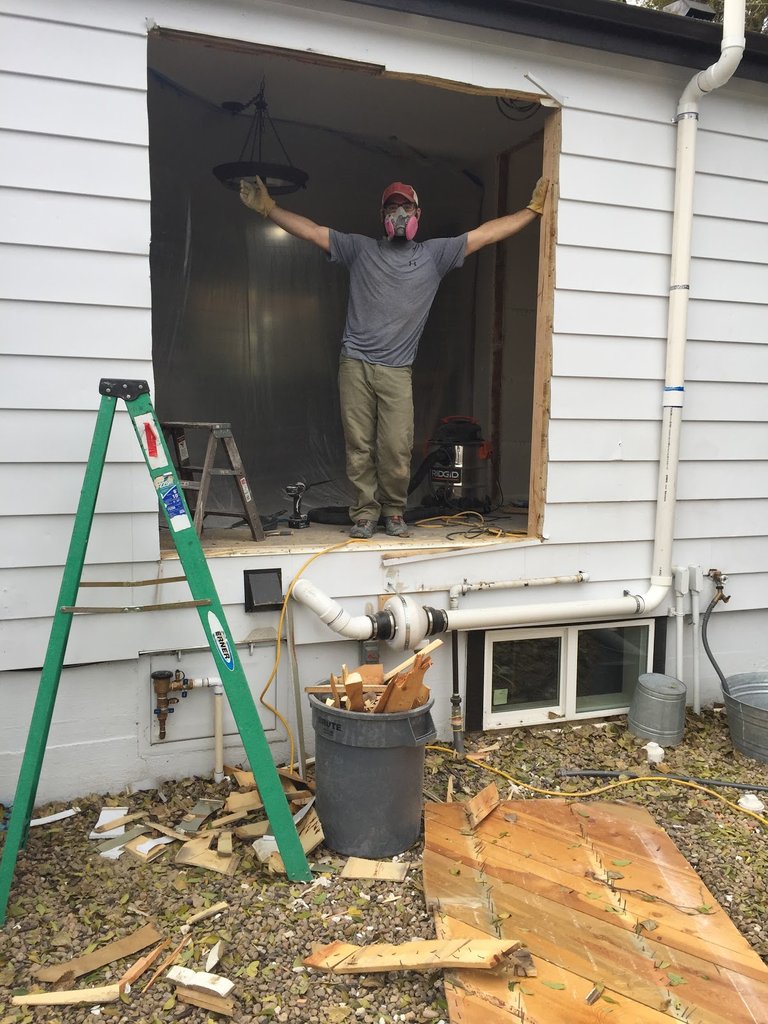
From the inside… there’s a lot more light!

That night we built the structural from and header for the door, 2 2x6s on edge at the top and doubled up 2x4s on each side to support it. I had chosen the location of the door based on the location of existing 2x 4 studs. I didn’t document that process well. Sometimes when you’re in the midst of things steps get lost in the recording process.
Anyways the next day after a drafty night we called over my folks and the 4 of us were able to lift the slider into place while Arya napped.
We tacked it in so it wouldn’t fall out and then leveled it in all directions, cutting shims of scrap wood as we went along screwing it into place as the instructions lead us. Honestly this part was the most difficult part of all. You really want the door to be level and plumb so it slides right and looks right. Oh yeah and i left out the part where we used an entire tube of caulk for the base before putting it in. That’s rather important.

Then there was sealing it all up to make it waterproof. There are so many variations to this online that it can be overwhelming so again we had to wing it combining some of our favorite methods. I’d already practiced this for the chicken coop window so felt fairly confident here. Rob finished it up with a healthy serving of caulk (pun not intended but we’ll go with it).
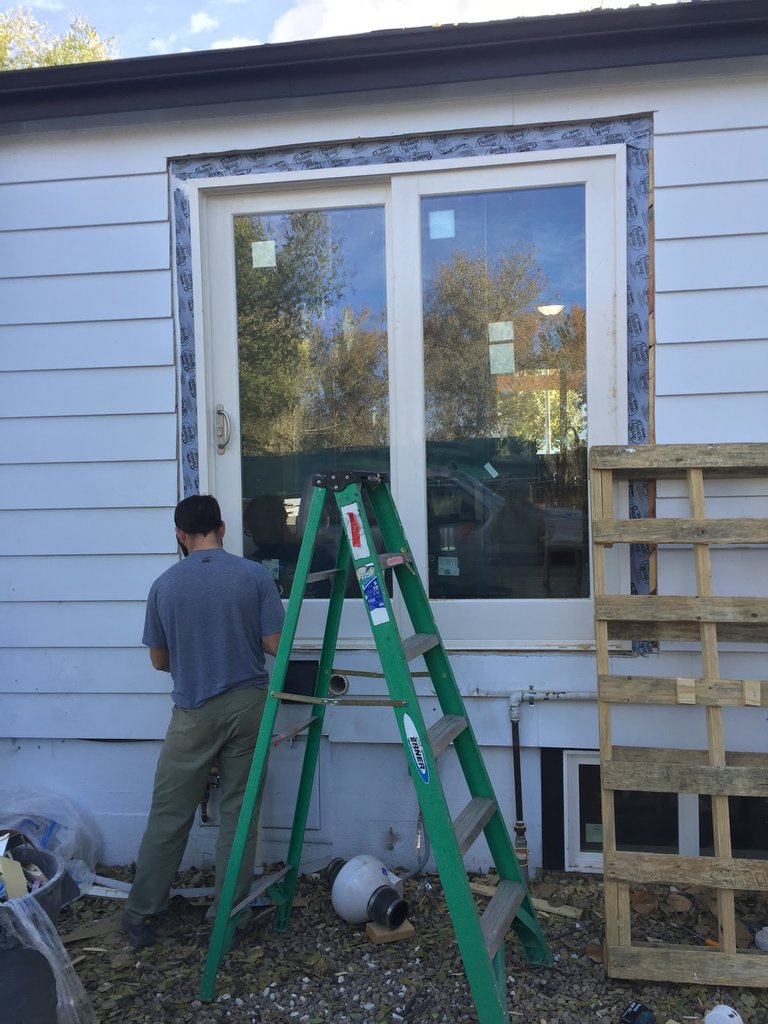
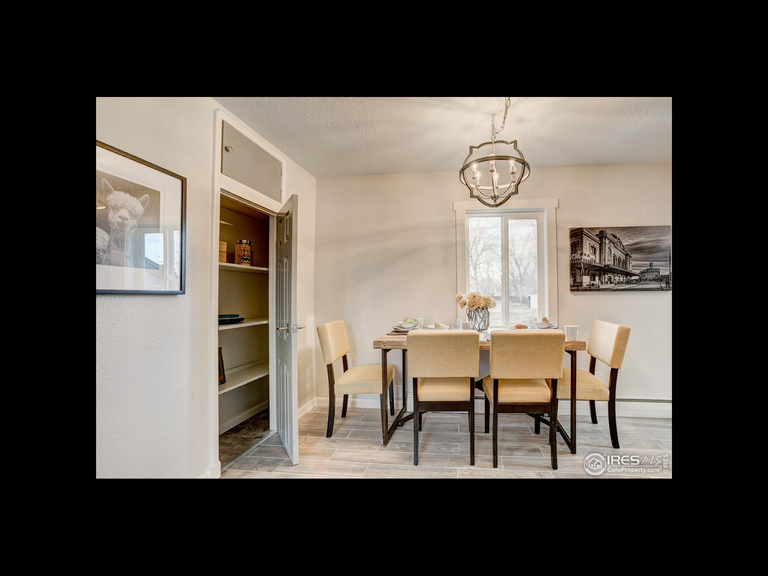
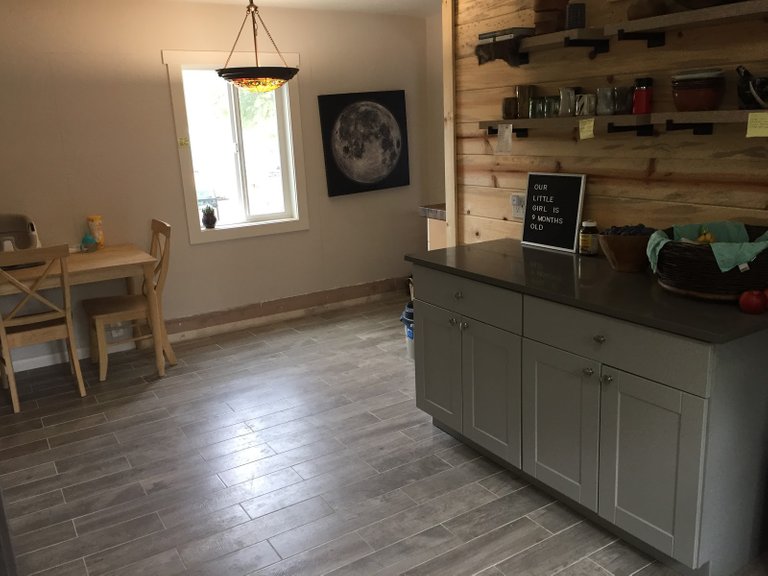
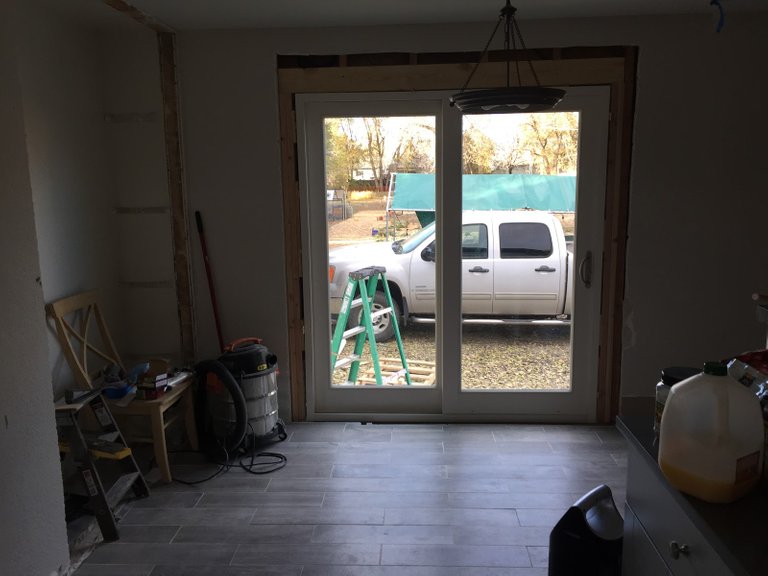
Here’s a shot of the inside all sealed up and our construction mess cleaned up a bit. You can see that we also removed the walls that stupidly enclosed the pantry. Now it’s wide open for that project when we find the time for it.
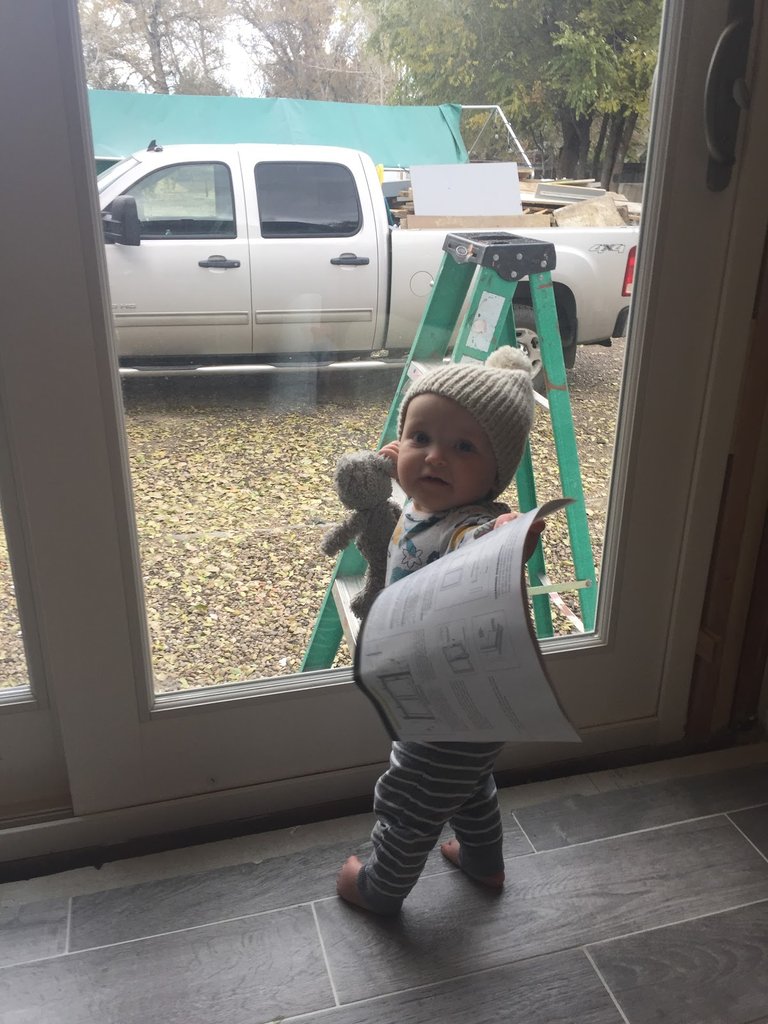
Arya woke up to inspect our work. I think she’s satisfied because now she can see outside too!
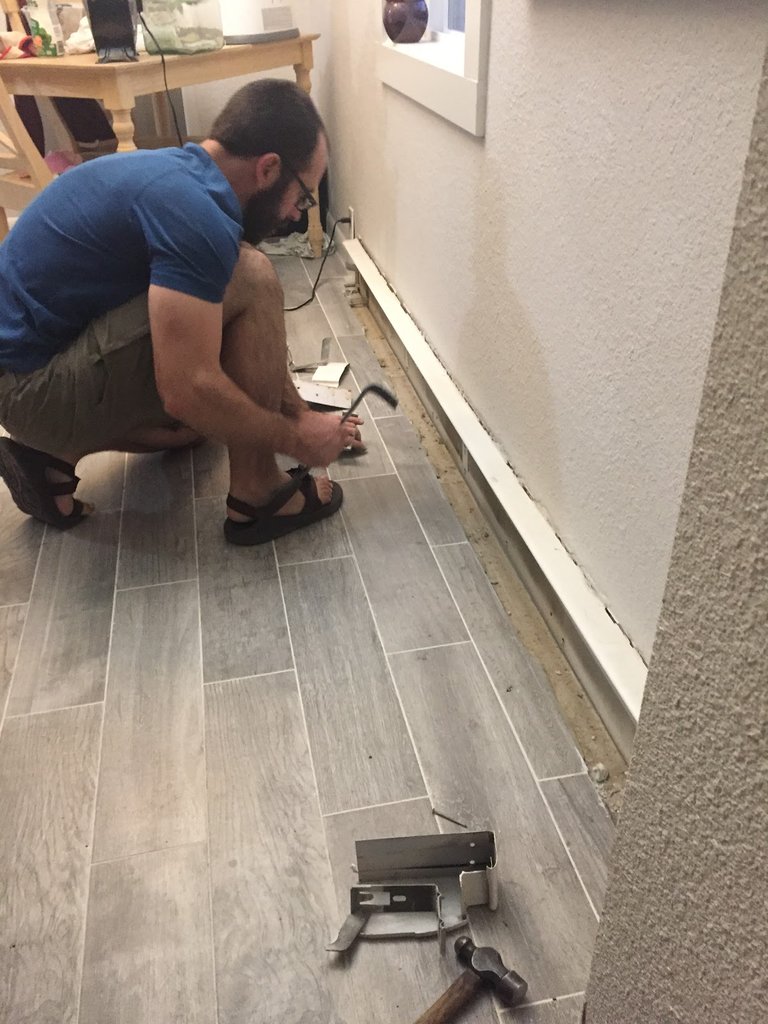
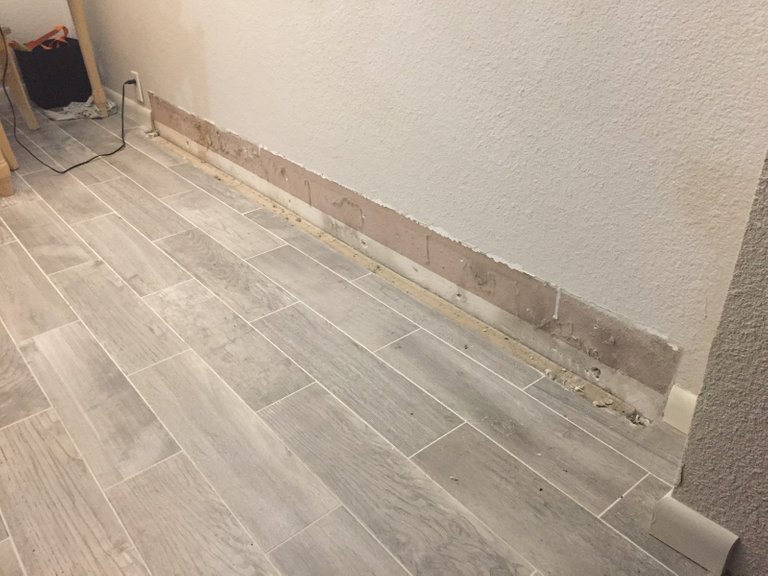
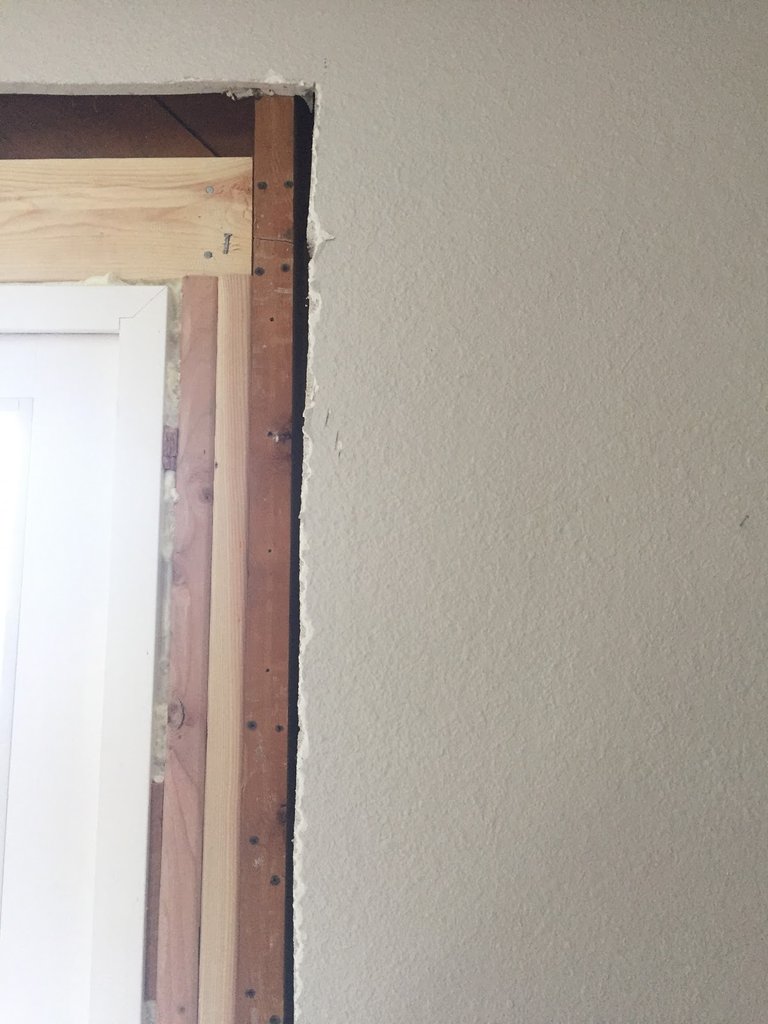
At this point we had to think about how to approach the next steps. We needed to fill in the gap in the tile floor where we removed the wall, we needed to repair the wall, and we needed to frame the door. Admittedly drywall is not something we’re good at despite numerous previous attempts.

After about a week of discussions and brainstorming we spent the following weekend doing our first tile project ever. We searched high and low for the exact tile match and I finally found it online at floor and decor. Almost 40 minutes away… $100 for shipping so Arya and I took the drive while Rob was at work.
And a few YouTube videos later we completed the floor. (My hands were too sticky for process photos! Sorry!)
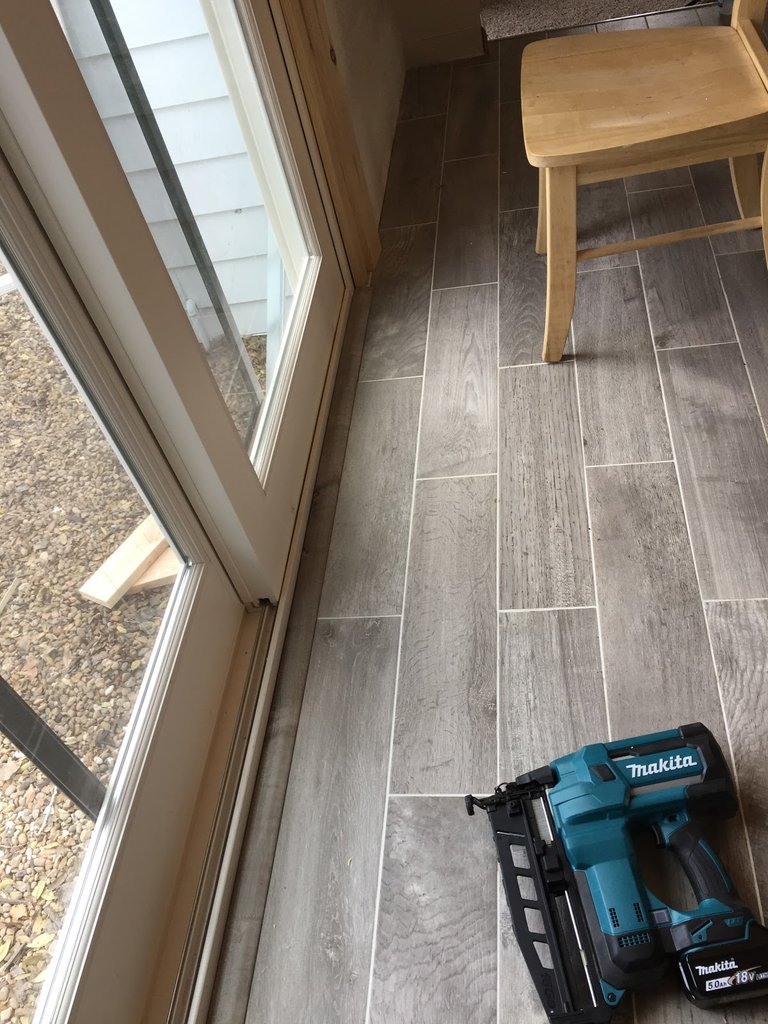
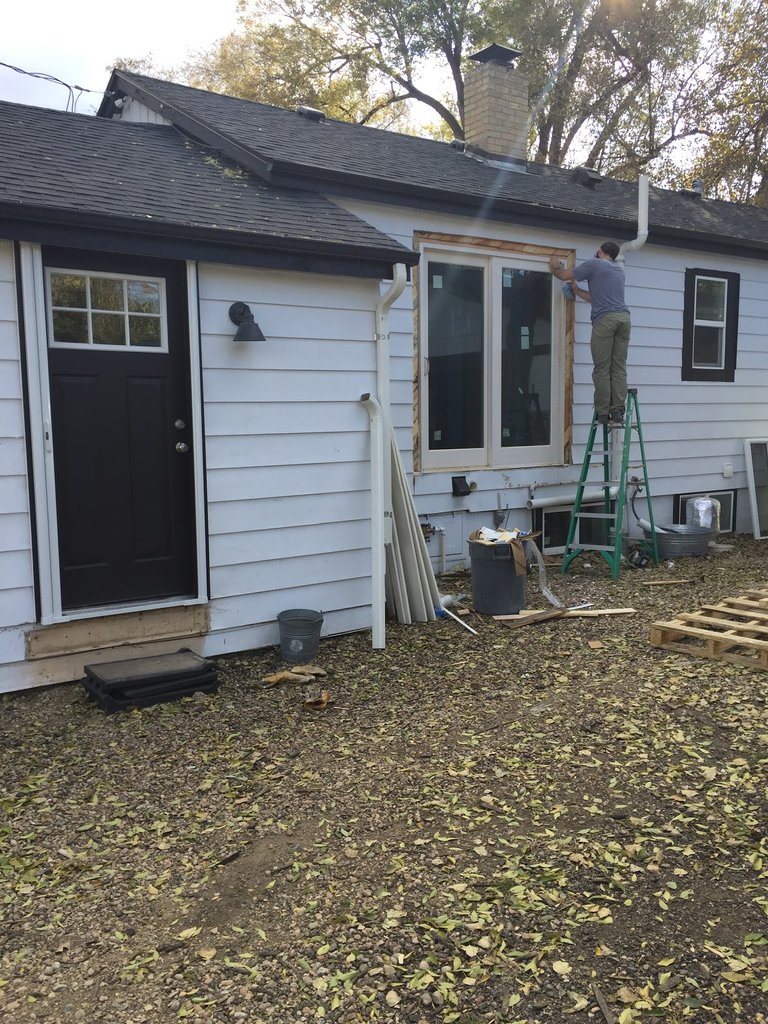
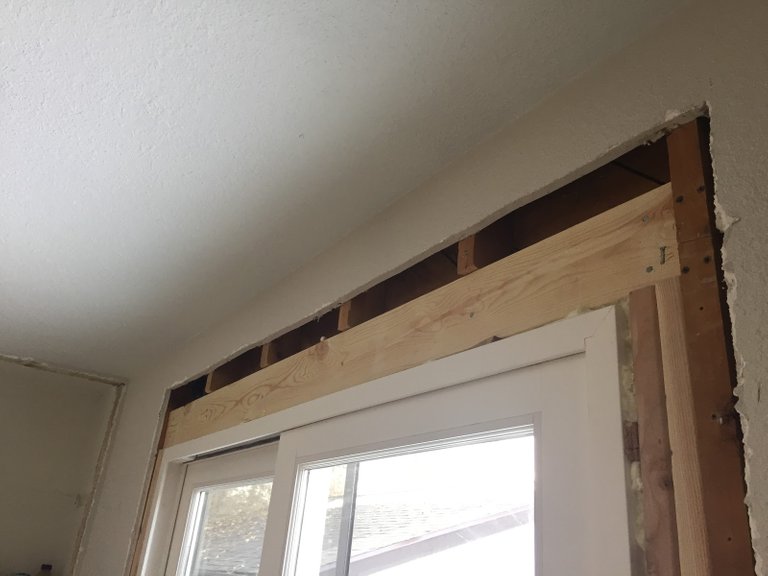
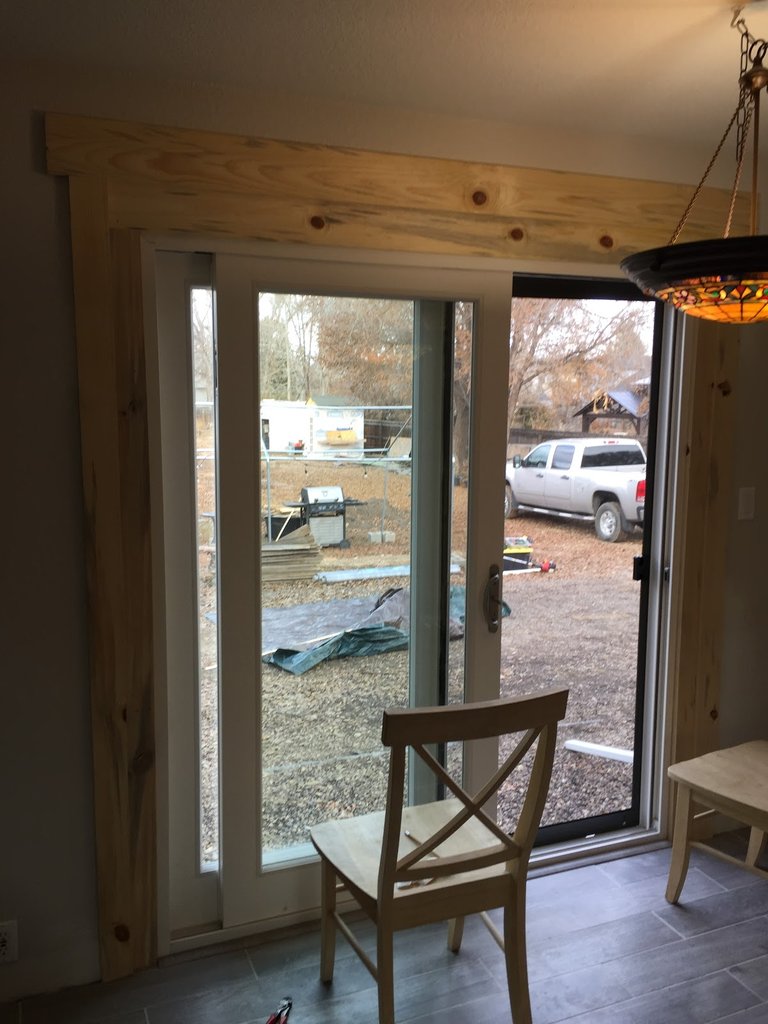
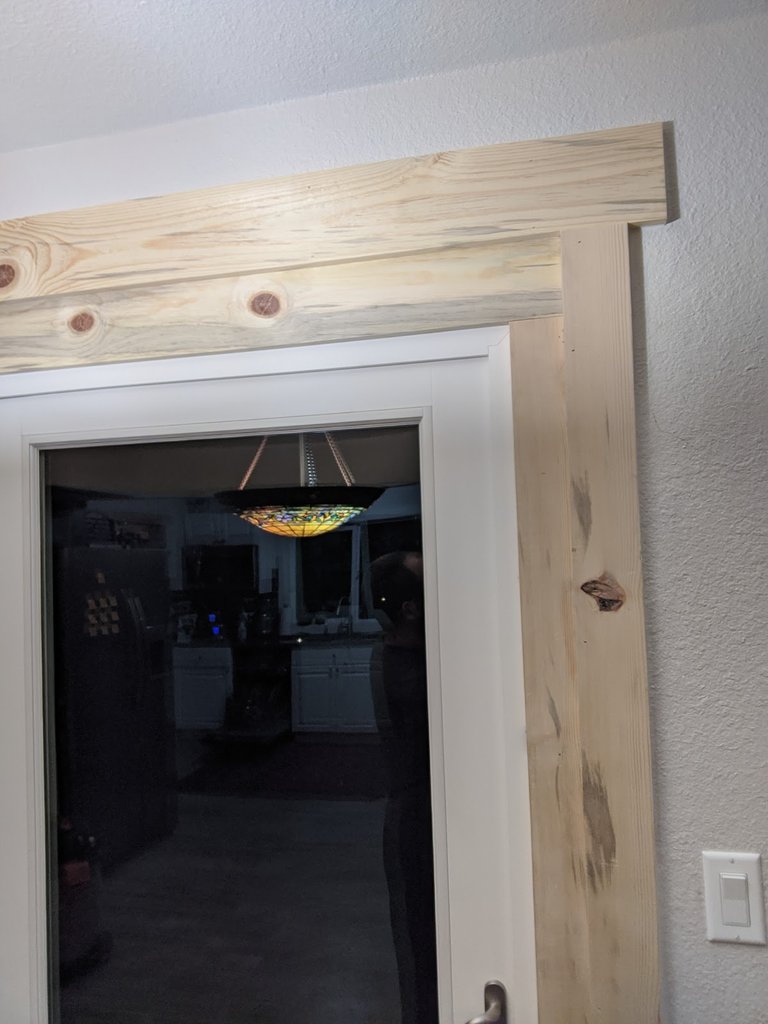
After the floor cured up we had our framing idea. We wouldn’t drywall, instead we’d apply a thick frame of the beetle kill pine used in the rest of the house.
This was it going up:
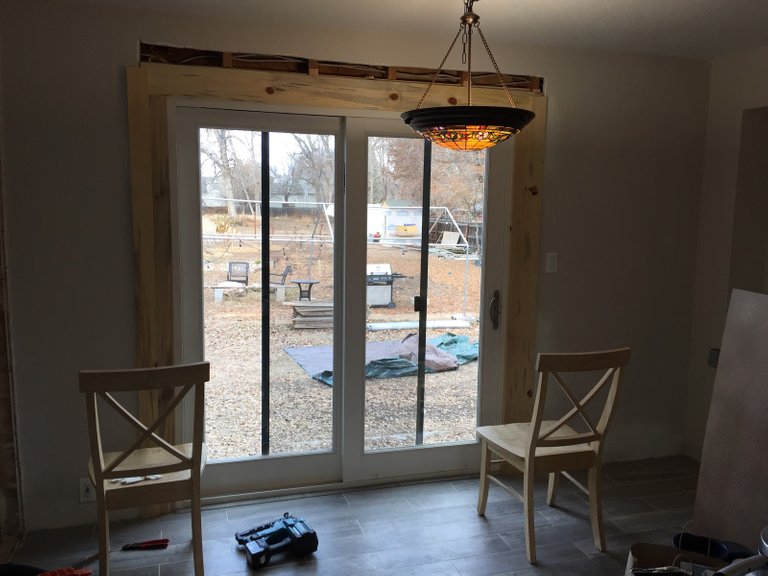
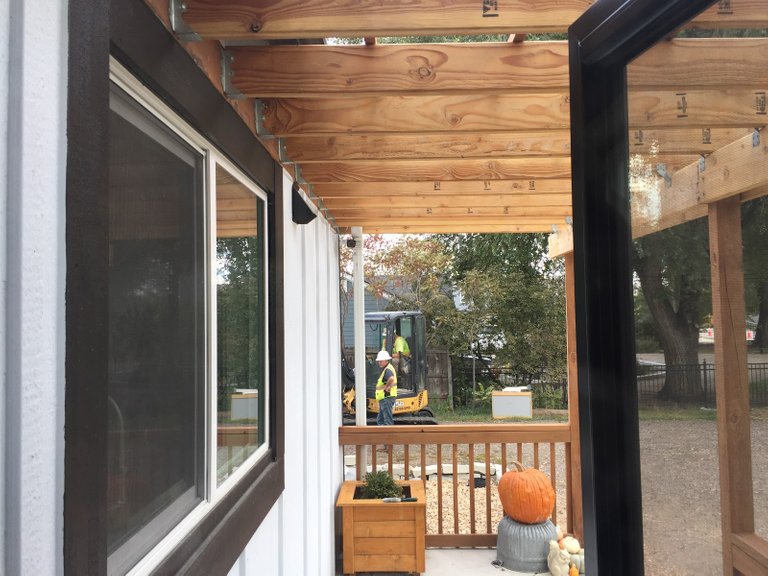
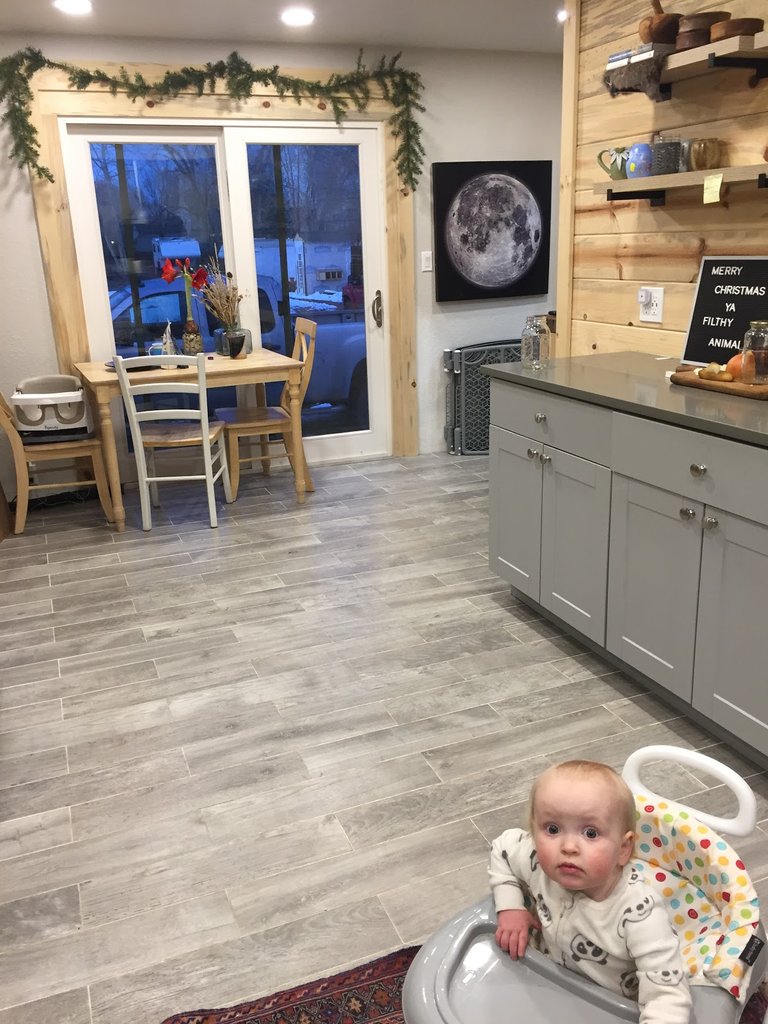
While we can't walk out the door yet since winter is upon us and deck building must wait for softer ground, we’re pretty happy with how it looks from the inside.
I hope you enjoyed the home improvement tutorial. This is just an example for you of how we did it. Make sure you’re safe and talk to a contractor or engineer before you put in a slider where there wasn’t one before. But also trust that you can do things you’ve never tried before. There were certainly quite a few “never done this befores” in this project!
For all you numbers people here’s a VERY rough pricing break down:
$2000 to move gas line
$50 for PVC to move Radon exhaust
$800 for the door and screen
$40 for tile and supplies
$40 for all lumber
$20 in caulk/waterproofing supplies
And we already owned the tools. If you don’t have to move a gas line or your radon system like we did then you’ll probably spend around $1000 plus your time (unless you go with an expensive door, no shame in that). Pretty nice upgrade for that price if you ask me.
Visit my blog at TangibleDuality.com for more stuff (although my first posts are usually here!) There are some things I only post on the blog.
Also help me reach my goal of 1000 followers either by following me here or
On Twitter: @ TangibleD
On Instagram: @Tangible_Duality
Or on Pinterest: @JayJayJeffery
Thanks!!!
This post was shared in the Curation Collective Discord community
community witness. Please consider using one of your witness votes on us here for curators, and upvoted and resteemed by the @c-squared community account after manual review.@c-squared runs a
Congratulations @jayjayjeffery! You have completed the following achievement on the Steem blockchain and have been rewarded with new badge(s) :
<table><tr><td><img src="https://images.hive.blog/768x0/https://steemitimages.com/60x70/http://steemitboard.com/@jayjayjeffery/voted.png?202001250103" srcset="https://images.hive.blog/768x0/https://steemitimages.com/60x70/http://steemitboard.com/@jayjayjeffery/voted.png?202001250103 1x, https://images.hive.blog/1536x0/https://steemitimages.com/60x70/http://steemitboard.com/@jayjayjeffery/voted.png?202001250103 2x" /><td>You received more than 5000 upvotes. Your next target is to reach 6000 upvotes. <p dir="auto"><sub><em>You can view <a href="https://steemitboard.com/@jayjayjeffery" target="_blank" rel="noreferrer noopener" title="This link will take you away from hive.blog" class="external_link">your badges on your Steem Board and compare to others on the <a href="https://steemitboard.com/ranking/index.php?name=jayjayjeffery" target="_blank" rel="noreferrer noopener" title="This link will take you away from hive.blog" class="external_link">Steem Ranking<br /> <sub><em>If you no longer want to receive notifications, reply to this comment with the word <code>STOP <h6><a href="https://v2.steemconnect.com/sign/account-witness-vote?witness=steemitboard&approve=1" target="_blank" rel="noreferrer noopener" title="This link will take you away from hive.blog" class="external_link">Vote for @Steemitboard as a witness to get one more award and increased upvotes!