
Instalacja
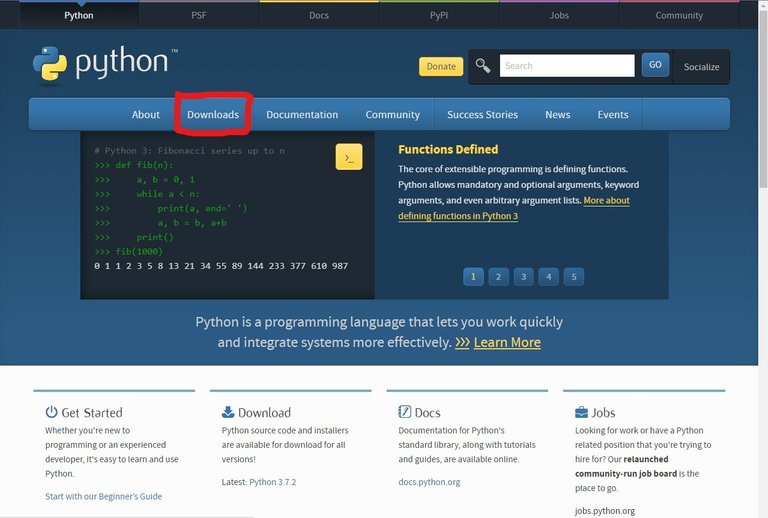
1. Wchodzimy na oficjalną stronę Pythona i przechodzimy w zakładkę downloads
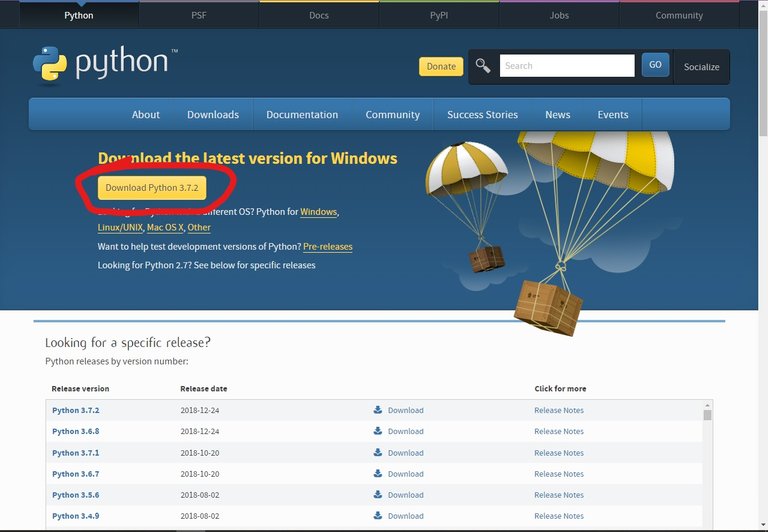
2. Pobieramy najnowszego Pythona:
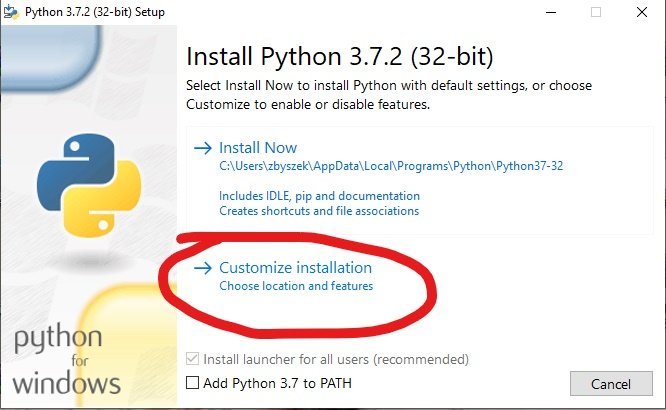
3. Otwieramy pobrany plik i klikamy Customize installation:
4. Zaznaczamy tak samo jak na zdjęciu i klikamy Next
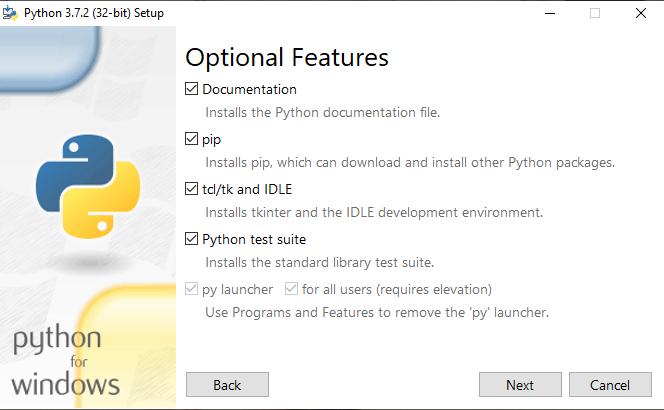
5. Zaznaczamy tak jak na zdjęciu i klikamy Install
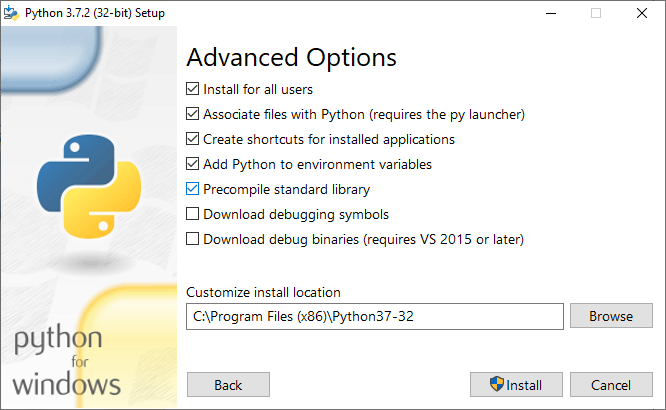
6. Python powinien być już zainstalowany 🙂

Właśnie jestem w trakcie nauki Pythona (w bardzo początkowym stadium), a tu taki post Twojego autorstwa się pojawił :)
Czyżbyś miał zamiar prowadzić na Steemit kurs z Pythona?
Jeśli tak, to super hiper mega fajnie :D
Też się cieszę :)
Congratulations @opelkus! You have completed the following achievement on the Steem blockchain and have been rewarded with new badge(s) :
<table><tr><td><span><img src="https://images.hive.blog/768x0/https://steemitimages.com/60x70/http://steemitboard.com/@opelkus/posts.png?201902051839" srcset="https://images.hive.blog/768x0/https://steemitimages.com/60x70/http://steemitboard.com/@opelkus/posts.png?201902051839 1x, https://images.hive.blog/1536x0/https://steemitimages.com/60x70/http://steemitboard.com/@opelkus/posts.png?201902051839 2x" /><td>You published more than 20 posts. Your next target is to reach 30 posts. <p dir="auto"><sub><em><a href="https://steemitboard.com/@opelkus" target="_blank" rel="noreferrer noopener" title="This link will take you away from hive.blog" class="external_link">Click here to view your Board<br /> <sub><em>If you no longer want to receive notifications, reply to this comment with the word <code>STOP <p dir="auto">To support your work, I also upvoted your post! <blockquote> <p dir="auto">Support <a href="https://steemit.com/@steemitboard" target="_blank" rel="noreferrer noopener" title="This link will take you away from hive.blog" class="external_link">SteemitBoard's project! <strong><a href="https://v2.steemconnect.com/sign/account-witness-vote?witness=steemitboard&approve=1" target="_blank" rel="noreferrer noopener" title="This link will take you away from hive.blog" class="external_link">Vote for its witness and <strong>get one more award!