Que tal querida comunidad de Hive y Graphic Design, espero que estén teniendo un excelente fin de semana, hoy me gustaría compartir con ustedes otro de mis trabajados de edición fotográfica, esta vez realizando este efecto de dibujado a lápiz con una fotografía, para lograrlo solo utilice con un par de recursos, un par de capas y unas cuantas configuraciones de fusión, algo relativamente sencillo.
Hello dear Hive and Graphic Design community, I hope you are having a great weekend, today I would like to share with you another of my photo editing works, this time making this pencil drawing effect with a photograph, to achieve it I only used a couple of resources, a couple of layers and a few blending settings, something relatively simple.
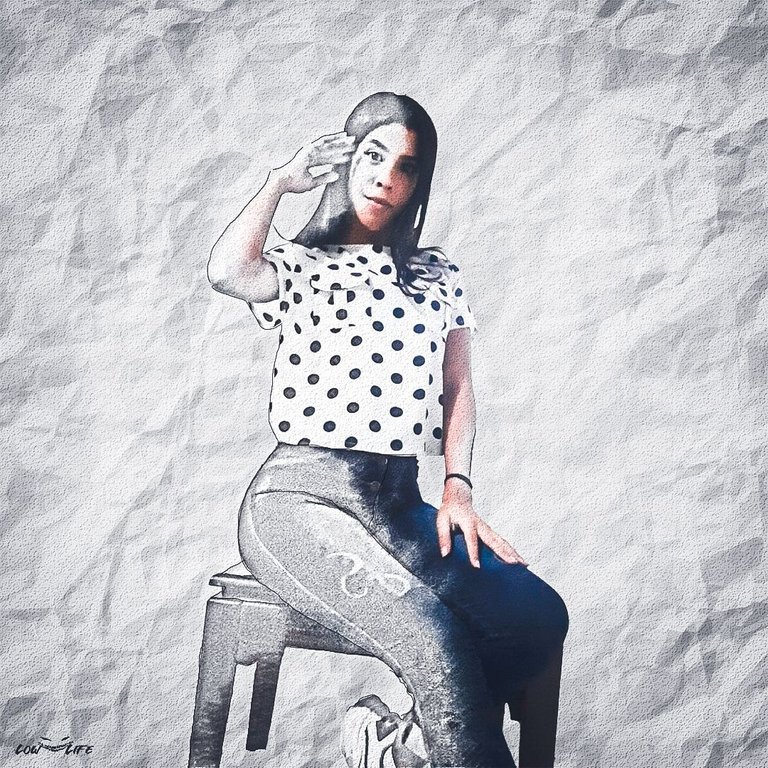
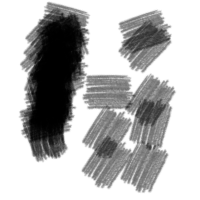
Cómo siempre dejare el paso a paso de cómo la realice, siendo lo más breve y detallado posible, dejando también la fuente de cada recurso que utilice para dicha edición, junto con una configuración de pinceles lista para descargar.
As always I will leave the step by step of how I made it, being as brief and detailed as possible, leaving also the source of each resource that I used for this edition, along with a brush configuration ready for download.

Click on the images to go to their source. ~ Clic en las imágenes para ir a su fuente.

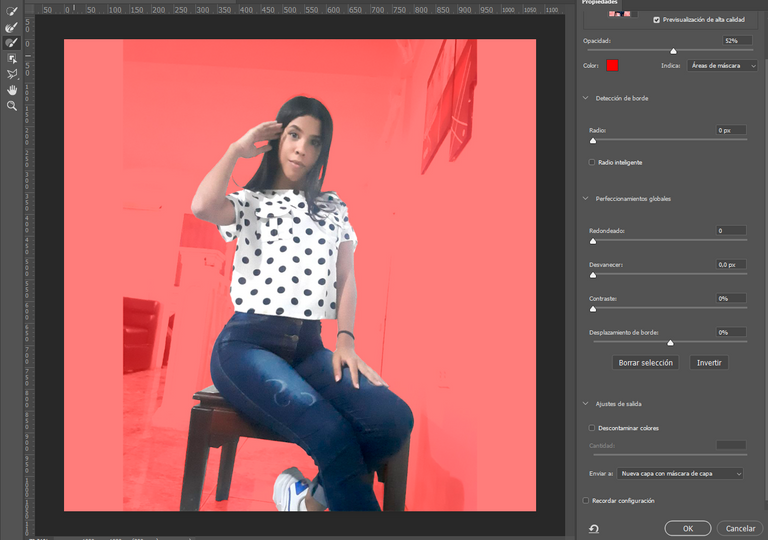
The first step I took to get started was to open a new project with the dimensions of 1080×1080mp and 300dpi, after that I added the photograph and with the quick select and mask selection tool, select all the part of the photograph I planned to edit, to remove its background.
El primer paso que di para comenzar fue abrir un nuevo proyecto con las dimensiones de 1080×1080mp y 300pp, luego de eso agregué la fotografía y con la herramienta de selección rápida y selección de máscara, seleccione toda la parte de la fotografía que planeaba editar, para eliminar su fondo.
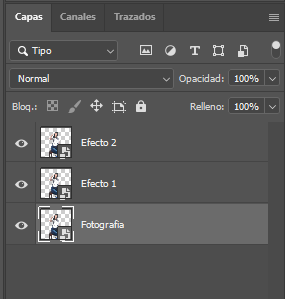
After that I sent the new crop to a new layer and duplicated it twice with Ctrl + J, then named those two copies Effect 1 and Effect 2.
Luego de eso envié el nuevo recorte a una nueva capa y la duplique dos veces con Ctrl + J, luego nombre a esas dos copias Efecto 1 y Efecto 2.
Then I converted the two duplicated layers to Smart Objects with right click, then added a white background color layer and locked it with the padlock.
Luego convertí las dos capas duplicadas en Objetos Inteligentes con clic derecho, para después agregue una capa de color blanca de fondo y la bloquee con el candado.

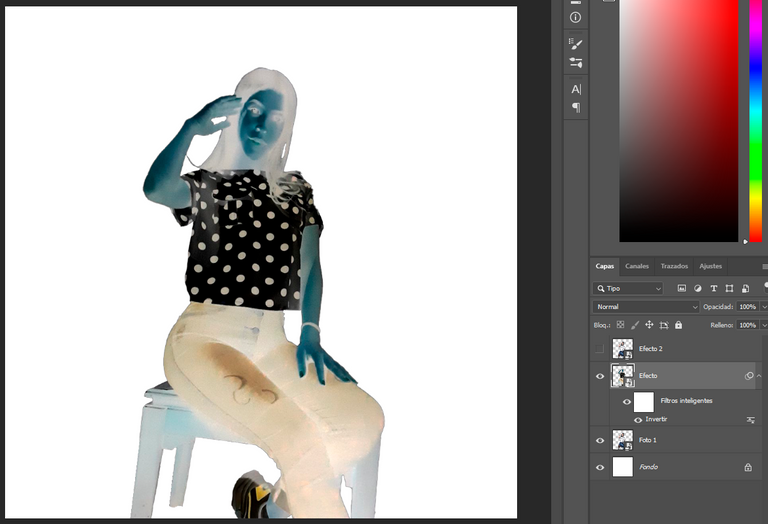
In the second step I went to the Effect 1 layer and inverted it with Ctrl + I, if it doesn't work then you can go to Image > Adjustments > Invert.
En el segundo paso me ubique en la capa de Efecto 1 y la invertí con Ctrl + I, si no funciona entonces pueden ir a Imagen > Ajustes > Invertir.
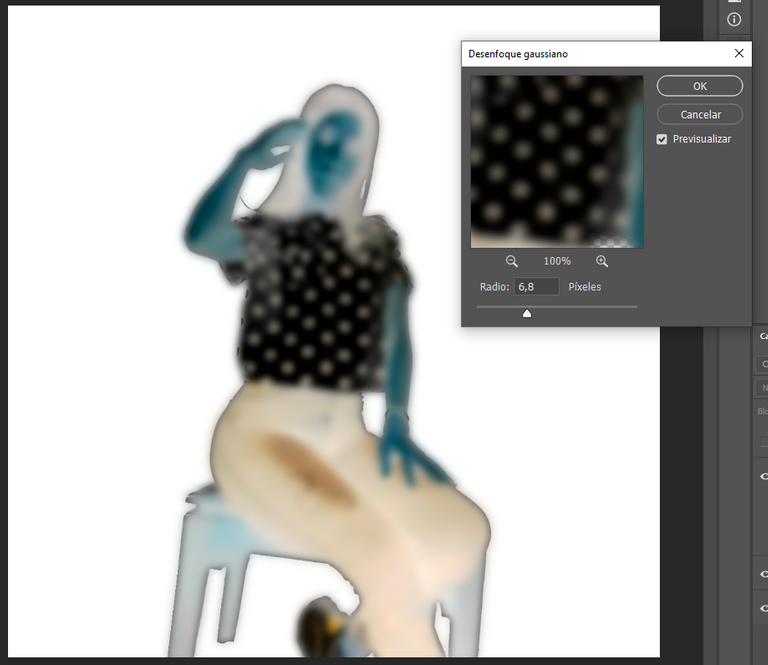
After inverting the image add a Gaussian blur filter, in Filter > Blur > Gaussian Blur of 6.8pixels radius, this may vary depending on the resolution of the photo you use.
Luego de invertir la imagen agregue un filtro desenfoque gaussiano, en Filtro > Desenfocar > Desenfoque Gaussiano de 6,8pixeles de radio, esto puede variar dependiendo de la resolución de la fotografía que utilicen.
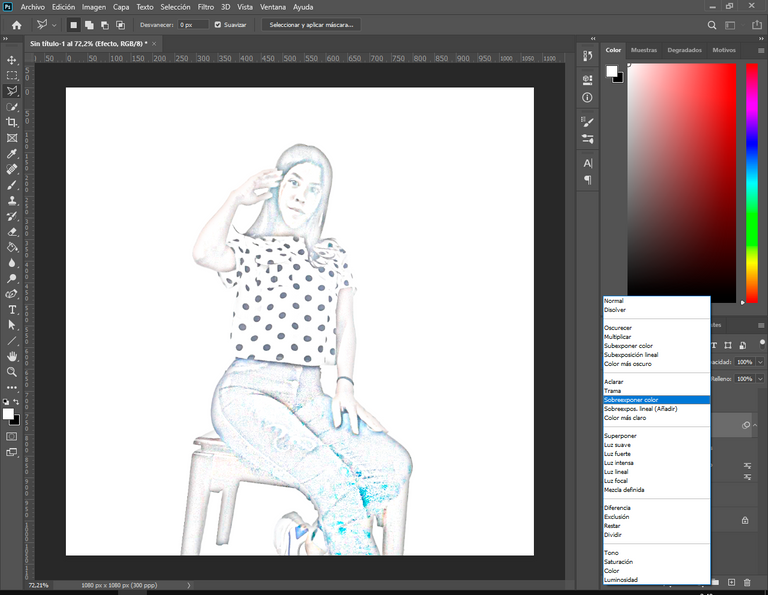
Then change the blending mode of the layer to Color Overexpose and get the following result.
Para después cambiar el modo de fusión de la capa a Sobreexponer color y obtener el siguiente resultado.

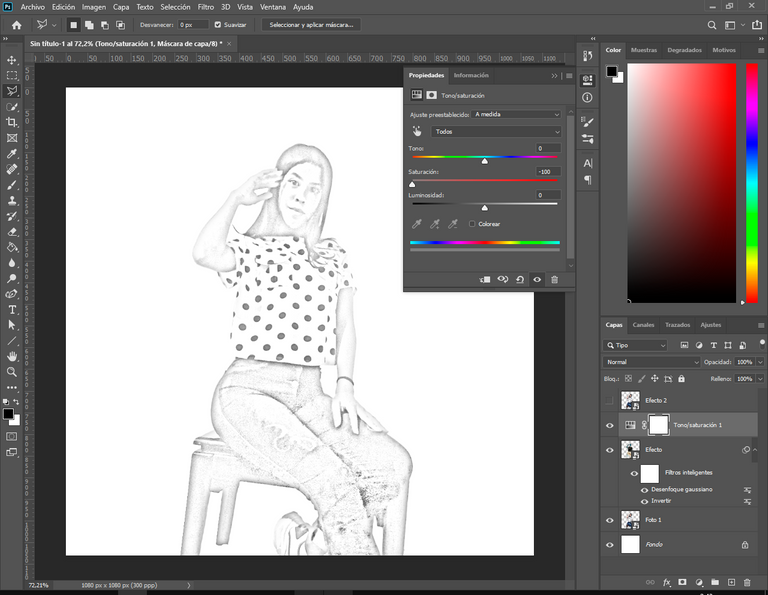
For the third step create a new Hue and Saturation adjustment layer on top of the Effect 1 layer to remove all the saturation from it.
Para el tercer paso cree una nueva capa de ajuste de tono y saturación sobre la capa de Efecto 1 para eliminar toda la saturación de esta.
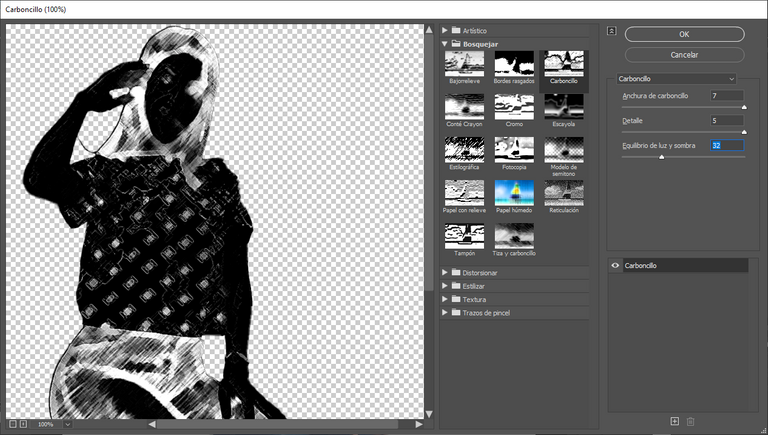
Then I enabled the Effect 2 layer and went to the filter gallery in Filters > Filter Gallery to give it the charcoal effect in the Sketches folder and added the following parameters.
Luego habilite la capa de Efecto 2 y me fui a la galería de filtros en Filtros > Galería de Filtros para darle el efecto de carboncillo en la carpeta de Bosquejos y le agregue los siguientes parámetros.
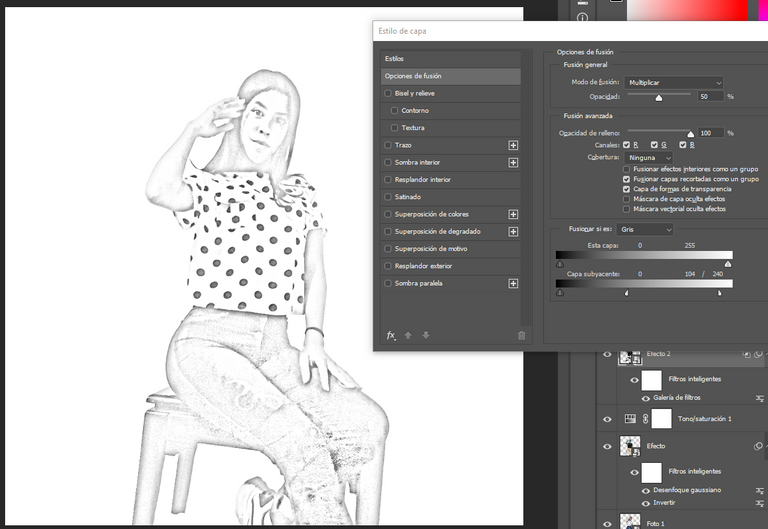
Then enter the blending options of the layer with Double click on it, change the blending mode of it to Multiply, lower its opacity to 50% and further blend the grayscales on the underlying layer with Alt + Right click on the tab to separate them.
Después entre a las opciones de fusión de la capa con Doble clic en ella, cambie el modo de fusión de ella a Multiplicar, baje su opacidad al 50% y fusione mas las escalas de grises en la capa subyacente con Alt + Clic derecho sobre la pestaña para separarlas.
Finally select effect layers 1 and 2 with Ctrl + Left Click and group them with Ctrl + G, then add a layer mask to the group.
Por ultimo seleccione las capas de efecto 1 y 2 con Ctrl + Clic Izquierdo y las agrupe con Ctrl + G, para después añadirle una mascara de capa al grupo.

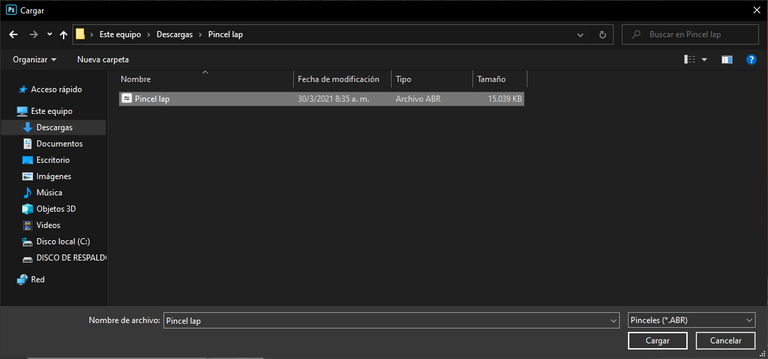
For the fourth step I added a new brush configuration, for this I had to download the ABR file that is in the resources at the beginning of the publication. Once downloaded I chose the Brush tool in Photoshop and with Right Click open the brushes panel.
Para el cuarto paso agregue una nueva configuración de pinceles, para esto tuve que descargar el archivo ABR que esta en los recursos al principio de la publicación. Una vez descargado escogí la herramienta de Pincel en Photoshop y con Clic Derecho abrimos el panel de pinceles.
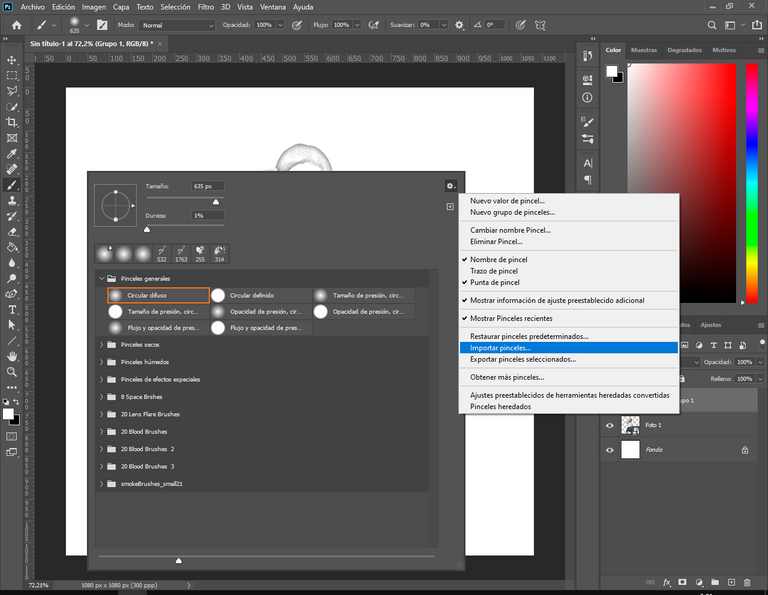
After opening the panel look for the Gear in the upper right corner of the box and look for the option that says Import brushes, once there I had to find the ABR file that I downloaded, look for the folder and select it to load the new brushes.
Luego de abrir el panel buscamos el Engranaje en la esquina superior derecha del cuadro y buscamos la opción que dice Importar pinceles, una vez ahí tuve que buscar el archivo ABR que descargue, busque la carpeta y la seleccione para cargar los nuevos pinceles.
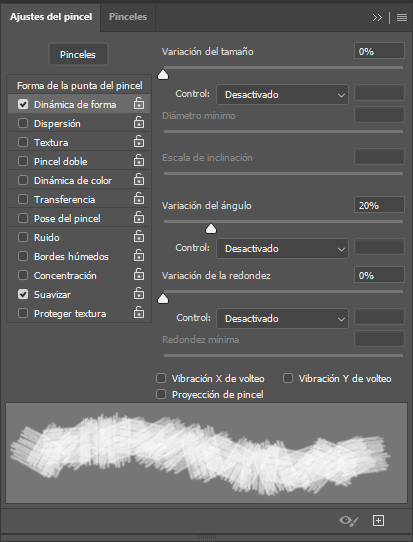
Once the new brushes are imported, go on to configure it for this enter the tool's configuration properties, and
enable the Shape Dynamics tab and change the Angle variation to 20% so that the brush shape changes with each stroke.
Una vez importado los nuevos pinceles, pase a configurarlo para esto entre las propiedades de configuración de la herramienta, y
habilite la pestaña de Dinámica de forma y cambie la variación del Angulo al 20% para que la forma del pincel cambie con cada trazo.
Now I could give that effect of being drawn while adding color with one of the downloaded brushes in certain parts of the picture, with a black brush flow between 60% and 20% between the face and legs areas in the group mask.
Ahora podía darle ese efecto de estar siendo dibujado mientras añado color con uno de los pinceles descargados en ciertas partes de la fotografía, con un flujo del pincel negro entre 60% y 20% entre la zonas del rostro y piernas en la mascara del grupo.
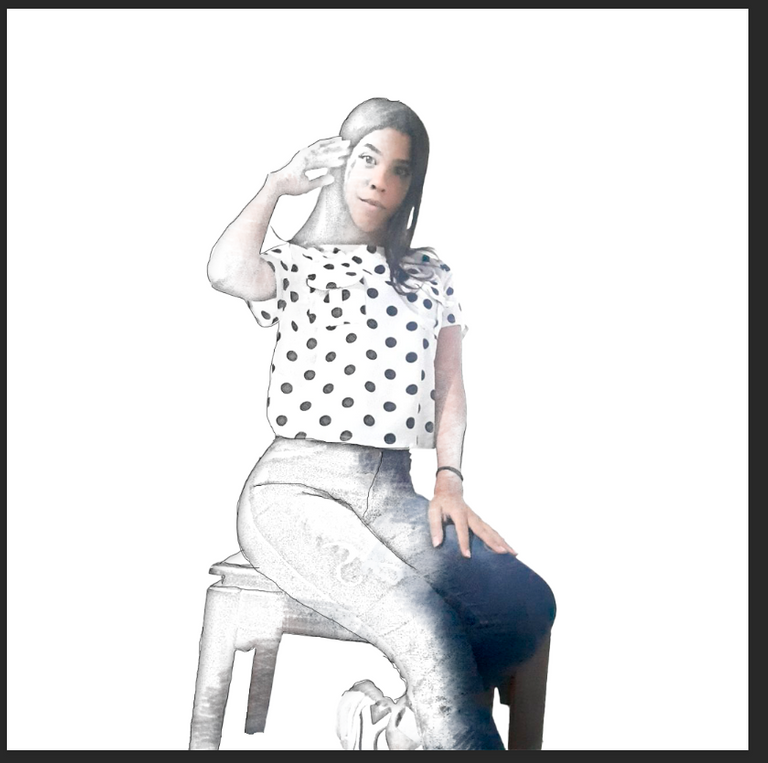
Finally create a new white layer and with a black brush of 1 pixel in diameter, draw black lines to the outline of the photograph to give it the effect of sketch lines.
Por ultimo cree una nueva capa en blanco y con un pincel negro de 1pix de diámetro, dibuje líneas negras al contorno de la fotografía para darle efecto de trazos de líneas de un boceto.

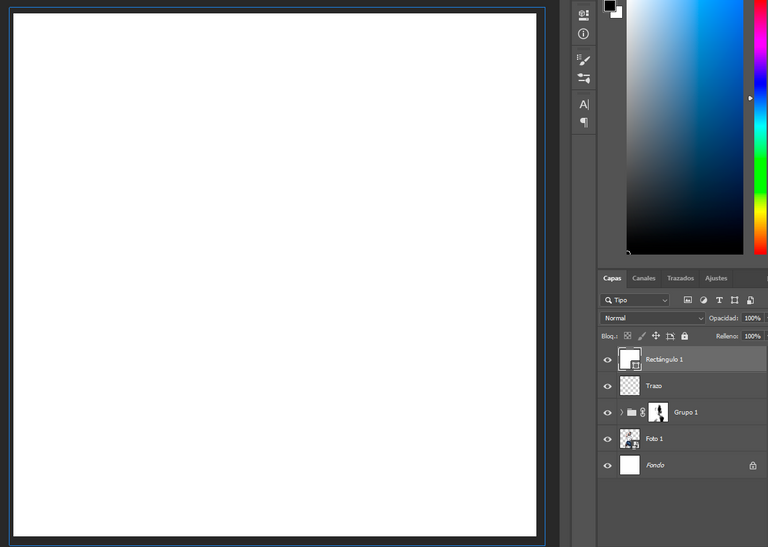
For the fifth step with the shape tool create a new rectangular shape with the white fill and no stroke, covering the whole picture and then transform that shape into a Smart Object, with Right Click on the shape layer.
Para el quinto paso con la herramienta forma cree una nueva forma rectangular con el relleno blanco y sin trazo, cubriendo toda la fotografía para después transformar esa forma en Objeto inteligente, con Clic Derecho sobre la capa de forma.
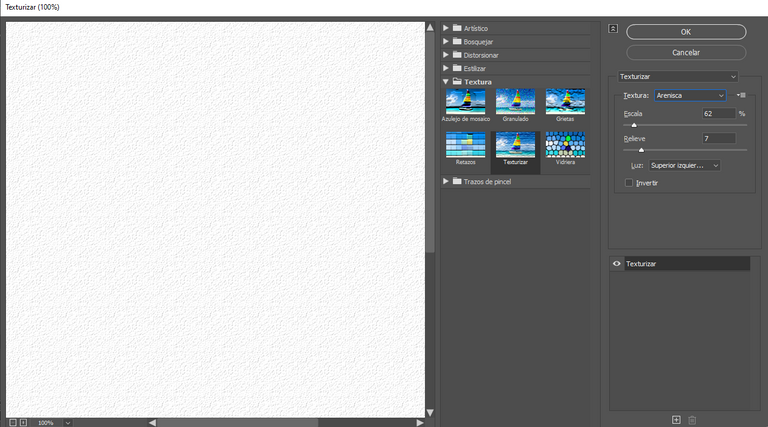
All this to add a sandstone filter to the image, for this I positioned myself on the new layer and went to Filter > Filter Gallery > Texturize, once there I chose the filter Texturize and set the texture type as sandstone with the following parameters.
Todo esto para agregarle un filtro de arenisca a la imagen, para esto me posicione sobre la capa nueva y me dirigí a Filtro > Galería de Filtros > Texturizar, una vez allí escogí el filtro Texturizar y establecí el tipo de textura como arenisca con los siguientes parámetros.
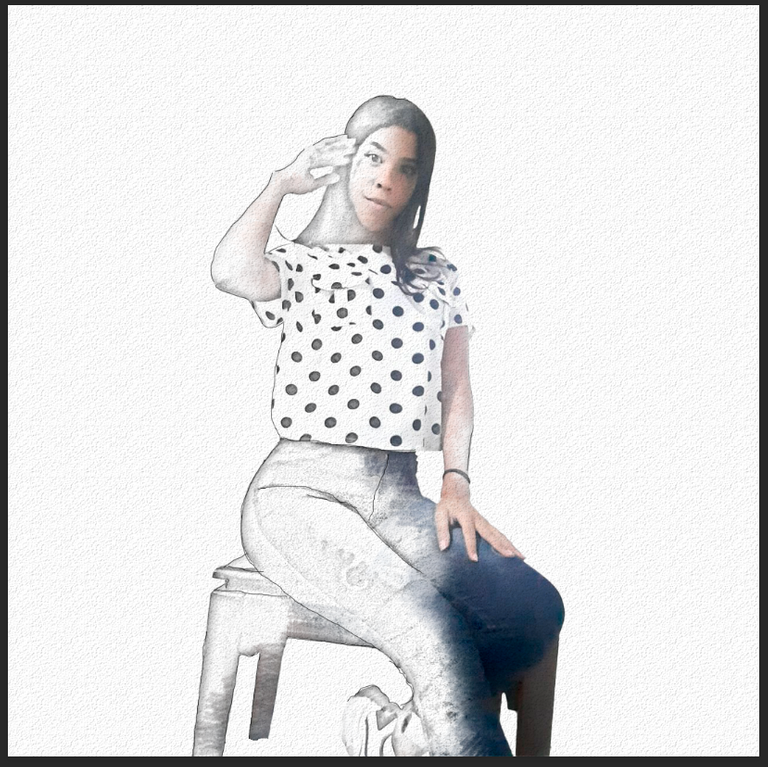
I then changed the blending mode of this layer to Multiply so that the image would have the following texture.
Después cambie el modo de fusión de esta capa a Multiplicar para que la imagen quedara con la siguiente textura.
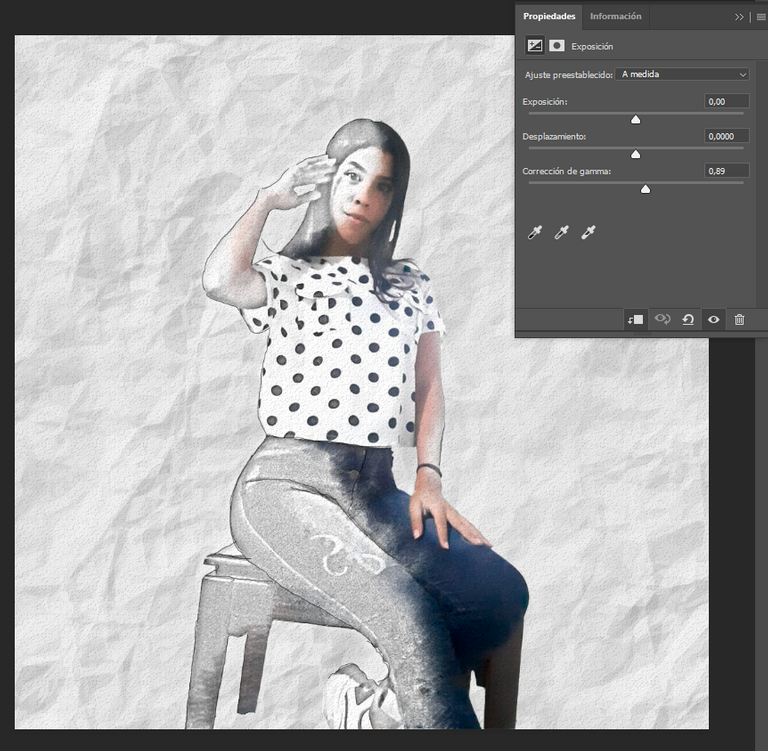
To finish I did some brush retouching on the group mask and on certain parts of the picture like the face and legs, then I added a new exposure layer on top of the base picture layer and set the following gamma correction.
Para finalizar hice algunos retoques con el pincel en la mascara del grupo y en ciertas partes de la fotografía como la cara y las piernas, luego agregue una nueva capa de exposición sobre la capa de la fotografía base y establecí la siguiente corrección de gamma.
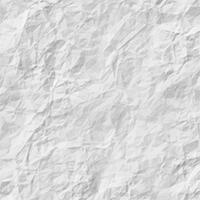
Then on top of the white background layer I added the last asset which would be the PNG with the crumpled paper texture, lowered the opacity of this to 70% and exported the project to Lightroom.
Luego encima de la capa de fondo blanca agregue el ultimo recurso que seria el PNG con la textura de papel arrugado, baje la opacidad de esta a un 70% y exporte el proyecto a Lightroom.

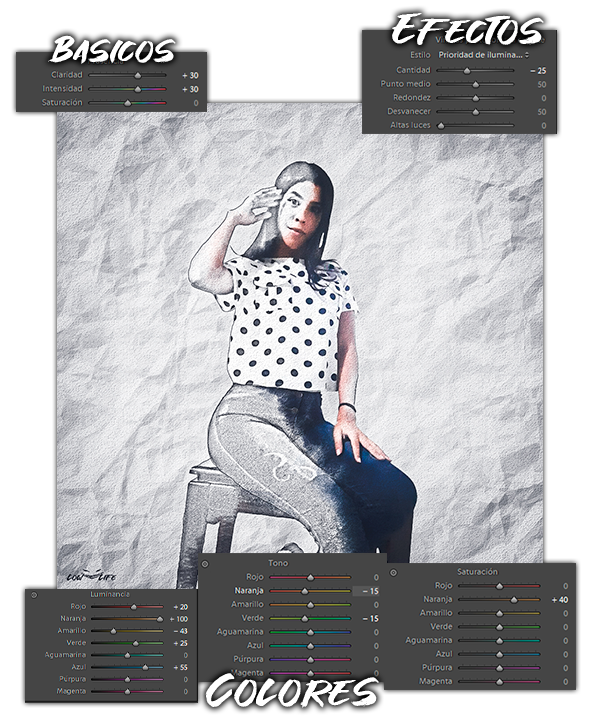
Once in Lightroom I didn't do much, I just gave it a little more presence in the basics and added a vignette effect in the edges, I also gave it some cooler colors in the tones with the following parameters.
Una vez en Lightroom no hice mucho solo le di un poco mas de presencia en los básicos y agregue un efecto de viñeta en los bordes, también le di unos colores mas fríos en los tonos con los siguientes parámetros.


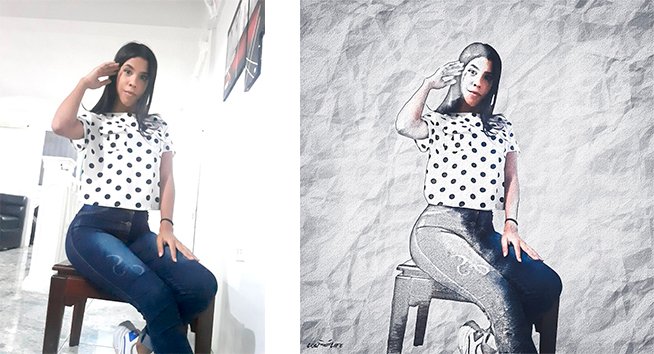
Musa: Keily Carballo
Y este amigos fue el resultado de todos los efectos combinados, espero que les haya gustado este efecto de edición y les sirva de ayuda si quieren realizar alguno igual o aplicar alguna de estas técnicas, como verán no son tan complicadas, cualquier consejo o aporte es bien recibido de mi parte sin mas que comentarles que tengan una excelente noche y hasta el próximo post!
And this friends was the result of all the combined effects, I hope you liked this editing effect and it will help you if you want to make any of the same or apply any of these techniques, as you will see they are not so complicated, any advice or input is welcome from me without further comment have a great night and see you next post!



Congratulations @lowlifevzla08! You have completed the following achievement on the Hive blockchain and have been rewarded with new badge(s) :
<table><tr><td><img src="https://images.hive.blog/60x70/http://hivebuzz.me/@lowlifevzla08/upvotes.png?202104200838" /><td>You distributed more than 3000 upvotes.<br />Your next target is to reach 4000 upvotes. <p dir="auto"><sub><em>You can view your badges on <a href="https://hivebuzz.me/@lowlifevzla08" target="_blank" rel="noreferrer noopener" title="This link will take you away from hive.blog" class="external_link">your board and compare yourself to others in the <a href="https://hivebuzz.me/ranking" target="_blank" rel="noreferrer noopener" title="This link will take you away from hive.blog" class="external_link">Ranking<br /> <sub><em>If you no longer want to receive notifications, reply to this comment with the word <code>STOP <p dir="auto"><strong><span>Check out the last post from <a href="/@hivebuzz">@hivebuzz: <table><tr><td><a href="/hivebuzz/@hivebuzz/tour-update4"><img src="https://images.hive.blog/64x128/https://i.imgur.com/xecznXF.png" /><td><a href="/hivebuzz/@hivebuzz/tour-update4">Hive Tour Update - Governance <h6>Support the HiveBuzz project. <a href="https://hivesigner.com/sign/update_proposal_votes?proposal_ids=%5B%22109%22%5D&approve=true" target="_blank" rel="noreferrer noopener" title="This link will take you away from hive.blog" class="external_link">Vote for <a href="https://peakd.com/me/proposals/147" target="_blank" rel="noreferrer noopener" title="This link will take you away from hive.blog" class="external_link">our proposal!