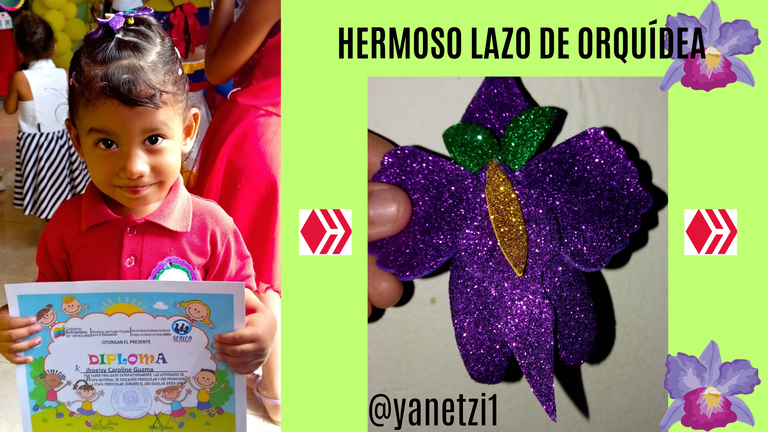
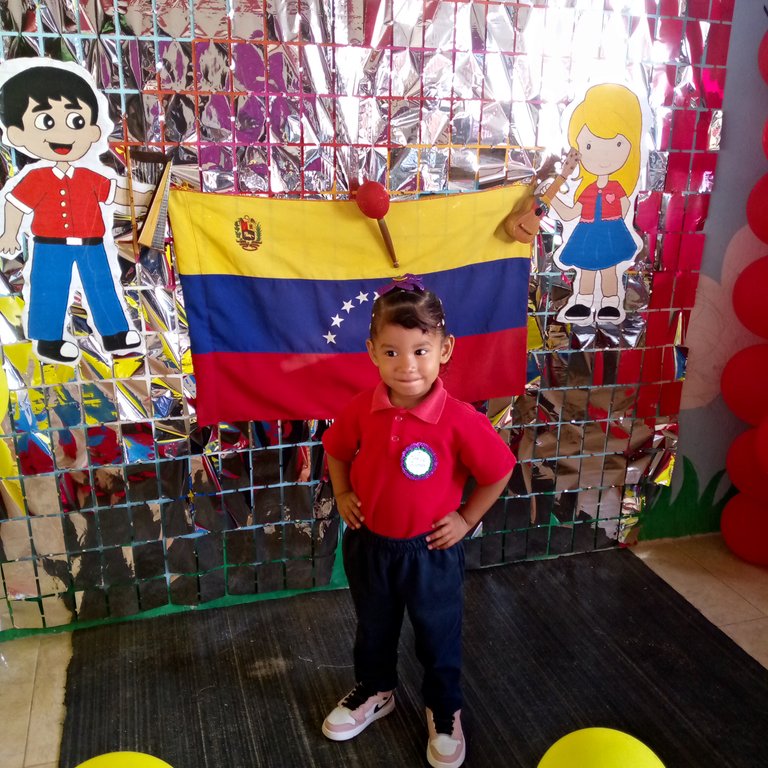
El día de hoy quiero contarles Cómo realizar un hermoso lazo de orquídea ideal para lucir en un cierre de proyecto de los temas culturales de Venezuela cómo lo hizo mi hija que le tocó hacer su cierre de proyecto de la orquídea tenía que hacerle un lazo referente a la flor y una maqueta pues es mi primera vez realizando este tipo de manualidades ya que mi hija está estudiando maternidad Que prácticamente viene siendo simoncito y pasó al primer nivel de preescolar les voy a estar presentando los materiales y el paso a paso de cómo realizar estas manualidades hechas con Foamy y muy fácil de hacer.
Los materiales utilizados en la elaboración de nuestra lazo de orquídea fueron los siguientes:
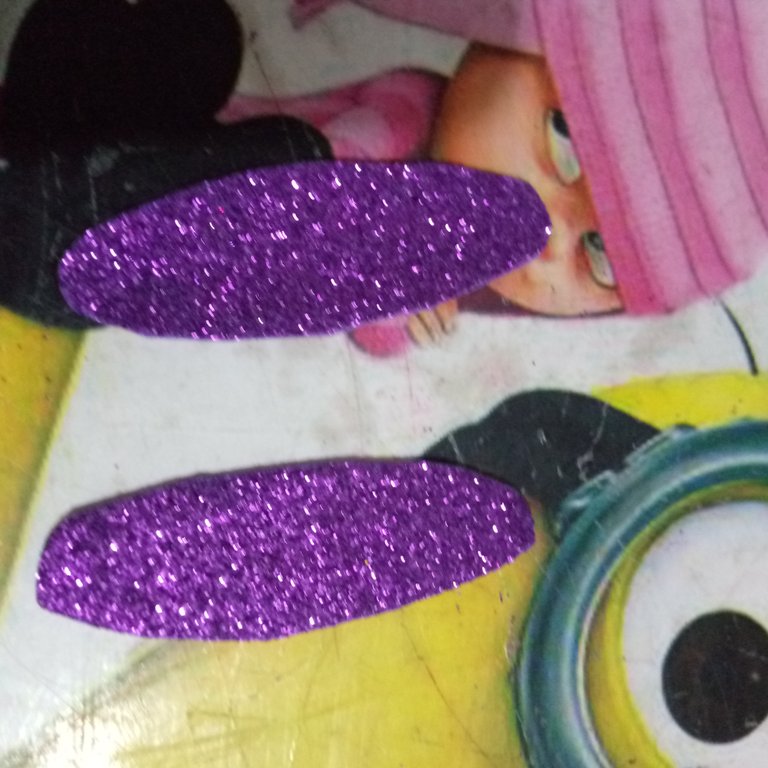
- Foamy morado escarchado
- Foamy verde escarchado
- Foamy amarillo escarchado
- Tijera
- Hoja
- Lapicero
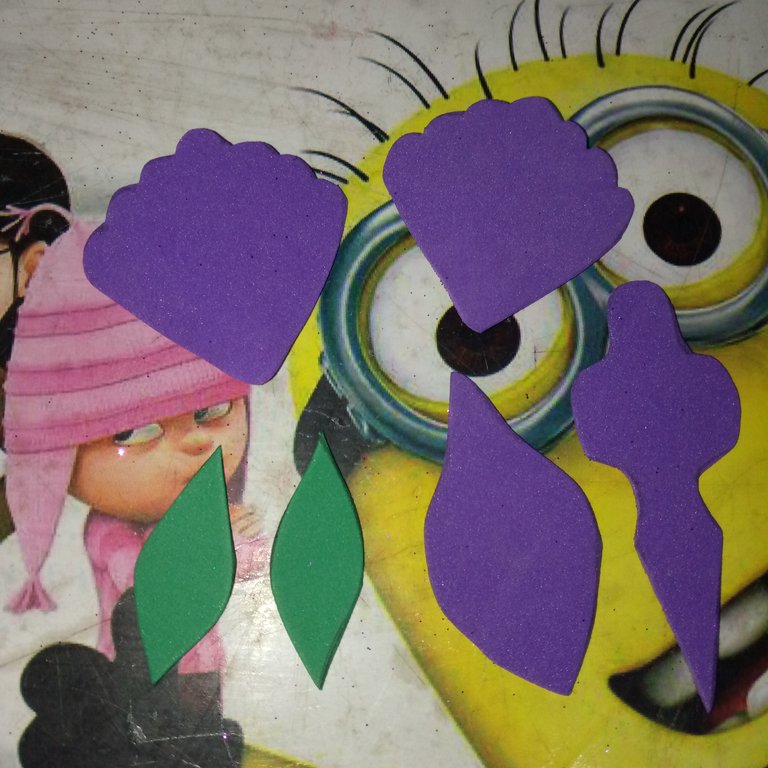
1Lo primero que voy a hacer es tomar la hoja blanca junto con el lápiz Y empezamos a hacer los patrones de la orquídea, tales como las hojas los pétalos y el centro de la flor que viene siendo el capullo
2Así de esta manera deberían de quedar los patrones de nuestra orquídea, una vez ya dibujado nos vamos a enfocar en recortarlos delicadamente para que queden bien delineados y así dibujarlos en el foamy.
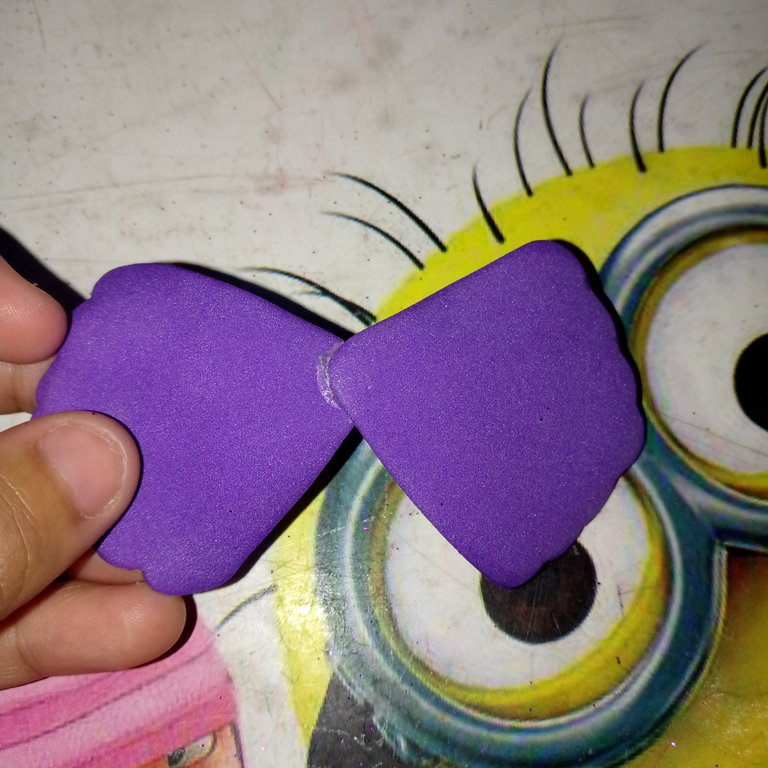
3Ahora simplemente lo que vamos a hacer es remarcar con el lapicero el molde de las hojas y de los pétalos una vez ya listo nos vamos a encargar de recortarlos de manera delicada recuerden que trabajar con foami no es fácil.
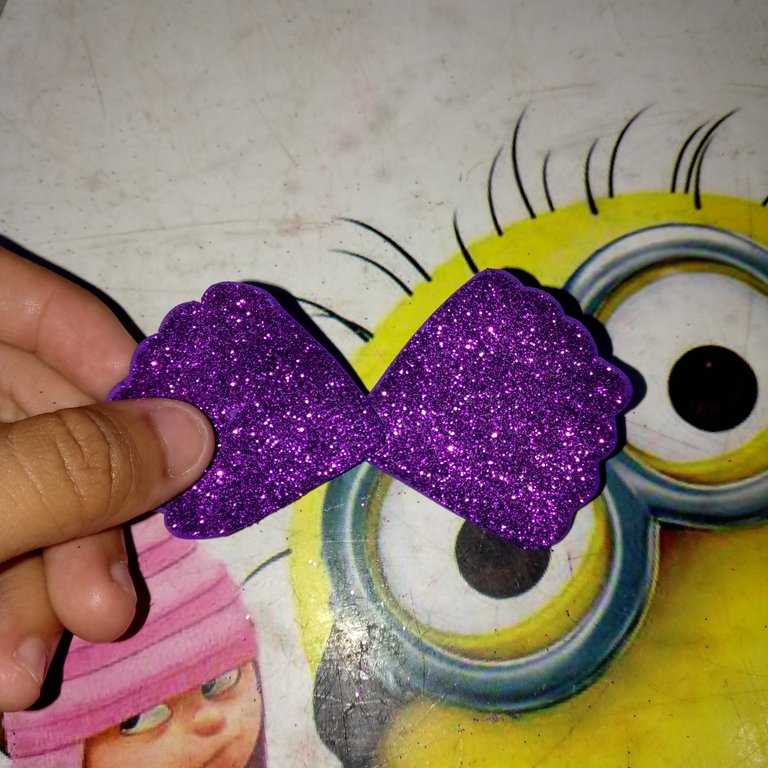
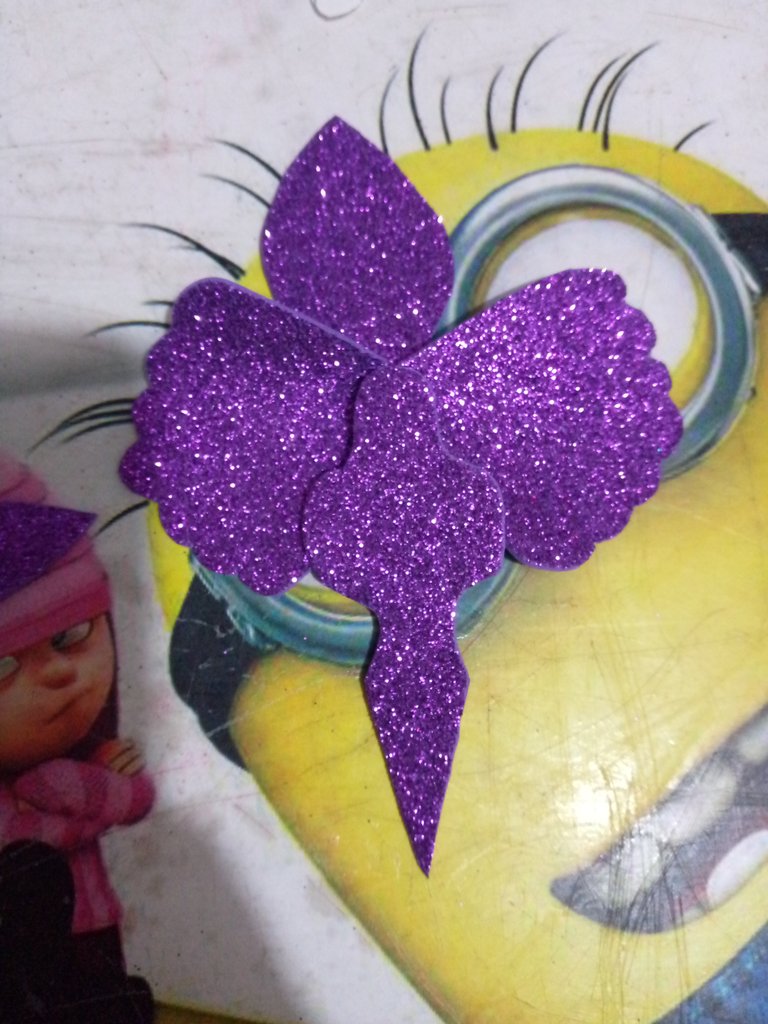
4Ya una vez estando todos listos y recortados nos vamos a poner a estructurar como tal las partes de la flor, de manera conjunta vamos a ir agregando silicon y vamos pegando hasta formar la base.
5Una vez ya estando listo tenemos que ver qué peguen muy bien las partes, asi de esta manera.
6Ahora lo que vamos es ir pegando por parte de manera que vayamos viendo como va dando forma la flor de orquídea, colocando todas las partes en el medio pondremos un pequeña hoja, de color amarillos definida.
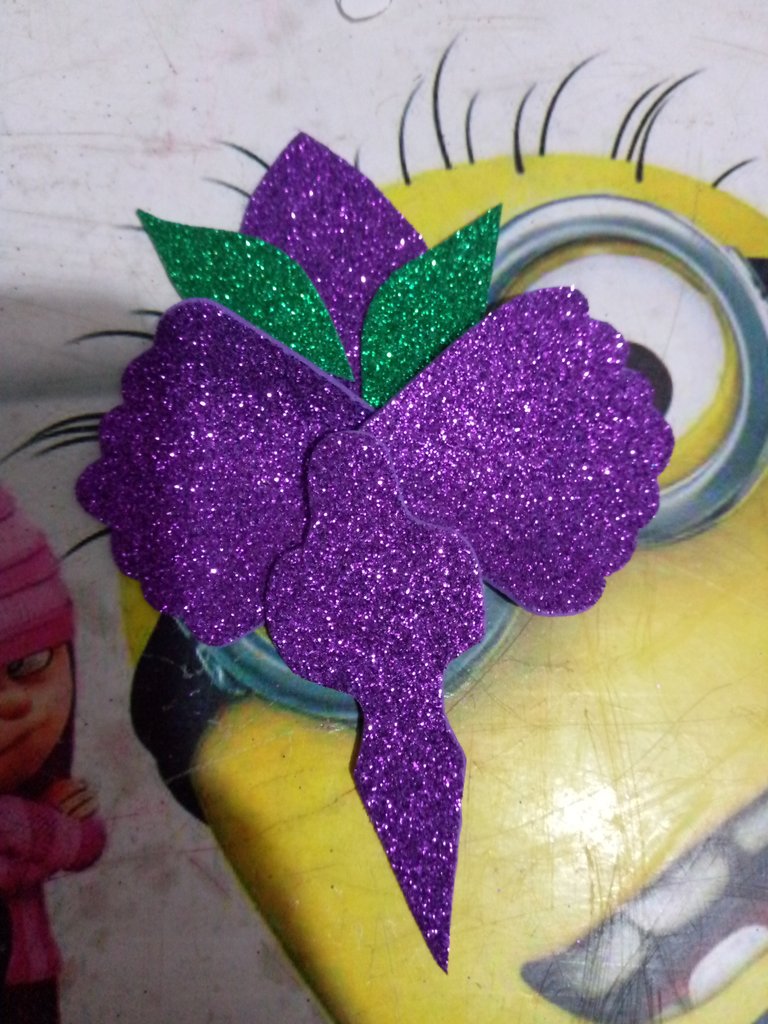


7A lo ultimo es lo que vamos a hacer es colocar silicon plner el gancho de el lado de preferencia y listo asi terminamos nuestro gancho bonito de la orquídea.
Espero que pronto para los proyectos de los mas pequeños de la casa pjedan animarse a ser participes de grandes momentos cono estos, unicos y especiales.

Saludos y bendiciones amigos 😇 que Esta semena sea llena de grandes momentos ideas y prácticas para realizar manualidades en casa.
- Las fotos son de mi propiedad y las tome de mi teléfono tecno spark go.
- Traductor utilizado:https://www.deepl.com
- Edite la foto mediante la aplicación de Canva.
Today I want to tell you how to make a beautiful orchid bow, ideal to show off at a project closing on the cultural themes of Venezuela, how my daughter did it, when she had to make her orchid project closing, I had to make a bow referring to the flower and a model because it is my first time doing this type of crafts since my daughter is studying maternity. She has practically been a simoncito and went to the first level of preschool. I will be presenting the materials and the step by step of how to make these crafts made with Foamy and very easy to do.
The materials used in the making of our orchid bow were the following:
- Frosty purple foamy
- Frosted green foamy
- Frosty yellow foamy
- Scissors
- Sheet
- Pencil
1The first thing I am going to do is take the white sheet along with the pencil and we begin to make the patterns of the orchid, such as the leaves, the petals and the center of the flower that is the bud
2This is how the patterns of our orchid should look. Once drawn we are going to focus on delicately cutting them out so that they are well outlined and thus drawing them on the foam.
3Now what we are simply going to do is highlight with the pencil the mold of the leaves and petals. Once ready, we are going to be in charge of cutting them out delicately. Remember that working with foam is not easy.
4Once we are all ready and cut out, we are going to start structuring the parts of the flower as such, together we are going to add silicone and glue until we form the base.
5Once it is ready we have to see that the parts stick together very well, like this.
6Now what we are going to do is glue each part so that we can see how the orchid flower takes shape, placing all the parts in the middle we will put a small leaf, a defined yellow color.
7The last thing we are going to do is place silicone on the hook on the preferred side and that's it, we finish our beautiful orchid hook.
I hope that soon for the projects of the little ones in the house they will be encouraged to be part of great moments like these, unique and special.
Greetings and blessings friends 😇 May this week be full of great moments, ideas and practices for making crafts at home.
- The photos are my property and were taken from my Tecno Spark Go phone.
- Translator used:https://www.deepl.com
- Edit the photo using the Canva app
Saludos @yanetzi01, que hermoso lazo, el color morado me encanta, la modelo luce muy guapa y feliz con su accesorio hecho con amor por su mamita. 🌼🌺🌸🌻💐
Feliz día!
!DIY
Muchas gracias amiga así es todo con amor queda hermoso, 😍 gracias por tus bonitas palabras
Projects like this are a great way to learn and have fun. That's a really nice bow.
Glitter has created an amazing art through its use. The process of cutting glitter paper with scissors looks beautiful.