Español
Saludos amigos creadores🙋☀🌈.
Existen gran variedad de películas que no importando cuantas veces veamos siempre nos generan sonrisa y disfrute. Monsters, película animada, es una de la que como dicen mis familiares impide que deje atrás mi alma de niña, pues me encanta y siempre que tengo oportunidad, me recreo observándola.
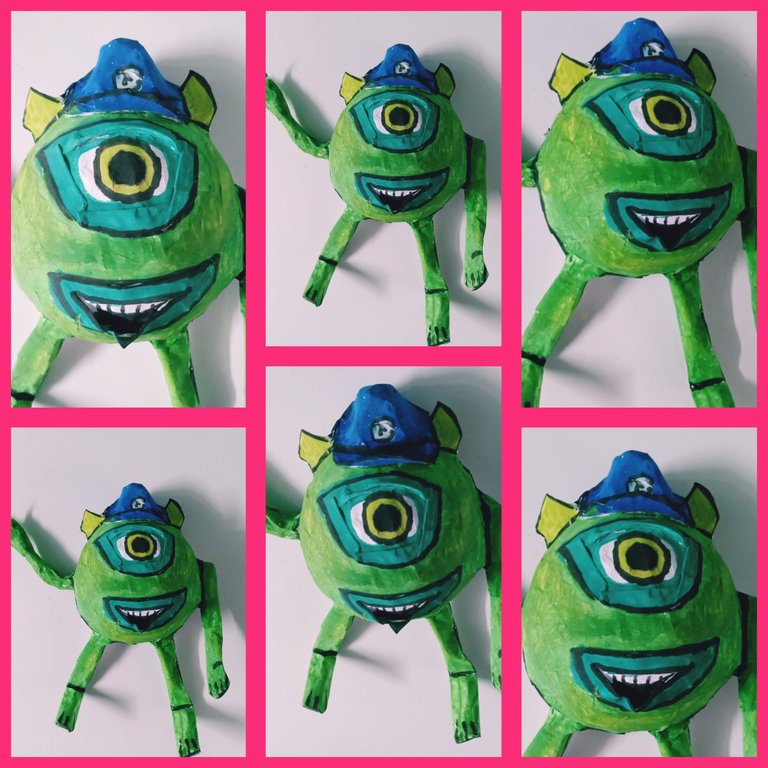
Hoy compartiré con ustedes un tutorial sencillo, que de seguro disfrutarán, pues Mike Wasouski, el pequeño monstruo verde, es el destino de mi confección, utilizando la técnica de papel maché.
Materiales
.Molde:Objeto redondo.
.Tiras de papel blanco
.Papel
.Cartulina
.Pega elaborada de harina
.Pegamento
.Tijera
.Temperas
.Acuarelas
.Lápiz
.Pincel
.Hilo
.Pequeño imán
.Barniz
Modo de confección
Cabeza y cuerpo
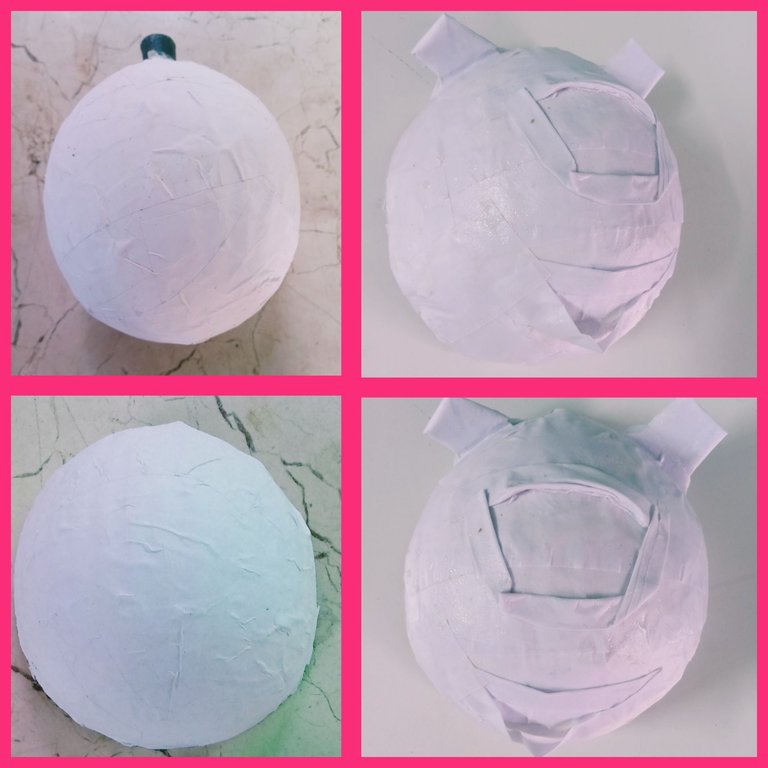
1-Tomar el molde redondo y con un algodonsito pequeño humedecido en aceite, impregnar toda su superficie.
2-Darle tres capas de empapelado a la estructura, utilizando tiras de papel blanco y la pega elaborada de harina. Dejar secar por doce horas.
3-Utilizando una tijera realizamos una grieta por todo su centro, permitiéndonos desmontarlo del molde y obtener dos mitades de igual diámetro.
Aquí amigos, nuestro proceder varía según el destino de nuestra confección. Si nuestro monstruo, es para decorativo de fríos o paredes de cuartos, es preferible sólo utilizar una de las mitades, pues permite mejor contacto en la superficie.
Si es para utilizarlo cómo soporte, para el rellenado de confituras, destinado para los pequeños de la casa, las dos mitades nos ayudarán más, pues le generará una mayor amplitud y firmeza. Yo utilicé la variante de una sóla mitad.
4-Tomar una de las mitades y utilizando la técnica de papel maché con tiras de papel blanco y pega elaborada de harina, realizarle dos capas de empapelado a la semicircunferencia completamente, permitiéndonos obtener una estructura cerrada. Dejar secar por ocho horas.
Tarritos.
1-Marcar con un lápiz en la cartulina la forma deseada de los tarritos.
2-Recortar siguiendo la guía con la tijera.
3-Adherir con el pegamento a la parte superior de la cabeza.
Para ser el relieve de ojo y boca:
1-Cortar dos tiritas finas de cartulina.
2-Realizar dobleces de forma circular asemejándolo a la forma deseada para la boca y para nuestro ojo.
3-Adherir con pegamento a la cabeza.
Brazos
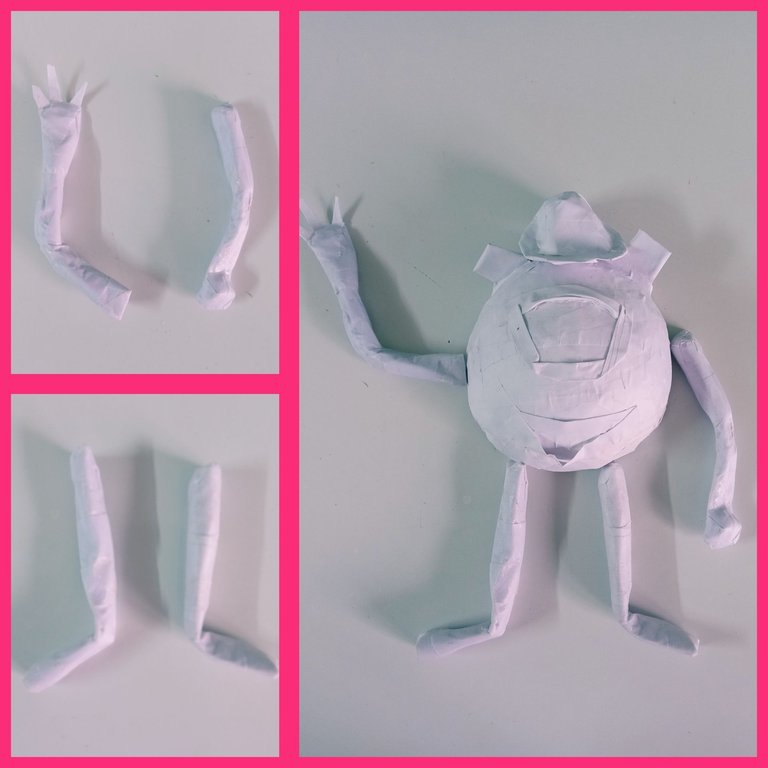
1-Estrujar dos papeles conformado dos estructuras alargadas.
2-Realizar dobleces según la posición que deseemos que adpoten.
3-.Darle una capa de empapelado en su totalidad. Dejar secar por cinco horas.
Piernas
1-Cortar con la tijera dos rectángulos de igual diámetro de cartulina.
2-Enrollarlos conformando dos tabaquitos largos.
3-Realizar en cada uno: un doblez a dos centímetros de uno de los estremos, conformado los pies.
4-Realizarle una capa de empapelado en su totalidad para mantener la estructura.
Accesorios:
Casco
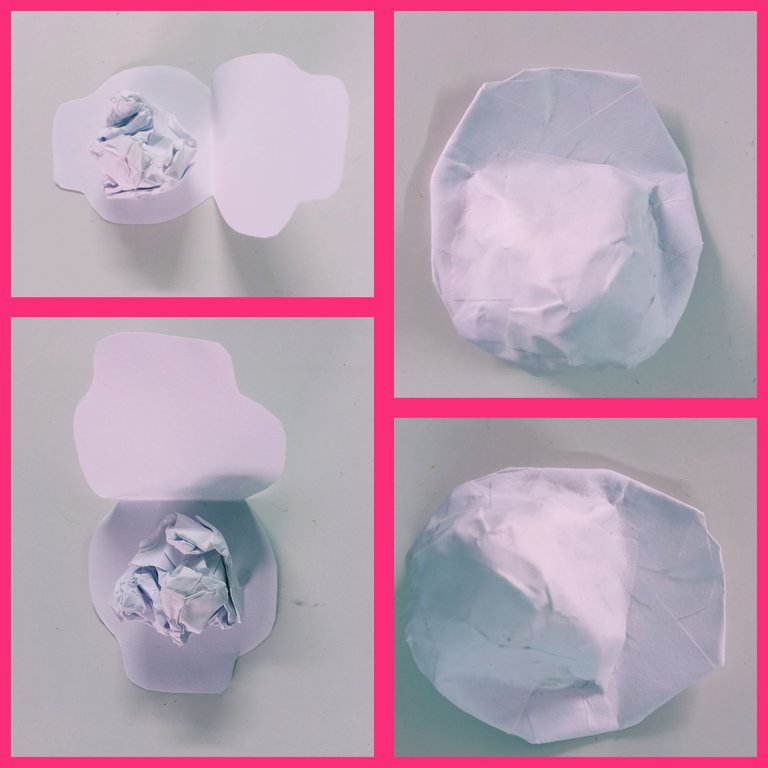
1-Tomar una hoja cuadrada y doblarla por su mitad.
2-Utilizando un lápiz dibujamos nuestro casquito.
3-Cortamos el molde de nuestro casco siguiendo la guía. Obteniendo al abrir la hojita doblada, la forma del casco doble.
4-Estrujar un papel conformando una pequeña bolita y adherirla con el pegamento en el centro de la hoja.
5-.Sellar el borde con pegamento dejando la bolita dentro y le realizamos una capa de empapelado con tiras de papel blanco y pega elaborada de harina, dejando conformado listo a nuestro casco, después de cinco horas de secado.
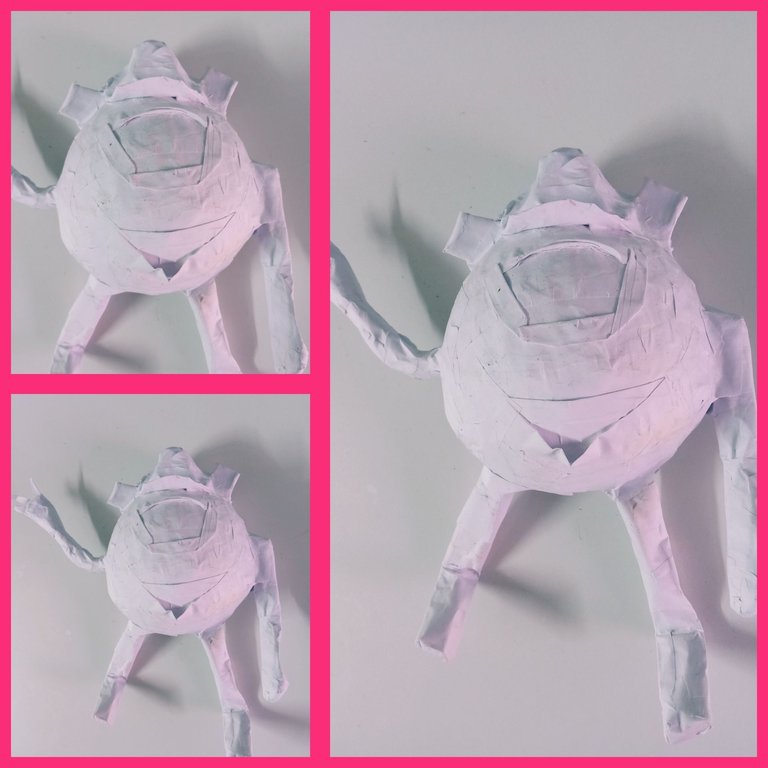
Ya tenemos nuestro cabeza, extremidades, casco confeccionadas. Ahora pasamos a unificarlas utilizando pegamento. Dejándolas lista para decorar con pinceles y temperas.
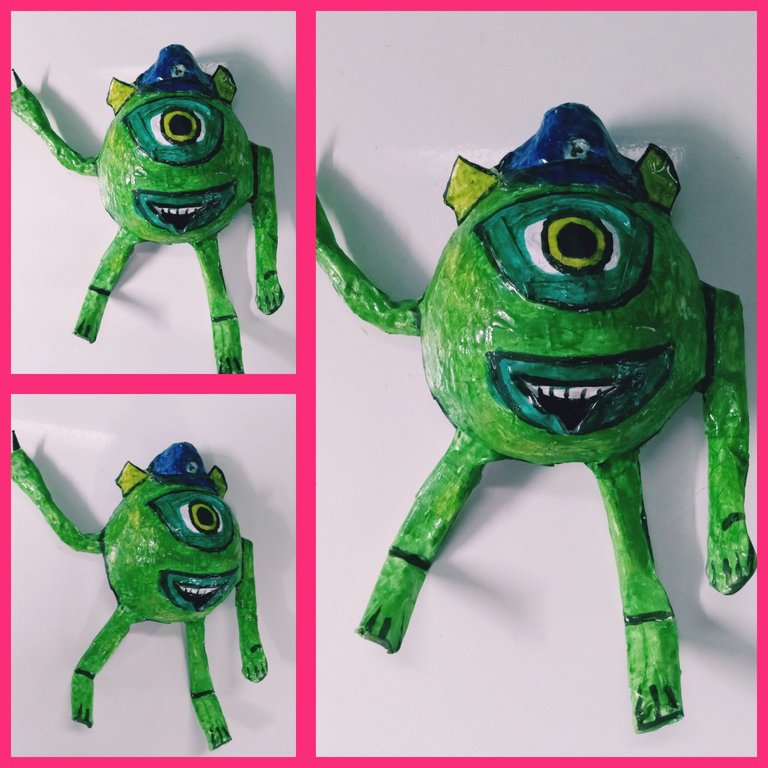
Quise asemejarlo al Mike Wasouski de la película, optando por escoger variedades de tonalidades de color verde para su pintado.Y para su pequeño casquito utilicé el azul. Resalté detalles con el color negro, profundizando en el centro de su enorme ojo. Para su acabado brilloso utilicé barníz.
Para lograr su sostén, podemos utilizar varias formas según el lugar destinado para el decorativo.
1-Adherir con pegamento un pequeño imán en la parte tracera.(Esta forma nos permite decorar fríos y neveras ó cualquier superficie de magnetismo)
2-Realizar un pequeño orificio en la región posterior, por el que vamos a introducir clavos previamente adheridos a la pared, permitiendo colgarlos a nuestro gusto.
3-Adherirle con pegamento en la parte superior un pequeño hilo.
Amigos, mi monstruo Mike Wasouski, ahora, no me genera solamente una sonrisa cuando lo veo en películas, sino en todo el día cuando lo observo decorando mi hogar.
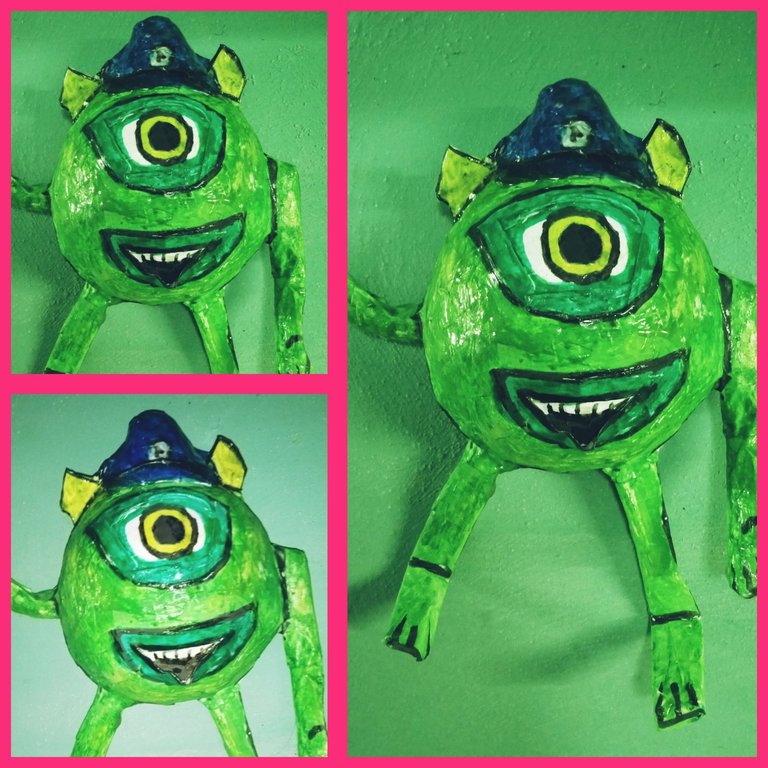
Los exhorto a que disfruten confeccionándolo, les aseguro que los pequeños de casa lo amarán, además de ser un bello decorativo para eventualidades como Halloween.
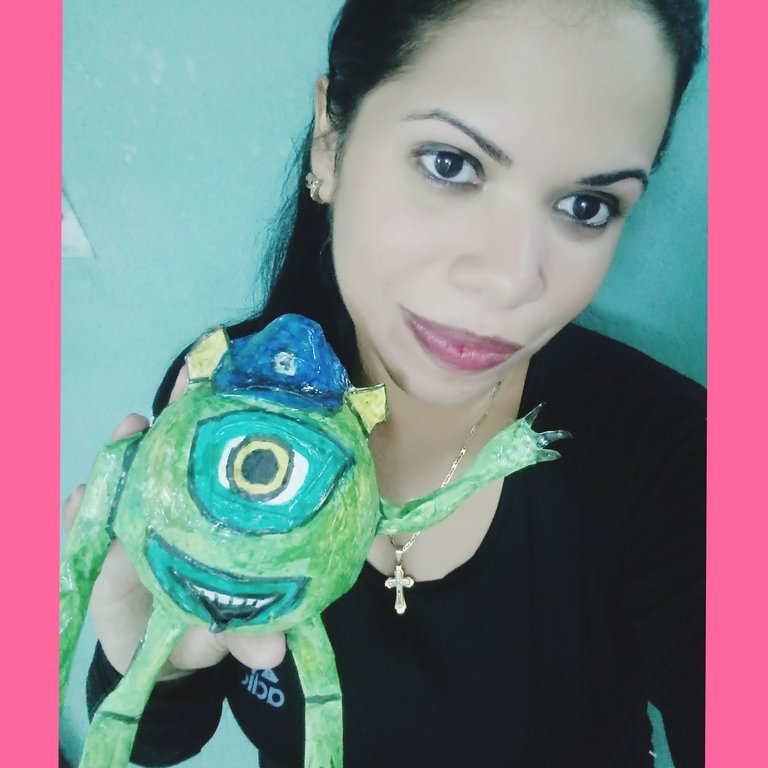
Bendiciones a todos amigos, les deseo una feliz semana cargada de momentos especiales, esos que llenan el alma.🙋🌈💖
English
Greetings fellow creators🙋☀🌈.
There are a wide variety of movies that, no matter how many times we watch, always generate a smile and enjoyment. Monsters, an animated movie, is one that, as my relatives say, prevents me from leaving my childhood soul behind, because I love it and whenever I have the opportunity, I take pleasure in watching it.
Today I will share with you a simple tutorial, which you will surely enjoy, because Mike Wasouski, the little green monster, is the destination of my sewing, using the papier mache technique.

Materials
.Mold: Round object.
.White paper strips
.Paper
.Cardboard
.Paste made of flour
.Glue
.Scissor
.Temperas
.Watercolors
.Pencil
.Brush
.Thread
.Small magnet
.Varnish
Mode of preparation
Head and body
1-Take the round mold and with a small cotton ball moistened in oil, impregnate its entire surface.
2-Give three layers of wallpaper to the structure, using strips of white paper and the glue made of flour. Leave to dry for twelve hours.
3-Using a scissors we make a crack all over its center, allowing us to disassemble it from the mold and obtain two halves of equal diameter.
Here, friends, our procedure varies according to the destination of our clothing. If our monster, is for decorative of cold or room walls, it is preferable to use only one of the halves, because it allows better contact on the surface.
If it is to be used as a support, for the filling of jams, intended for the little ones of the house, the two halves will help us more, because it will generate a greater amplitude and firmness. I used the one-half variant.
4-Take one of the halves and using the papier mache technique with strips of white paper and glue made of flour, make two layers of wallpaper to the semicircle completely, allowing us to obtain a closed structure. Leave to dry for eight hours.
Jars.
1-Mark with a pencil on the cardboard the desired shape of the jars.
2-Trim following the guide with the scissors.
3-Adhere with the glue to the top of the head.
To be the relief of eye and mouth:
1-Cut two thin strips of cardboard.
2-Make bends in a circular shape resembling the shape desired for the mouth and for our eye.
3-Adhere with glue to the head.

Arms
1-Squeeze two papers forming two elongated structures.
2-Make bends according to the position that we want them to adapt.
3-.Give it a coat of wallpaper in its entirety. Leave to dry for five hours.
Legs
1-Cut with the scissors two rectangles of equal diameter of cardboard.
2-Roll them into two long cigarettes.
3-Make in each one: a bend two centimeters from one of the ends, forming the feet.
4-Make a layer of wallpaper in its entirety to maintain the structure.

Accessories:
Helmet
1-Take a square sheet and fold it in half.
2-Using a pencil we draw our cap.
3-We cut the mold of our helmet following the guide. Obtaining by opening the folded leaflet, the shape of the double helmet.
4-Squeeze a piece of paper into a small ball and stick it with the glue in the center of the sheet.
5-.Seal the edge with glue leaving the ball inside and we make a layer of wallpaper with strips of white paper and glue made of flour, leaving our helmet shaped ready, after five hours of drying.

We already have our head, limbs, helmet ready-made. Now we move on to unifying them using glue. Leaving them ready to decorate with brushes and tempera.

I wanted to make him look like Mike Wasouski from the movie, opting to choose varieties of shades of green for his painting.And for her little cap I used the blue one. I highlighted details with the black color, deepening in the center of his huge eye. For its shiny finish I used varnish.

To achieve its support, we can use several ways depending on the place intended for the decorative.
1-Stick a small magnet on the back with glue.(This shape allows us to decorate cold and fridges or any surface of magnetism)
2-Make a small hole in the back region, through which we are going to introduce nails previously adhered to the wall, allowing them to be hung to our liking.
3-Attach a small thread to the top with glue.
Friends, my monster Mike Wasouski, now, not only generates a smile when I see him in movies, but all day long when I watch him decorating my home.

I urge you to enjoy making it, I assure you that the little ones at home will love it, besides being a beautiful decorative for eventualities such as Halloween.

Blessings to all friends, I wish you a happy week full of special moments, those that fill the soul.🙋🌈💖
Wow, I loved the technique you used to create this little green monster. You can do a lot with that technique.
Excellent work.
Cierto, con la técnica de papel maché podemos darle riendas sueltas a nuestra imaginación. Muchas gracias. Excelentes días 🙋🌈
True, with the papier mache technique we can give free rein to our imagination. Thank you very much. Excellent days 🙋🌈
Congratulations @marydeluz! You have completed the following achievement on the Hive blockchain And have been rewarded with New badge(s)
<table><tr><td><img src="https://images.hive.blog/60x70/https://hivebuzz.me/@marydeluz/upvoted.png?202411061610" /><td>You received more than 10000 upvotes.<br />Your next target is to reach 15000 upvotes. <p dir="auto"><sub><em>You can view your badges on <a href="https://hivebuzz.me/@marydeluz" target="_blank" rel="noreferrer noopener" title="This link will take you away from hive.blog" class="external_link">your board and compare yourself to others in the <a href="https://hivebuzz.me/ranking" target="_blank" rel="noreferrer noopener" title="This link will take you away from hive.blog" class="external_link">Ranking<br /> <sub><em>If you no longer want to receive notifications, reply to this comment with the word <code>STOP <p dir="auto"><strong>Check out our last posts: <table><tr><td><a href="/hive-122221/@hivebuzz/pum-202410-delegations"><img src="https://images.hive.blog/64x128/https://i.imgur.com/fg8QnBc.png" /><td><a href="/hive-122221/@hivebuzz/pum-202410-delegations">Our Hive Power Delegations to the October PUM Winners<tr><td><a href="/hive-122221/@hivebuzz/pud-202411-feedback"><img src="https://images.hive.blog/64x128/https://i.imgur.com/zHjYI1k.jpg" /><td><a href="/hive-122221/@hivebuzz/pud-202411-feedback">Feedback from the November Hive Power Up Day<tr><td><a href="/hive-122221/@hivebuzz/pum-202410-result"><img src="https://images.hive.blog/64x128/https://i.imgur.com/mzwqdSL.png" /><td><a href="/hive-122221/@hivebuzz/pum-202410-result">Hive Power Up Month Challenge - October 2024 Winners ListSuper artístico te quedo bien lindo.
Muchas gracias.Saludos🙋☀
🙂🙌
This truly is a friendly moslnsterz haha. Nice work
Looks like a character from monster inc.
Nice work
!diy
!discovery 40
This post was shared and voted inside the discord by the curators team of discovery-it
Join our Community and follow our Curation Trail
Discovery-it is also a Witness, vote for us here
Delegate to us for passive income. Check our 80% fee-back Program
está muy bonito, buen trabajo
very nice, good job
Muchas gracias .Bendecidos días🙋✨
Thank you very much.Blessed days✨✨