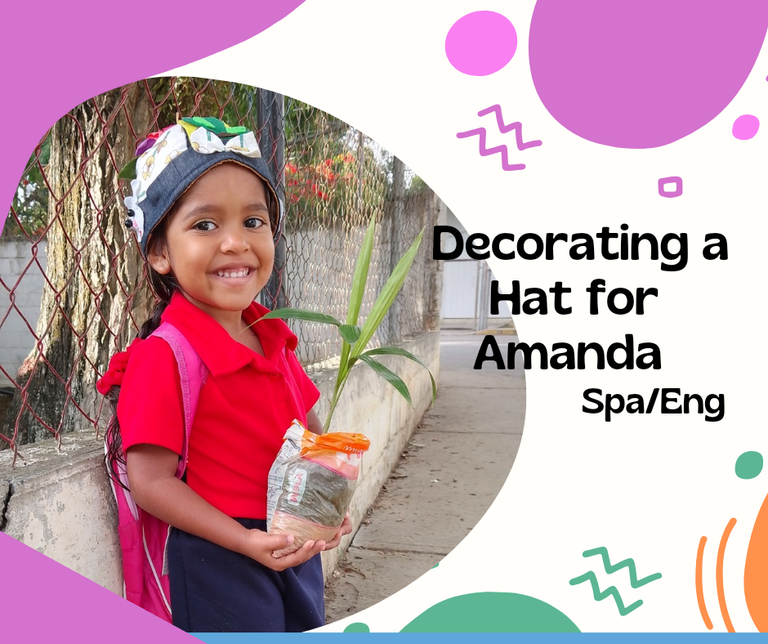
Decorating a Hat for Amanda
Hello to all the members of the community.
It's always exciting to stop by not only to share my experiences, but also to marvel at the creative potential at its finest, reflected in beautiful creations.
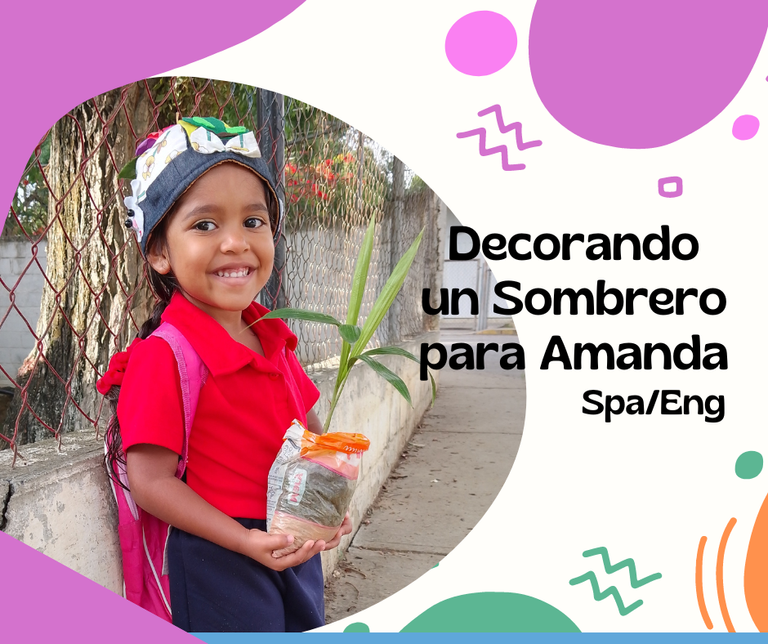
Amanda was asked in Kindergarten to make a crazy hat to commemorate World Environment Day, I didn't make a crazy hat, but I did decorate one with an environmental motif and here I show you how I made it.
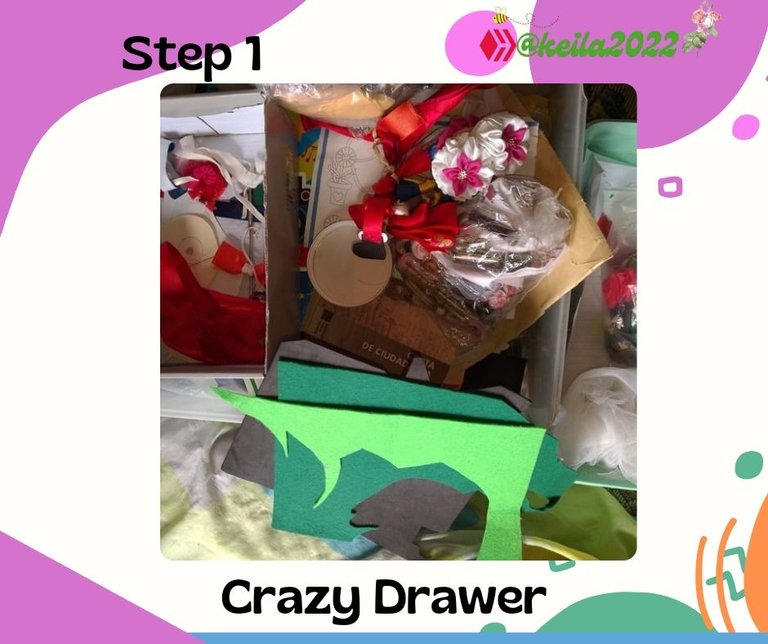
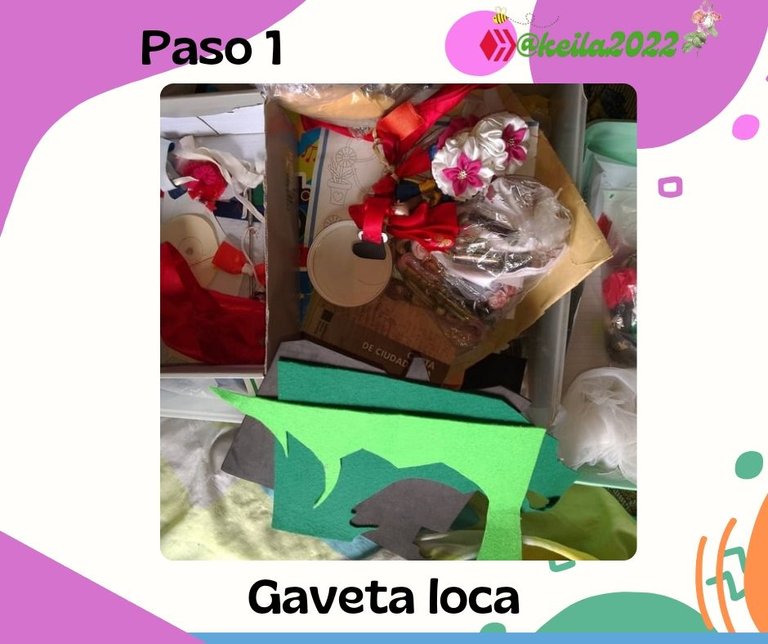
Step 1.
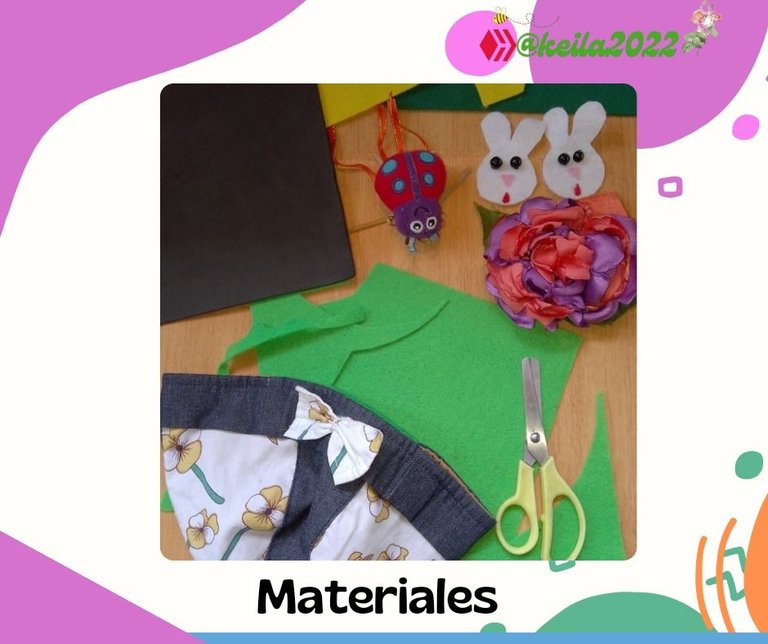
The first thing I did was to locate the crazy hat and select the material to use:
Hat.
Felt: Light green, dark green, pink, brown.
Thin anime.
Foami: Black.
1 ladybug.
2 felt rabbits.
1 flower.
Thread and needle
Scissors

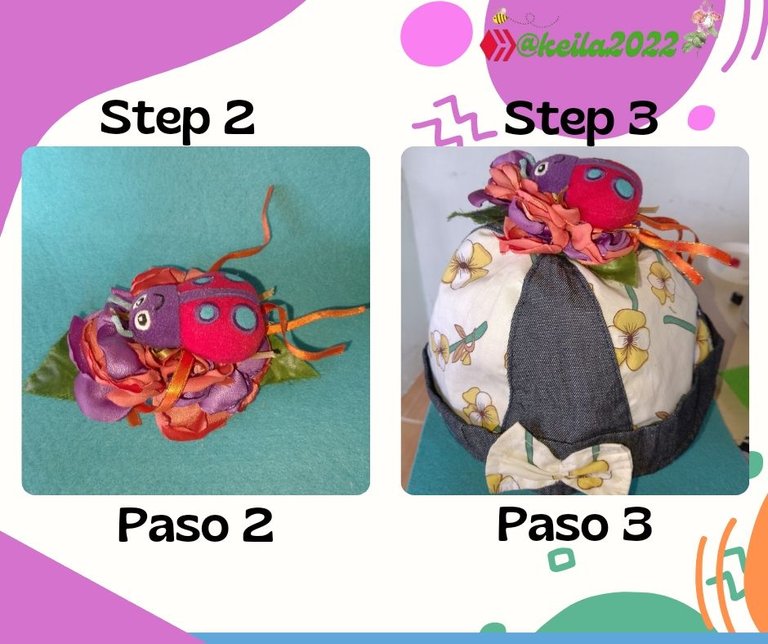
Step 2.
With needle and thread I placed the ladybug on the flower, making sure it was securely attached.
Step 3:
Using the previous technique, I fixed the flower with the ladybug on the hat, taking into account that the stitches should be as precise as possible, so that the thread does not look messy at the end and is acceptable from an aesthetic point of view.
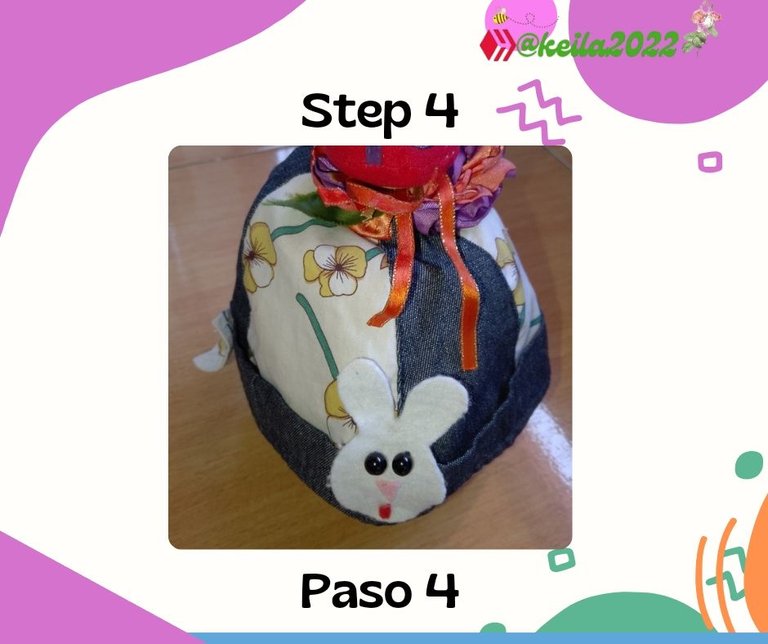
Step 4.
I attached the rabbits to the sides of the hat.
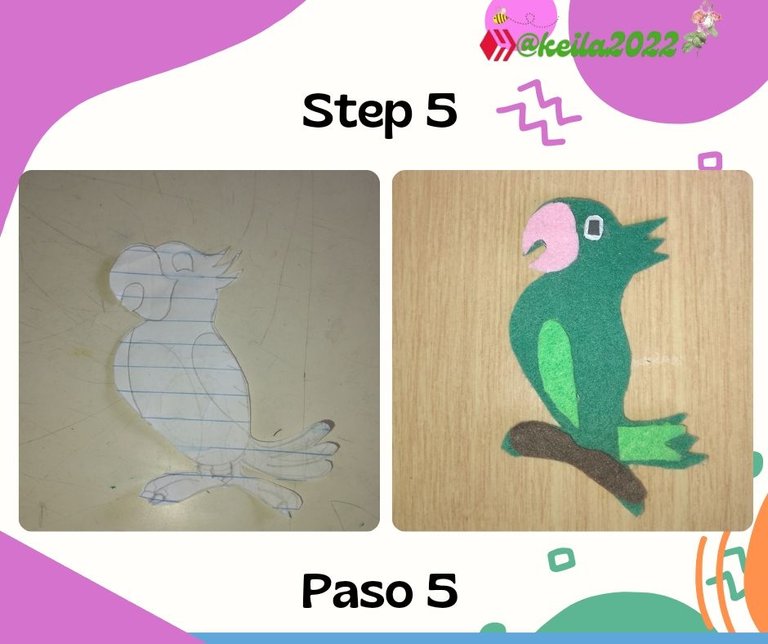
Step 5.
For the bird, I drew a parrot on paper and then transferred it to the felt. I glued its parts with silicone and, in the case of the eye, since I didn't have white felt, I used a small piece of anime (from a food tray) and a circle of black foami.
Believe it or not, I attached the anime and the foami with needle and thread because the silicone would peel off as it dried.
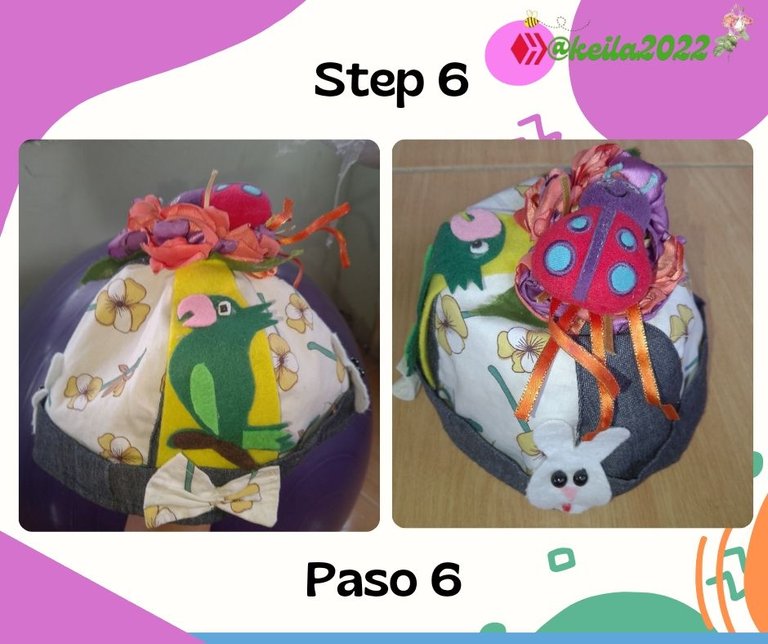
Step 6:
The little parrot, I attached it to the hat using needle and thread and the hat was ready.
For this work I didn't buy any material, I just used what I had, some scraps and others like the ladybug was from a ribbon that Amanda used at another time and the bunnies were from some bare feet that I made for her when she was pregnant hehehehe.
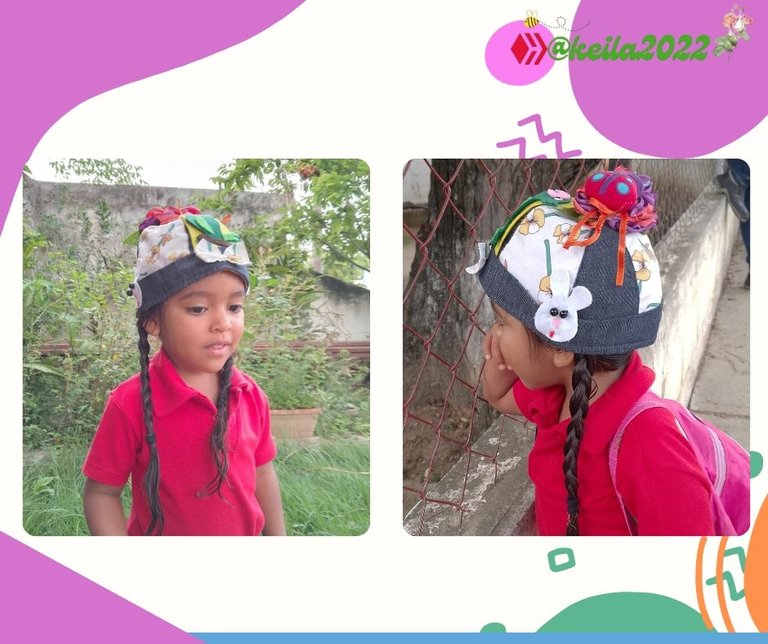
I must say that my little girl was attentive to the whole process of elaboration, passing me the materials, ordering things, always by my side.
She is so happy with her hat, she has been wearing it all week long.
I really enjoy doing this kind of work, firstly because I respond to the children's requests and secondly because crafts take me out of the routine and stimulate my creativity.
As always it is a pleasure to share with everyone.
I will be grateful and appreciate your comments and suggestions.
Thanks for visiting my blog.
A big hug in the distance.
Image Design: Canva
Translator used: Deepl.com
*Spanish Version"
Decorando un Sombrero para Amanda
Hola a todos los miembros de la comunidad.
Siempre es emocionante pasar por aquí no solo a compartir mis experiencias, sino también a maravillarme con el potencial creativo en su máxima expresión, reflejado en hermosas creaciones.
A Amanda le pidieron en el Jardín de Infancia un sombrero loco para conmemorar el Día Mundial del Ambiente, yo no hice un sombrero loco, pero si decoré uno con motivo ambiental y aquí les muestro como lo elaboré.
Paso 1.
Lo primero que hice fue ubicar la gaveta loca y seleccionar el material a utilizar:
Sombrero.
Fieltro: Verde claro, verde oscuro, rosado, marrón.
Anime fino.
Foami: Negro.
1 mariquita.
2 conejos de fieltro.
1 flor.
Hilo y aguja
Tijera
Paso 2.
Con aguja e hilo coloqué la mariquita en la flor, asegurándome de que quede bien fijada.
Paso 3
Usando la técnica anterior, fijé la flor con la mariquita en el sombrero, tomando en cuenta que las puntadas deben ser lo más precisas posibles, para que al final no se vea desordenado el hilo y quede aceptable desde el punto de vista estético.
Paso 4.
Fijé los conejos en los laterales del sombrero.
Paso 5.
Para ave, dibujé un loro en papel y luego lo transferí al fieltro. Sus partes las pegué con silicón y, en el caso del ojo, como no tenía fieltro blanco, usé un trocito de anime (de una bandeja de alimentos) y un círculo de foami negro.
Aunque no lo crean, el anime y el foami lo fijé con aguja e hilo porque el silicón al secar se despegaba.
Paso 6:
El pequeño loro, lo fijé al sombrero usando aguja e hilo y listo el sombrero.
Para este trabajo no compré ningún material, solo usé el que tenía, algunos retazos y otros como la mariquita era de un lazo que Amanda usó en otro momento y los conejos eran de unos pies descalzos que le realicé cuando estaba embarazada de ella jejeje.
Debo decir que mi niña estuvo atenta a todo el proceso de elaboración, pasándome los materiales, ordenando las cosas, siempre a mi lado.
Está tan feliz con su sombrero, que lo ha usado durante toda la semana.
Me gusta mucho hacer este tipo de trabajos, en primer lugar porque doy respuesta a las solicitudes de los niños y en segundo lugar porque las manualidades me sacan de la rutina y estimulan mi creatividad.
Cómo siempre es un gusto compartir con todos.
Sabré agradecer y valorar los comentarios y sugerencias.
Gracias por visitar mi blog.
Un gran abrazo en la distancia.
Diseño de imágenes: Canva
Traductor utilizado: DeepL.com
Yeehaw! What a delightful and creative adventure you had decorating that hat for Amanda! Keep on crafting, partner!
Hello.
It is gratifying to see the result hehehe!
Thanks for reading and commenting.
Hugs!
Saddle up, friend. Your words lasso hearts and warm the soul. Keep spinning your yarns under that big ol' sky. Many happy trails ahead! ✨🤠
Ohhh. Que lindo! Me encantó el resultado. Y que niña tan preciosa. Dios la bendiga!
Hola.
Gracias.
Es sencillo pero bonito jejeje.
Amén.
Un gran abrazo
Si, me parece muy auténtico! Saludos
That's a very nice hat for Amanda. She looks so happy 👏🏿
Greetings to the team.
I appreciate and value your vote and comments.
It is a pleasure to be part of the community.
Always grateful.
A big hug
Congratulations @keila2022! You have completed the following achievement on the Hive blockchain And have been rewarded with New badge(s)
<table><tr><td><img src="https://images.hive.blog/60x70/https://hivebuzz.me/@keila2022/upvotes.png?202406091321" /><td>You distributed more than 700 upvotes.<br />Your next target is to reach 800 upvotes. <p dir="auto"><sub><em>You can view your badges on <a href="https://hivebuzz.me/@keila2022" target="_blank" rel="noreferrer noopener" title="This link will take you away from hive.blog" class="external_link">your board and compare yourself to others in the <a href="https://hivebuzz.me/ranking" target="_blank" rel="noreferrer noopener" title="This link will take you away from hive.blog" class="external_link">Ranking<br /> <sub><em>If you no longer want to receive notifications, reply to this comment with the word <code>STOPHello.
Thank you, very much.
A hug
Awesome job @keila2022! Keep pushing yourself and you'll reach your Hive goals before you know it.
BTW, we noticed we miss your support for our proposal. Mays we ask you to check it out and consider supporting it?
Thank you!
muy bonito quedo, los materiales son fáciles de conseguir y utilizar!
very nice looking, the materials are easy to get and use!
Hola.
Se ve muy bien jejeje.
La decoración es realmente sencilla y fácil de hacer.
Creo que lo más significativo es que Amanda observe todo el proceso, así da valor a lo que se hace en casa y al trabajo hecho a mano.
Gracias por leer y comentar.
Un gran abrazo