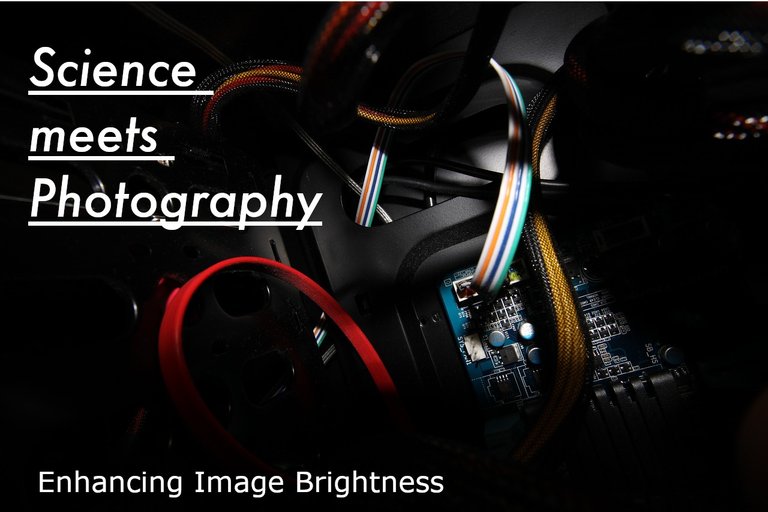
<h4><center>Introduction
<p dir="auto">Image brightness is a fundamental aspect of photography that significantly influences the visual appeal and clarity of pictures. Whether capturing a serene landscape, a vibrant cityscape, or a memorable portrait, the brightness of an image can enhance its overall impact and convey the desired mood. Properly adjusted brightness brings out details that might otherwise be lost, highlights the subject, and ensures that the image resonates with viewers.
<p dir="auto">In the digital era, photographers and image enthusiasts often rely on software tools to fine-tune their images. While many photo editing applications provide intuitive sliders and presets for brightness adjustment, understanding the underlying mechanics can offer greater control and customization. Python, a powerful and versatile programming language, opens up a world of possibilities for image manipulation through its robust libraries and tools.
<p dir="auto">In this blog post, we will delve into the science behind image brightness, focusing on the pixel values that make up an image and how they can be manipulated to achieve the desired effect. By leveraging the capabilities of NumPy, a fundamental package for scientific computing in Python, we will explore how to manually enhance the brightness of images at the pixel level. This approach not only provides a deeper understanding of image processing but also equips you with the skills to implement custom brightness adjustments tailored to specific needs.
<p dir="auto">We will start by understanding the basics of pixel values and the role of RGB channels in defining an image's color and brightness. Then, we will move on to practical implementations, demonstrating how to load images, manipulate pixel values, and apply brightness adjustments using NumPy. Throughout the process, we will emphasize the importance of clipping values to maintain the integrity of the image and prevent distortion.
<p dir="auto">By the end of this tutorial, you will have a comprehensive understanding of how image brightness works and how to control it using Python and NumPy. Whether you are a photographer looking to enhance your photos or a developer interested in image processing, this guide will provide you with the tools and knowledge to achieve professional results. So, let's dive in and unlock the potential of your images through the power of Python and NumPy.
<h3><center>Understanding Image Brightness
<p dir="auto">Image brightness refers to the overall lightness or darkness of an image. It is determined by the intensity of light emitted or reflected from the image. In digital images, brightness is represented by the values of pixels, which are the smallest units of a picture.
<p dir="auto"><center><strong>Pixels and Their Values:<br />
A pixel's value in an image represents its color and intensity. In a grayscale image, a pixel value ranges from 0 (black) to 255 (white). Values between 0 and 255 represent different shades of gray, forming a gradient from black to white. For example, a pixel value of 127 represents a medium gray, whereas values closer to 255 are lighter shades of gray, and values closer to 0 are darker shades of gray.
<p dir="auto">For colored images, pixels are represented by three values corresponding to the Red, Green, and Blue (RGB) channels. Each channel can have a value between 0 and 255. These values are typically stored as tuples. For instance, a pixel with RGB values (255, 0, 0) will be represented as a tuple (255, 0, 0), which corresponds to pure red. Similarly, a pixel with RGB values (0, 255, 0) will be pure green, and (0, 0, 255) will be pure blue. When all three channels have the same value, the result is a shade of gray. For example, (127, 127, 127) as a tuple represents a medium gray.
<p dir="auto">By combining different intensities of these three primary colors stored in tuples, a wide spectrum of colors can be created, allowing for rich and detailed images.
<p dir="auto"><center><strong>RGB Channels:
<ul>
<li><strong>Red Channel: Controls the intensity of red hues.
<li><strong>Green Channel: Controls the intensity of green hues.
<li><strong>Blue Channel: Controls the intensity of blue hues.
<p dir="auto">By manipulating these values, we can control the brightness and color of an image.
<h3><center>Tools and Libraries
<p dir="auto">We will use NumPy, a fundamental package for scientific computing in Python. NumPy provides support for large multi-dimensional arrays and matrices, along with a collection of mathematical functions to operate on these arrays. Additionally, we will use <code>skimage (Scikit-Image), a collection of algorithms for image processing in Python.
<h3><center>Step-by-Step Guide to Adjusting Image Brightness
<p dir="auto"><center><strong>1. Loading the Image
<p dir="auto">We will use the <code>skimage library to load and convert the image into a NumPy array.
<p dir="auto"><em>Example Code:
<pre><code>from skimage import io
import numpy as np
# Load an image from file
image = io.imread('path_to_image.jpg')
<p dir="auto"><br /><br />
<center><strong>2. Understanding Pixel Manipulation
<p dir="auto">To enhance brightness, we need to increase the value of each pixel. However, care must be taken to ensure that the values do not exceed 255, the maximum value for a pixel in an 8-bit image.
<p dir="auto"><em>Example Code:
<pre><code>def increase_brightness(image_array, value):
# Convert image to float to prevent overflow
image_array = image_array.astype(np.float64)
# Increase brightness
image_array += value
# Clip values to ensure they lie between 0 and 255
image_array = np.clip(image_array, 0, 255)
# Convert back to uint8
return image_array.astype(np.uint8)
<p dir="auto"><br /><br />
<center><strong>3. Adjusting Brightness Manually
<p dir="auto">We can now use the above function to manually adjust the brightness of the image.
<p dir="auto"><em>Example Code:
<pre><code>bright_image_np = increase_brightness(image, 50)
# Display the brightened image using skimage
io.imshow(bright_image_np)
io.show()
<h3><center>The Science Behind Pixel Manipulation
<p dir="auto">When we talk about increasing the brightness of an image, we are essentially increasing the intensity of light that each pixel emits. This is done by adding a constant value to each of the RGB channels.
<p dir="auto"><strong>Example:
<ul>
<li>Original Pixel Value: (100, 150, 200)
<li>Brightness Increase: 50
<li>New Pixel Value: (150, 200, 250)
<div class="table-responsive"><table>
<thead>
<tr><th>-100<th>0<th>+100
<tbody>
<tr><td><img src="https://images.hive.blog/768x0/https://dl.dropboxusercontent.com/scl/fi/orhwfh3l9dpk7wz9jipgw/100.png?rlkey=ekad5l15he0re2g2mpe2okc78&st=cxfoia5e&dl=1" alt="-100" srcset="https://images.hive.blog/768x0/https://dl.dropboxusercontent.com/scl/fi/orhwfh3l9dpk7wz9jipgw/100.png?rlkey=ekad5l15he0re2g2mpe2okc78&st=cxfoia5e&dl=1 1x, https://images.hive.blog/1536x0/https://dl.dropboxusercontent.com/scl/fi/orhwfh3l9dpk7wz9jipgw/100.png?rlkey=ekad5l15he0re2g2mpe2okc78&st=cxfoia5e&dl=1 2x" /><td><img src="https://images.hive.blog/768x0/https://dl.dropboxusercontent.com/scl/fi/m9iqrca3f0820vlih5u3k/0.png?rlkey=a6dtqr8pyupm3ycq85vh3dwpf&st=iubclzzx&?dl=1" alt="0" srcset="https://images.hive.blog/768x0/https://dl.dropboxusercontent.com/scl/fi/m9iqrca3f0820vlih5u3k/0.png?rlkey=a6dtqr8pyupm3ycq85vh3dwpf&st=iubclzzx&?dl=1 1x, https://images.hive.blog/1536x0/https://dl.dropboxusercontent.com/scl/fi/m9iqrca3f0820vlih5u3k/0.png?rlkey=a6dtqr8pyupm3ycq85vh3dwpf&st=iubclzzx&?dl=1 2x" /><td><img src="https://images.hive.blog/768x0/https://dl.dropboxusercontent.com/scl/fi/lvsbyvcy466tdkeb464s9/100.png?rlkey=f1839eozjx1tunz5sruun93rj&st=y7uq1svv&dl=1" alt="+100" srcset="https://images.hive.blog/768x0/https://dl.dropboxusercontent.com/scl/fi/lvsbyvcy466tdkeb464s9/100.png?rlkey=f1839eozjx1tunz5sruun93rj&st=y7uq1svv&dl=1 1x, https://images.hive.blog/1536x0/https://dl.dropboxusercontent.com/scl/fi/lvsbyvcy466tdkeb464s9/100.png?rlkey=f1839eozjx1tunz5sruun93rj&st=y7uq1svv&dl=1 2x" />
<p dir="auto">By applying this transformation uniformly across the image, we increase the overall brightness while preserving the relative differences in intensity between pixels.
<p dir="auto"><center><strong>Why Clip Values?<br />
Clipping ensures that the pixel values remain within the valid range (0 to 255). Without clipping, adding a high brightness value could result in overflow, leading to incorrect and distorted pixel values.
<h4><center>Practical Applications of Brightness Adjustment
<p dir="auto">Brightness adjustment is essential in various fields and applications:
<ol>
<li><p dir="auto"><strong>Photography and Graphic Design:<br />
Adjusting brightness is a common task in photo editing to enhance visual appeal. Photographers often increase brightness to highlight details or decrease it to create moodier effects.
<li><p dir="auto"><strong>Medical Imaging:<br />
In medical imaging, brightness adjustment can help in visualizing structures and abnormalities in X-rays, MRIs, and CT scans. Proper brightness levels can reveal critical details that are otherwise difficult to discern.
<li><p dir="auto"><strong>Surveillance and Security:<br />
Brightness adjustment in surveillance footage can improve visibility in low-light conditions, aiding in the identification of objects or individuals.
<li><p dir="auto"><strong>Scientific Research:<br />
Scientists adjust brightness in images from microscopes, telescopes, and other imaging devices to enhance visibility and contrast, facilitating better analysis and interpretation.
<hr />
<h3><center> Future Topics
<p dir="auto">Stay tuned for more blog posts on exciting topics related to computer vision and photography. In upcoming posts, we will explore various techniques such as edge detection, line detection, contrast enhancement, and much more. These topics will provide deeper insights into the fascinating world of image processing and how you can leverage Python to create stunning visual effects and extract meaningful information from images. Keep an eye out for these tutorials to further expand your skills in computer vision and photography!
<h3><center>References
<ul>
<li><a href="https://numpy.org/doc/stable/" target="_blank" rel="noreferrer noopener" title="This link will take you away from hive.blog" class="external_link">NumPy Documentation
<li><a href="https://scikit-image.org/" target="_blank" rel="noreferrer noopener" title="This link will take you away from hive.blog" class="external_link">Scikit-Image Documentation
<hr />
Welcome back!
Image processing is something I have not done a lot of, but I do use Python for other things. I expect there are some powerful libraries for this and 'AI' could do some clever stuff.
!BEER
Thanks Steevc! Absolutely! Python has a rich ecosystem of powerful libraries for image processing. Some of the most popular ones include OpenCV, PIL/Pillow, and scikit-image. Additionally, for more advanced tasks, there are AI and machine learning frameworks like TensorFlow and PyTorch, which offer tools for creating sophisticated image processing and analysis models. If you're already familiar with Python, diving into these libraries could open up a lot of exciting possibilities! If you have any questions let me know, cheers to your Beer! :)
I've seen some cool stuff tracking objects in video. That has lots of potential uses. I've just not had time to play with it.
My latest exercise has been extracting data from Hive and generating posts from it.
I'll get to this topic in one of my posts. Using Hough transform which is designed to detect lines or other shapes. Cool stuff! I have to check out what posts you generate. In fact, there is a lot to check out. Much has changed in these past years, don't even know where to start
You'll see them on my feed. I use Python at work for interfacing with various measuring instruments and play around with the Hive stuff for fun.
I am always happy to see people come back as we have lost a lot of the old crowd for various reasons. Hive has not grown as I might hope, but there is a lot going on.
How does the clipping work since you're modifying three values? For example, if you red is the highest value and it is at 254, do all three values just get increased by one in order to maintain the overall color?
Good observation and question :) Clipping preserves the range of intensity values but can lead to a loss of detail and color distortion. It affects the overall color balance, especially if one or more components are frequently clipped. We typically have two situations here. The first one is an uniformed adjustment. If the brightness adjustment is uniform, the color balance is generally maintained unless clipping occurs. When clipping does occur, the affected color channels will saturate, altering the hue and saturation of the resulting color. Then there is non-uniform adjustment. When different components are clipped to varying extents, the color balance can shift.
There are ways how to handle and avoid clipping, the solution is actually quite simple. Normalization for instance. By normalizing pixel values after brightness adjustment we ensure they remain within the 0-255 range yet maintain the overall color, so we would not use clipping at all. Generally speaking, as you mentioned in your example, we would increase all values by one. Like adding a constant to the values of a list.
View or trade
BEER.Tasty!
Thanks for your contribution to the STEMsocial community. Feel free to join us on discord to get to know the rest of us!
Please consider delegating to the @stemsocial account (85% of the curation rewards are returned).
You may also include @stemsocial as a beneficiary of the rewards of this post to get a stronger support.