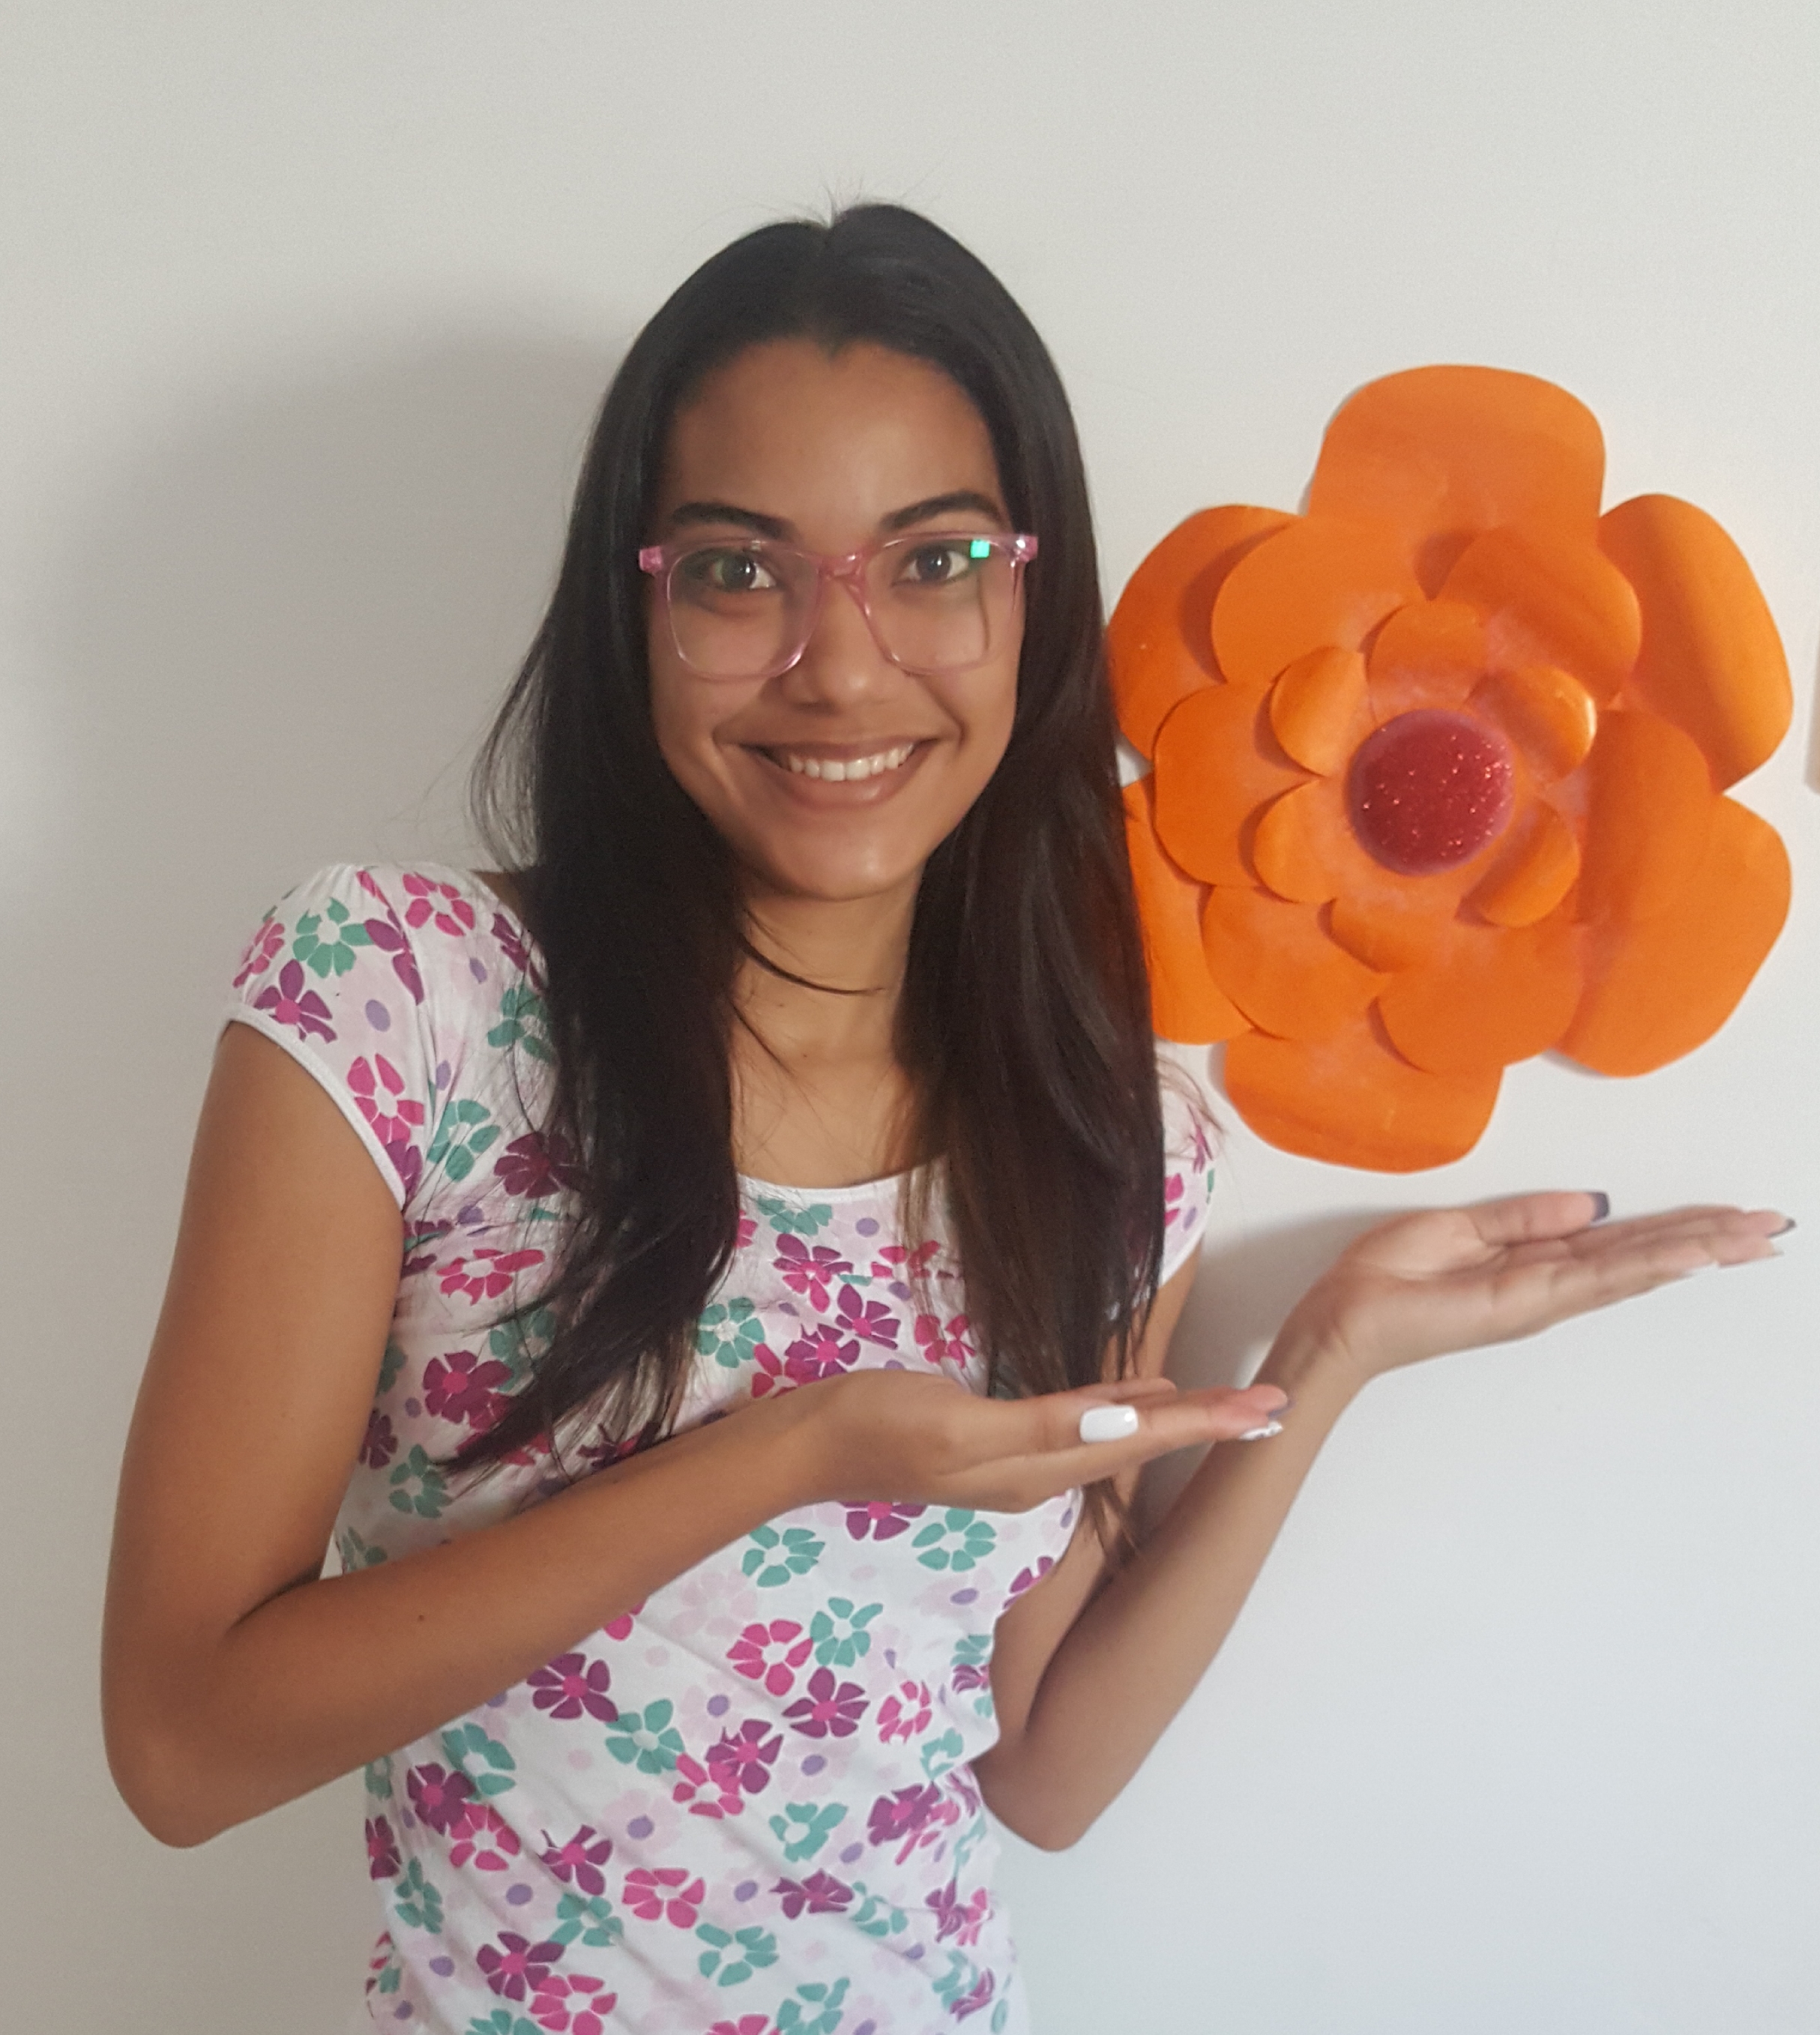
¡Hola amigos queridos, de Hive y Hive Diy! Feliz inicio de semana, espero que se sientan muy bien y llenos de muchas bendiciones.
Yo me siento bendecida, desperté un día más y pude estar acá compartiendo con ustedes una de las cosas que me gusta hacer, las manualidades se me dan bien porque siempre tengo ideas, soy muy creativa. Hoy les mostraré como realizar flores grandes para decorar bien sea en un cumpleaños o para lo que la necesiten.
Hello dear friends, from Hive and Hive Diy! Happy start to the week, I hope you feel very well and full of many blessings.
I feel blessed, I woke up one more day and was able to be here sharing with you one of the things I like to do, I'm good at crafts because I always have ideas, I'm very creative. Today I will show you how to make large flowers to decorate either for a birthday or for whatever you need.
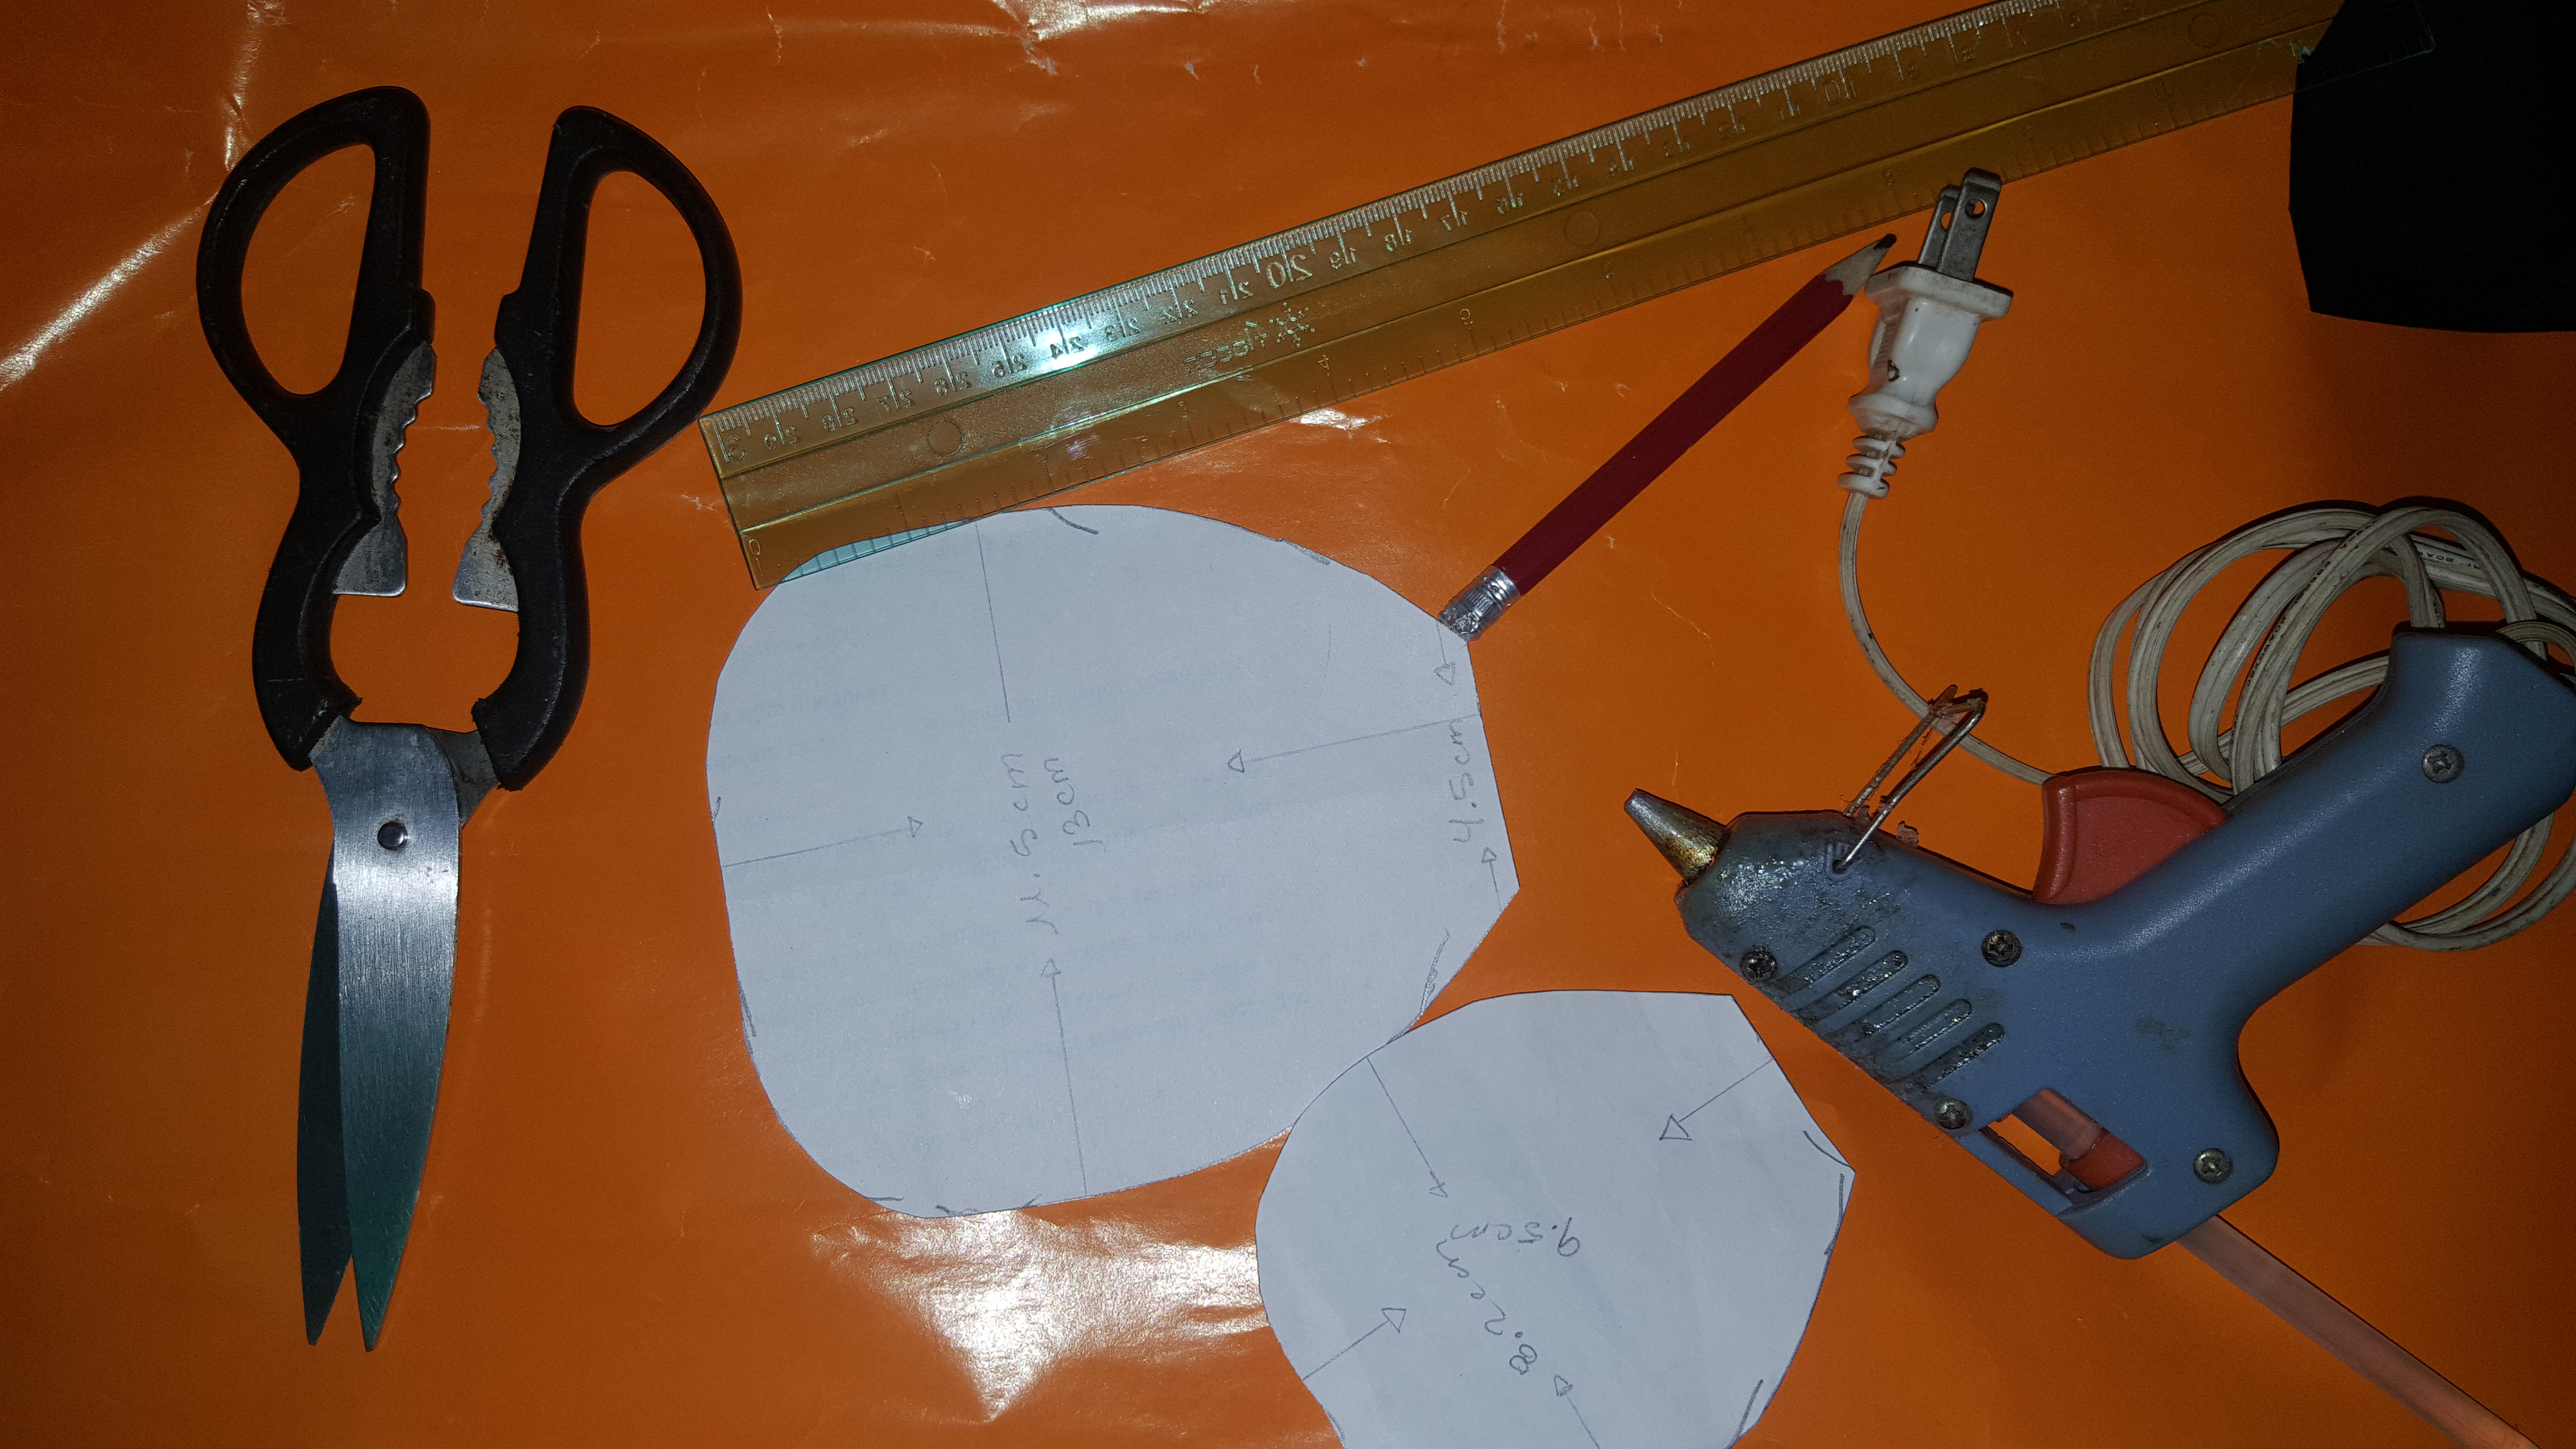
Materiales:
- Lápiz
- Papel lustrillo
- Tijeras
- Moldes de los pétalos
- Pistola con silicon en barra
- Reglas
- Foami
Materials:
- Pencil
- Luster paper
- Pair of scissors
- Petal molds
- Gun with silicone stick
- Rules
- foami
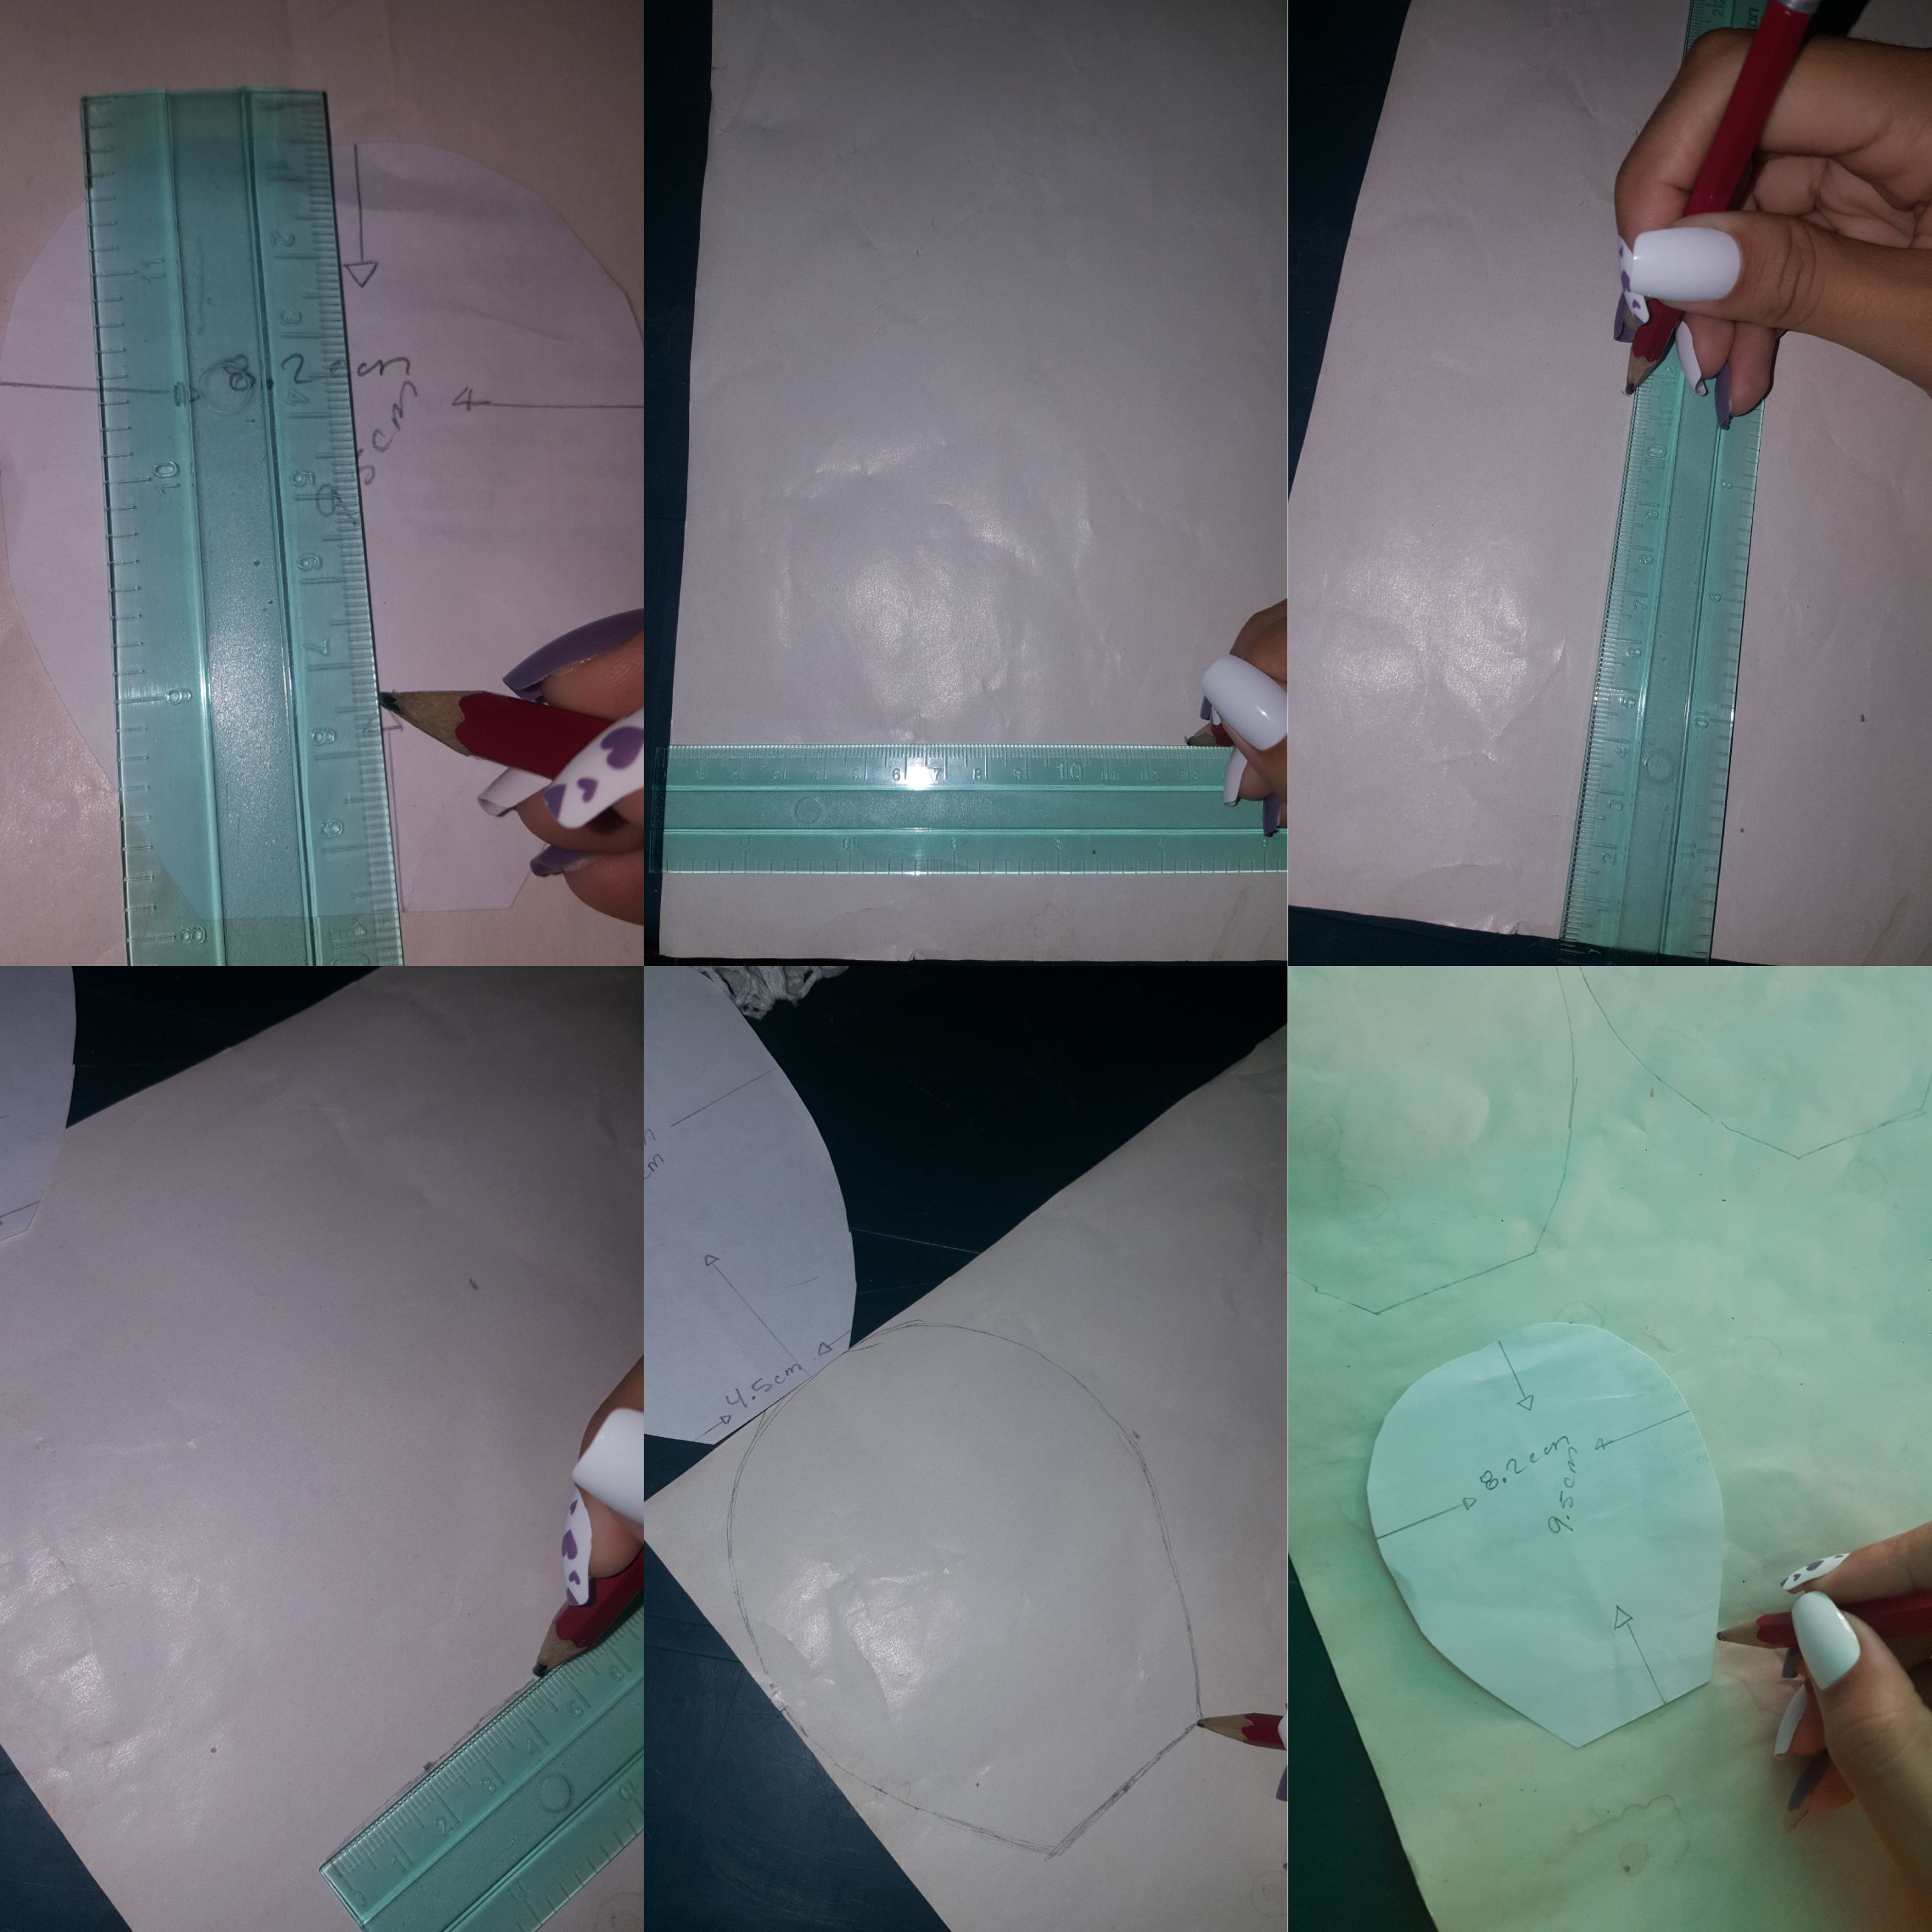
¿Cómo lo hice?, Los invito a seguirme en el paso a paso y verán:
How did I do it? I invite you to follow me step by step and you will see:
Primero inicié calculando el model que tenía de pétalos, normalmente trabajo al ojo porciento pero para poder mostrarles, le tomé las medidas. Luego de tener las medidas de los tres moldes de pétalos(uno grande, mediano y pequeño), en el papel lustrillo(yo decidí este porque era lo que tenía, estoy reciclando) pero si quieren un material donde les quede más resistente, les recomiendo la cartulina escolar del color que prefieran. En el papel lustrillo plasmé las medidas que le tomé al pétalo, hice un cuadrado de 11.5 cm de ancho por 13 cm de largo y la línea recta de abajo donde empieza el pétalo es de 4.5 cm, adentro de ese cuadrado hice mi pétalo, lo recorté y luego calquee para hacerlo más rápido, de esta manera hice todos los demás pétalos, lo único que cambia en el proceso, son las medidas.
First I started calculating the model I had of petals, normally I work by eye percent but to be able to show you, I took the measurements. After having the measurements of the three petal molds (one large, medium and small), on the luster paper (I decided on this because it was what I had, I am recycling) but if you want a material that is more resistant, I recommend the school cardboard of the color you prefer. On the luster paper I captured the measurements I took for the petal, I made a square 11.5 cm wide by 13 cm long and the straight line below where the petal begins is 4.5 cm, inside that square I made my petal, I cut and then traced to make it faster, this way I made all the other petals, the only thing that changes in the process, is the measurements.
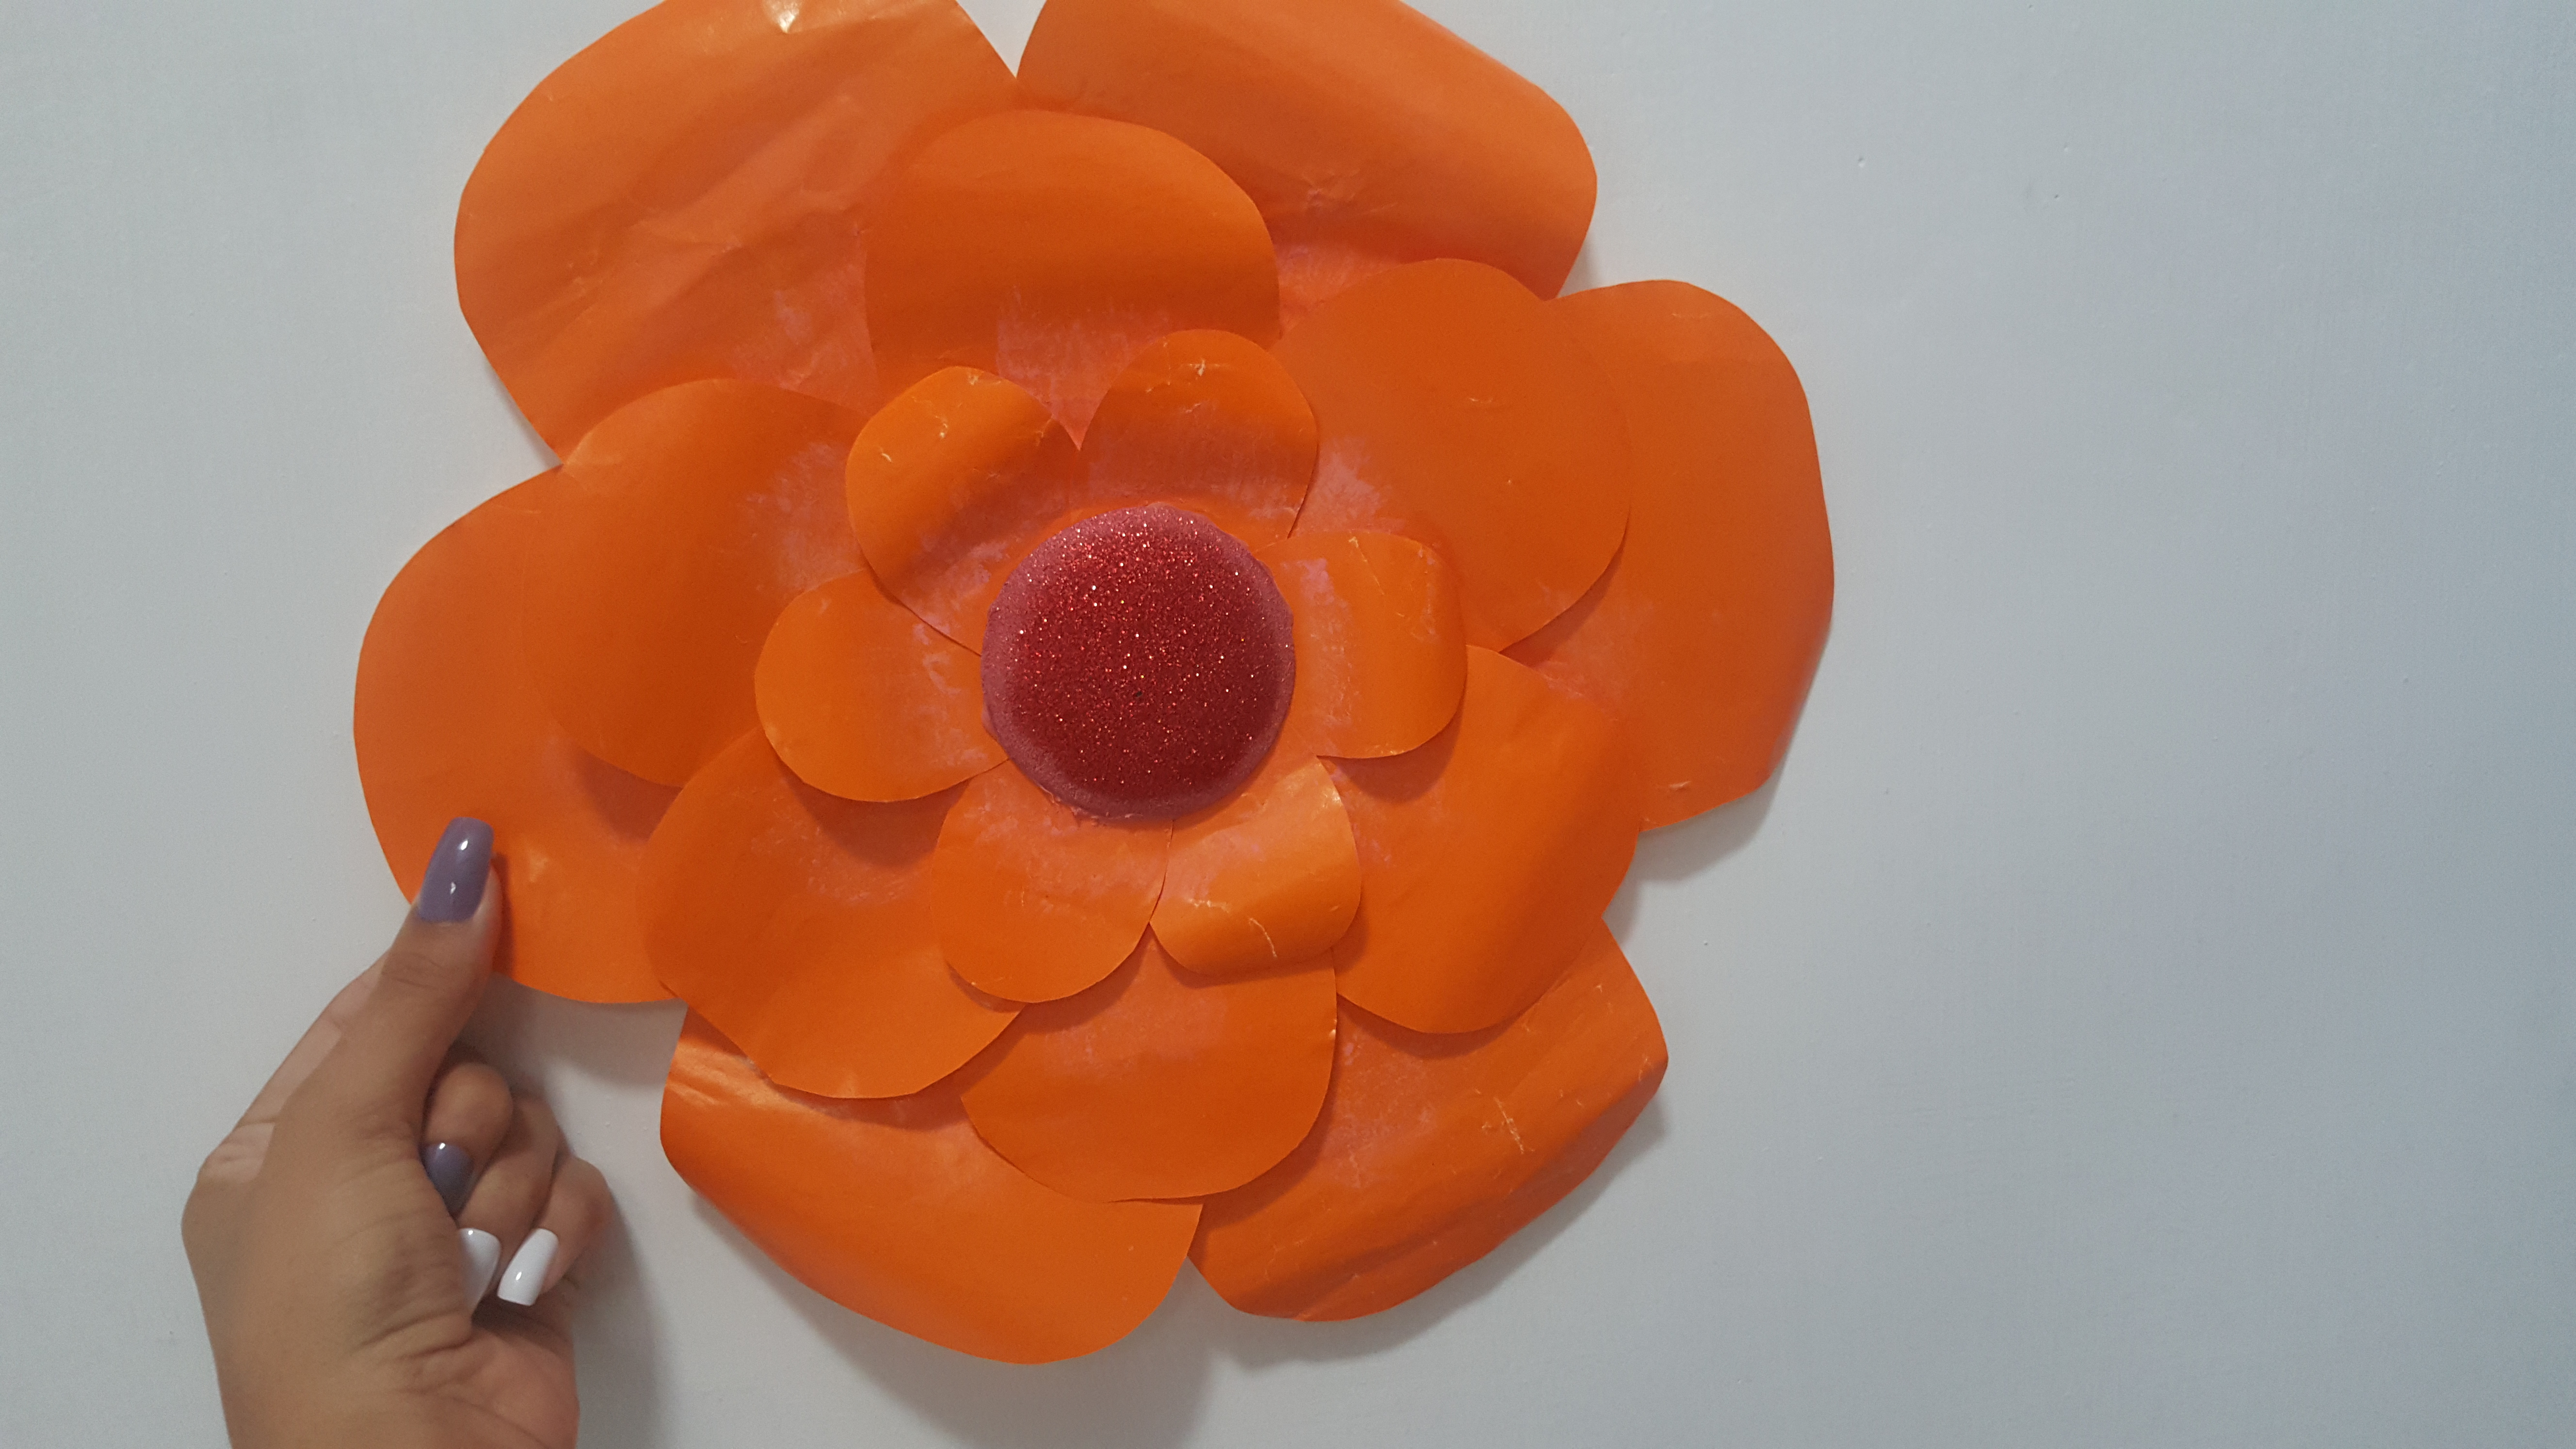
Una vez marcado todos los pétalos (6 de cada tipo, en total son 18 pétalos), empecé a recortar cada uno de ellos hasta terminarlos todos, luego con una regla, le doy forma en la punta a los pétalos para que quede medio arqueada y tome la forma real de la flor, lo hice en todos los 18. Con la pistola de silicón ya caliente, pegué un pétalo al lado de otro en forma circular y luego los más pequeños encima de los grandes en las uniones de los pétalos de abajo. Ya casi está lista.
Once I marked all the petals (6 of each type, in total there are 18 petals), I began to cut each one of them until I finished them all, then with a ruler, I shape the petals at the tip so that it is half arched and I took the real shape of the flower, I did it in all 18. With the hot glue gun, I glued one petal next to another in a circular shape and then the smaller ones on top of the larger ones at the joints of the lower petals . It's almost ready.
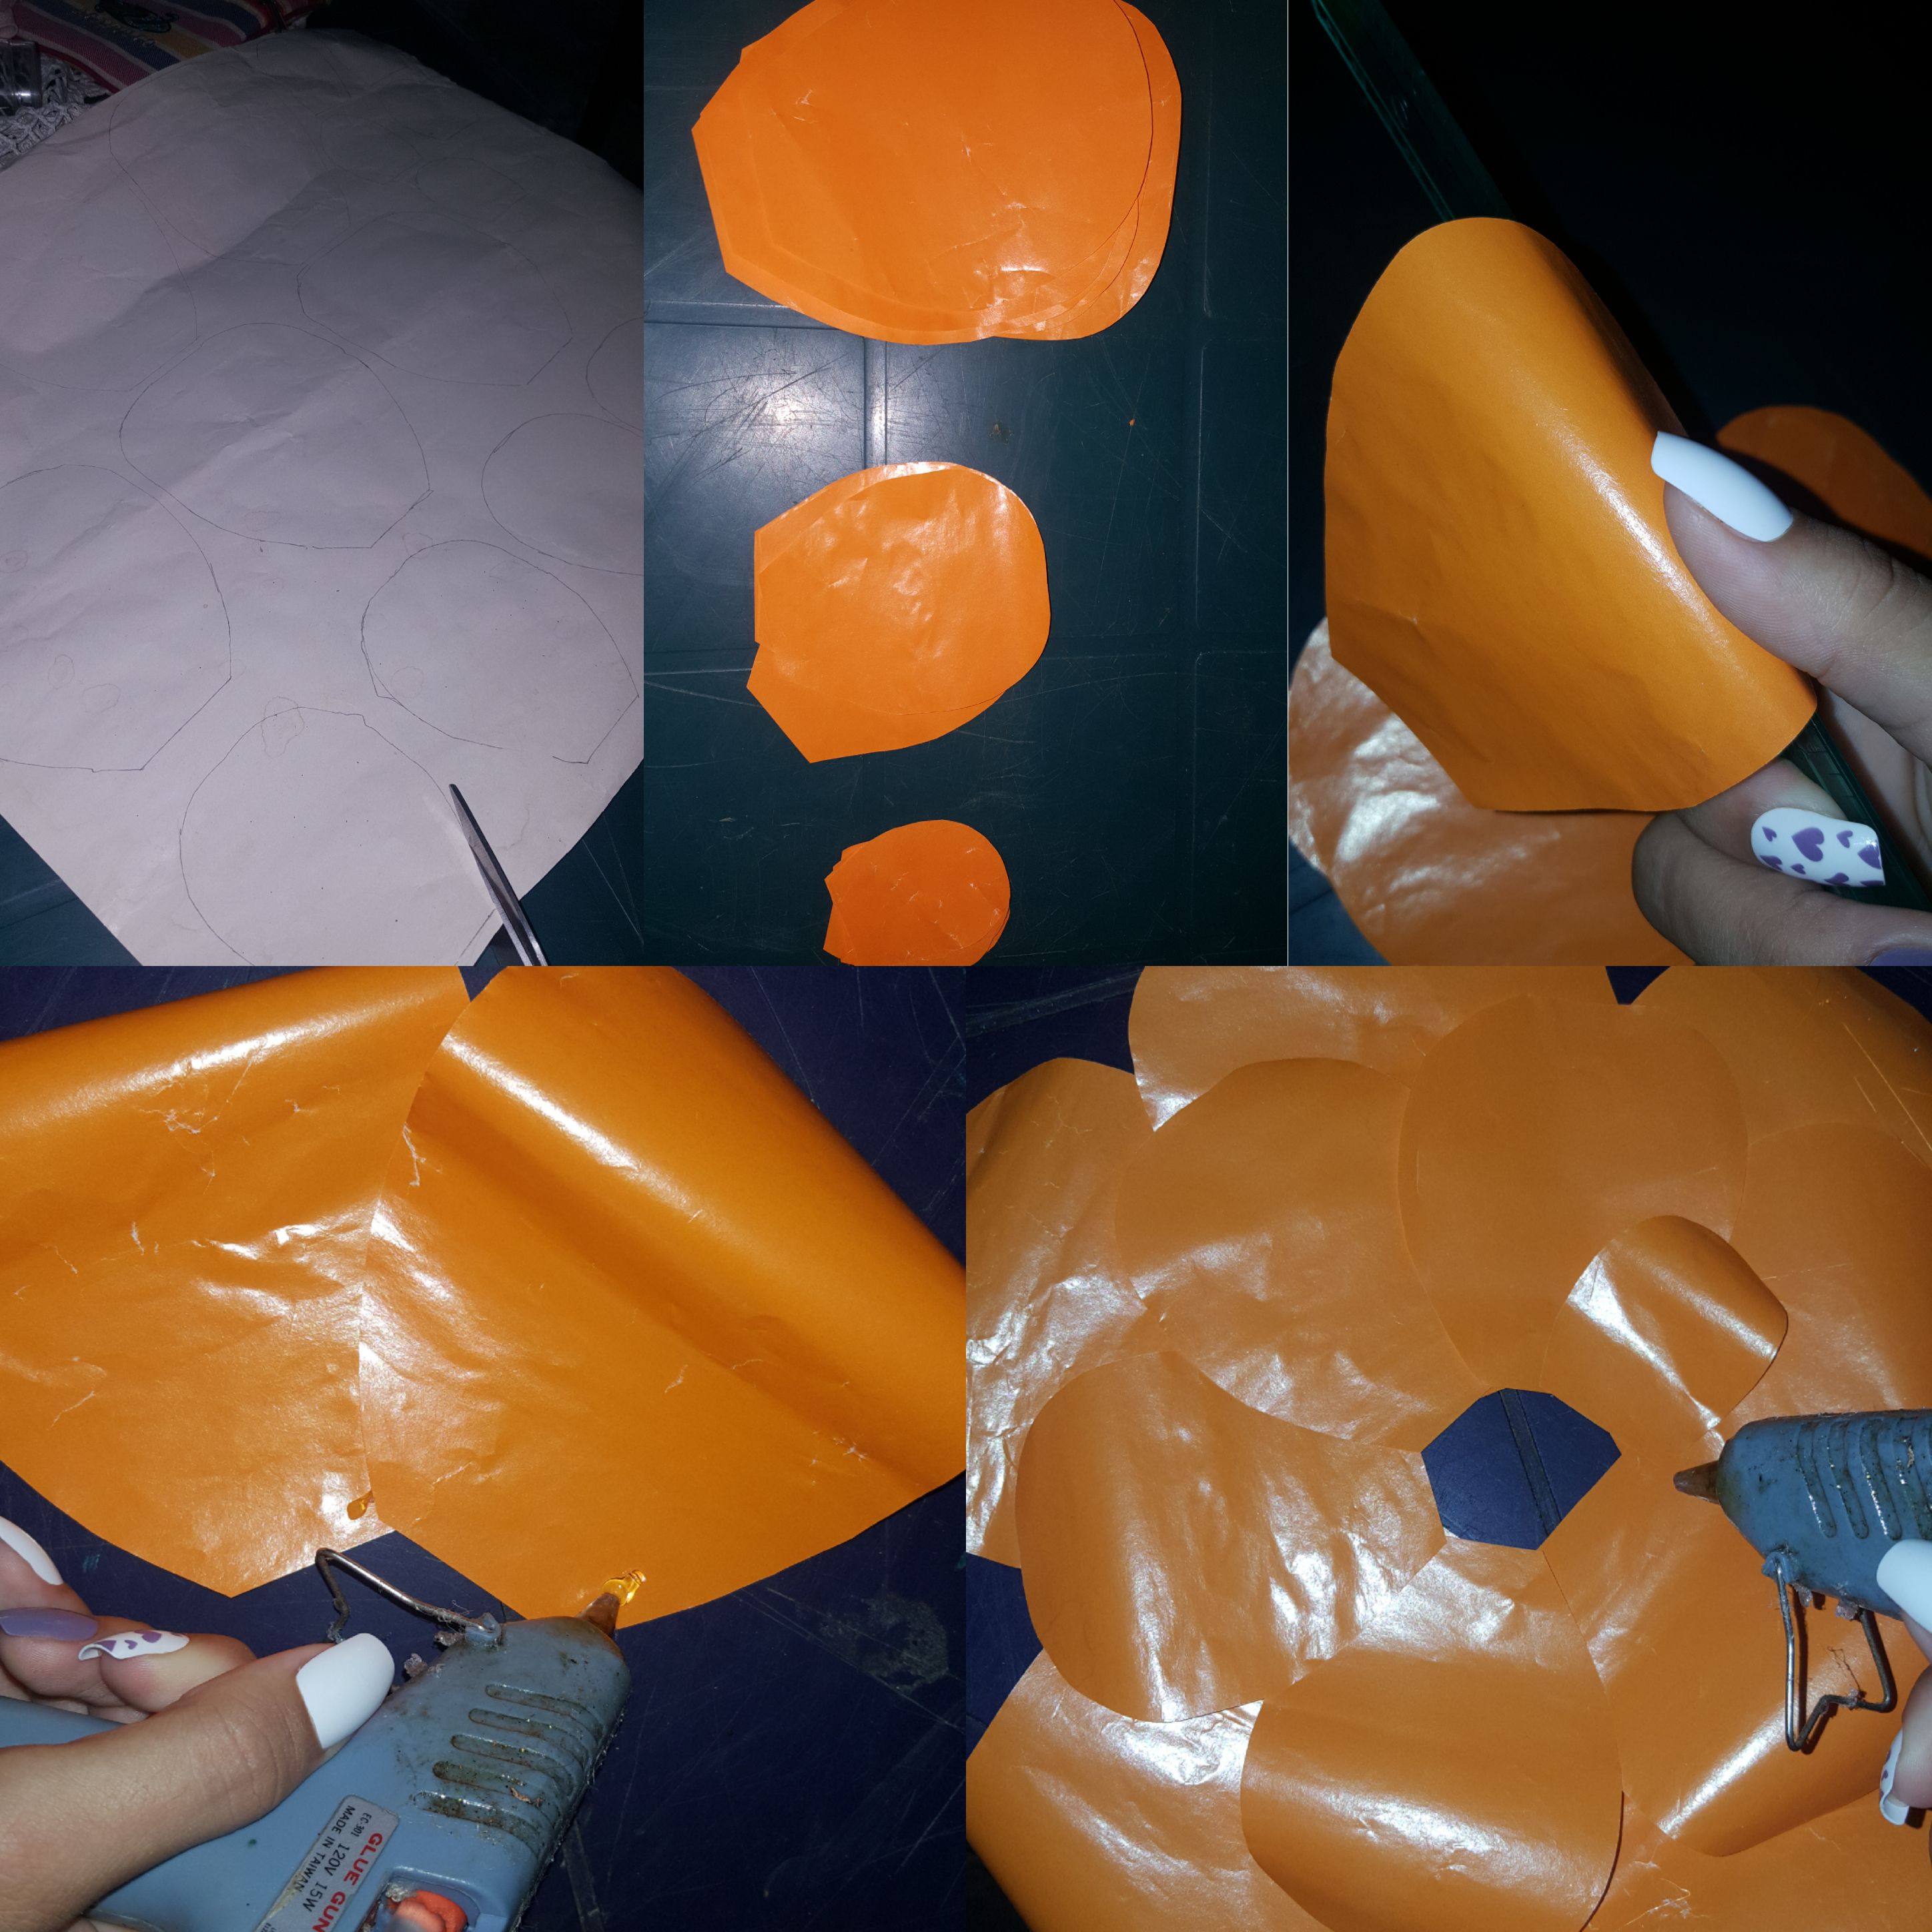
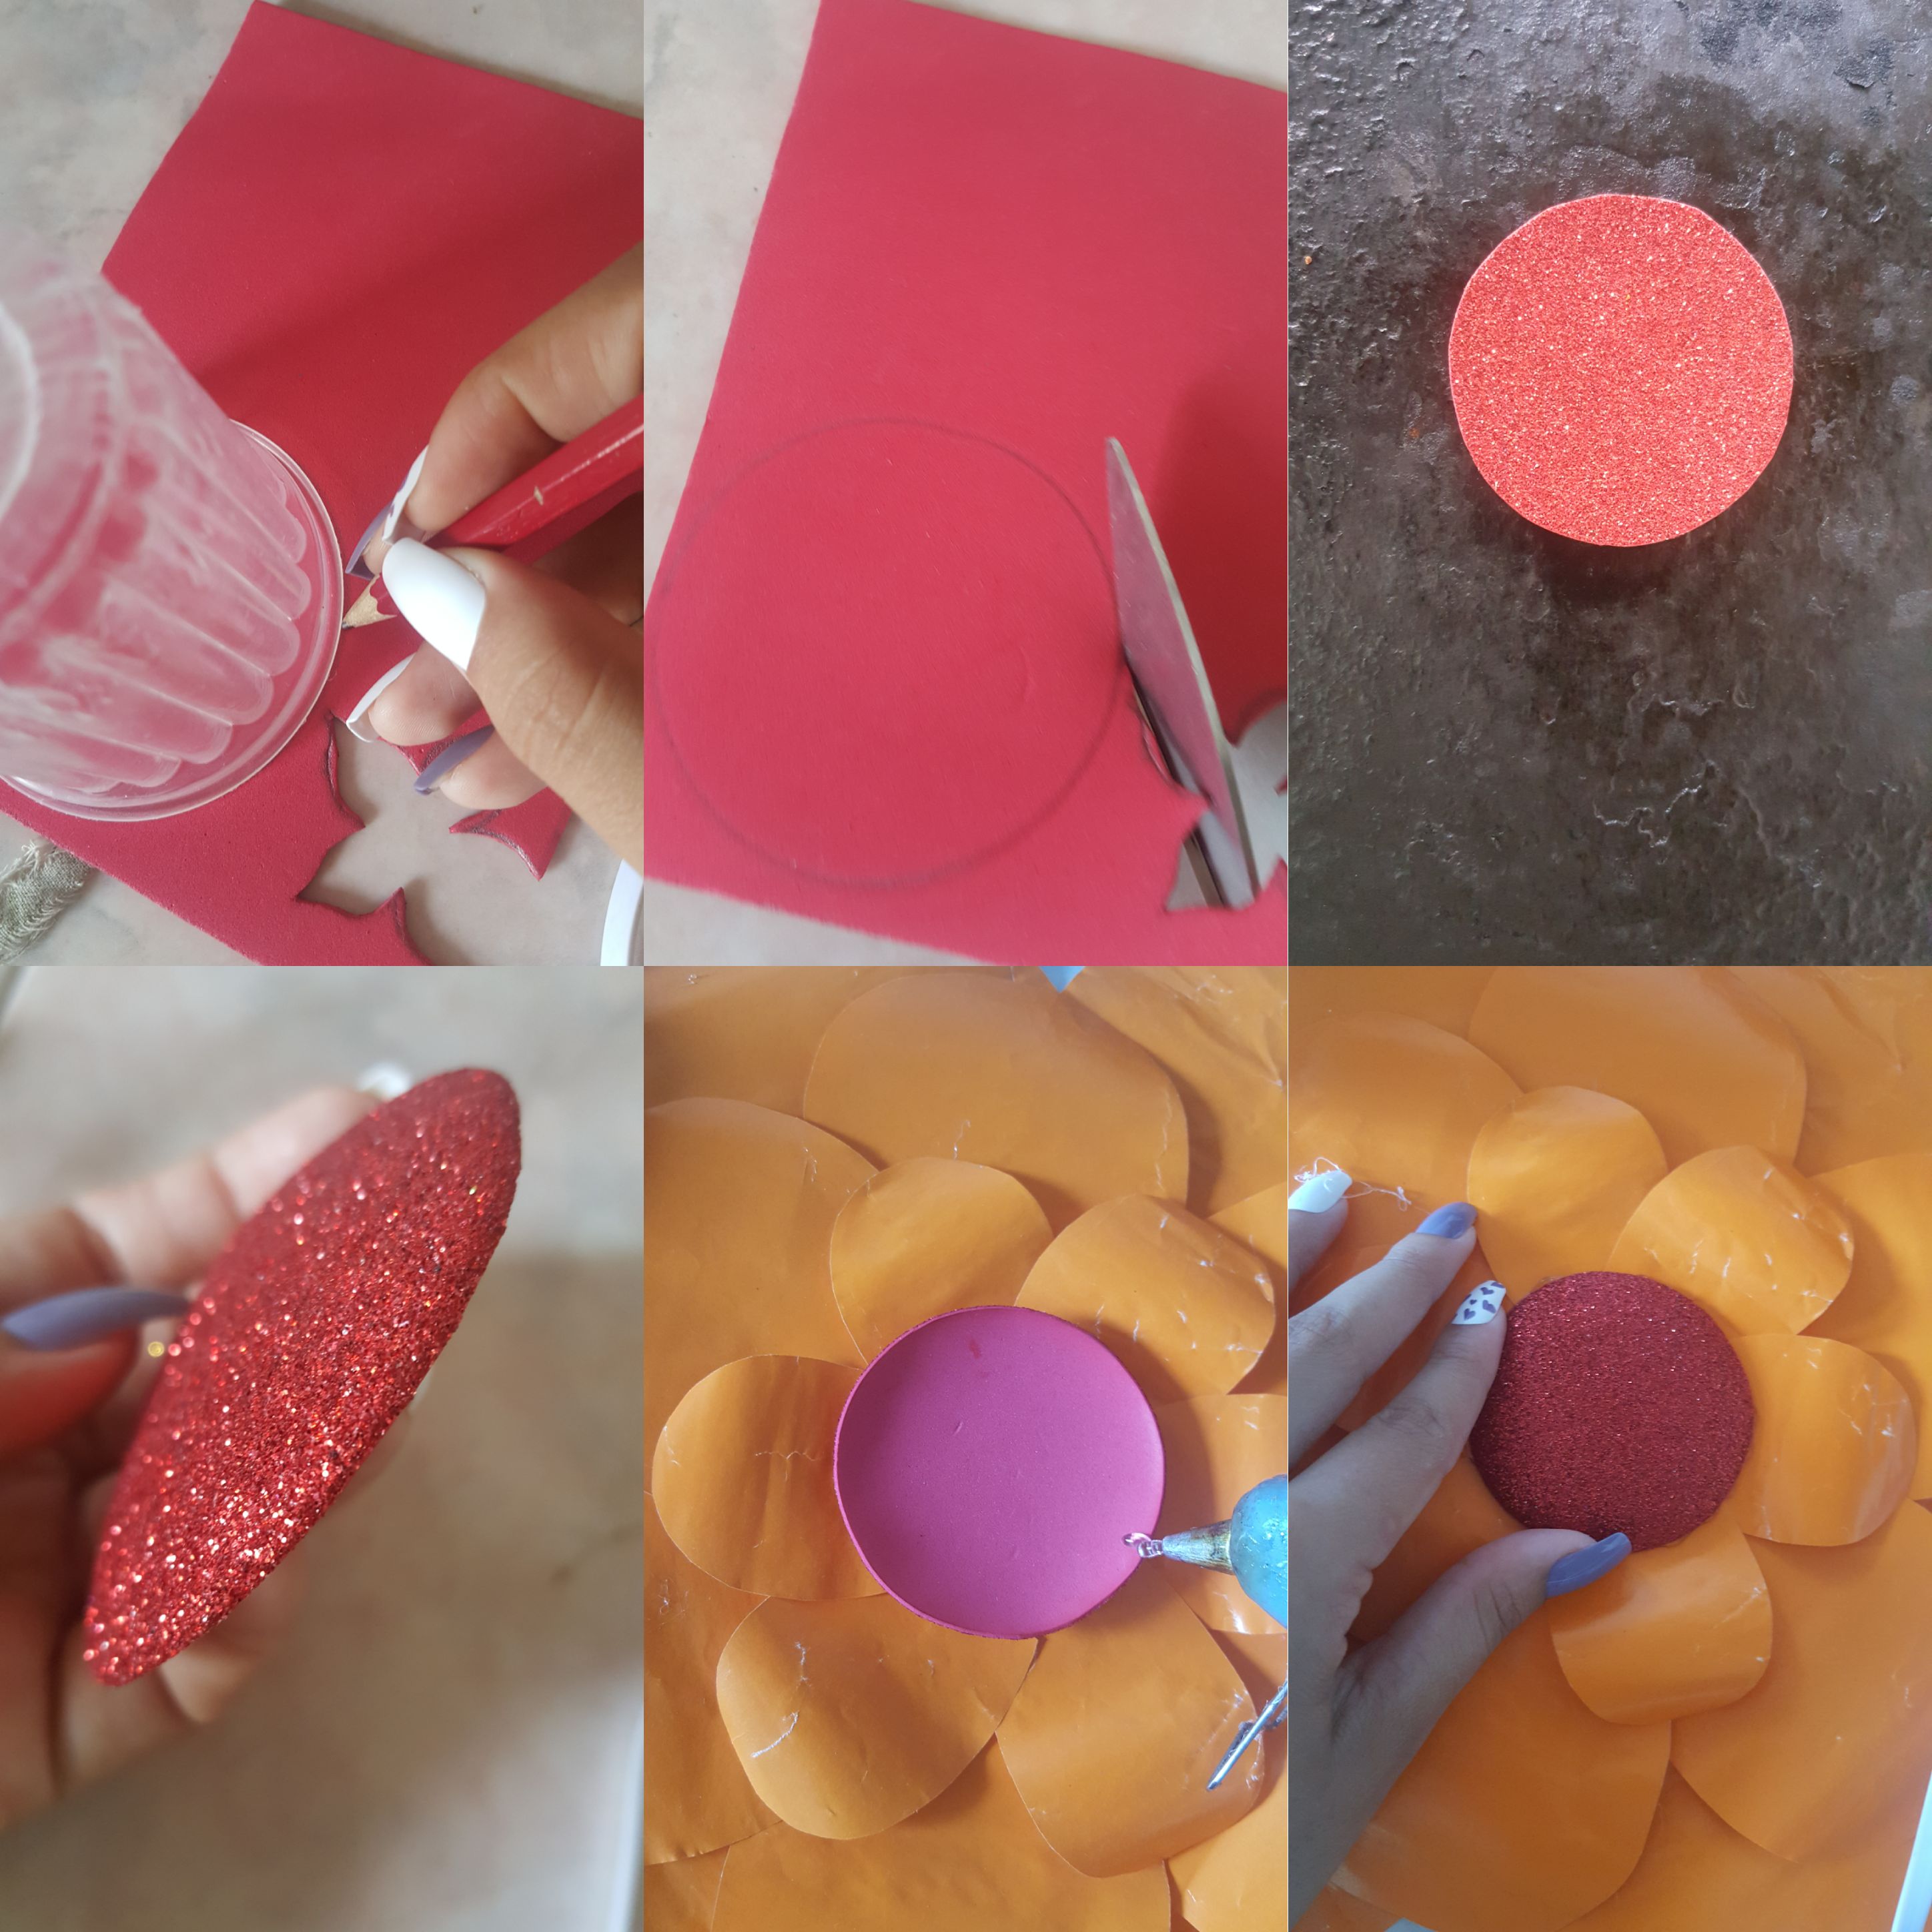
Para el círculo del centro tomé un pedazo de foami que recicle, marqué con un vaso para ayudarme, acorde al tamaño,lo recorté y coloqué en calor para que tomara una forma redonda como se puede ver en la foto, pegué, coloqué un poco de sombras y ¡Listo!
For the center circle I took a piece of foami that I recycled, I marked it with a glass to help me, according to the size, I cut it out and placed it in heat so that it took a round shape as you can see in the photo, I glued, I placed a little shadows and voila!
La idea la google y la fuente es la siguiente:https://pin.it/MLUIJ5K
The idea the google and the source is as follows:https://pin.it/MLUIJ5K
Texto traducido por Deepls
Text translated by Deepls
Espero que les guste, acepto sugerencias y nos vemos en el próximo post. Gracias por estar al pendiente, espero que podamos seguir compartiendo conocimientos✂️❤️
I hope you like it, I accept suggestions and see you in the next post. Thank you for being on the lookout, I hope we can continue sharing knowledge✂️❤️
Muy linda flor, ideal para decorar 15años, felicidades, agradecida hayas compartido.
Para eso estamos mi bella, muchas gracias corazón 💕
Que bonita flor! Me encanta utilizarlas para decorar las fiestas!!
Es mas practica, linda y sencilla. Ideal 😍
Muy bonito tu trabajo...! me gustan las técnicas de trabajos con patrones y medidas.
Muchas gracias, es mas facil y practico