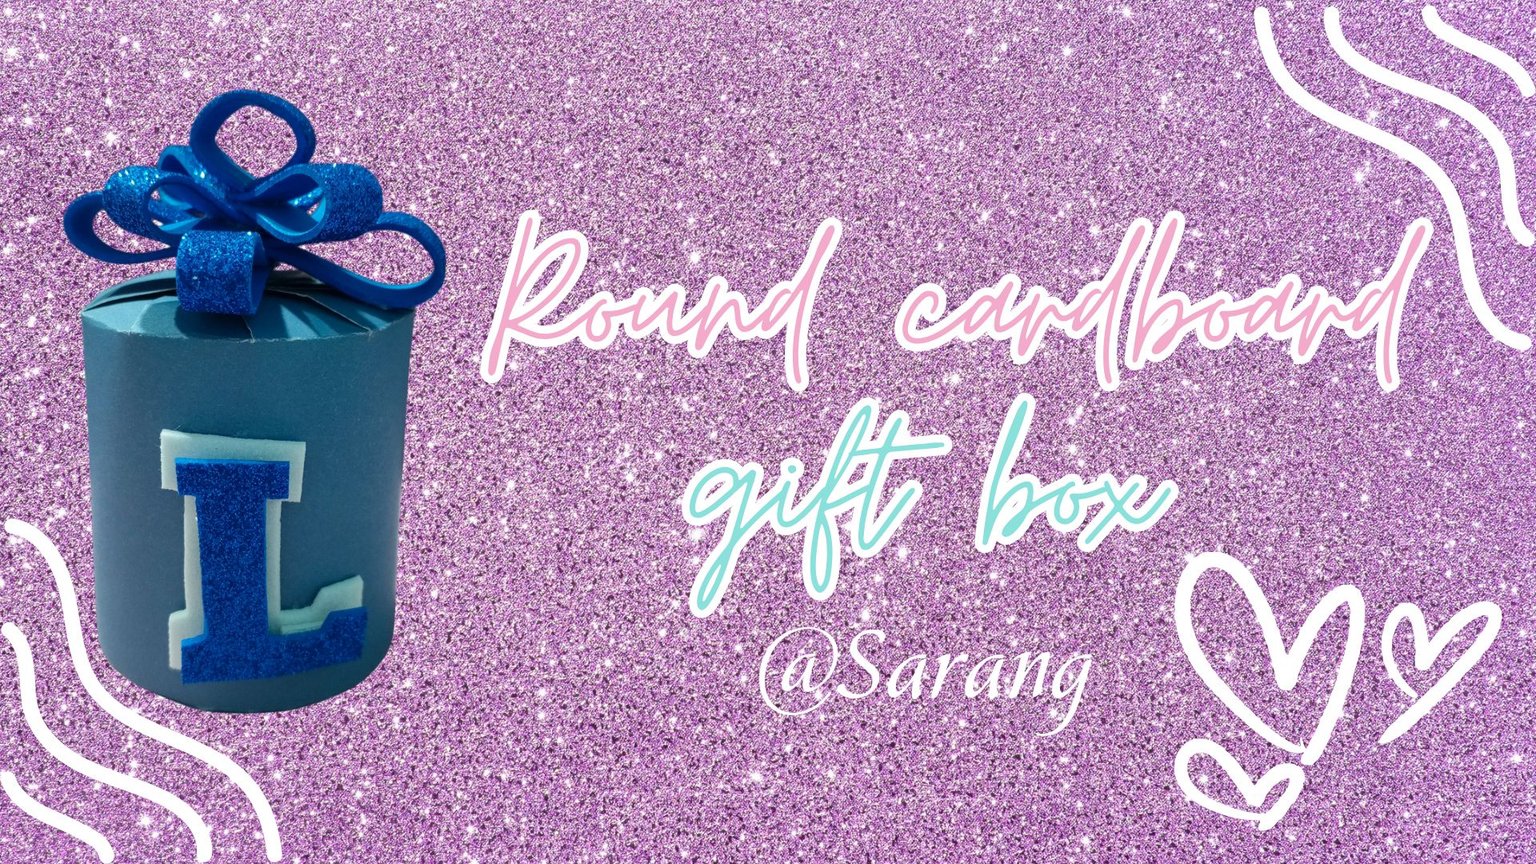
Hello beautiful people! 🥰🫰🏻
El día de hoy les traigo una manualidad super sencilla e ideal para cuando quieren darle un detalle a alguien el día de su cumpleaños o porque no, también el día del amor y la amistad que ya esta cerca. 🥰
Today I bring you a super simple and ideal craft for when you want to give a detail to someone on their birthday or why not, also the day of love and friendship that is already near. 🥰
En estos días fue el cumpleaños de uno de mis sobrinos y le compré unas golosinas para darle un detallito, pero quería dárselos en una cajita linda, diferente y especial para él, es por eso que buscando referencias en internet encontré esta cajita que me pareció muy linda, ya que no es la típica cajita cuadrada, sino redonda así que me gusto, como saben que me gusta dar regalos personalizados le agregué no solo el lazo sino la inicial de su nombre en foami.
These days was the birthday of one of my nephews and I bought him some candies to give him a little gift, but I wanted to give it to him in a nice box, different and special for him, that's why looking for references on the internet I found this box that I found very nice, it is not the typical square box, but round so I liked it, as you know I like to give personalized gifts I added not only the ribbon but the initial of his name in foami.
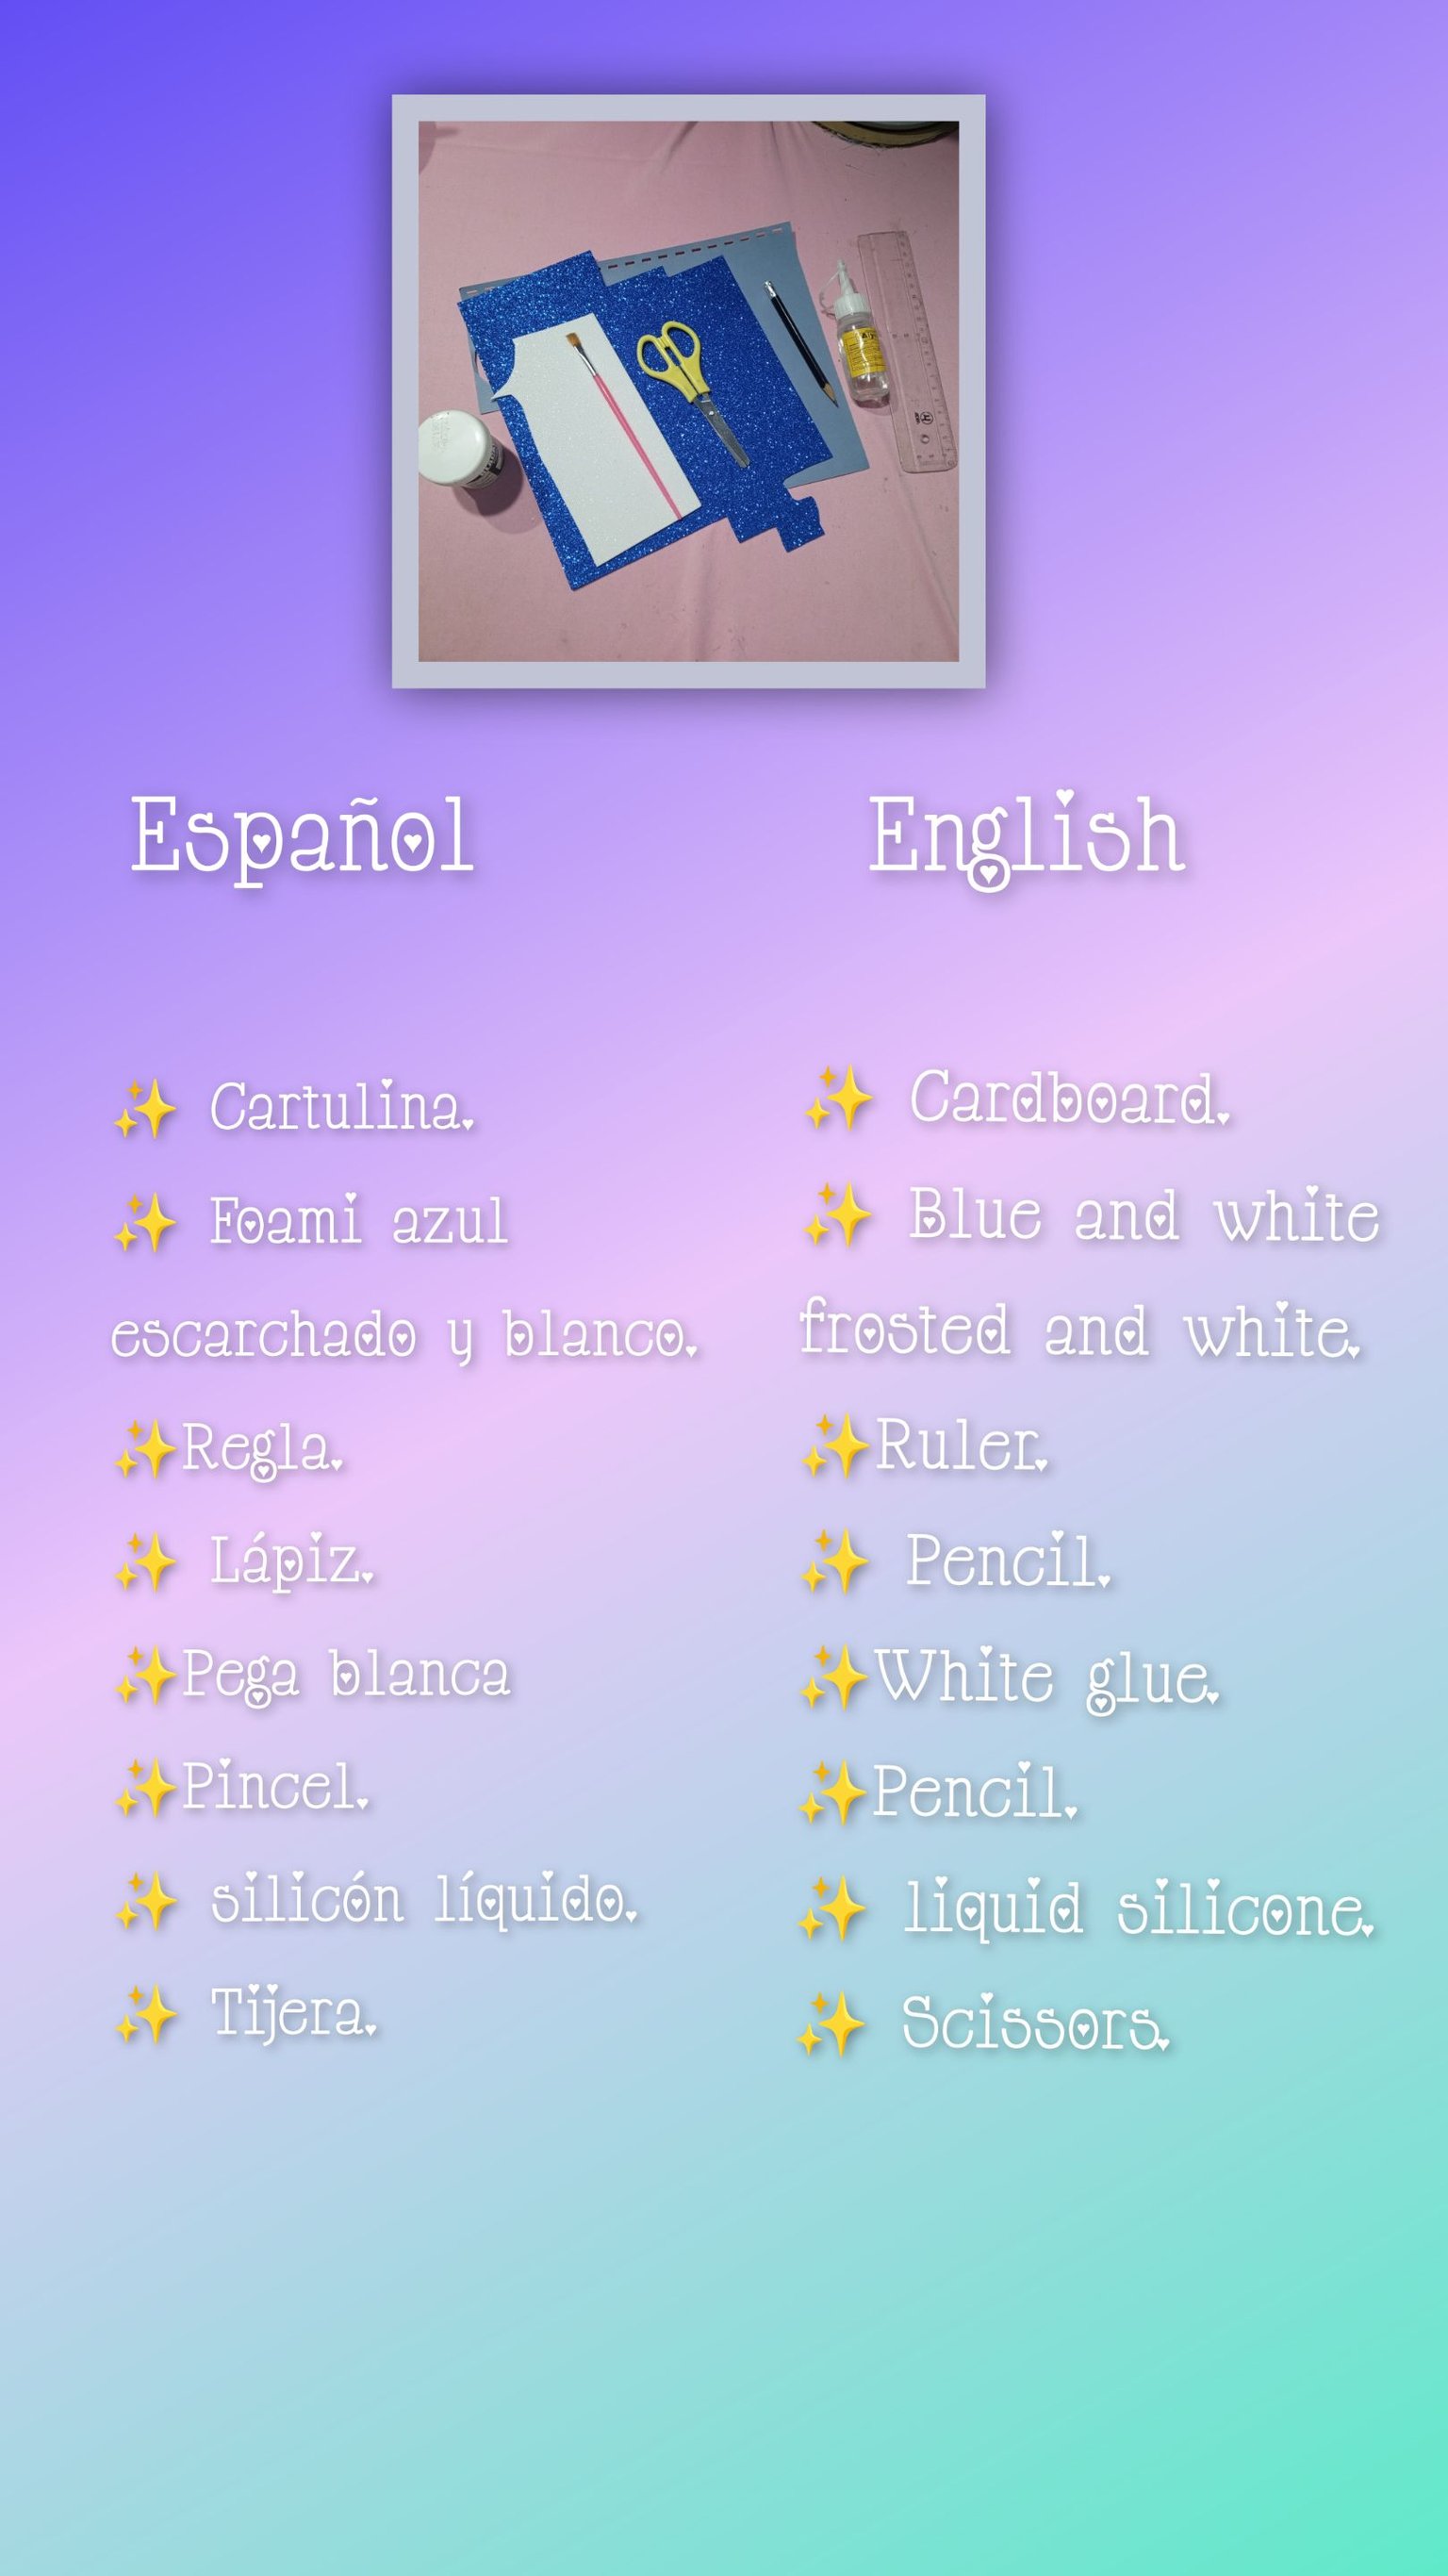
Ya sin más preámbulo vamos con la lista de materiales y el paso a paso.
Without further ado, let's go through the list of materials and the step-by-step instructions.

🌟Step-by-step🌟
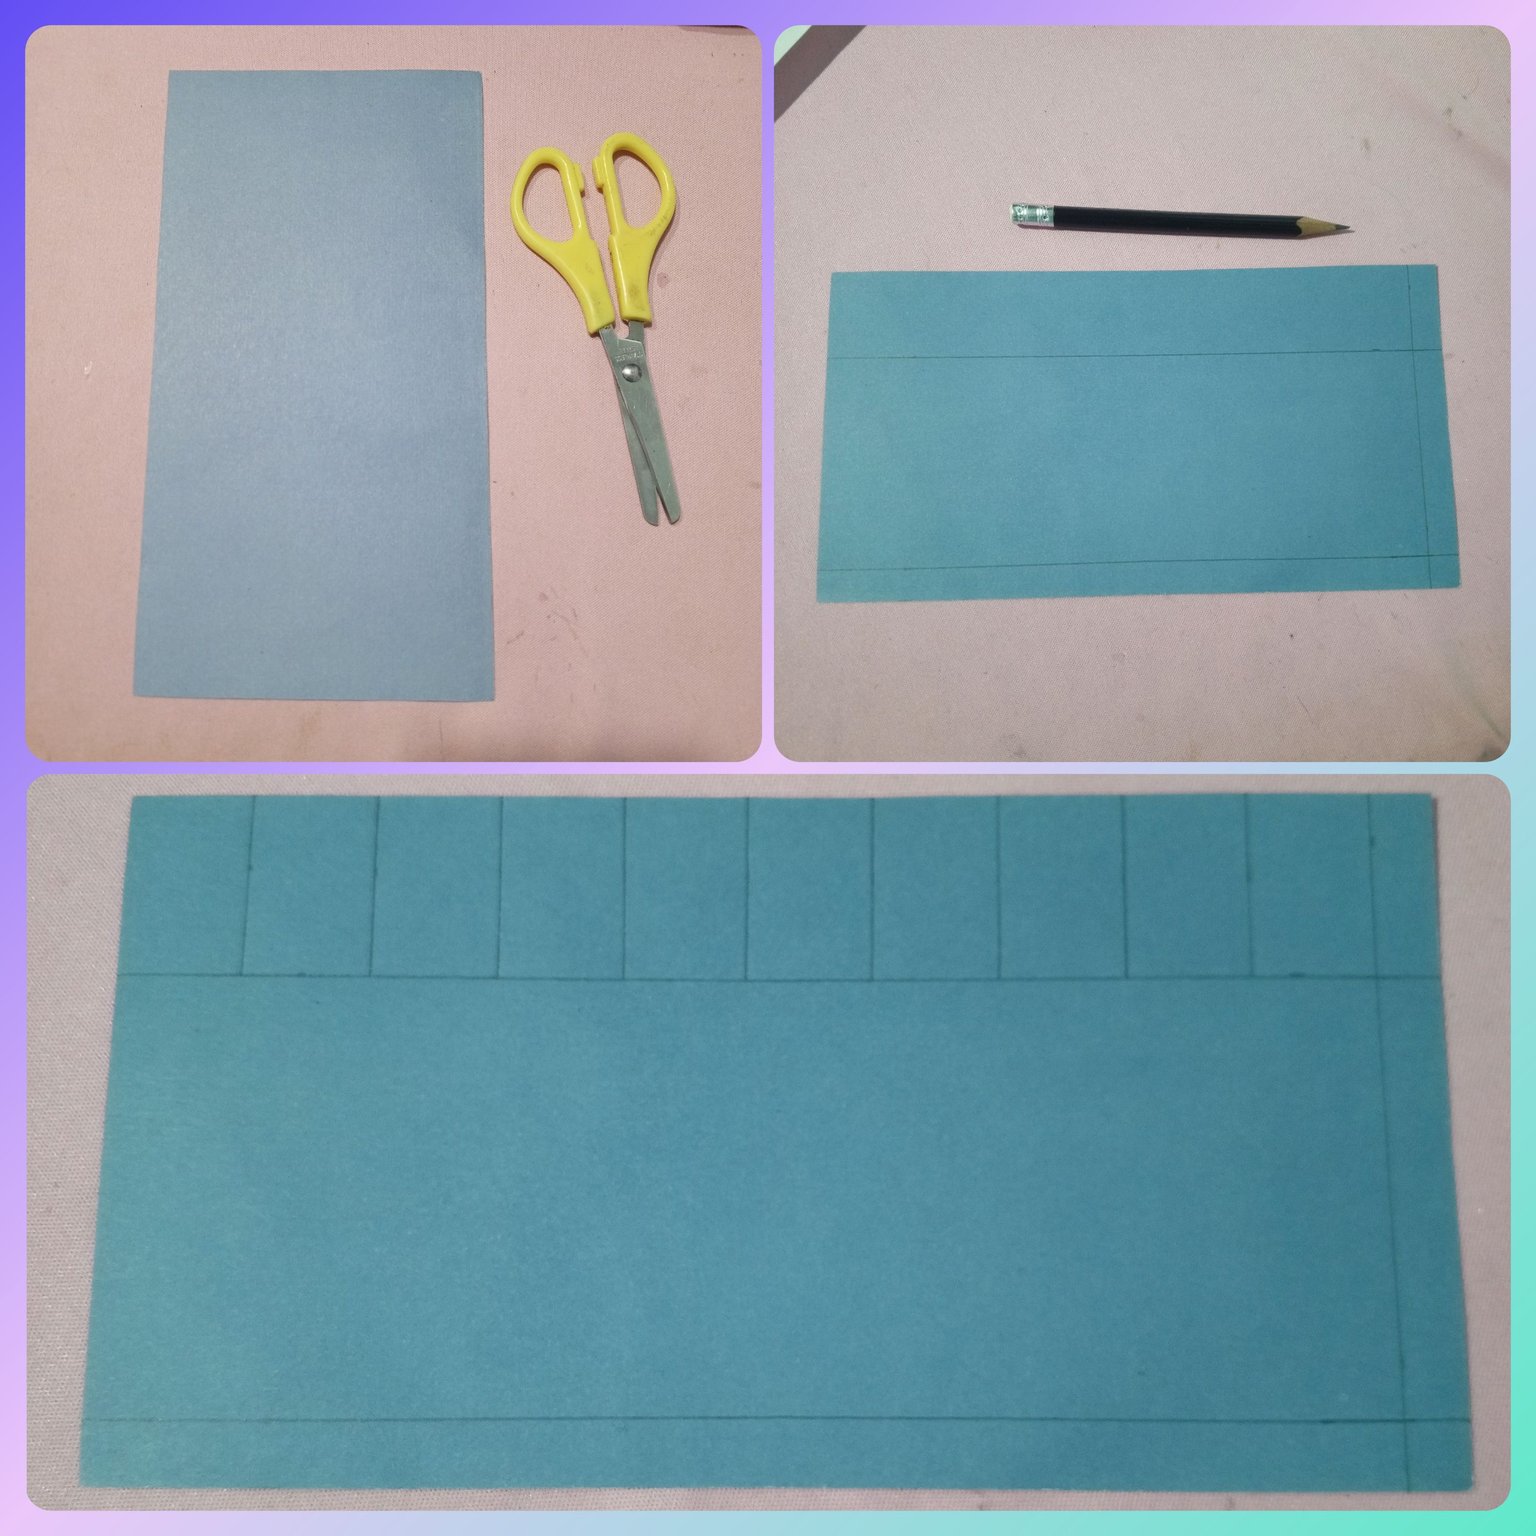
Primero arme la cajita y para eso recorte un rectángulo de 10x22 Cm aproximadamente.
Luego en la parte superior del rectángulo que recorte, medi 3 Cm hacia adentro, en la parte inferior medi 1 Cm hacia adentro y en uno de los laterales medi 1 Cm hacia adentro. En la parte superior donde medi los 3 cm hice esas pequeñas divisiones de 2 Cm cada una.
First I made the box and for that I cut out a rectangle of 10x22 cm approximately.
Then in the upper part of the rectangle that I cut out, I measured 3 cm inward, in the lower part I measured 1 cm inward and in one of the sides I measured 1 cm inward. In the upper part where I measured the 3 cm I made those small divisions of 2 cm each.
Lo marque todo con lápiz para que puedan apreciar mejor, sería bueno que ustedes también lo hicieran porque les facilitará el siguiente paso.
I marked it all with pencil so that you can better appreciate it, it would be good if you do it too because it will make the next step easier for you.
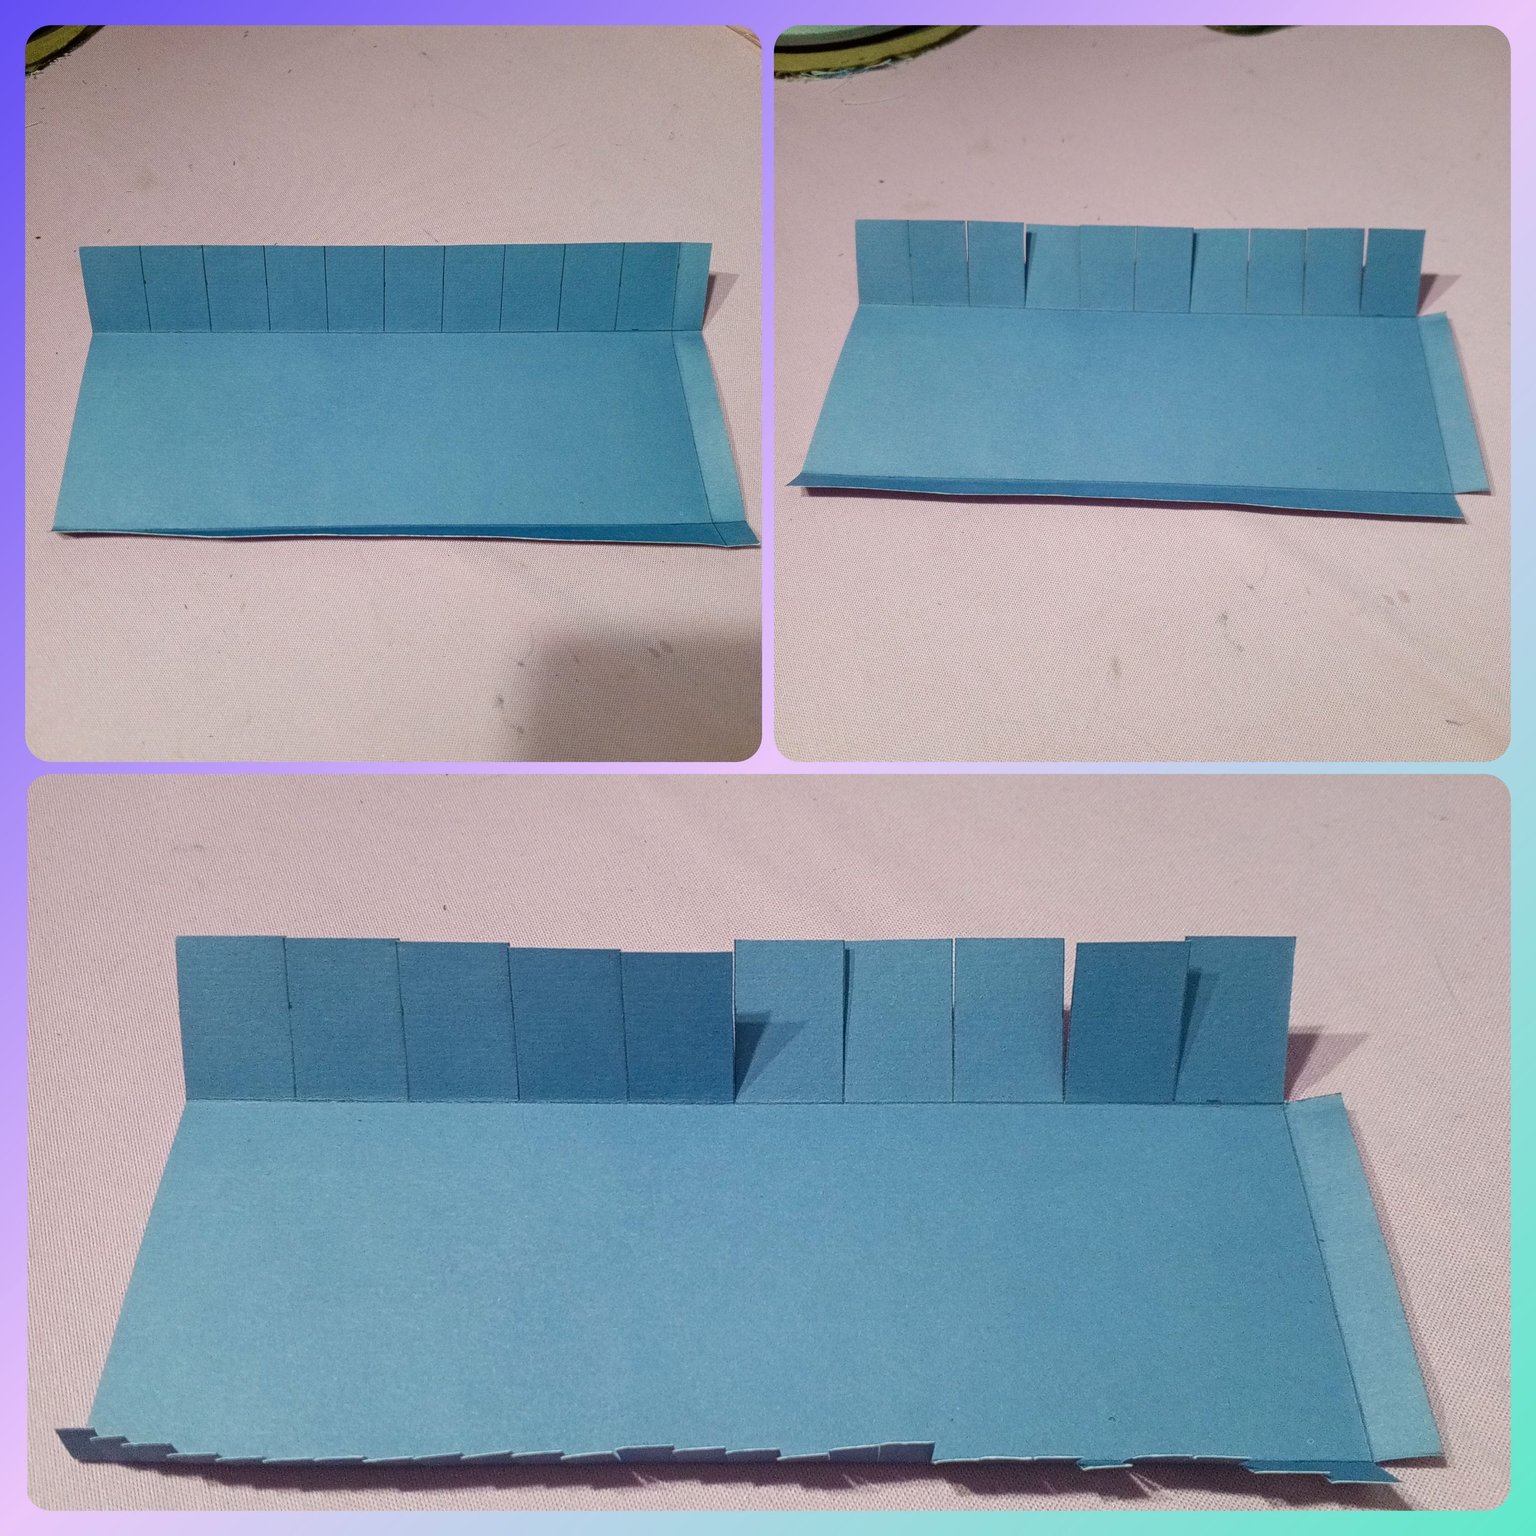
Luego con la ayuda de una regla 📏 comencé a doblar el rectángulo guiandome por las líneas que traze antes. Luego con la tijera comencé a cortar ✂️ las pestañas superiores e inferiores. También recorté los rectángulos de 2 Cm que había hecho en la pestaña superior de la caja y también hice pequeños cortes en la pestaña inferior de la caja.
Then with the help of a ruler 📏 I started to fold the rectangle following the lines I drew before. Then with the scissors I started to cut ✂️ the upper and lower tabs. I also cut out the 2cm rectangles that I had made on the top flange of the box and also made small cuts on the bottom flange of the box.
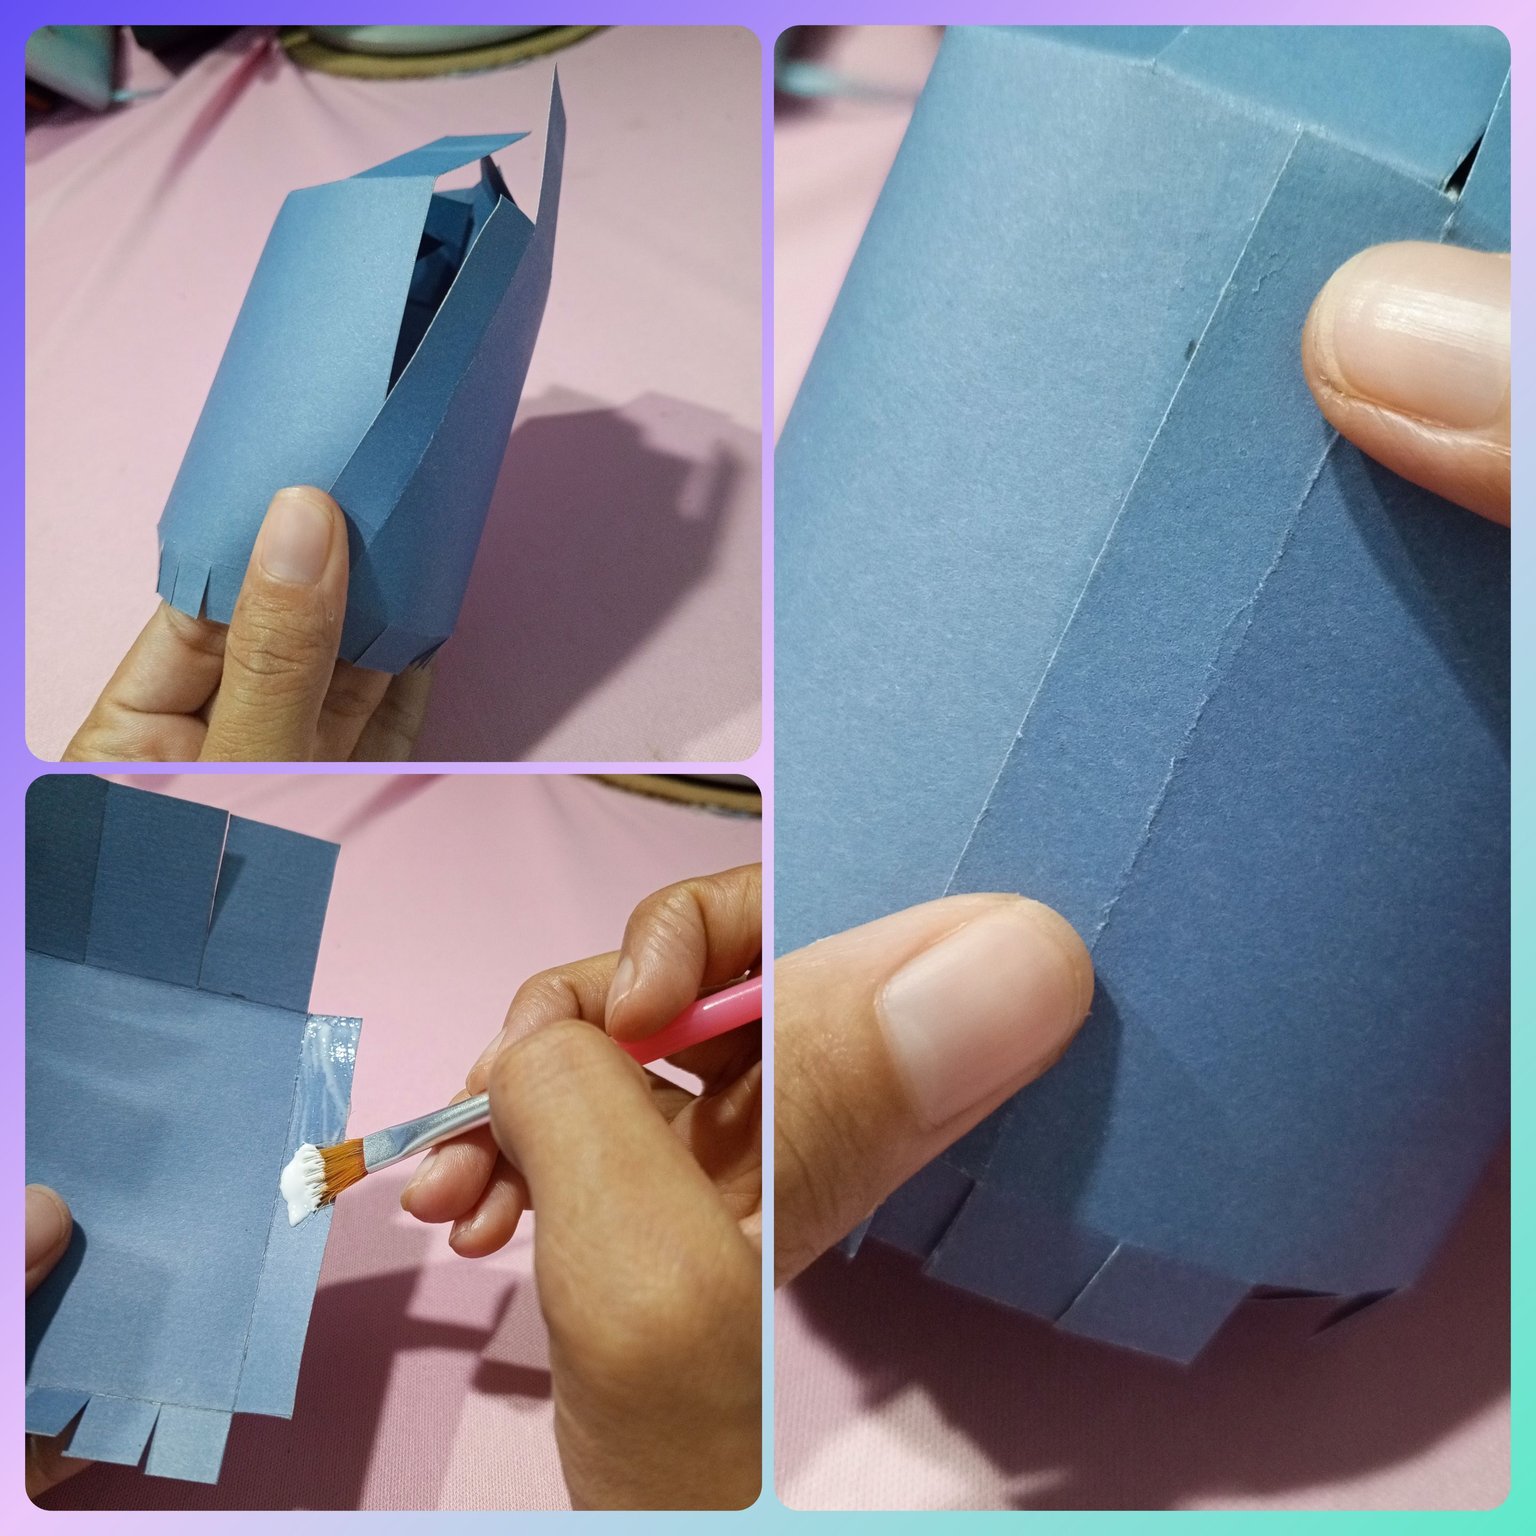
Como pueden ver en la imagen uní los dos extremos del rectángulo con pegamento blanco o pega blanca, como quieran llamarle, para comenzar a formar la cajita redonda.
As you can see in the image, I joined the two ends of the rectangle with white glue or white glue, whatever you want to call it, to start forming the round box.
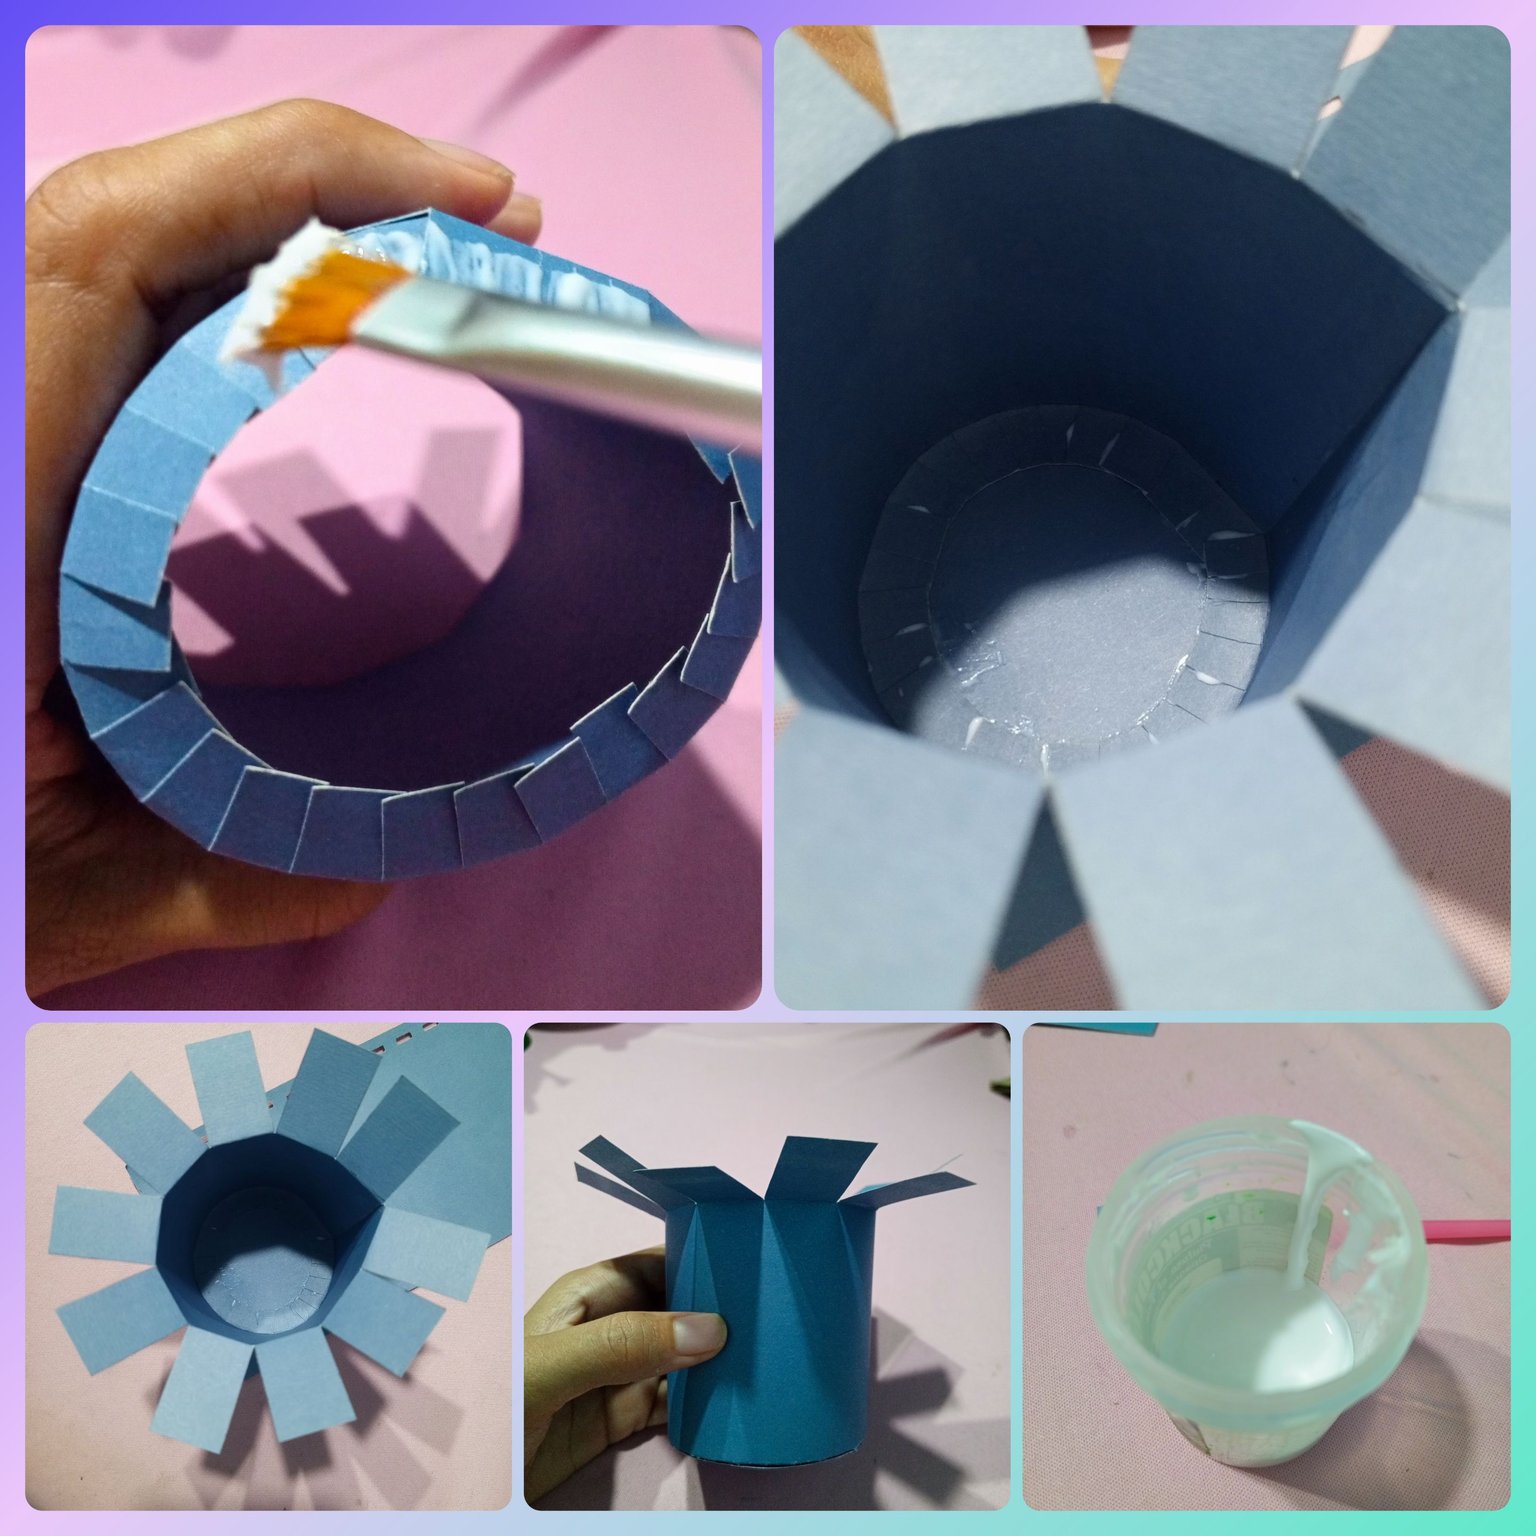
¿Recuerdan los pequeños cortes que hice en la pestaña inferior? Esos nos servirán para hacer la base de la cajita, puse pega blanca en esos cortes y luego con mucho cuidado los pegue al resto de la cartulina azul dandole la forma correcta porque puede quedar un poco distorsionada, así que hay que asegurase de que quede lo más redonda posible y luego deje que secará la pega.
Do you remember the little cuts I made on the bottom flap? Those will serve to make the base of the box, I put white glue on those cuts and then carefully glue them to the rest of the blue cardboard giving it the right shape because it can be a little distorted, so make sure it is as round as possible and then let the glue dry.
Como pueden ver en la imagen yo puse la pega con un pincel porque tengo la pega almacenada en este frasquito que antes era de pintura al frío, pero si ustedes tienen la pega en un frasquito con dispensador pueden poner la pega directamente con la ayuda del dispensador sin necesidad de usar una brocha.
As you can see in the image I put the glue with a brush because I have the glue stored in this little bottle that used to be cold paint, but if you have the glue in a bottle with a dispenser you can put the glue directly with the help of the dispenser without using a brush.
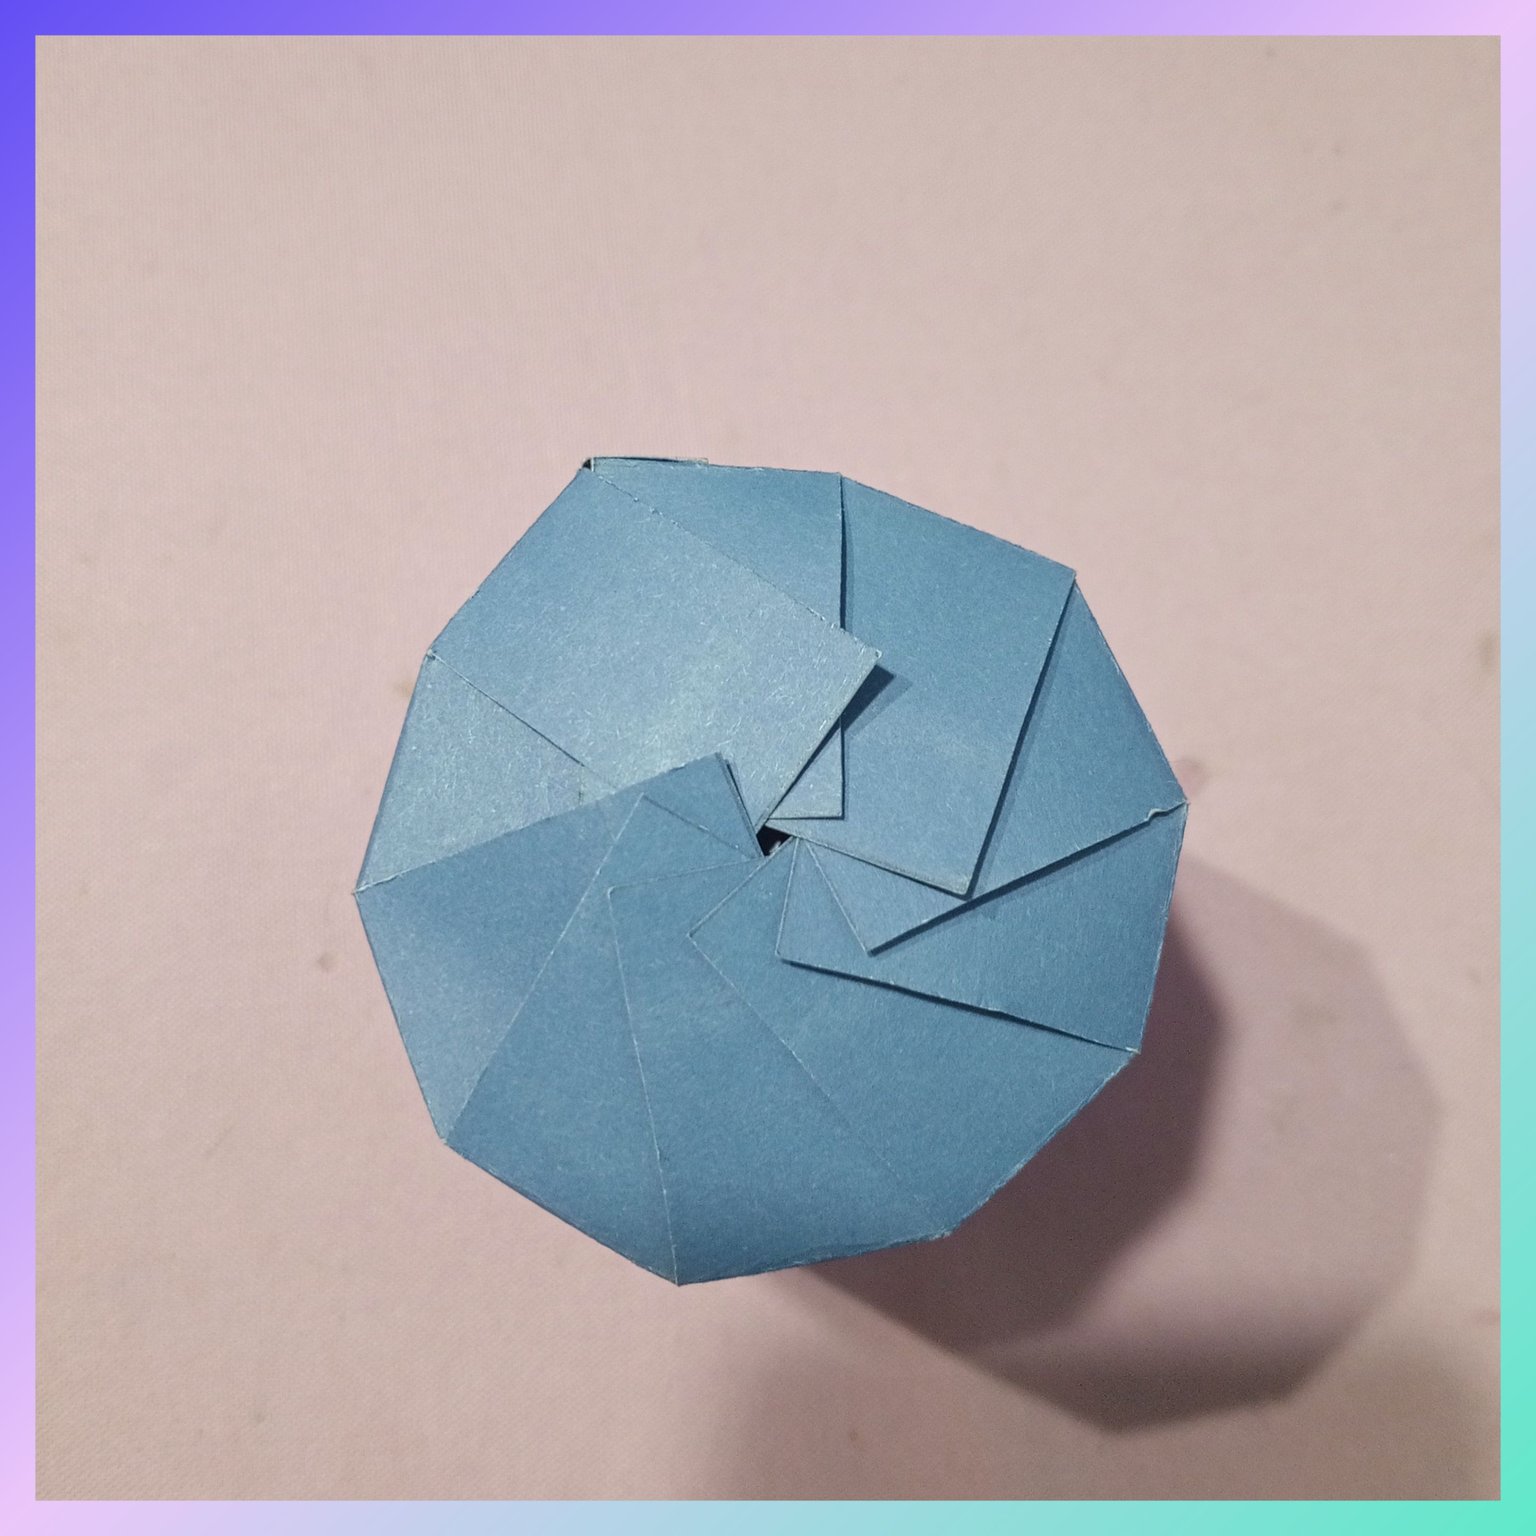
Luego de que seco con la ayuda de unas tijeras ✂️ recorté el exceso de cartulina y de esa forma hice la base de la cajita.
After it dried with the help of scissors ✂️ I cut the excess cardboard and that way I made the base of the box.
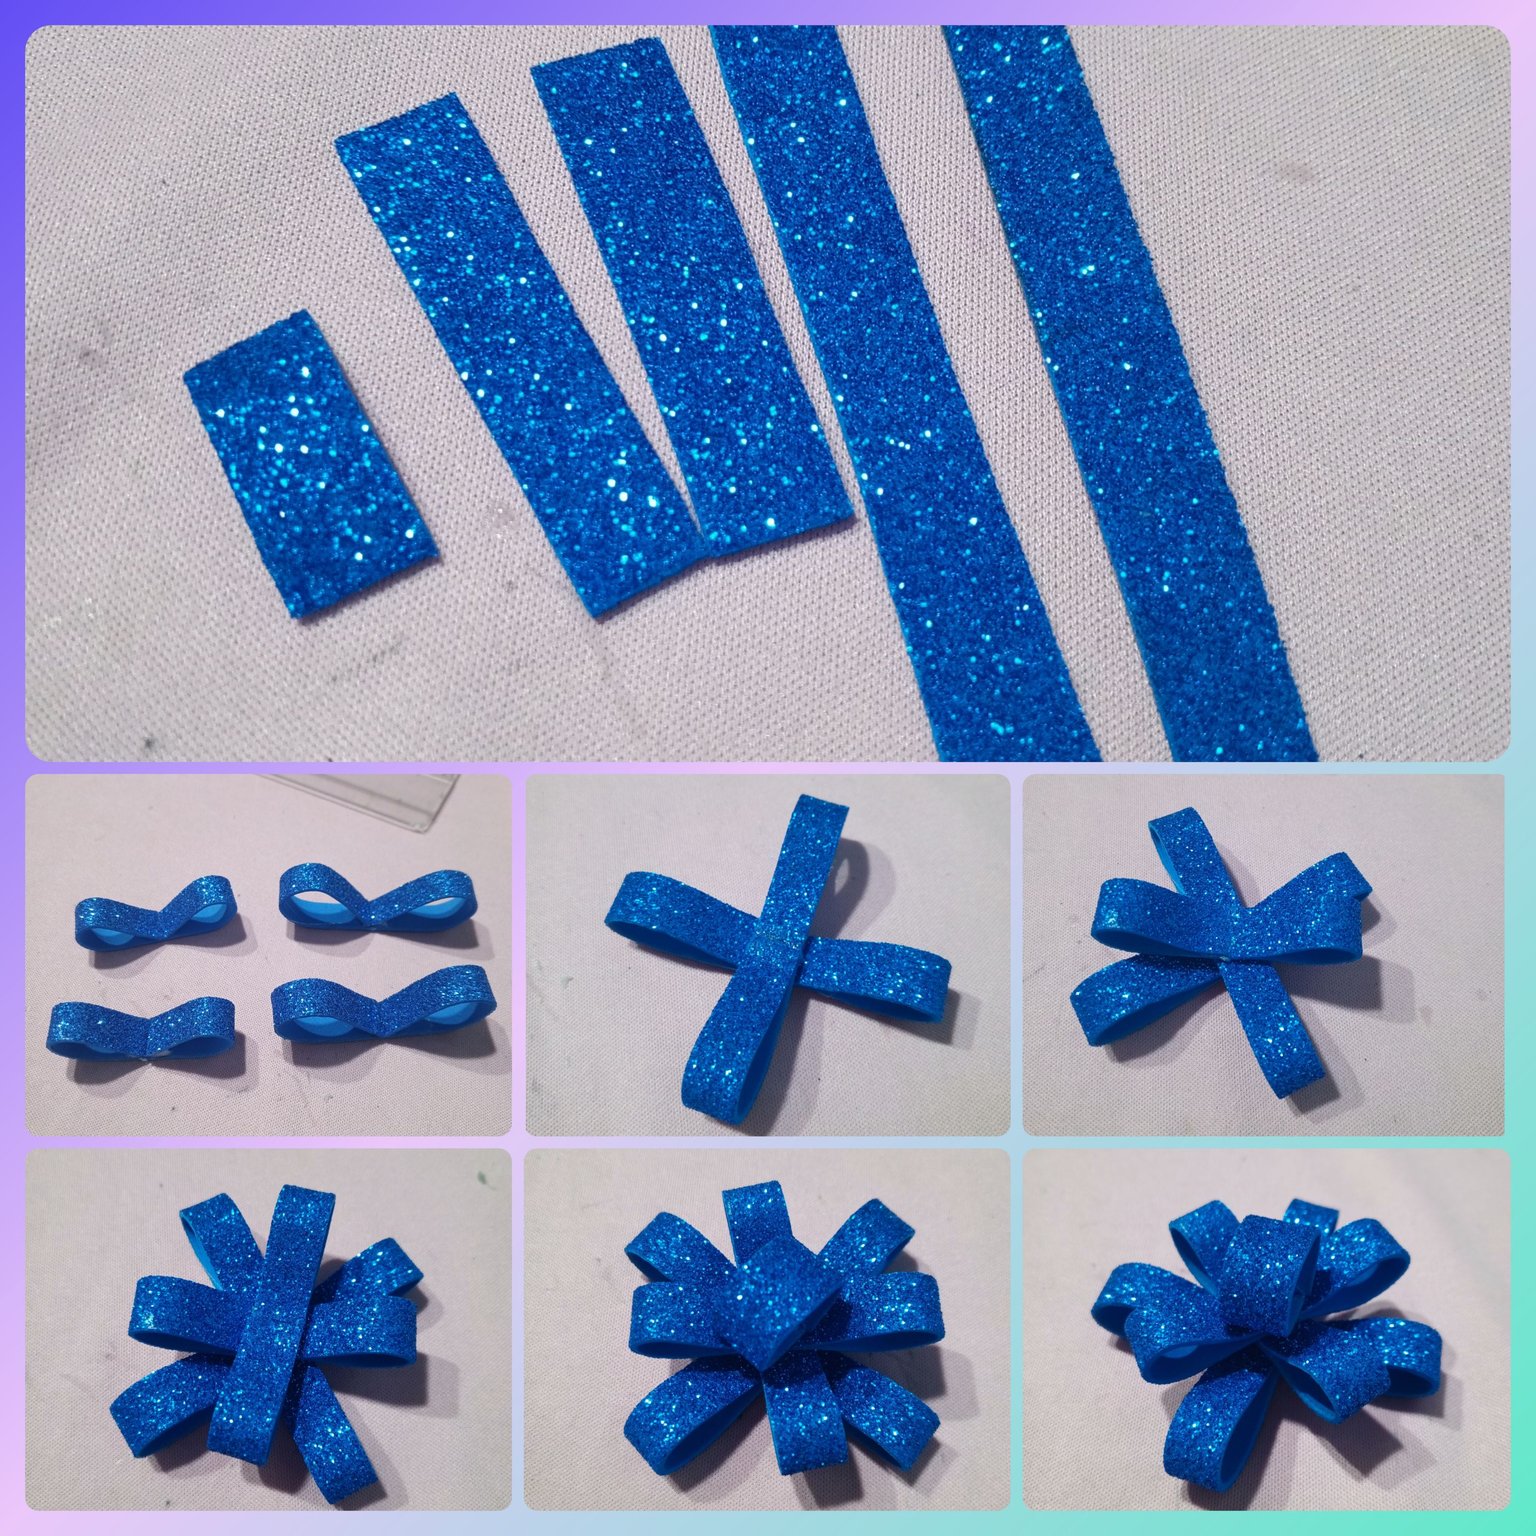
Luego hice el lazo o moño y para eso recorté dos tiras de foami escarchado de 15 x 1 Cm y dos de 12 x 1 Cm y una de tamaño opcional.
Then I made the bow and for that I cut two strips of frosted foami of 15 x 1 cm and two of 12 x 1 cm and one of optional size.
Para formar los gajos del lazo, tome las tiras de foami y doble los extremos hacia adentro y los pegue con silicón frio, la verdad es que con silicón caliente es mejor porque pega de inmediato, pero como no tengo en este momento, tuve que hacerlo con el silicón frío que es un poco más tedioso porque tuve que sostenerlos hasta que se pegaron, pero funcionó que es lo importante.
To form the bow segments, take the foami strips and fold the ends inwards and glue them with cold silicone, the truth is that hot silicone is better because it sticks immediately, but as I don't have it at the moment, I had to do it with cold silicone which is a little more tedious because I had to hold them until they stuck, but it worked which is the important thing.
Luego monte una pieza sobre la otra, para armar el lazo, para esto también use silicón frío, primero las dos piezas más grandes las pegué como en forma de cruz y las dos más pequeñas y por último hice un rollito con la pieza de tamaño opcional y lo pegue arriba y listo mi lazo.
Then I mounted one piece on top of the other, to assemble the bow, for this I also used cold silicone, first the two larger pieces I glued them as a cross and the two smaller ones and finally I made a roll with the optional size piece and glued it on top and my bow was ready.
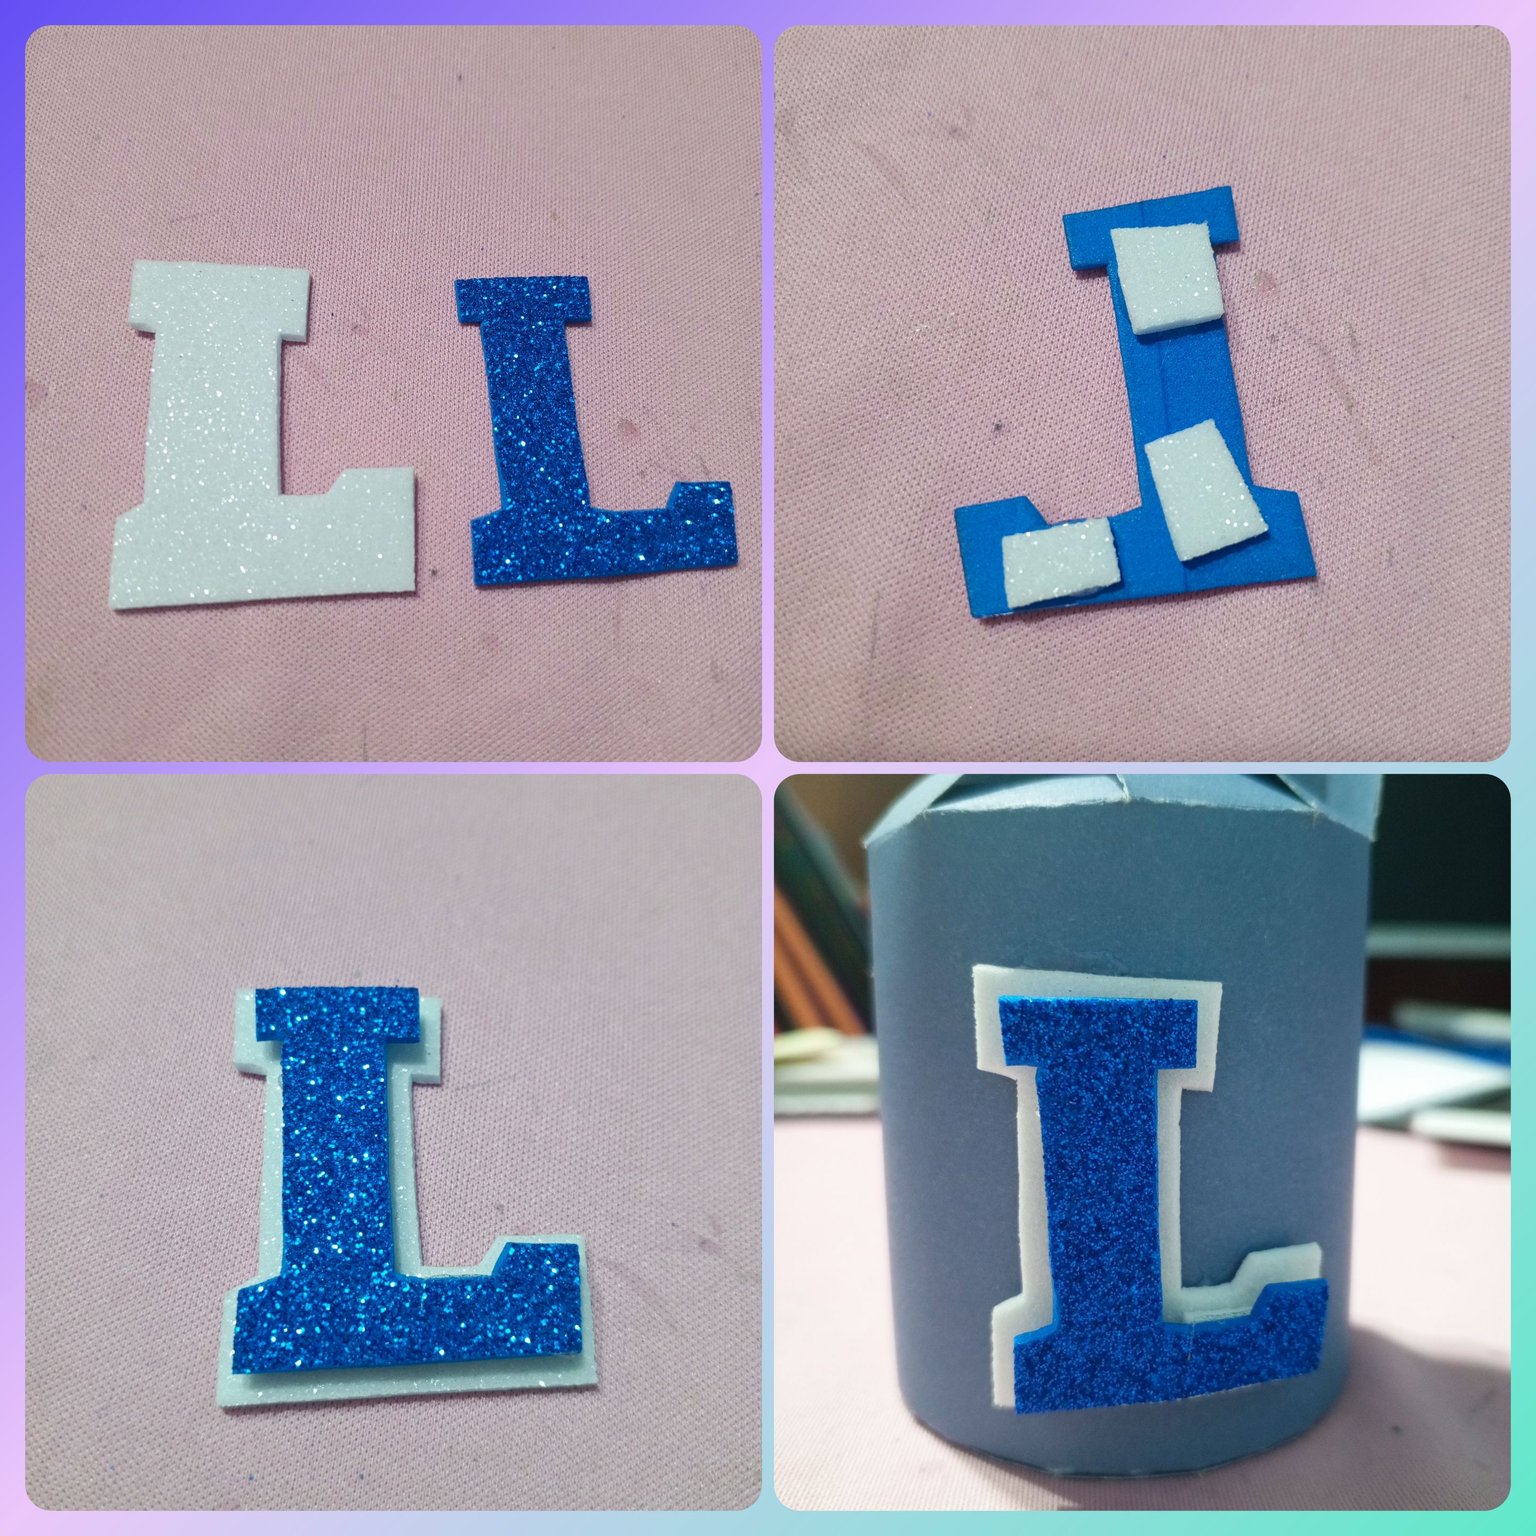
Por último la letra, recorté dos "L" una pequeña en azul escarchado y otra un poco mas grande en blanco, como saben me gustan las letras en 3D así que en la letra azul peque unos retasos de foami para darle altura a la letra, y luego la pegue a la letra blanca. Por último pero no menos importante la pegué a la cajita redonda y listo.
Finally the letter, I cut out two "L", a small one in frosted blue and another one a little bigger in white, as you know I like 3D letters so I cut out a few pieces of foami on the blue letter to give the letter height, and then I glued it to the white letter. Last but not least I glued it to the round box and that was it.

Así quedo mi cajita con el lazo y la letra, como les dije es algo sencillo para dar un detalle pero con estelo y además personalizado, así que espero que les haya gustado.
This is how my box turned out with the ribbon and the letter, as I told you it is something simple to give a detail but with a personalized touch, so I hope you liked it.
Y esto es todo por hoy, sí les gusto no olviden darle amorshito a mi post dejando un lindo comentario o dando click en el corazoncito. 💜😉😊🤭🥰
Nos vemos en un próximo post, que estén bien y Dios los bendiga, bye.🥰😘💜🌹🪷
And that's all for today, if you like me don't forget to give love to my post by leaving a nice comment or clicking on the little heart. 💜😉😊🤭🥰
See you in a next post, be well and God bless you, bye.🥰😘💜🌹🪷
Fotografías propias, tomadas con mi Tecno Spark 10 Pro editadas en incollage/ portada creada en Canva. Traducción al inglés con DeepL.
Own photos, taken with my Tecno Spark 10 Pro edited in incollage/ cover created in Canva. Translation to English with DeepL.

Congratulations @sarangzg7! You have completed the following achievement on the Hive blockchain And have been rewarded with New badge(s)
Your next target is to reach 7000 upvotes.
You can view your badges on your board and compare yourself to others in the Ranking
If you no longer want to receive notifications, reply to this comment with the word
STOPCheck out our last posts:
Estupenda idea amiga @sarangzg7, me encanto esta muy linda.
Me gustó bastante vale esta bien bonita, siento que es un tutorial que te puede salvar en cualquier momento de que quieras dar un detalle a alguien y no tengas en donde darlo, me gustó, sin dudas nuevo seguidor, gracias por compartir en hive un saludo <3
This seems like a wonderful gift idea for people we care about. It is very colourful and beautiful and we love it. Amazing work friend and thanks for sharing.
Me encantó la forma de la caja amiga 💕. Hace mucho no elaboró una en cartulina y siempre me ha encantado ver el resultado final al armarla. Muy bonito 💕
Está genial este empaque para un regalo , y más por el toque personalizado , seguro que le encantó a tu sobrino