Saludos querida comunidad, continúo mi camino navideño con el macramé, esperando hacer unos cuantos colgantes más para adornar mi árbol de navidad antes que llegue la noche buena, también aprovechando de ofrecer colgantes a la venta por redes sociales a pesar de que me quita tiempo 😁, esto me ha parecido muy entretenido porque estos son de pequeño tamaño y me permite hacer muchas versiones diferentes de figuras y no pasar tanto tiempo enfrascada en un solo diseño, hoy comparto con ustedes un Santa Claus, espero sea de provecho para todos ustedes este tutorial 🥰
Greetings dear community, I continue my Christmas journey with macramé, hoping to make a few more pendants to decorate my Christmas tree before Christmas Eve arrives, also taking advantage of offering pendants for sale on social networks even though it takes time 😁, I found this very entertaining because these are small in size and allow me to make many different versions of figures and not spend so much time immersed in a single design, today I share with you a Santa Claus, I hope this tutorial is useful for all of you 🥰
Materiales / Materials

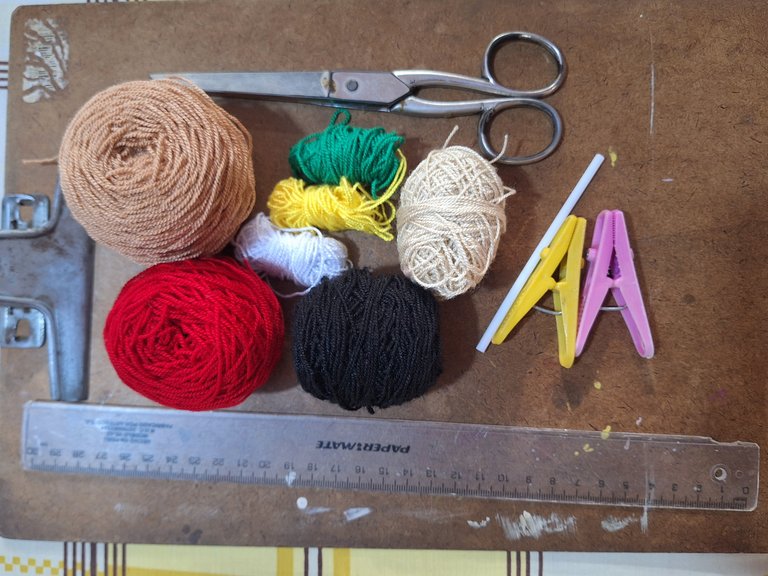
- Hilo acrílico para crochet: beige, beige claro, negro, blanco, rojo, verde y amarillo.
- Tabla
- Palito de plástico
- Tijera
- 2 pinzas para ropa
- Patrón
- Acrylic crochet yarn: beige, light beige, black, white, red, green and yellow.
- Board
- Plastic stick
- Scissors
- 2 clothespins
- Pattern
Proceso / Process

Nuevamente para hacer este diseño usé una imagen de referencia, redibujé el diseño en la aplicación Pixel Station, con un lienzo de 19 columnas y 28 filas de cuadros, es decir, que el numero de columnas representa los hilos guía necesarios, mientras que las filas representan el número de hileras de nudos, cada cuadro representa un nudo, en dicha aplicación es muy fácil pintar cuadro por cuadro, posteriormente edité la imagen en Inshot para agregar los números.
Again to make this design I used a reference image, I redrew the design in the Pixel Station application, with a canvas of 19 columns and 28 rows of squares, that is, the number of columns represents the necessary guide threads, while the rows represent the number of rows of knots, each square represents a knot, in this application it is very easy to paint frame by frame, later I edited the image in Inshot to add the numbers.


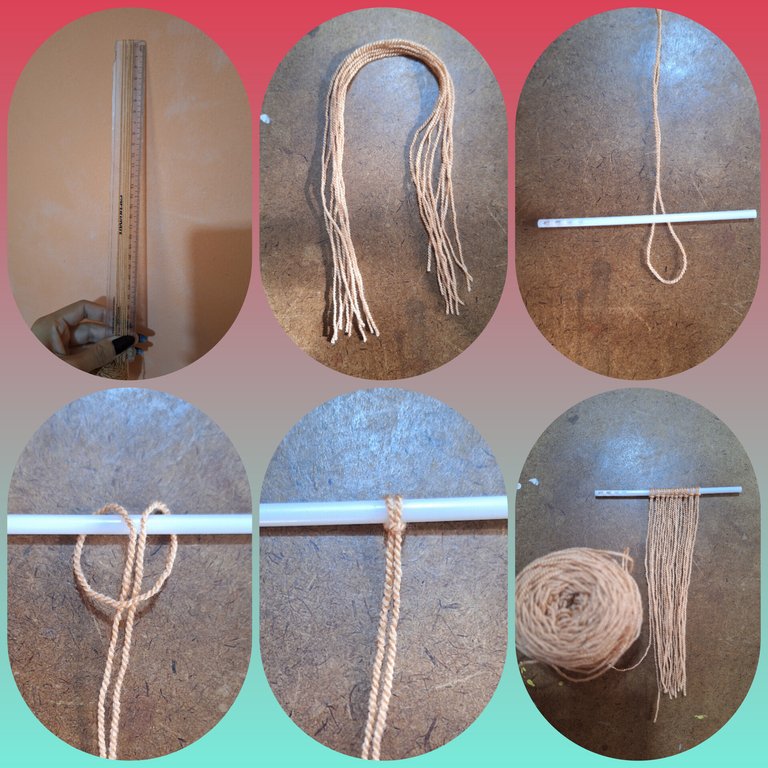
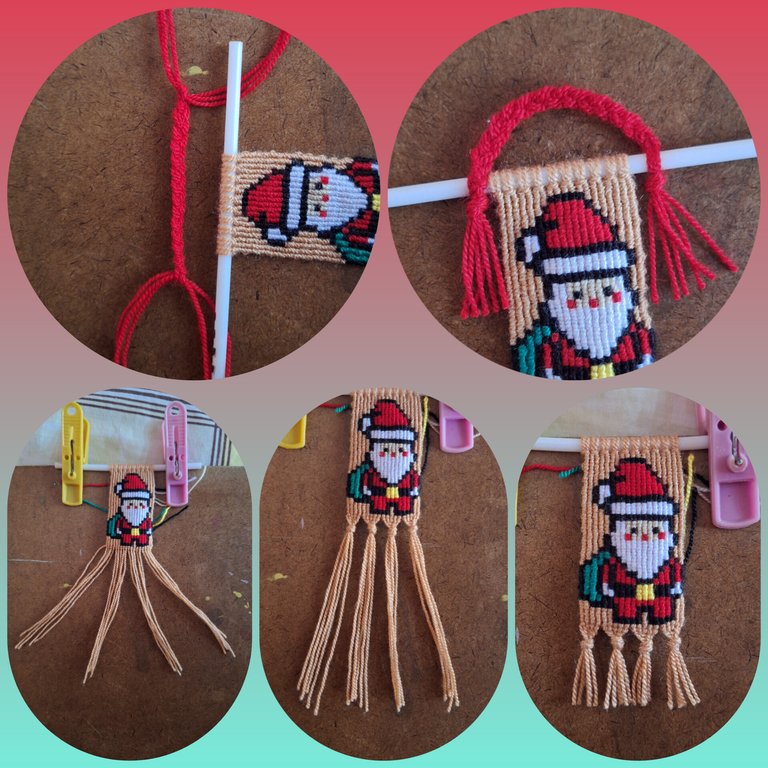
Para comenzar con el hilo beige corté 9 hebras de 30 cm y una hebra adicional unida al ovillo. Anudé las hebras al palito de platico por la mitad, de ese modo se van obteniendo los hilos guías, la hebra unida al ovillo se anuda de primer lugar a la izquierda para que que esta sirva de primer hilo anudador.
To start with the beige thread I cut 9 strands of 30 cm and an additional strand attached to the ball. I tied the strands to the plastic stick in the middle, in this way the guide threads are obtained. The strand attached to the ball is tied first on the left so that it serves as the first knotting thread.

La primera hilera se hace solo con el hilo anudador beige, esta al igual que en todas las hilera impares el hilo anudador envuelve dos veces cada uno de los hilos guía de izquierda a derecha. En la segunda hilera se agregar el hilo anudador de color negro para hacer los cambios de color correspondiente, es dicha hilera así como en todas las pares se anuda de derecha a izquierda. Los demás colores de hilo anudador se van agregando como corresponde en el patrón, para cambiar de color se cruzan por detrás los hilos anudadores.
The first row is made only with the beige knotting thread. This, as in all the odd rows, the knotting thread wraps twice around each of the guide threads from left to right. In the second row, the black knotting thread is added to make the corresponding color changes. This row, as in all the even rows, is knotted from right to left. The other colors of knotting thread are added as appropriate in the pattern. To change color, the knotting threads are crossed behind each other.
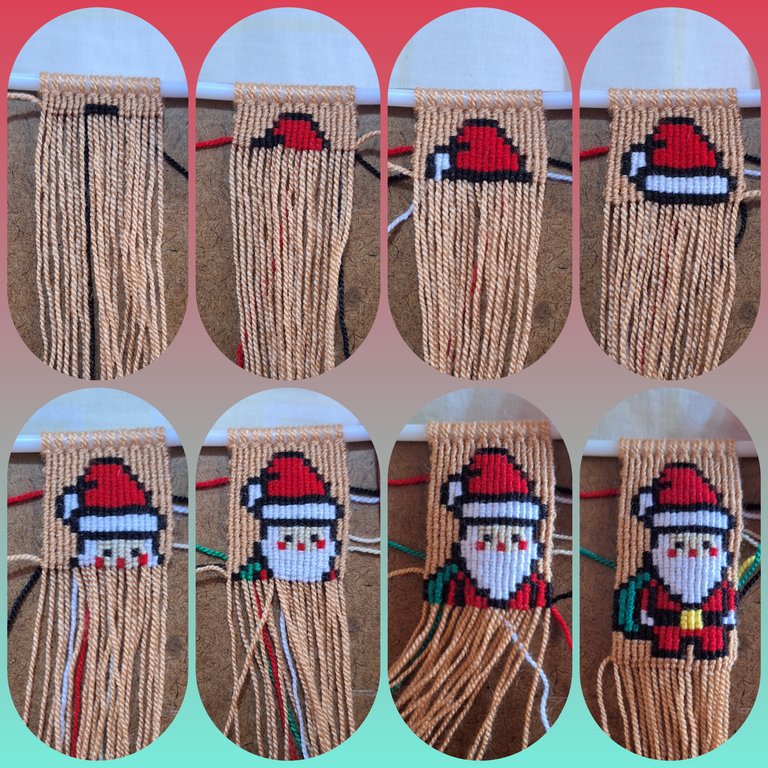

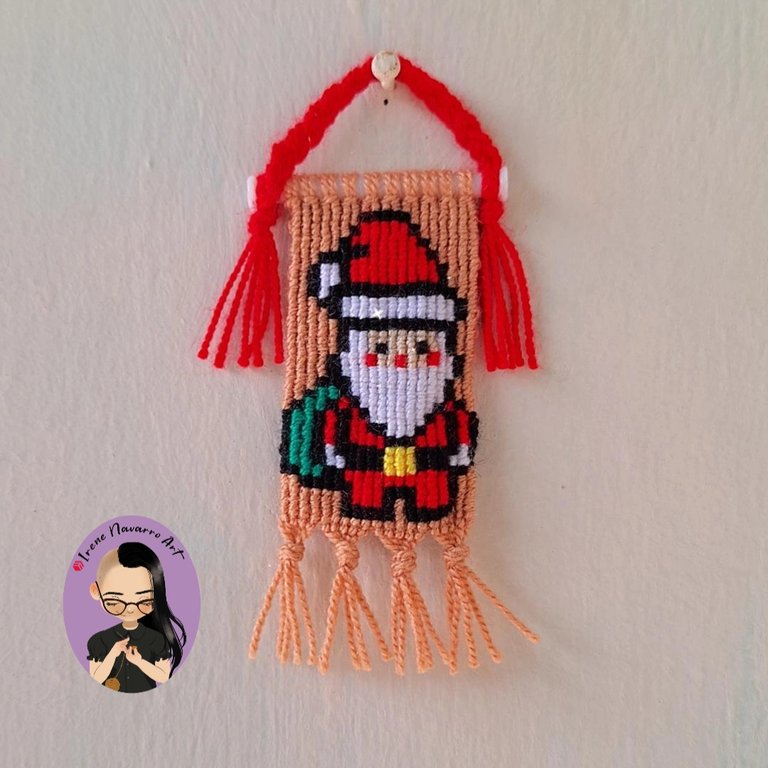
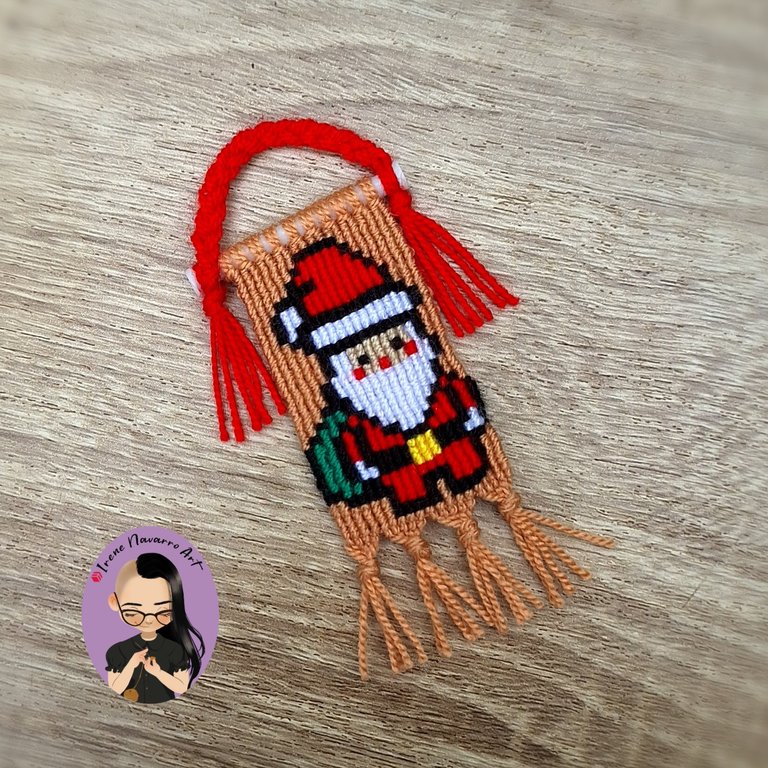
Una vez finalizada la hilera 28 de nudos, se dividen los hilos en 4 partes y se hacen nudos, se corta para emparejar las puntas de los flecos. Con 6 hebras de 20cm de hilo rojo se hace una trenza para anudar al palito, se puede quemar los extremos del palito al final para que se vea mejor.
Once the 28th row of knots is finished, the threads are divided into 4 parts and knotted, cutting to match the tips of the fringes. With 6 strands of 20cm of red thread, a braid is made to tie to the stick, you can burn the ends of the stick at the end so it looks better.
Resultado / Result

Imágenes tomadas con dispositivo Samsung A54. Portada editada en Inshot
Pictures taken with Samsung A54 device. Cover edited in Inshot
Espero les haya gustado. Les invito a leer mis próximas publicaciones y siempre estaré dispuesta a responder sus preguntas y comentarios, también pueden seguirme y contactarme en cualquiera de mis redes sociales. ¡Muchas gracias!
I hope you liked it. I invite you to read my next publications and I will always be willing to answer your questions and comments, you can also follow me and contact me on any of my social networks. Thank you!
Facebook
Twitter
Instagram
Ko-Fi
Discord: irenenavarroart#0361
Posted Using InLeo Alpha


Que bonito, mucho talento y dedicación para lograrlo amiga. Bendiciones 🤗.
Muchas gracias ☺️
Esta precioso este colgante. Muy navideño
Gracias 😁
An amazing art creation that you show. And I love the handicraft creation that you show.
Este diseño de santa es un encanto, siempre me deleito con tus proyectos, felicidades.💗🤗
Gracias ☺️ pronto espero compartir otro
😀Que fino estaré atenta
Increíble tu habilidad para recrear a cualquier personaje. Este proyecto Hive Diy de Santa Claus quedó bellísimo.
Muchísimas gracias 💜
Gracias por compartir, muy didáctica la explicación. Saludos @irenenavarroart.
Gracias ☺️ Saludos
Muy lindo tu trabajo. Limpio y unas instrucciones detalladas. te felicito. Saludos desde Colombia
Muchas gracias ☺️ Saludos
Muy bonito macramé de Santa Claus 🎅 @irenenavarroart, buen diseño y bien creativo amiga!! 👌😉
Muchas gracias ☺️
Always creating something amazing. Weldone dear