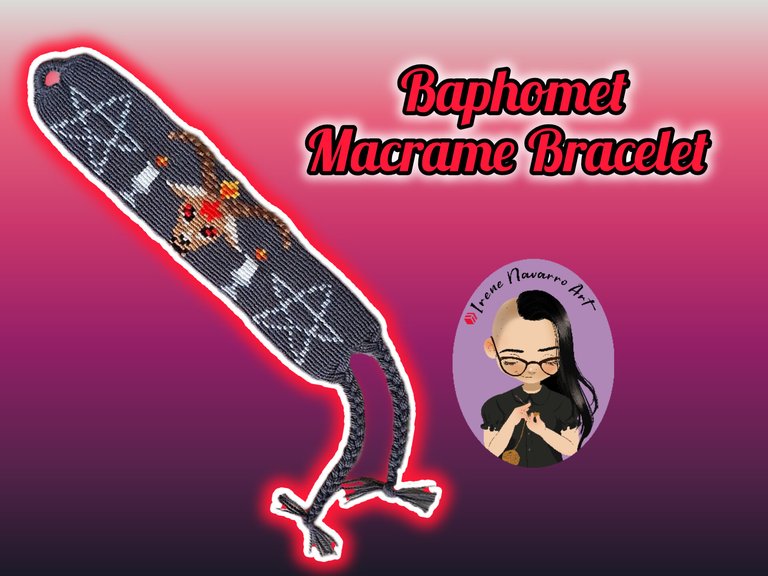
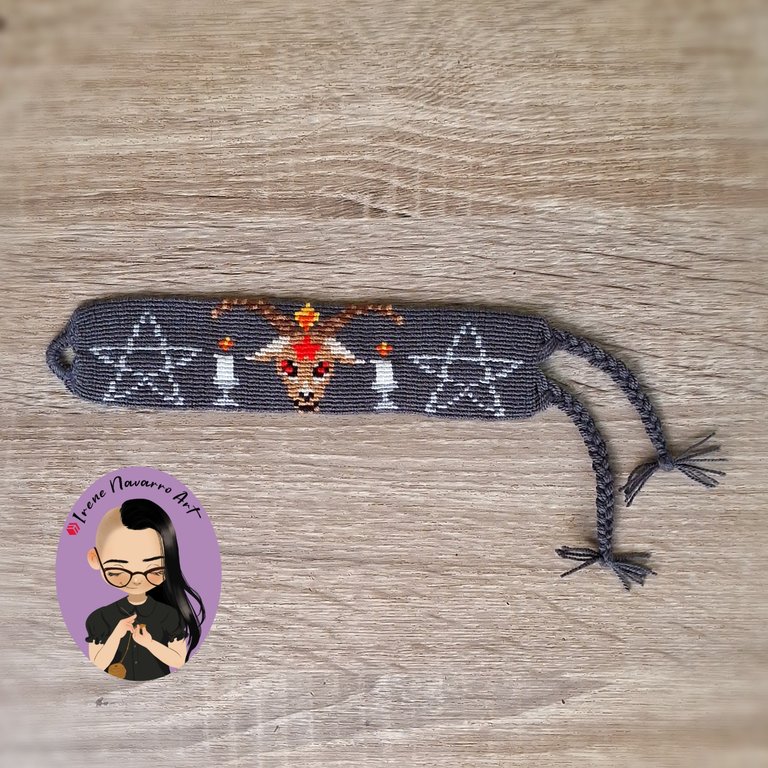
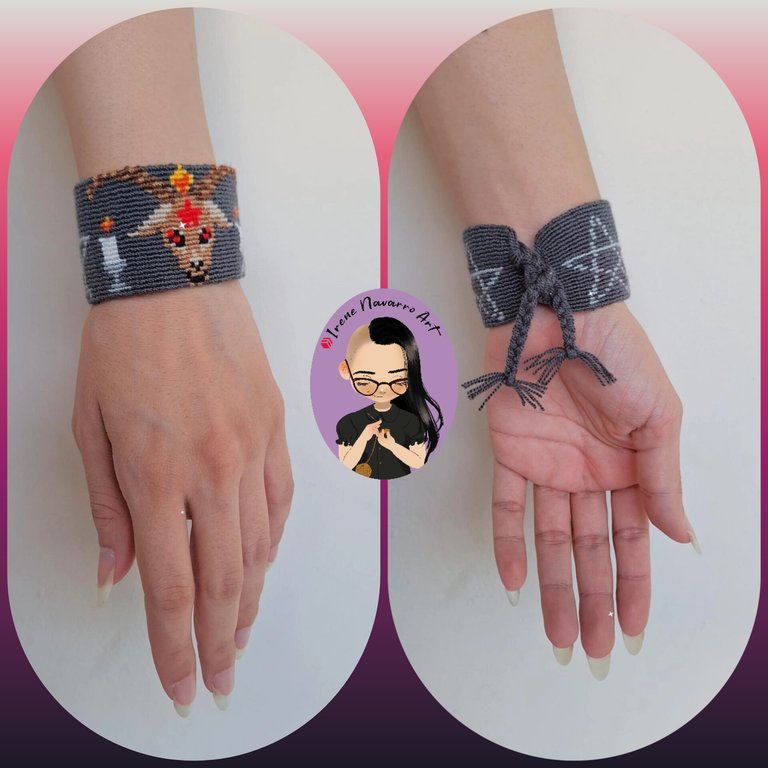
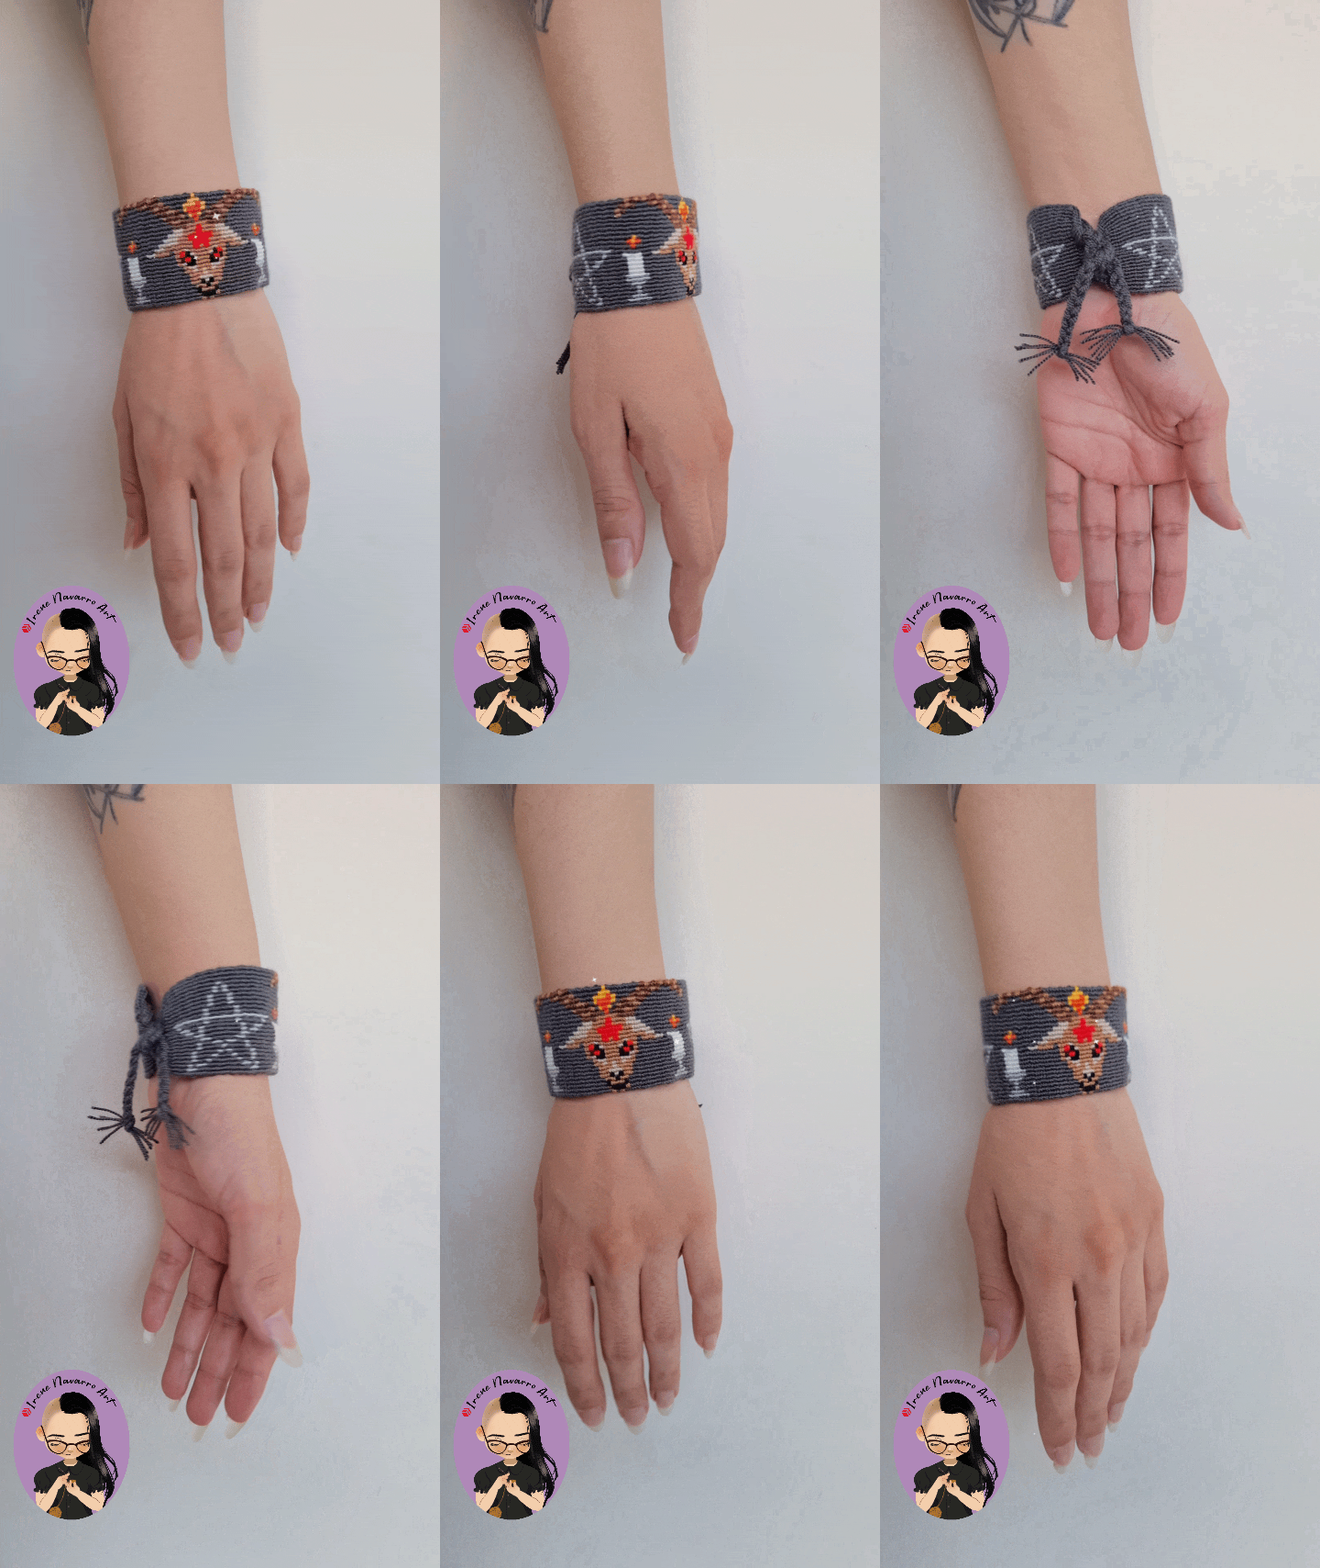
Saludos a todos en la comunidad Hive DIY, hoy les comparto un tutorial para hacer un brazalete en macramé con la figura de Baphomet, me gustó mucho hacer este diseño y estoy complacida con el resultado, espero les sea de utilidad.
Greetings to everyone in the Hive DIY community, today I am sharing a tutorial to make a macramé bracelet with the figure of Baphomet, I really liked making this design and I am pleased with the result, I hope it is useful to you.
Materiales / Materials

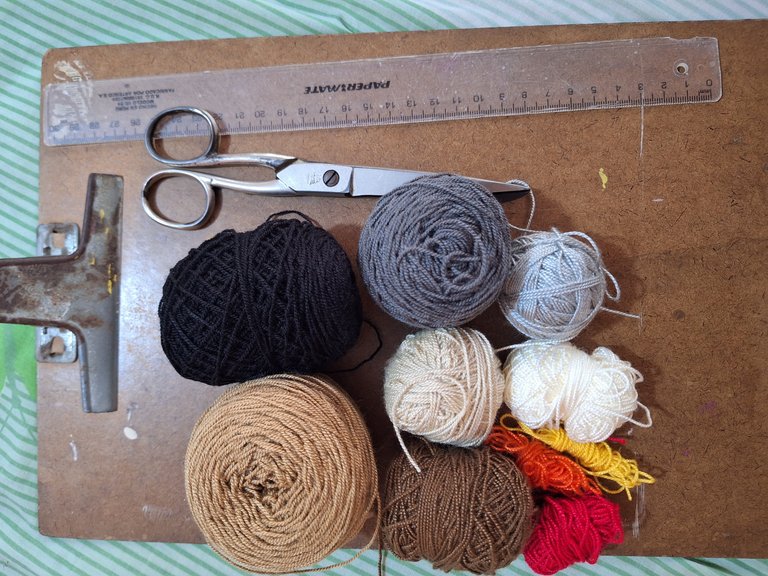
- Hilo acrílico para crochet: gris oscuro, gris claro, blanco, naranja, amarillo, negro, rojo, beige claro, beige oscuro y marrón.
- Tabla con clip
- Regla
- Tijera
- Patrón
- Acrylic crochet yarn: dark grey, light grey, white, orange, yellow, black, red, light beige, dark beige and brown.
- Clip board
- Rule
- Scissors
- Pattern
Proceso / Process

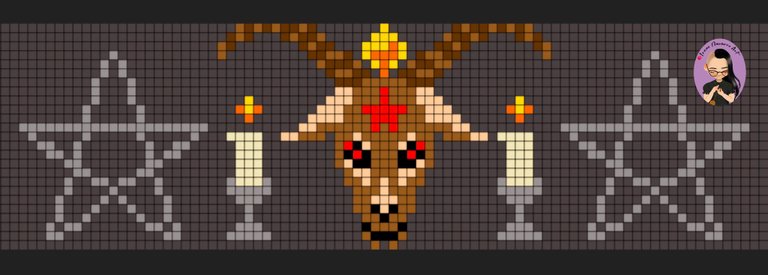
Para hacer este patrón usé la aplicación Pixel Station, la cual permite crear un lienzo de cuadros y pintar cada uno de estos con la herramienta de pincel o la de bote de pintura. Hice un lienzo de 25 cuadros de alto y 85 cuadros de ancho. Es decir que para el brazalete se necesitan 25 hilos guía y se hacen 85 hileras de nudos.
To make this pattern I used the Pixel Station application, which allows you to create a canvas of squares and paint each one of them with the brush tool or the paint pot tool. I made a canvas 25 squares high and 85 squares wide. That is, for the bracelet you need 25 guide threads and 85 rows of knots are made.

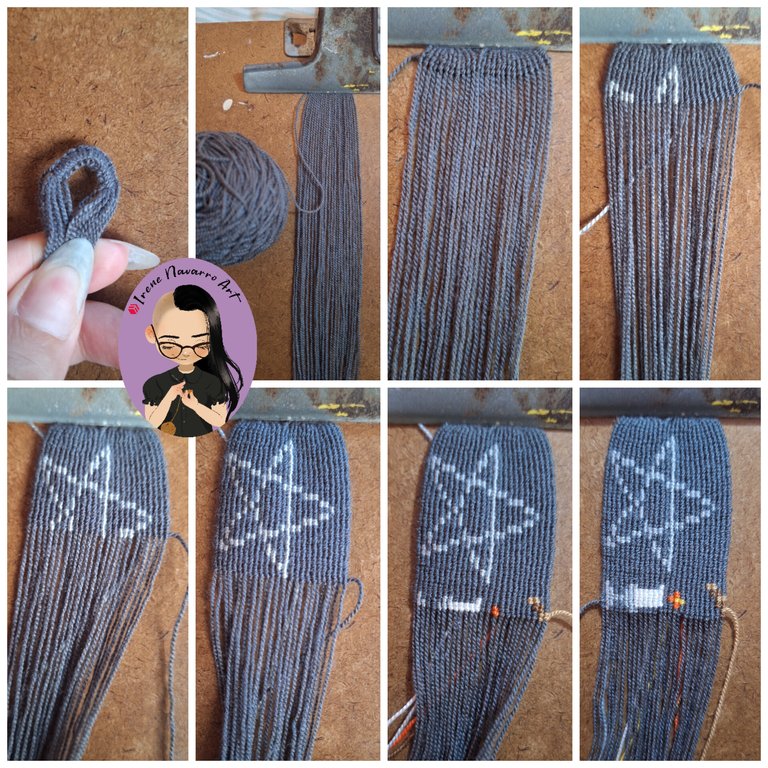
Con hilo gris oscuro cortar 11 hebras de 60 cm, una hebra de 70 cm y una hebra dejarla unida al ovillo. Colocar las hebras mas cortas al centro y una larga a cada lado, sujetar por la mitad con el clip de la tabla. Con las hebras largas hacer 20 nudos planos, alternado el nudo en forma de P y el nudo en forma de 4, envolviendo a las hebras del centro.
With dark gray yarn, cut 11 strands of 60 cm, one strand of 70 cm and leave one strand attached to the ball. Place the shortest strands in the center and one long one on each side, secure in the middle with the board clip. With the long strands, make 20 flat knots, alternating the P-shaped knot and the 4-shaped knot, wrapping the center strands.
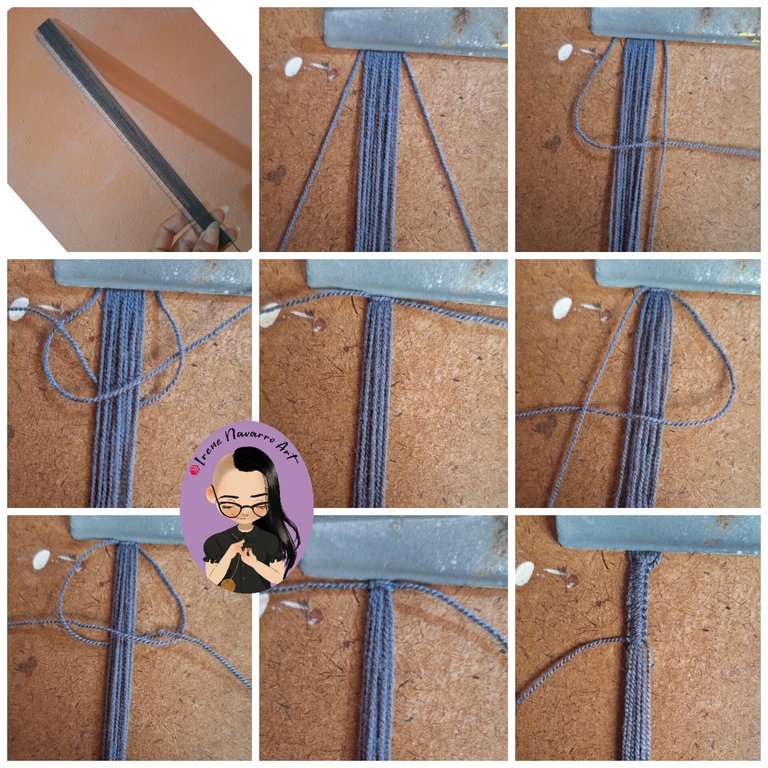

Doblar en forma de U y sujetar con el clip de la tabla, dejando la hebra unida al ovillo de primera a la izquierda, esa hebra va a servir como hilo anudador del color de fondo, las demás hebras van a ser los 25 hilos guía.
Hacer dos hileras de nudos con el hilo gris oscuro, en esta técnica el hilo anudador envuelve dos veces casa uno de los hilos guía de izquierda a derecha y en la siguiente hilera de derecha a izquierda y así sucesivamente, agregar el hilo gris claro para hacer los nudos correspondientes al pentagrama o estrella según indica el patrón, luego agregar el blanco, el naranja y el amarillo para la vela encendida, en los cambios de color los hilos anudadores se cruzan por la parte de atrás.
Make two rows of knots with the dark gray thread, in this technique the knotting thread wraps twice around one of the guide threads from left to right and in the next row from right to left and so on, add the light gray thread to make the knots corresponding to the pentagram or star as indicated by the pattern, then add the white, orange and yellow for the lit candle, in the color changes the knotting threads cross at the back.

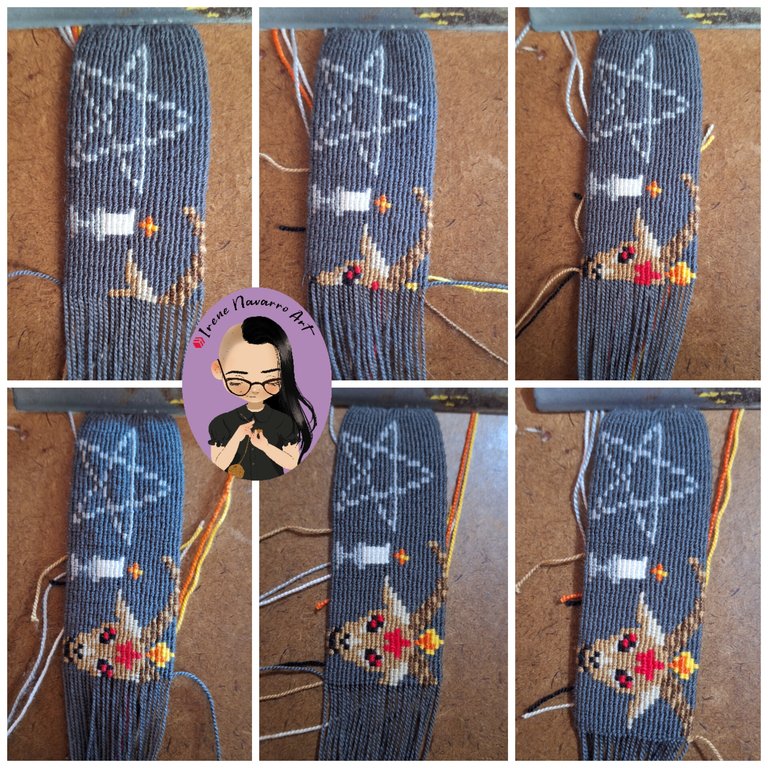
Para los cuernos usé hilo beige oscuro y marrón, mientras que para el rostro usé el mismo beige oscuro con beige claro, los ojos rojos con negro y los detalles en rojo.
For the horns I used dark beige and brown thread, while for the face I used the same dark beige with light beige, the eyes red with black and the details in red.

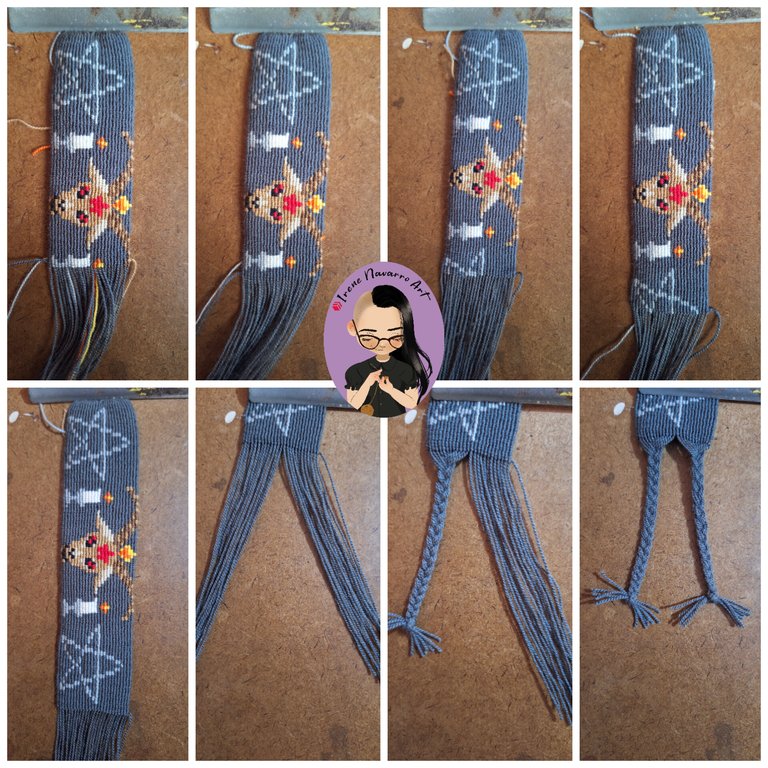
Luego del rostro se repite el mismo diseño de la vela y pentagrama en sentido opuesto, al finalizar se hacen nuevamente dos hileras de nudos solo con el hilo gris oscuro. Separar los hilos en dos partes y hacer dos trenzas.
After the face, the same design of the candle and pentagram is repeated in the opposite direction. At the end, two rows of knots are made again only with the dark gray thread. Separate the threads into two parts and make two braids.
Resultado / Result

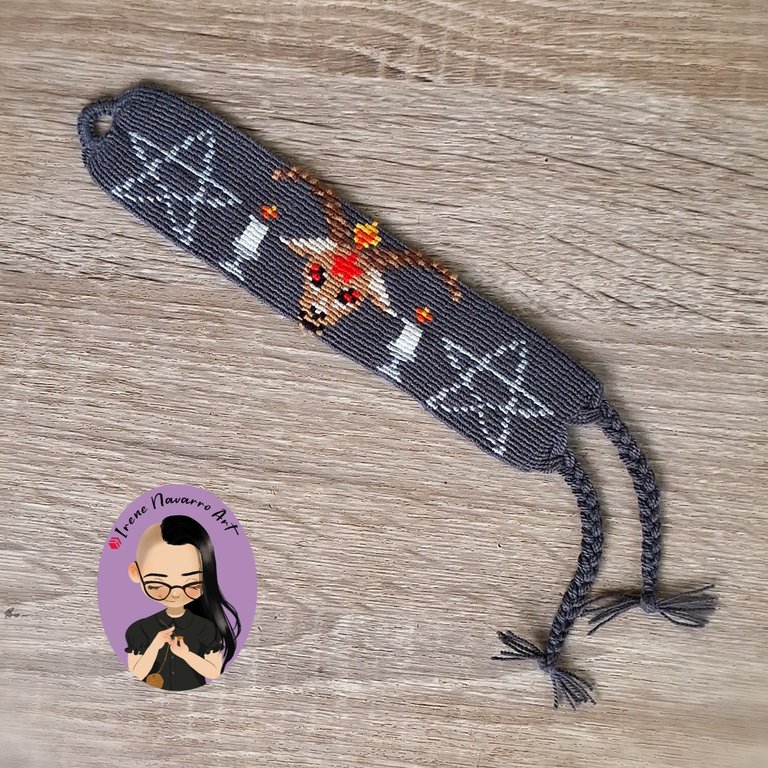
Imágenes tomadas con dispositivo Samsung A54. Portada editada en Inshot
Pictures taken with Samsung A54 device. Cover edited in Inshot

Espero les haya gustado. Les invito a leer mis próximas publicaciones y siempre estaré dispuesta a responder sus preguntas y comentarios, también pueden seguirme y contactarme en cualquiera de mis redes sociales. ¡Muchas gracias!
I hope you liked it. I invite you to read my next publications and I will always be willing to answer your questions and comments, you can also follow me and contact me on any of my social networks. Thank you!
Facebook
Twitter
Instagram
Ko-Fi
Discord: irenenavarroart#0361
Posted Using InLeo Alpha

Que nivel de detalle Irene, esto esta hermoso! 😍 me encanta 💖
Muchas gracias Yetsi 🖤
The rewards earned on this comment will go directly to the people( @irenenavarroart ) sharing the post on Reddit as long as they are registered with @poshtoken. Sign up at https://hiveposh.com.https://reddit.com/r/blogs/comments/1dfzxeq/baphomet_macrame_bracelet/
Siempre he vsito varias pulseras de macrame, pero nunca uno con tanta sutileza y detalle en su dibujo, muy muy bonita, saludos amiga
Muchas gracias por tus palabras ☺️ Saludos
Un brazalete más que es hermoso amiga, el brazalete que quisiera usar algún día, excelente tutorial, lo que hasta ahora no domino, es como incrustarle los hilos de colores para hacer las figuras. Gracias por compartir.
Muchas gracias, solo hay que cambiar el color del hilo anudador. Saludos ☺️
Gracias amiga, te queda tan perfecto, que uno se pregunta como lo hizo 👍😃
Ahora sí sacaste al verdadero Chamuco 😵💫😝🤘🏻 quedó pro
Jajajajajjaa pues sí, gracias 🥰
quedó demasiado bestial!
Muchas gracias 😊
Excelente trabajo, tanto este como otros que has compartido, tenes mucha habilidad y tendrías que estar muy orgullosa de las cosas que podes armar. Me encantan
Muchas gracias 😊 Saludos
Wow!! La verdad que quedó de maravilla, que nivel de detalle y simetría. Imagino que hay que superar un buen nivel de complejidad para lograr ese resultado. Ha quedado muy bello amiga. Saludos
Muchas gracias, todo es la práctica. Saludos ☺️
Has realizado un trabajo muy sorprendente con tu brazalete, me encanto como hiciste cada uno de los pasos, están muy bien explicados, gracias por compartir.
Escrito por lionsaturbix / Written by lionsaturbix
¡¡¡Buen trabajo!!! Gracias por publicar tu excelente contenido en Hive Diy.