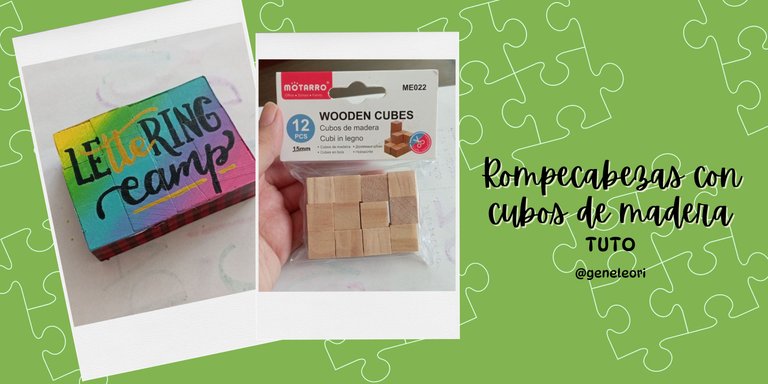
¡Hola hivers!💜
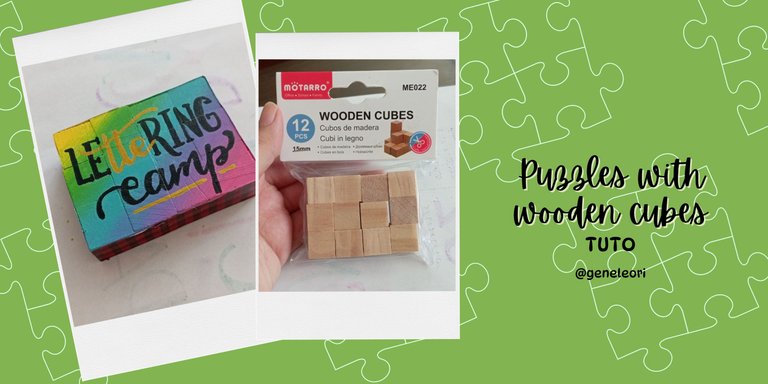
Espero que se encuentren bien y felices, queridos crafters. Para mi cumpleaños mi cuñada me regaló varias piezas de madera para pintar y decorarlas como quiera. Entre ellas estaba una serie de cubos de madera pequeños (de 1,5 cm) y que me parecían geniales para hacer tipo un rompecabezas. El punto fue que los guardé y mientras buscaba como hacer el lanzamiento de mi campamento de lettering los encontré y me decidí a pintar uno de sus lados. Les cuento que tal me fue:

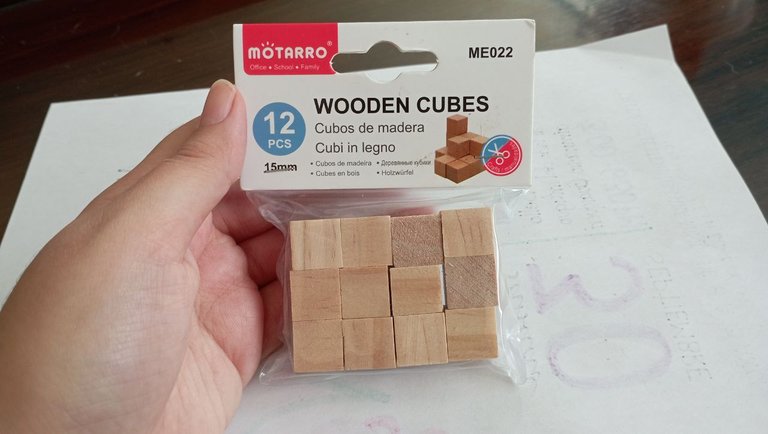
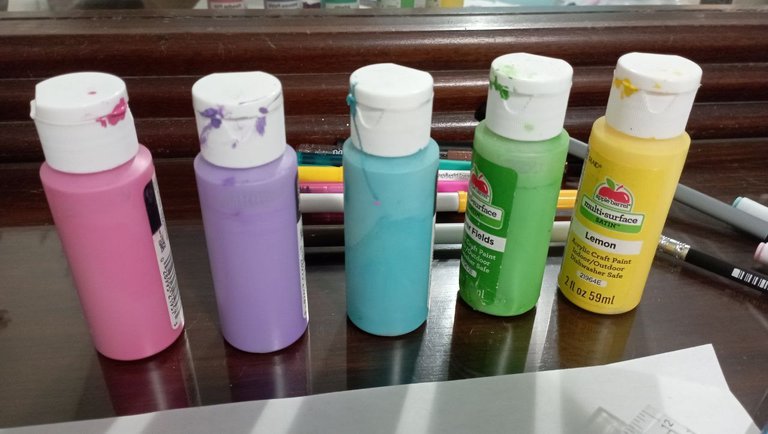
MATERIALES
Cubos de madera
Cinta o washi tape
Pintura acrílica
Marcadores de pintura acrílica
Barniz para pintura acrílica (yo use en spray)
PASO A PASO
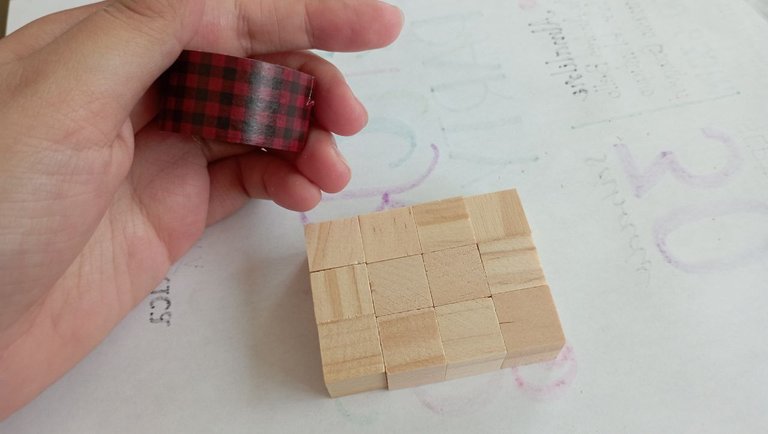
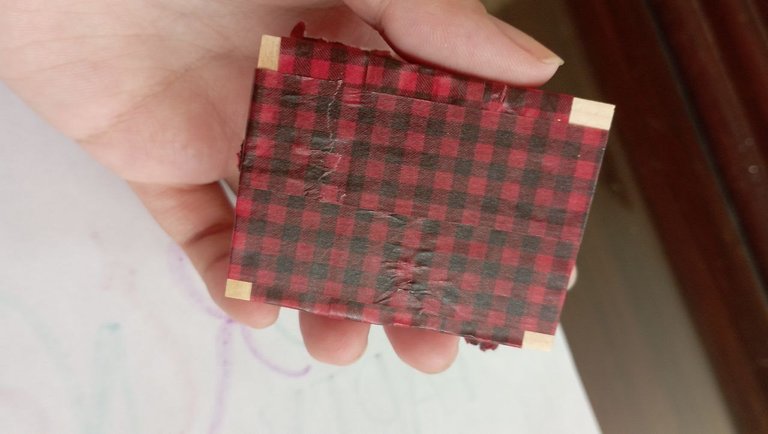
PASO 1
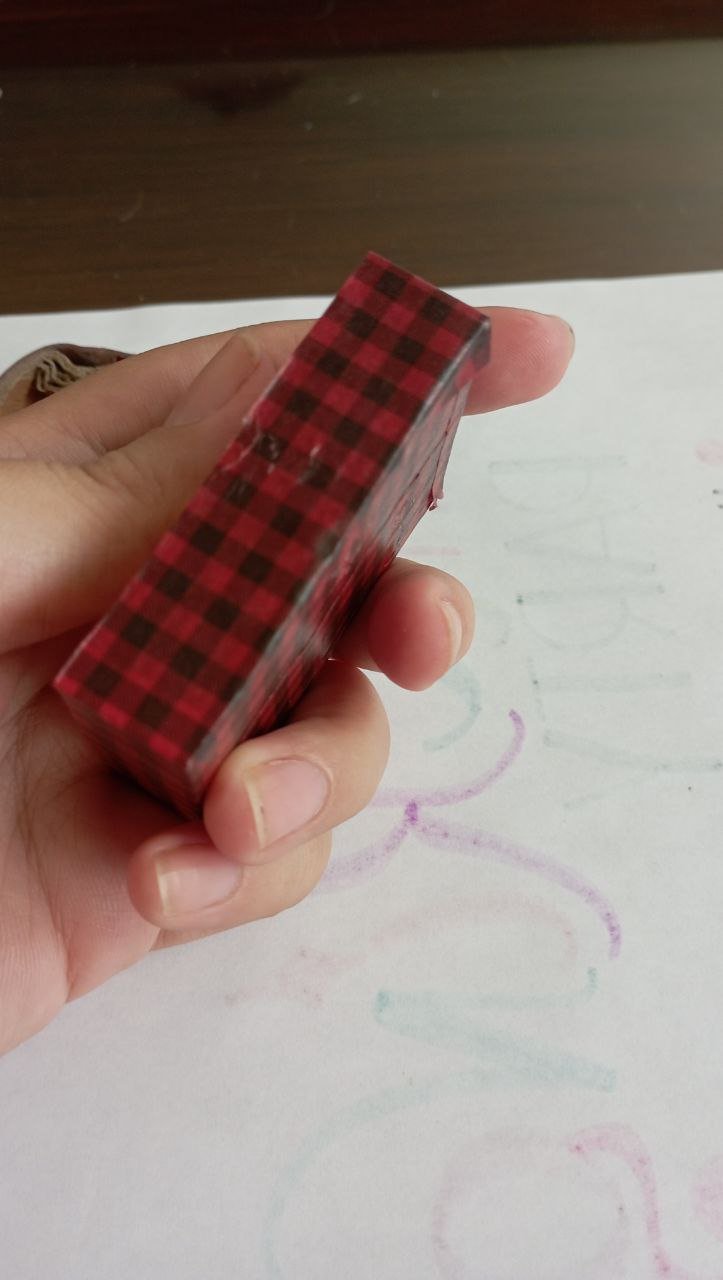
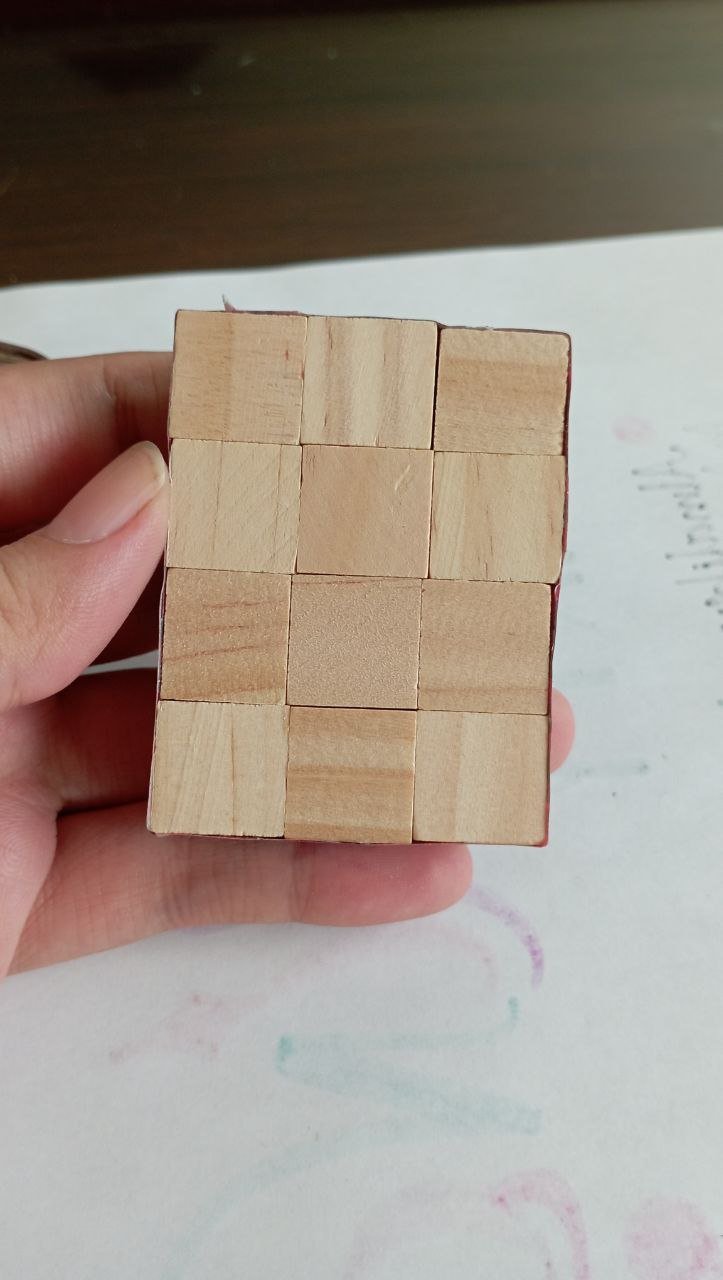
Lo primero fue revisar los cubos de madera y ordenarlos de tal forma de que encajaran entre sí. Al tenerlos ordenados, use un washi tape para unirlos. Literal los cubrí por completo, solo dejando libre la parte que iba a pintar, así los mantenía unidos mientras pintaba y protegía las otras caras de los cubos.
 |  |
|---|
|
PASO 2
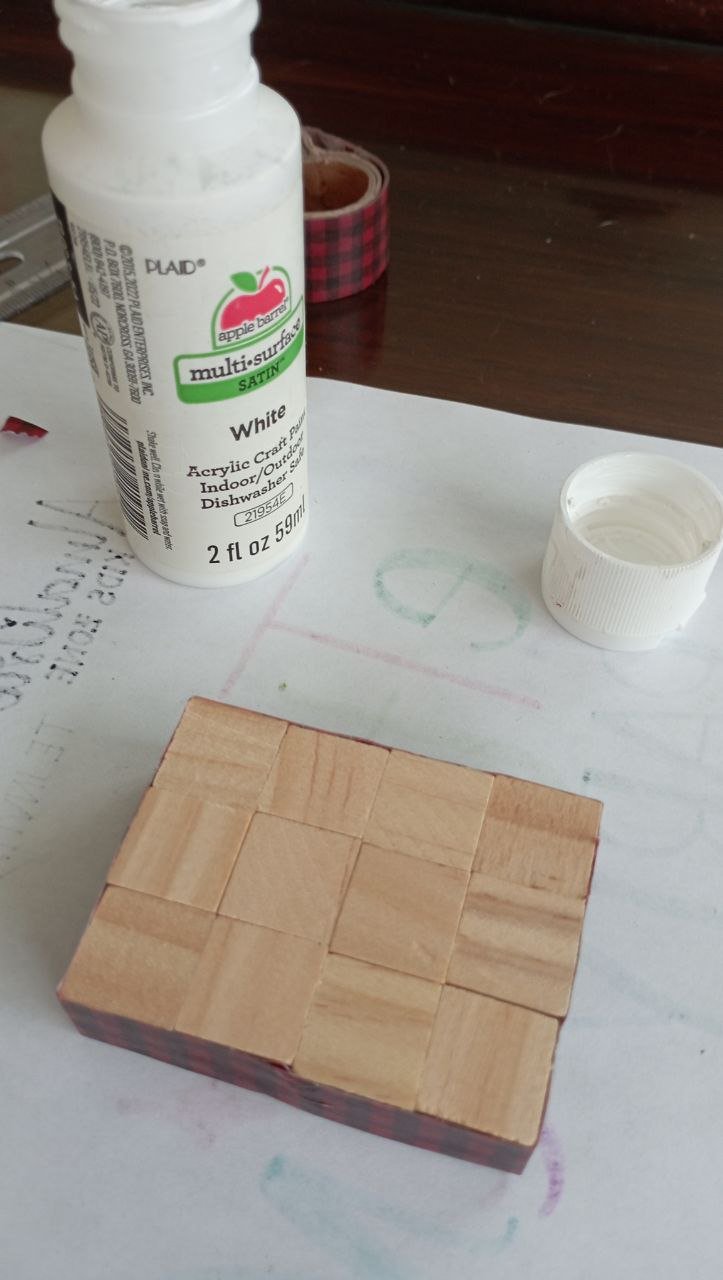
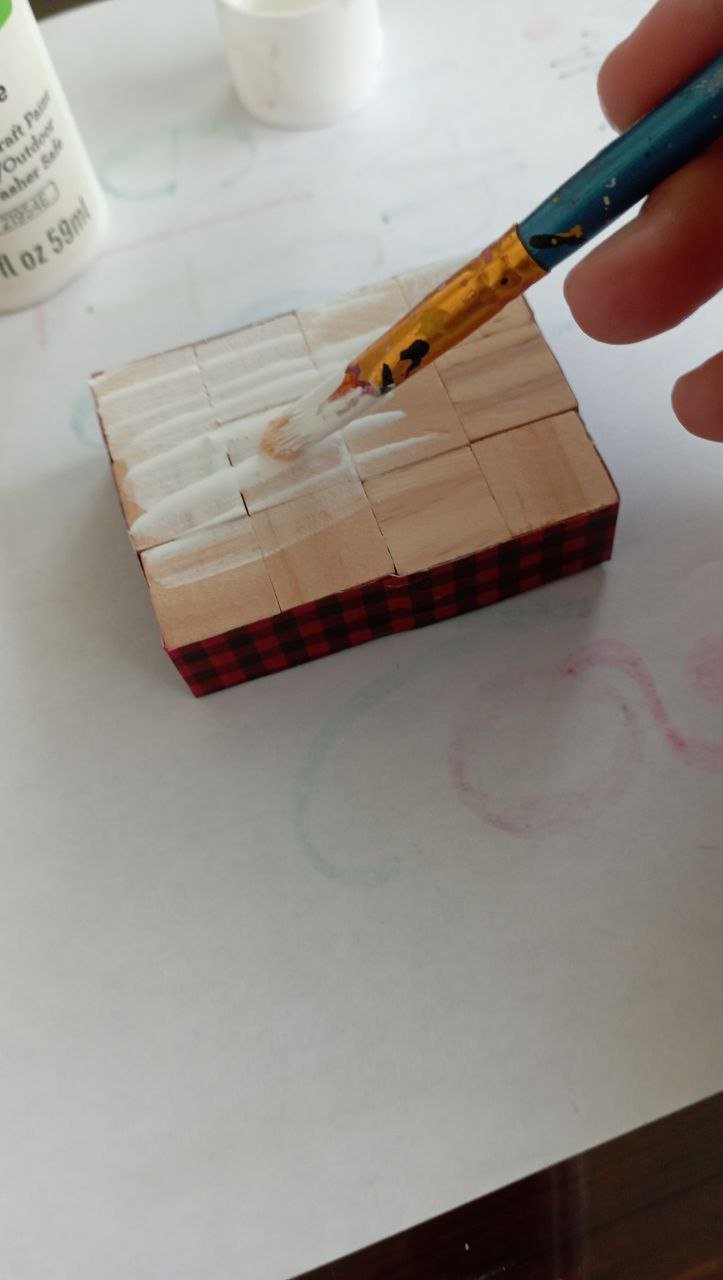
Con las otras caras de los cubos protegidas empecé a pintar la base. Para esto use color blanco para emparejar el fondo y luego poder ponerle color. Tuve que darle unas 3 capas y esperar que secara bien para continuar.
 |  |
|---|
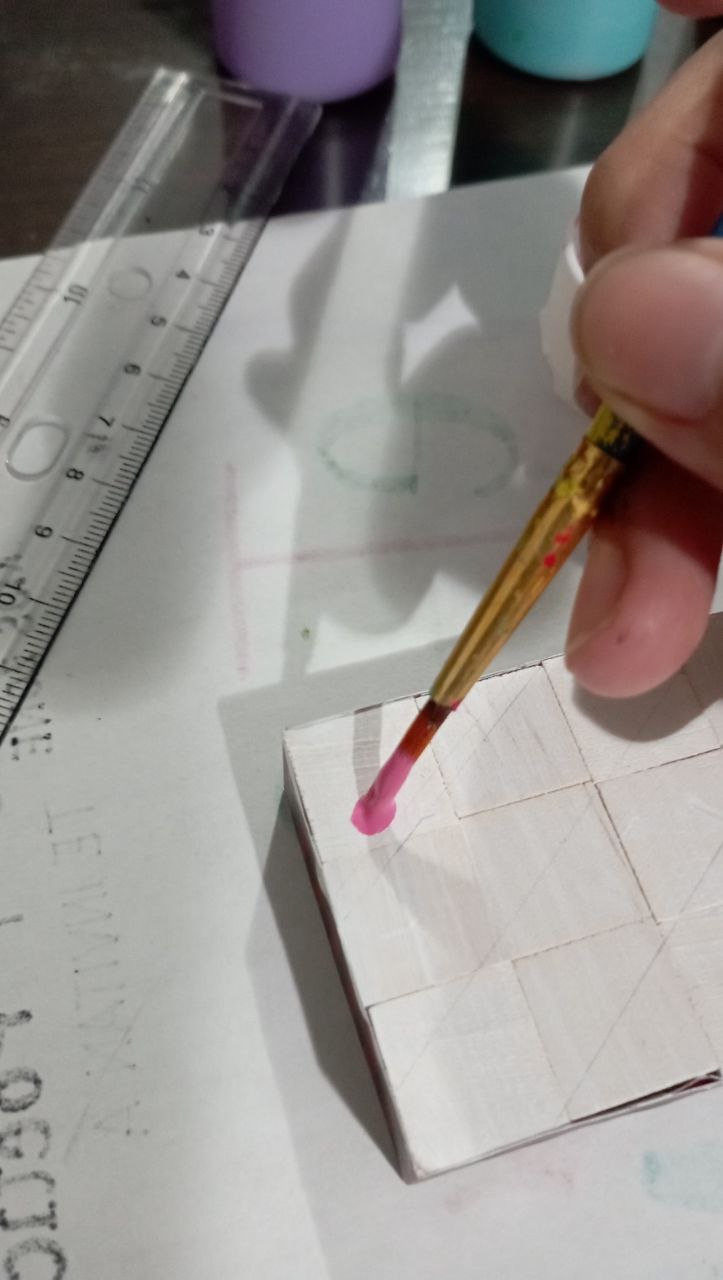
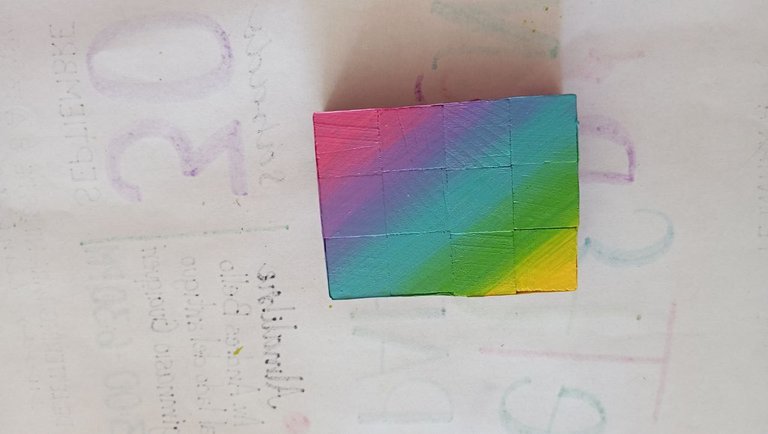
PASO 3
El fondo representaba un desafío, porque la idea era que cada cubo pudiera identificarse y así poder armar el rompecabezas. Asi que me decidi por hacer un arcoiris con tonos pasteles: amarillo, verde, turquesa, morado y rosado. Primero pinte 2 capas de cada tono por separado y para la tercera capa si trabaje el degrado entre cada uno de los tonos. Lo deje secar bien para continuar.
 |  |
|---|
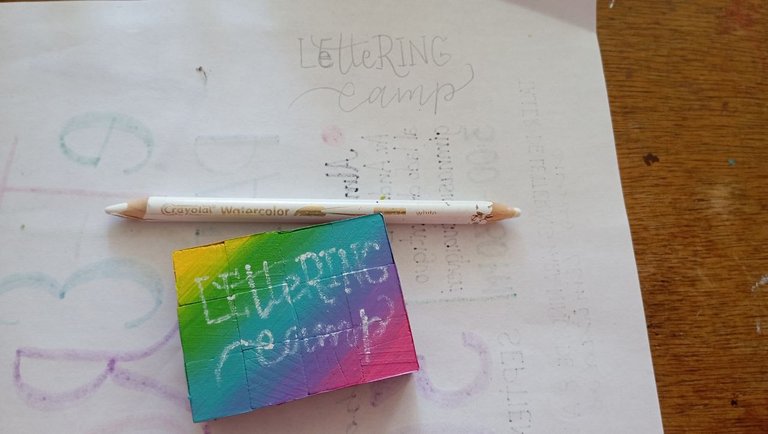
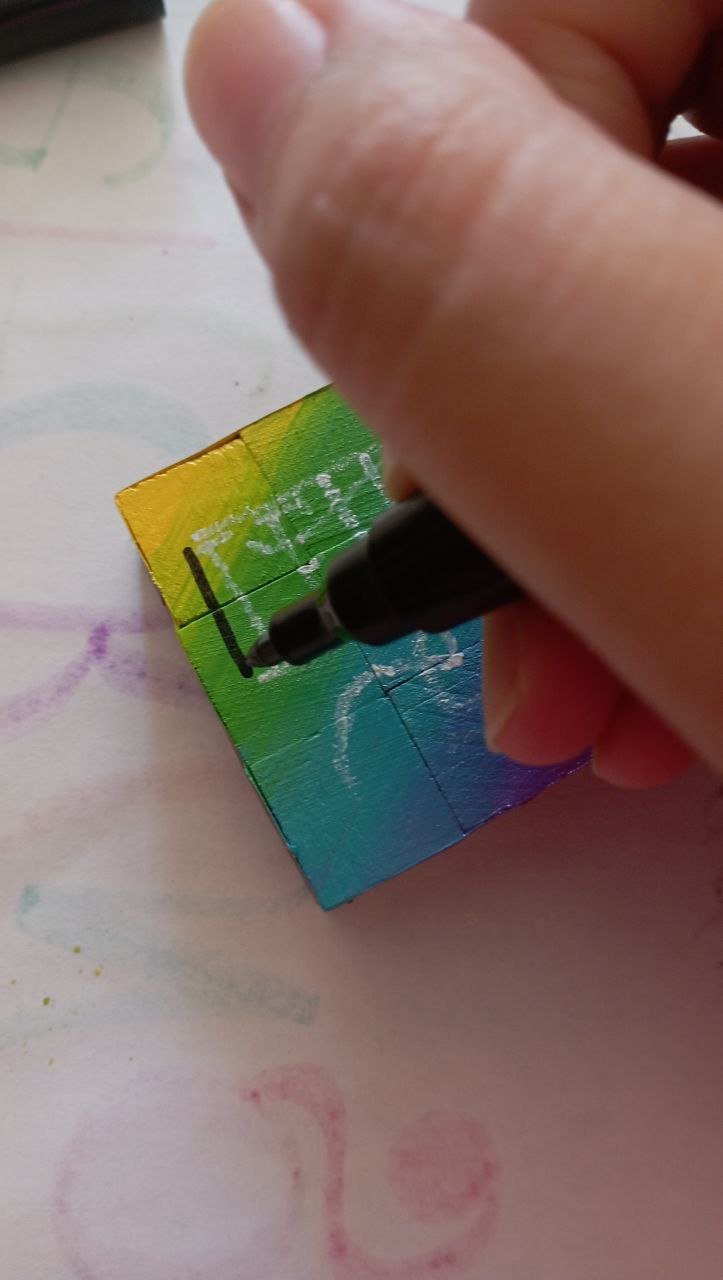
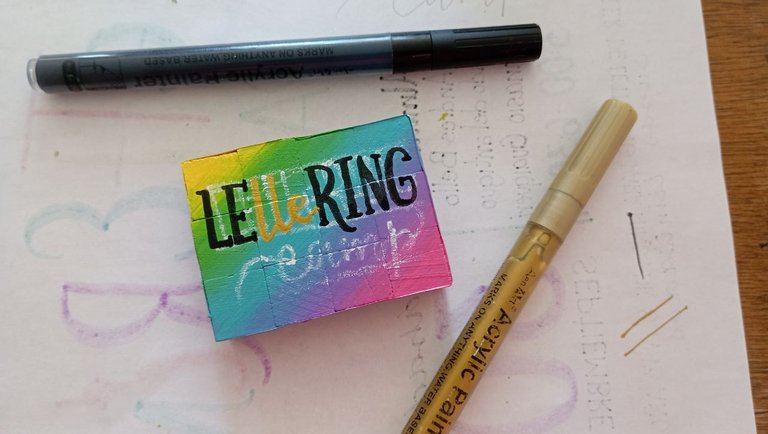
PASO 4
Ahora tocaba dibujar la frase: “Lettering camp” haciendo referencia al campamento de lettering, para esto use un lápiz acuarelable blanco, marcador de pintura acrilica negro y dorado. Para “Lettering” use una mezcla de letras serif y cursivas al estilo bounce (significa que pareciera que las letras bailan). En cambio, para “camp” use un estilo cursivo sencillo. Con el lápiz acuarelable hice una guía de las letras y para luego pasar los marcadores de pintura acrílica.
 |  |
|---|
 |  |
|---|
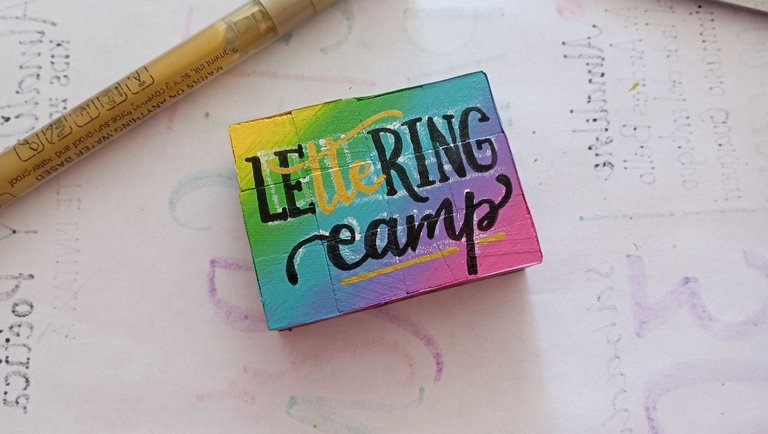
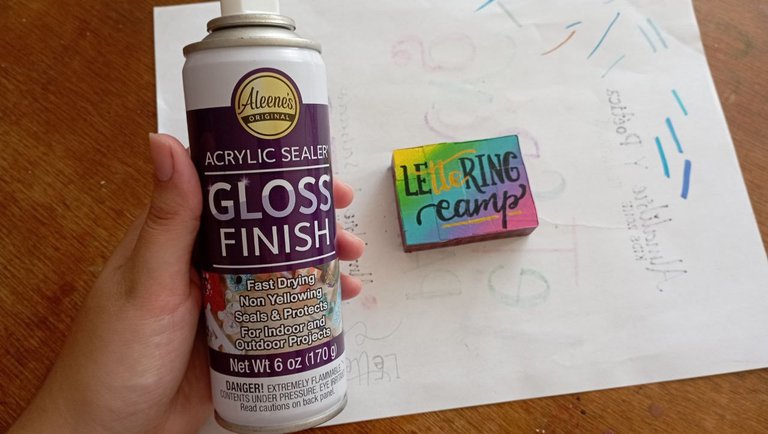
PASO 5
Espere al día siguiente para continuar, con un pañito húmedo limpie los restos de lápiz acuarelable y solo quedaba aplicar el barniz. Este que use es en spray, así que con solo rociarle un poco (ya que la superficie era pequeña) fue suficiente. Lo deje secar todo el día.
PASO 6
Con el barniz y la pintura seca, solo me quedaba despegar el washi tape. Admito que la parte fácil fue despegarlo, pero la pintura se filtró un poco en los laterales de los cuadrados del medio, así que con delicadeza los fui despegando.
PASO 7
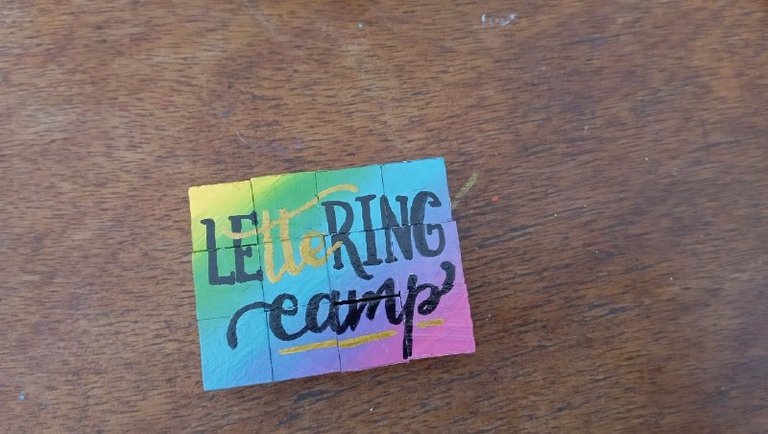
¡Rompecabezas listo!
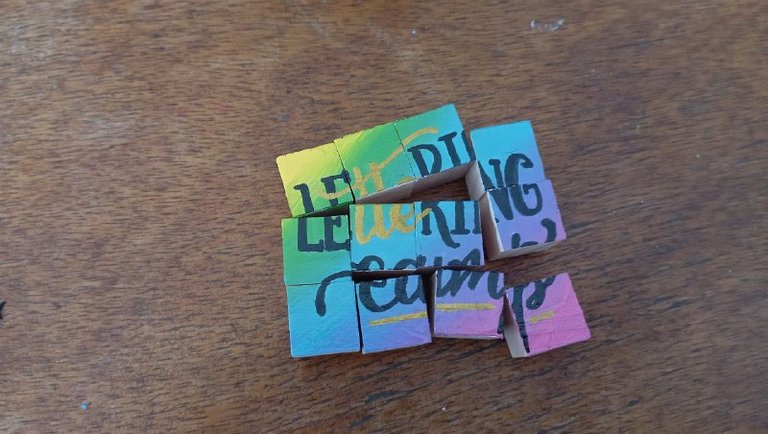
Una vez los despegue, grabe un video armando el rompecabezas para así ir anunciando lo que sería el campamento. Me gustó la idea, y creo que me hubiera gustado más si hubieran sido unos cubos mucho más grandes para poder hacer más letras y detalles.
Gracias por leerme
Con cariño, G.
Hi hivers! 💜
I hope you are well and happy, dear crafters. For my birthday my sister-in-law gave me several pieces of wood to paint and decorate as I wish. Among them was a series of small wooden cubes (1.5 cm) and that I thought were great to make a puzzle type. The point was that I kept them and while I was looking for a way to launch my lettering camp I found them and decided to paint one of their sides. I'll let you know how it went:
MATERIALS
Wooden cubes
Tape or washi tape
Acrylic paint
Acrylic paint markers
Acrylic paint varnish (I used spray paint)
STEP BY STEP
STEP 1
The first thing was to go through the wooden cubes and arrange them in such a way that they fit together. Once I had them in order, I used washi tape to join them together. I literally covered them completely, only leaving free the part I was going to paint, thus keeping them together while I painted and protecting the other sides of the cubes.
| |
|---|
|
STEP 2
With the other faces of the cubes protected I started to paint the base. For this I used white color to even out the background and then I could put color on it. I had to give it about 3 coats and wait for it to dry well to continue.
| |
|---|
STEP 3
The background represented a challenge, because the idea was that each cube could be identified and the puzzle could be put together. So I decided to make a rainbow with pastel tones: yellow, green, turquoise, purple and pink. First I painted 2 layers of each tone separately and for the third layer I worked the gradient between each of the tones. Let it dry well to continue.
| |
|---|
STEP 4
Now it was time to draw the phrase: "Lettering camp" referring to the lettering camp, for this I used a white watercolor pencil, black and gold acrylic paint marker. For "Lettering" I used a mix of serif and italic letters in a bounce style (meaning that the letters seem to dance). For "camp" I used a simple cursive style. With the watercolor pencil I made a guide for the letters and then I used the acrylic paint markers.
| |
|---|
| |
|---|
STEP 5
I waited for the next day to continue, with a damp cloth I cleaned the remains of the watercolor pencil and the only thing left to do was to apply the varnish. This one I used is a spray varnish, so just spraying a little (since the surface was small) was enough. I let it dry all day.
STEP 6
With the varnish and paint dry, I only had to peel off the washi tape. I admit that the easy part was peeling it off, but the paint seeped a little on the sides of the middle squares, so I gently peeled them off.
STEP 7
Puzzle ready!
Once I took them off, I recorded a video of me putting the puzzle together to announce what the camp would be like. I liked the idea, and I think I would have liked it better if the cubes had been much bigger so I could make more letters and details.
Thank you for reading me
With love, G..
FUENTE
Fotos: tomadas por mi desde mi redmi 10
Traducción: Deepl
SOURCE
Photos: taken by me from my redmi 10
Translation: Deepl

Hola amiga, primero que nada esos cubos de madera están muy buenos y creo que es la primera vez que lo veo y más aún de ese tamaña, así que fue un gran regalo. Además es increíble la creatividad y ese diseño qué hiciste, la cual le da un toque único y muy especial a cada uno de esos cubos, ahora cuentas con una nueva diversión. Gracias por compartirlo con nosotros.