Hi friends !!
Hola Amigos !!
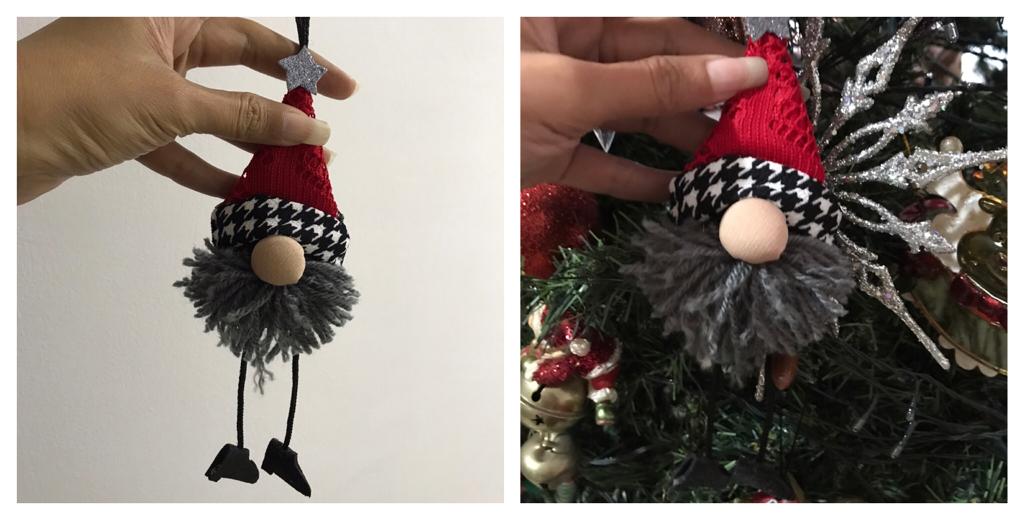
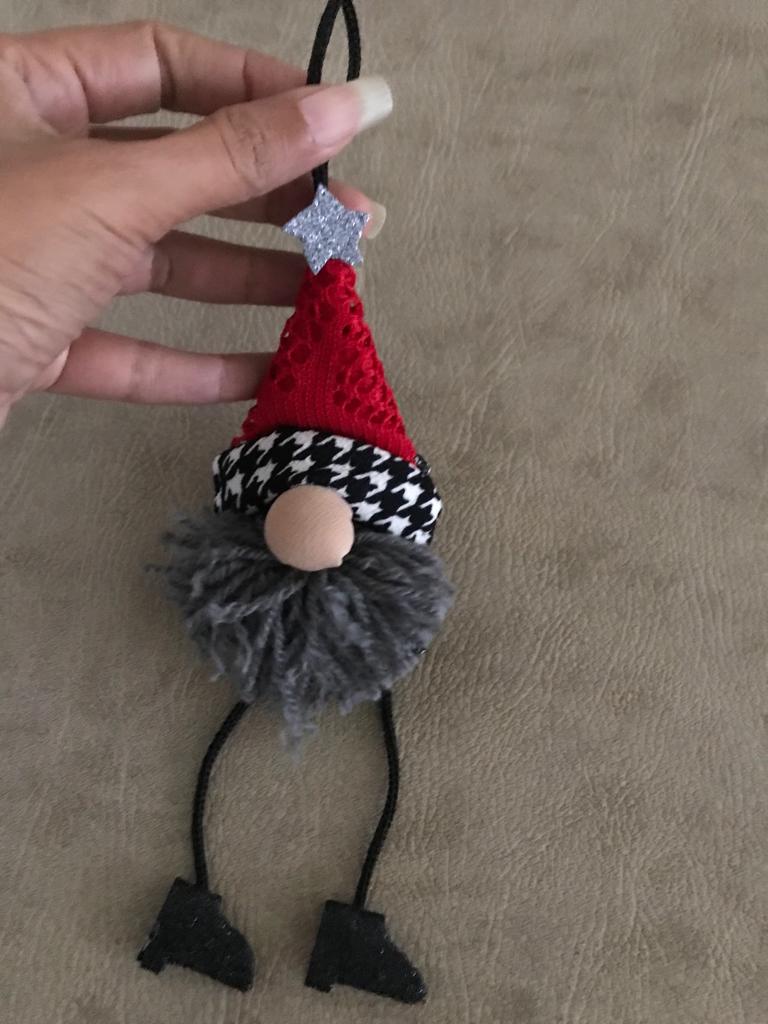
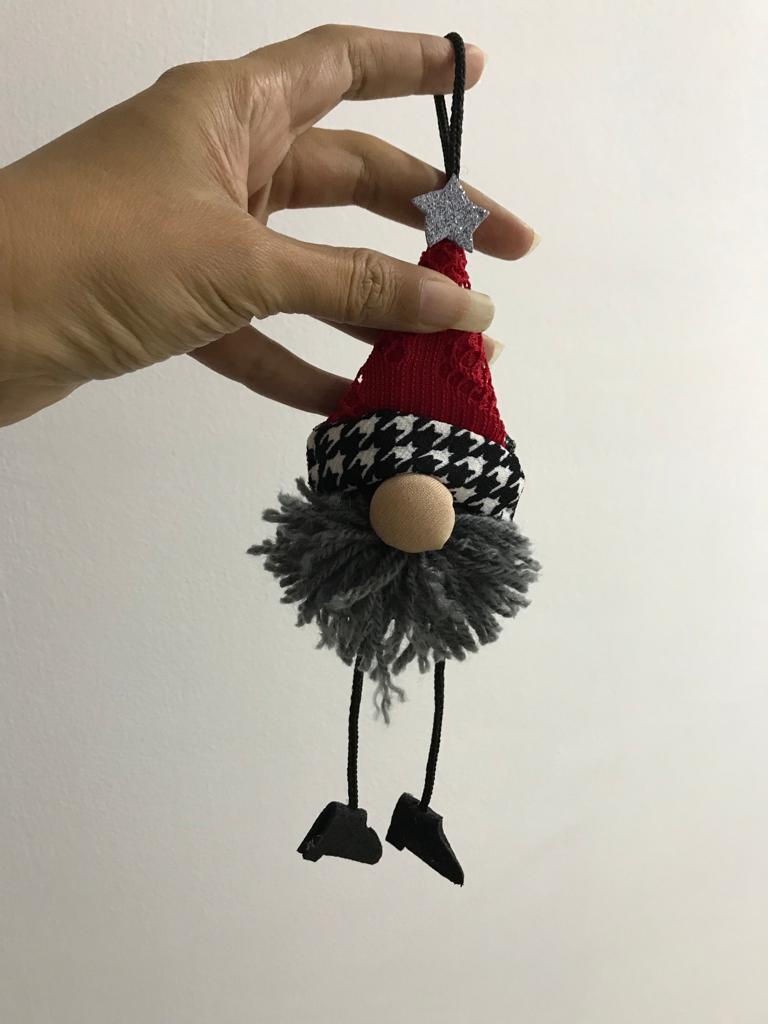
I love Christmas because I can give free rein to my imagination and create beautiful crafts. If you are thinking about how to decorate your home this holiday season with beautiful and cheap crafts that you can do at home yourself. Today I will show you how to make a decorative and cute Christmas elf in a few steps.
Me encanta la navidad porque puedo dar riendas a mi imaginación y crear lindas manualidades. Si estás pensando cómo decorar tu hogar en estas fiestas con hermosas y económicas manualidades que ustedes mismos puedan hacer en casa. El día de hoy les mostraré cómo realizar en pocos pasos un decorativo y lindo duende navideño.
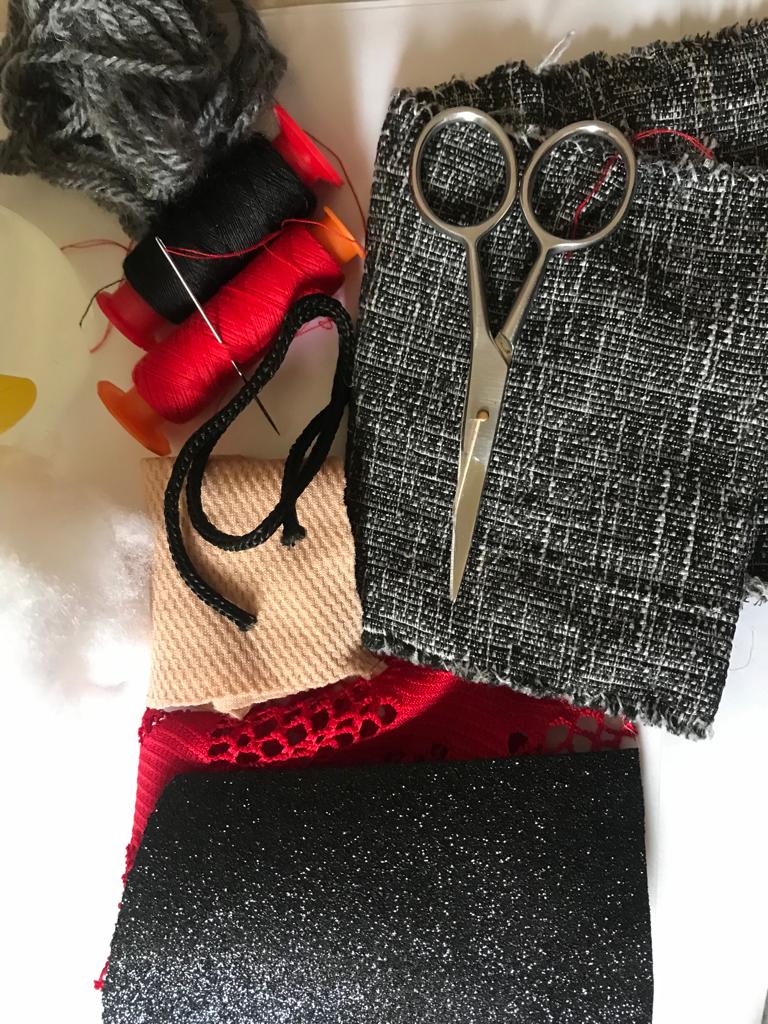
For it you will need the following materials:
Para el necesitarás los siguientes materiales:
• Small and large checkered fabrics (of the desired color).
•Red and beige fabric.
•Filling.
•Gray stamen.
•Thin black cord.
•Black and shiny gray foamy.
•Needle and thread.
•Scissors.
•Glue.
• Telas a cuadros pequeños y grandes (del color deseado).
•Tela roja y beige.
•Relleno.
•Estambre gris.
•Cordón delgado negro.
•Foamy negro y gris brillante.
•Aguja e hilo.
•Tijera.
•Pegamento.
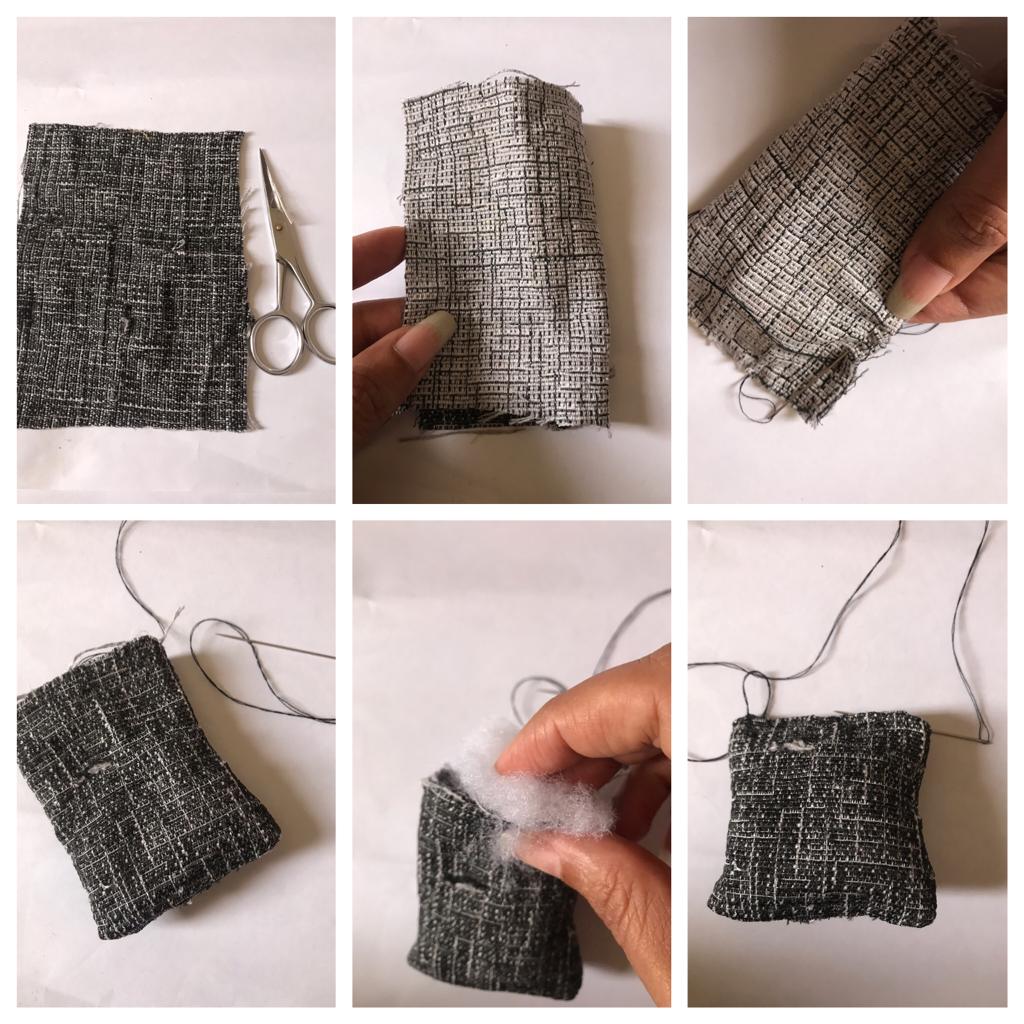
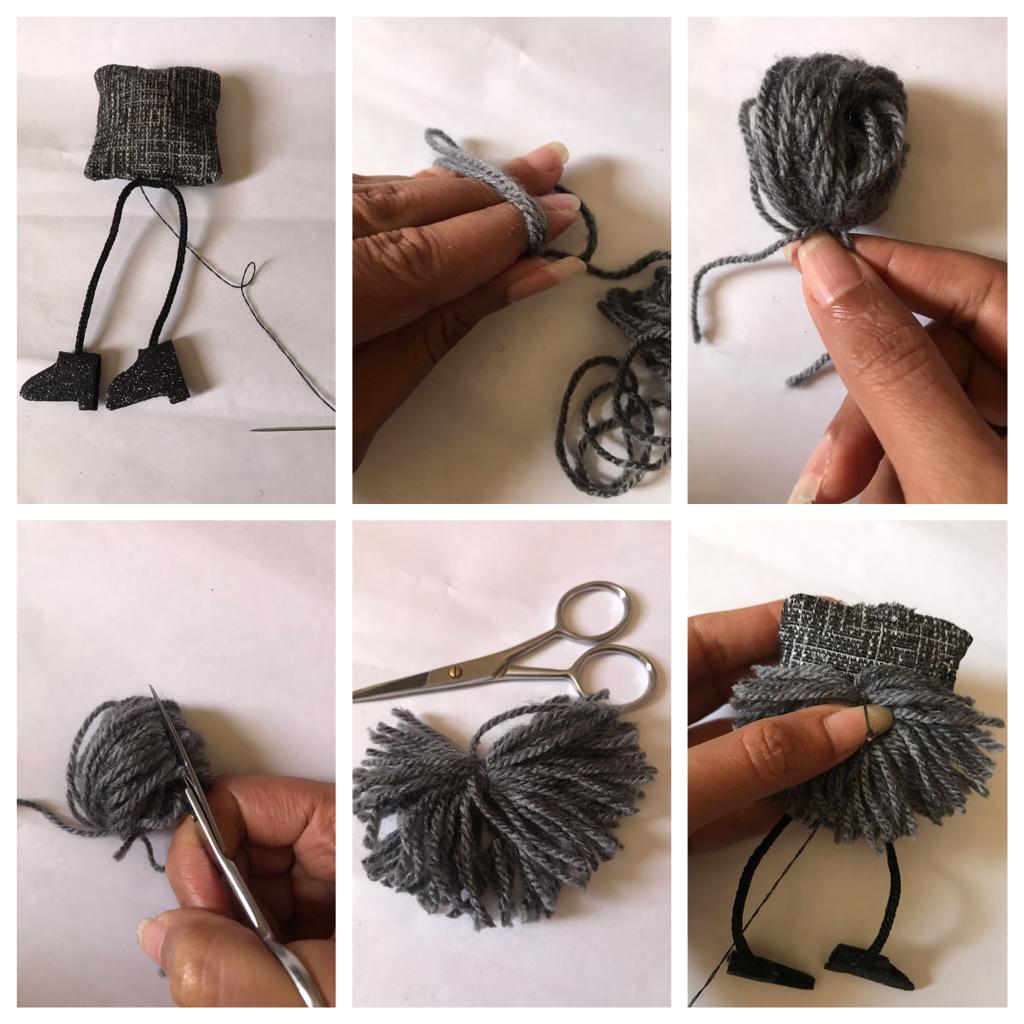
He started by cutting a rectangle of fabric (small squares) 14 centimeters wide and 18 centimeters high. He folded the back in half, made some stitches on two of its sides and left one end without sewing; to later turn the seam, fill and sew forming a cushion.
Inició cortando un rectángulo de tela ( a cuadros pequeños) de 14 centímetros de ancho y 18 centímetros de alto. Dobló a la mitad por la parte posterior, realizó unas puntadas en dos de sus lados y dejó si coser un extremo; para posteriormente dar vuelta a la costura , rellenar y coser formando una almohadilla.
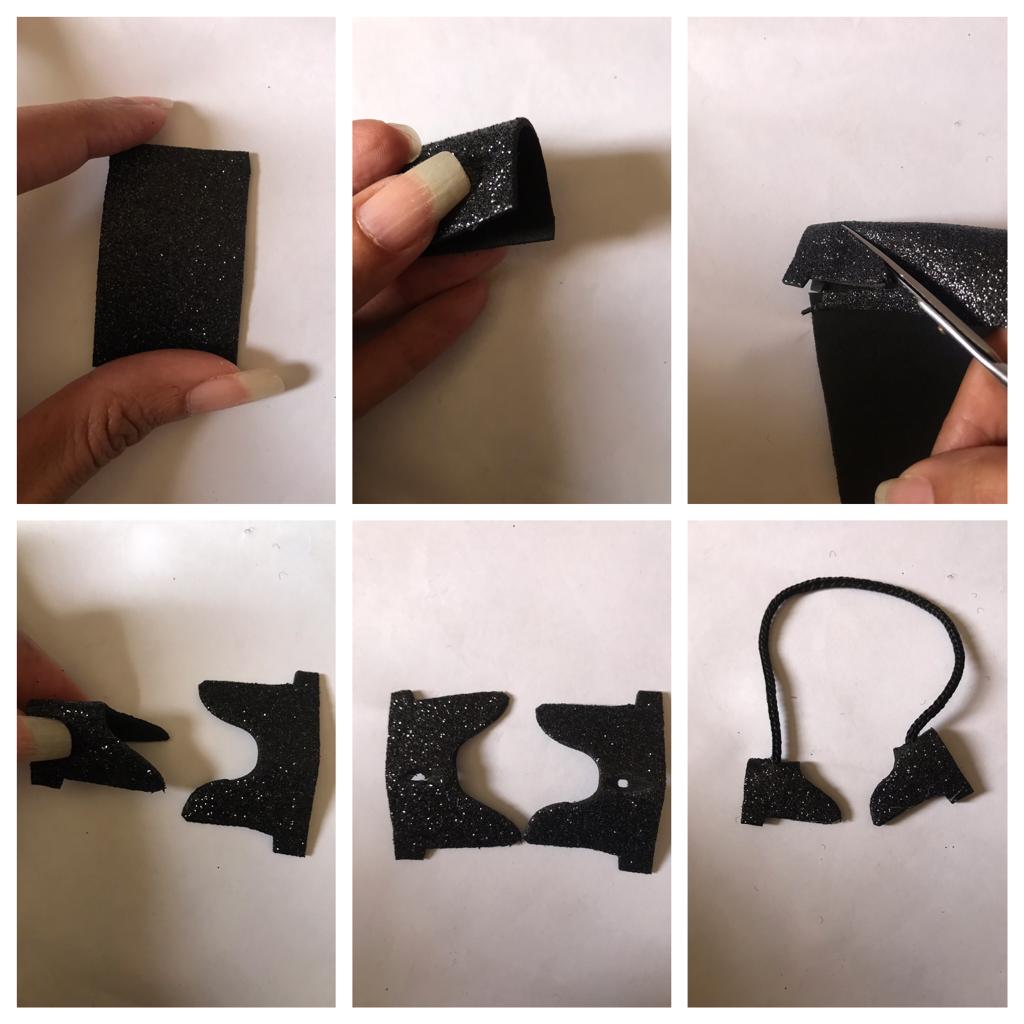
Then I cut a small rectangle (7 centimeters high and 4 centimeters wide) black foam, folded in half and proceed to shape a boot with scissors (follow the procedure to complete the pair; as shown in the figure). Open a small hole between both sides of the foamy boots (in each one of them). I thread the end of each piece of lace (16 centimeters long) through the holes and pin both sides of the boots together.
Luego corto un pequeño rectángulo (7 centímetros alto y 4 de ancho) foamy negro,dobló a la mitad y procedo a dar forma de bota con la tijera ( seguir el procedimiento para completar el par; tal como se observa en la figura). Abrir un pequeño orificio entre ambos lados de las botitas de foamy ( a cada una de ellas). Paso a través de los orificios el extremo de cada trozo de cordón(16 centímetros de largo) y fijo junto ambos lados de las botas.
Then I fix half of the lace with the boots to one of the sides of the pad (with stitches). He continued winding the gray thread between his fingers, forming a roll, passing a piece of thread inside it and knotting it to later cut its upper end and shape the Christmas elf's beard. Fixed it from the middle to the lower end of the pad (as shown in the figure).
Luego fijo la mitad del cordón con las botas a uno de los lados de la almohadilla (con puntadas). Continuó enrollando el hilo gris entre los dedos formó un rollo, paso dentro de él un trozo de hilo y anudó para posteriormente cortar su extremo superior y dar forma a la barba del duende navideño. Fijo esta de la mitad al extremo inferior de la almohadilla ( tal como se observa en la figura).
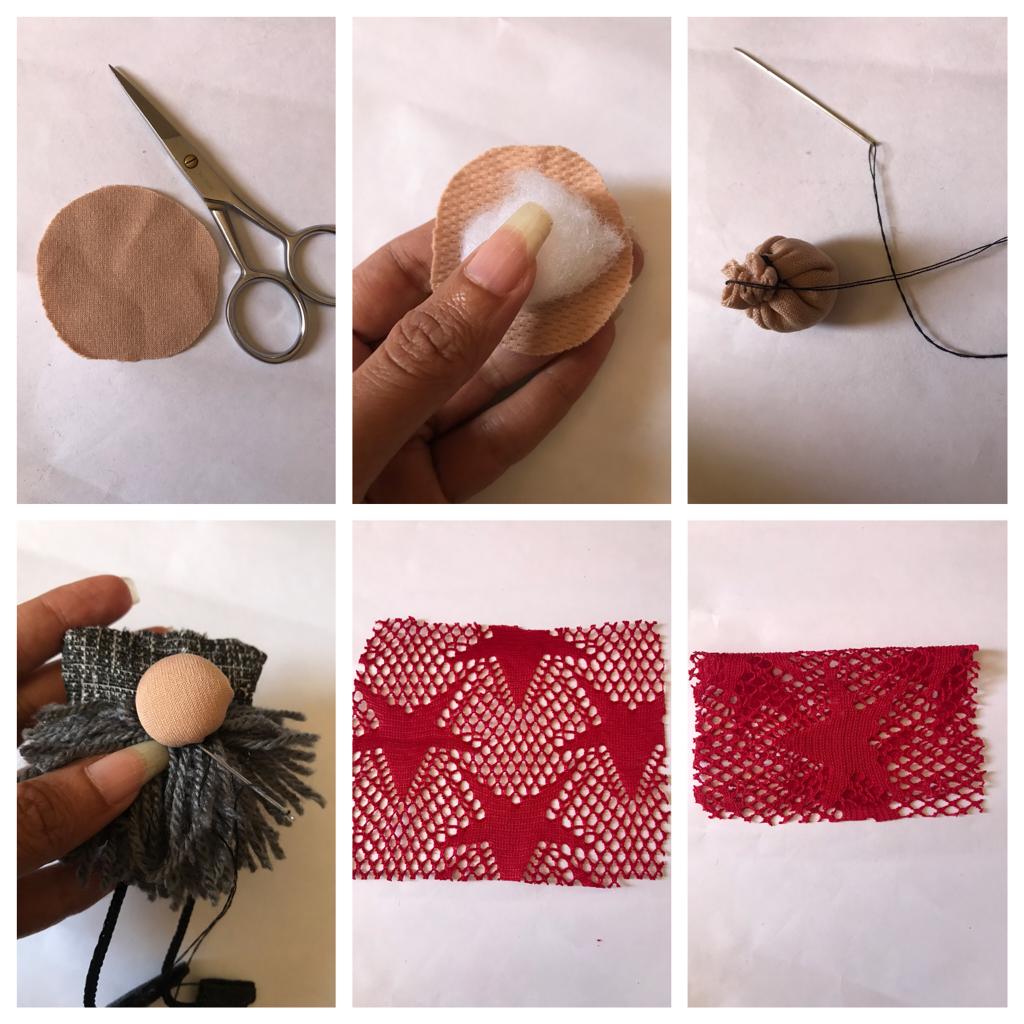
He continued cutting small circles 7 centimeters in diameter in the beige fabric. I placed a bit of padding in its center and with stitches around the edge I shaped its nose. Which I fixed to the center of the upper end of his beard. I cut a rectangle of red cloth (24 centimeters wide and 18 centimeters high); folded horizontally in half.
Continuó cortando pequeños círculos de 7 centímetros de diámetro en la tela beige. Ubicó un poco de relleno en su centro y con puntadas por el borde doy forma a su nariz. Que fijo al centro del extremo superior de su barba. Corto un rectángulo de tela roja ( 24 centímetros de ancho y 18 centímetros de alto); dobló horizontalmente a la mitad.
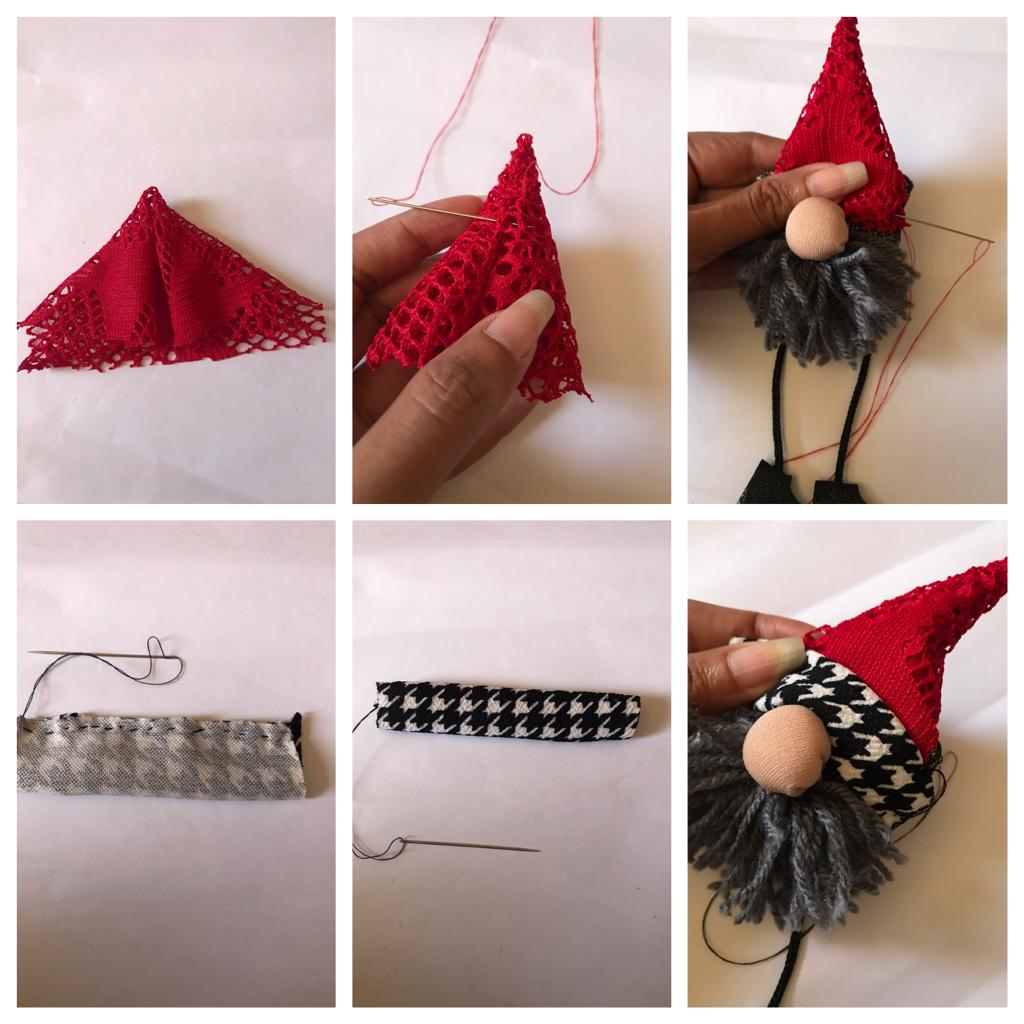
I continue to bring the stitches from the upper end to the center and made a vertical seam to shape the leprechaun's hat. With stitches I fix the hat on the pad; to the upper end of the nose. He went on to cut a strip of cloth (large checkered); a few centimeters longer than the width of the pad and 8 centimeters high; folded down the back horizontally in half, sew and turn the seam. Fix at the base of the cap.
Sigo llevando las puntadas del extremo superior al centro y realizó una costura vertical para dar forma al gorro del duende. Con puntadas fijo el gorro sobre la almohadilla; a el extremo superior de la nariz. Continuó cortando una tira de tela (a cuadros grandes); unos centímetros más larga que el ancho de la almohadilla y de 8 centímetros de alto; dobló por la parte posterior horizontalmente a la mitad, coser y dar vuelta a la costura. Fijar a base del gorro.
To finish, I cut a piece of cord and fix its ends to the upper end of the hat. I cut a small star in the gray foam and fix it to the upper end of the hat to the Christmas elf to decorate and give a touch of shine.
Para finalizar corto un trozo de cordón y fijo sus extremos al extremo superior del gorro. Corto una pequeña estrella en el foamy gris y la fijo al extremo superior del gorro al duende navideño para decorar y dar un toque de brillo.
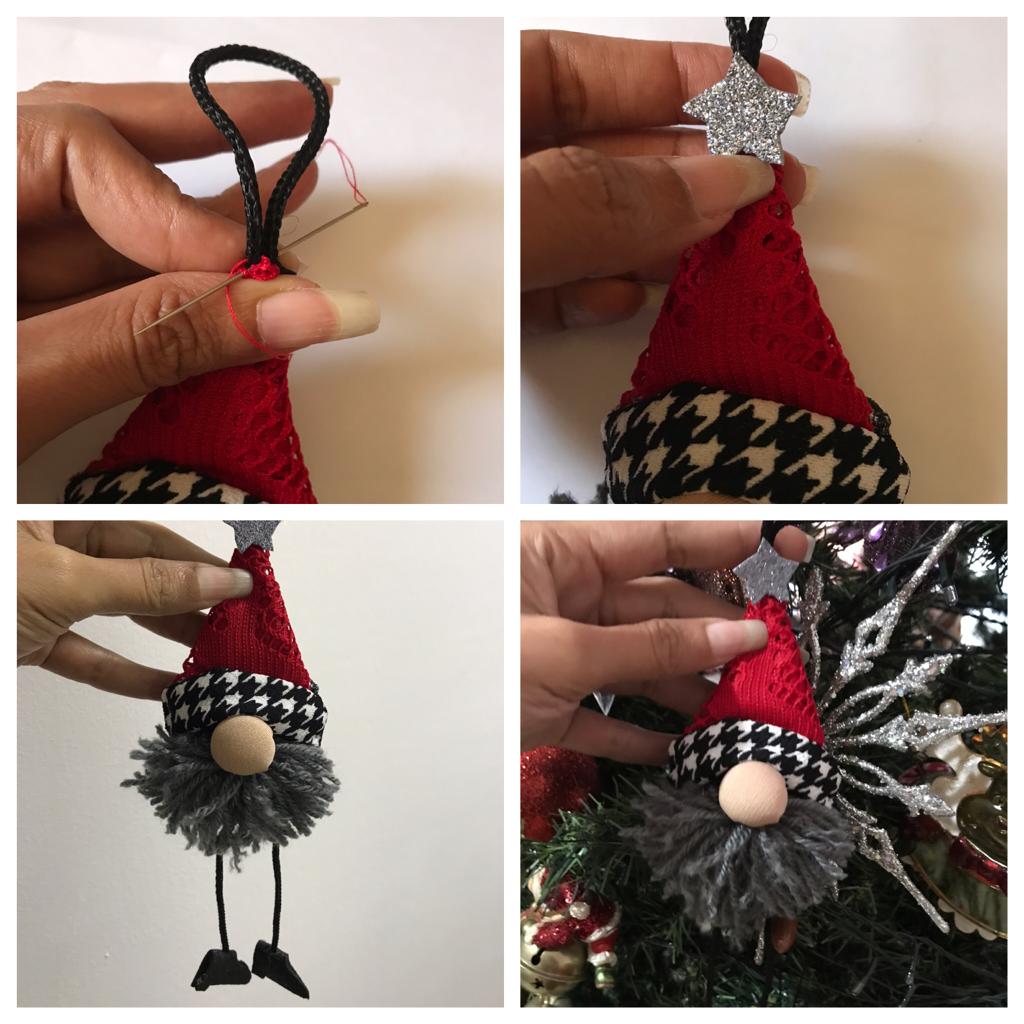
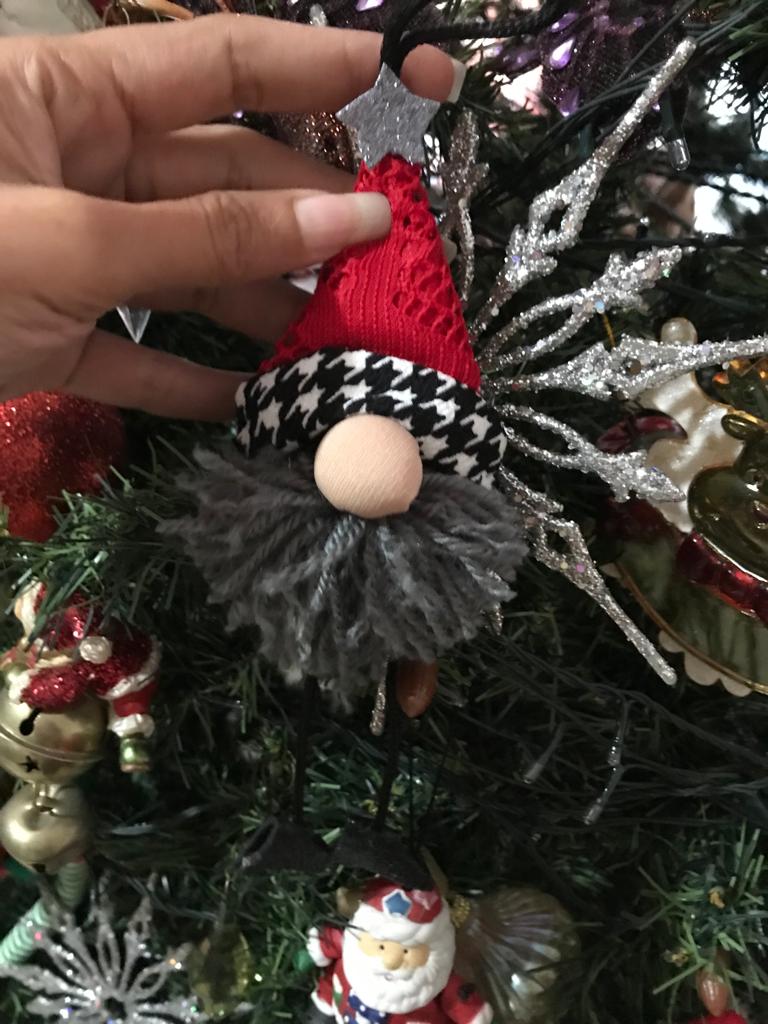
This decorative and cute Christmas elf. It is a beautiful craft that you can enhance yourselves by following this tutorial and give a beautiful Christmas touch to your home.
Este decorativo y lindo duende navideño. Es una hermosa manualidad que podrán realzar ustedes mismos siguiendo este tutorial y dar un bello toque navideño a su hogar.
Until a next opportunity.
Hasta una próxima oportunidad.
The photos in this article are my own and the grids were made using the incollage application; the translation of the article using the Google translator.
Las fotos de este artículo son de mi autoría y las cuadrículas fueron realizadas utilizando la aplicación incollage; la traducción del artículo usando el traductor de Google.
Está hermoso el adorno ❤️, quedará precioso en nuestros arbolitos 🎄
Muchas gracias amiga!!! Espero lo hagas para adornar tu árbol en navidad
Adoro estos Gnomitos de navidad! nos has enseñado un paso a paso muy sencillo para lograrlo voy hacer unos cuantos para decorar mi árbol.
Me alegra te guste mi trabajo… mil gracias 😊
The rewards earned on this comment will go directly to the people( @equipodelta ) sharing the post on Twitter as long as they are registered with @poshtoken. Sign up at https://hiveposh.com.
Gracias por su gran apoyo!!!
Muy lindo te quedó este duende. De verdad que parece un adorno que se hace rápido, pero si nos ponemos a hacer unos 20 llevará algo de tiempo. Igual me encantan !!!
Puedes hacerlo con tiempo, pero son muy fáciles de hacer… me alegra te guste
Que lindo este gnomo y que chistosas sus piernitas flaquitas jaja me gustó mucho! 🤗❤️
es demasiado simpático...gracias!!! me alegra te guste
Hahaha es súper cuchiiii y gracioso me encanta 🥺🤍
Este diseño de adorno siempre me ha gustado demasiado, está demasiado adorable 🎄🎄🎄🎄
es un diseño muy lindo y divertido ideal para estas navidades
Hola @bothanikha. Lindo trabajo, te felicito. ¡Saludos!
gracias amiga... me alegra te guste mi trabajo...saludos
Hermoso
gracias amiga!!!