Últimamente me la vivo full que los dias se me pasan volando y no me había dado cuenta que Halloween esta más cerca que nada, no es que ame con locura o celebre esta fecha como tal, pero admito que me gusta parte de sus decoraciones y disfraces, por ello aunque por muy pequeña quise elaborar una decoración para lápices con esta temática, sin más por aqui les muestro el paso a paso ✨🧟♀️
Hello creative friends! How are you? I hope you are doing well and that your day has been wonderful, we are doing very well around here thank God.
Lately I live full that the days fly by and I had not realized that Halloween is closer than anything, not that I love madly or celebrate this date as such, but I admit that I like part of their decorations and costumes, so although very small I wanted to develop a decoration for pencils with this theme, without further ado here I show you the step by step ✨🧟♀️
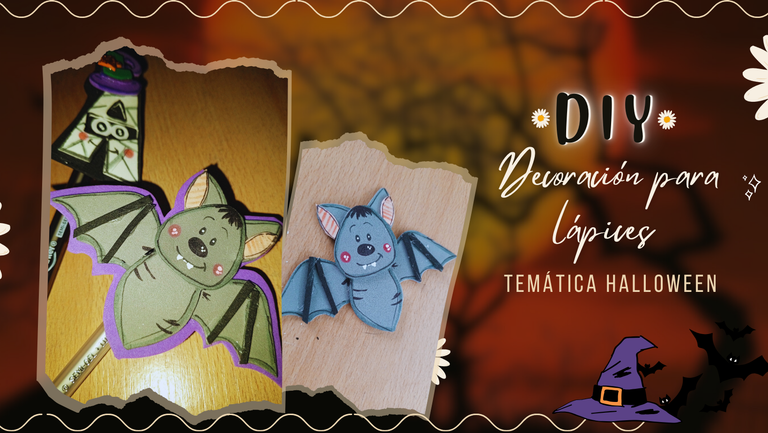

Materiales:
- Foami liso colores: Gris, blanco, negro, morado
- Marcadores
- Pintura al frío color blanca
- Silicón líquido
Materials:
- Plain Foami colors: gray, white, black, purple.
- Marker pens
- Cold paint in white color
- Liquid silicone

Paso a Paso | Step by Step
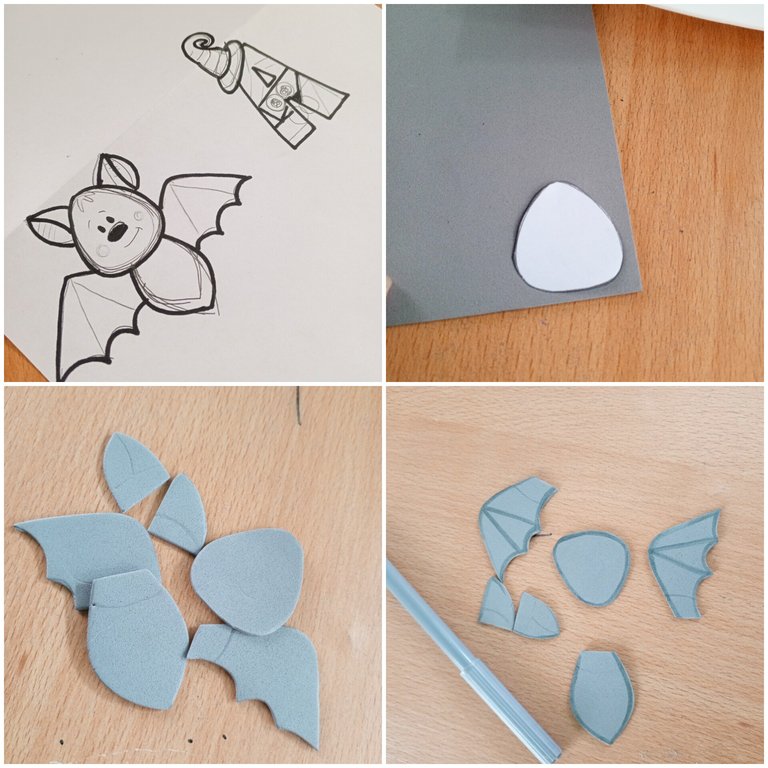
✨ En una hoja blanca (un retazo) realice el dibujo de las decoraciones que queria, que básicamente era un vampirito y una A con estilo de Momia y bruja, luego utilicé estos mismos como patrones para marcar en el foami, comenzando por hacer el vampiro, y la mayoria de sus piezas (por no decir todas) debian ser plasmadas en foami gris para luego difuminarlas con marcador gris.
✨ On a white sheet (a scrap) I made the drawing of the decorations I wanted, which basically was a little vampire and an A with Mummy and witch style, then I used these as patterns to mark on the foami, starting by making the vampire, and most of his pieces (if not all) were to be shaped in gray foami and then blurred with gray marker.
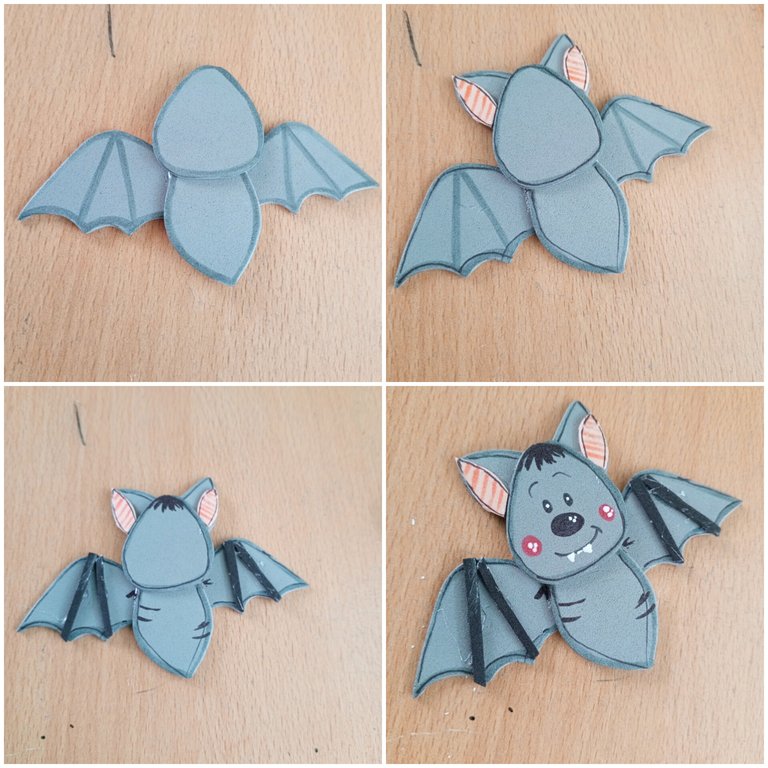
✨ Luego pegue cada pieza en su lugar y con un marcador negro punta extra fina realicé un delineado (nada perfecto) a todo el vampirito, incluso a la parte interna de las orejas que las realice con un retazo de foami color salmón, seguidamente corté dos tiras muy mínimas en foami negro y pegue en la división de sus alas.
✨ También con marcador negro le realicé una especie de cabello, los ojitos, la nariz y boca; para con pintura al frio darle un poco de luz y realizar unos mini colmillos.
✨ Then I glued each piece in its place and with an extra fine black marker I made an outline (nothing perfect) to the whole vampire, including the inner part of the ears that I made with a piece of salmon-colored foami, then I cut two very minimal strips in black foami and glued in the division of its wings.
✨ Also with black marker I made a kind of hair, eyes, nose and mouth; to give it a little light with cold paint and make some mini fangs.
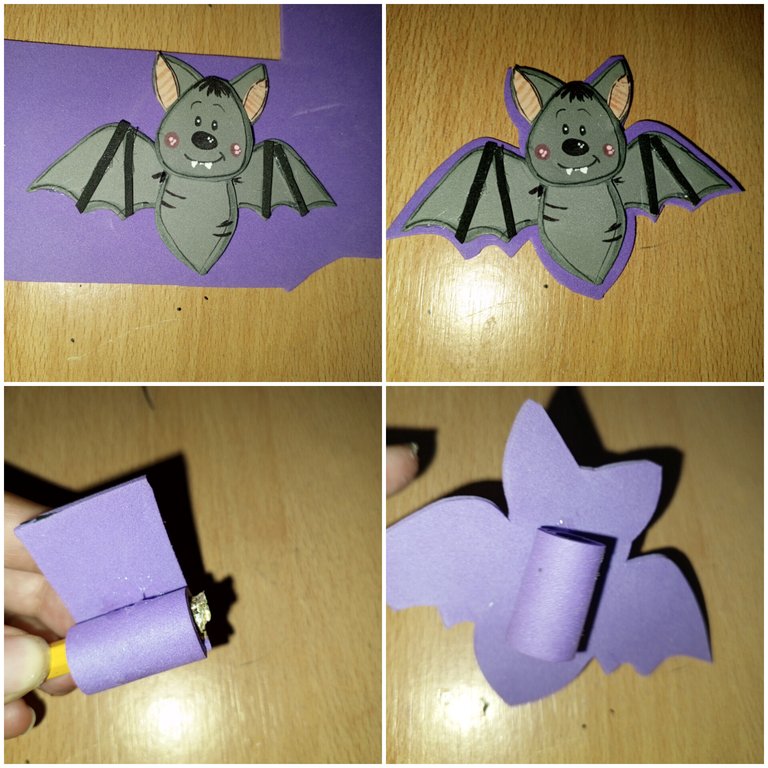
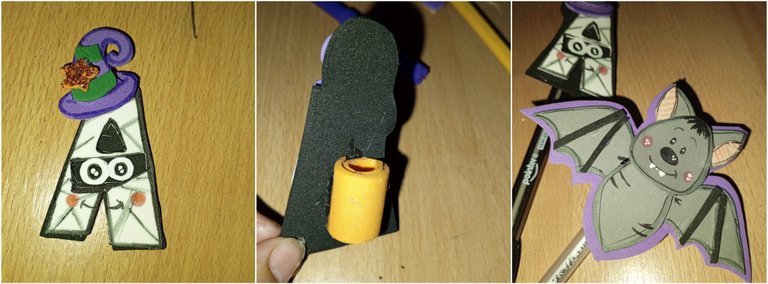
✨ Una vez listo, pegue sobre foami morado para recortar dejando un pequeño borde y utilizando una tira de foami y ayuda de un lápiz, le di forma a un cilindro con la medida justa, una vez seco por su ranura pegue a la parte trasera sel vampiro, culminando asi esta primera decoración.
✨ Once ready, paste on purple foami to cut leaving a small edge and using a strip of foami and the help of a pencil, I gave shape to a cylinder with the right size, once dry through its groove glue to the back of the vampire, thus culminating this first decoration.
✨ Para la inicial "A" con estilo de momia, recorté dos letras A, una blanca y una negra a diferencia que a la blanca le hice corte donde iria la cara (ojos de la momia), luego pegue una sobre otra y con marcador gris y negro realice detalles, además hice un par de ojitos y pegué y como extra un sombrero de bruja.
✨ For the initial "A" with mummy style, I cut out two letters A, one white and one black, but I cut the white one where the face (mummy's eyes) would go, then I glued one over the other and with gray and black marker I made details, I also made a pair of eyes and glued and as an extra a witch's hat.
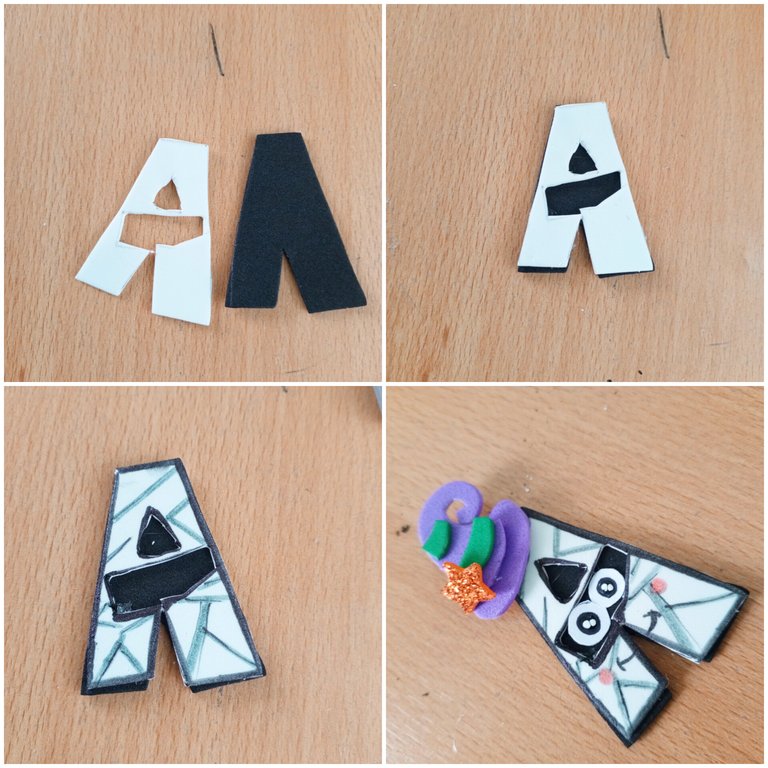
✨ Por último repeti el proceso tal cual cómo con el vampiro haciendo un cilindro de foami para sujetarse al lapiz, culminando asi con estas decoraciones tenebrosasss👀✨
✨ Finally, repeat the process as with the vampire by making a foami cylinder to attach to the pencil, culminating with these spooky decorations.

Resultado | Result
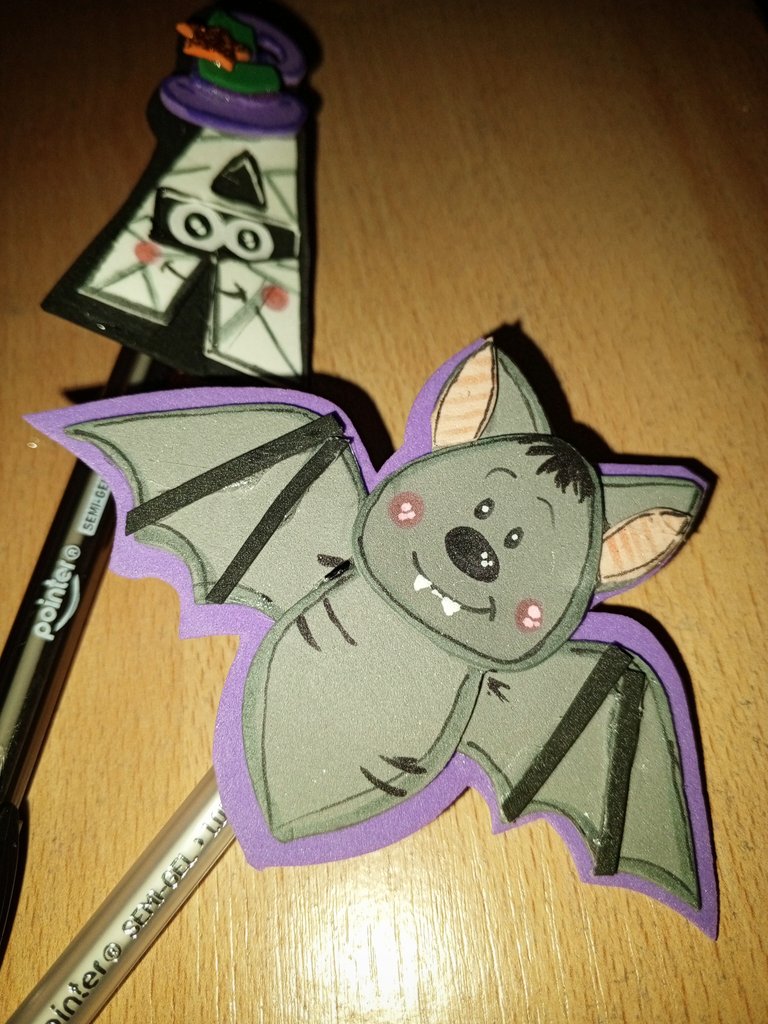
Hace mucho que no hacia alguna decoración para esta fecha y aunque no fueron de mis favoritas, si me gustaron mucho y más el hecho de poder darle lq forma que queria a la A.
Sin más amigos, me despido hasta una proxima oportunidad ✨👋🏻🩷
It's been a long time since I made a decoration for this date and although they were not my favorite, I liked them a lot and even more the fact of being able to give the A the shape I wanted.
Without further ado friends, I bid you farewell until next time ✨👋🏻🩷
📷Ediciones | Editing in Canva and Picstar
✨Traducciones | Translations in Deepl
Beautiful and creative.
Best regards dear.
Te quedaron muy bonitos Aliz, mi favorito la forma de la A🥰
Bueno a mi si me gustaron mucho están lindos y se ven como tiernas sus caritas
Que lindos y tenebrosos quedaron jajaja
Muy lindos para estas fechas me gustó mucho el resultado que obtuviste.
Admiro tu habilidad para crear personajes tan divertidos, me encantó esta manualidad que tiene muchas posibilidades de uso.
Ami te quedaron demasiado tiernas las dos ideas que nos compartes. 🤭 Sabes que yo tampoco celebro estas fechas, pero de verdad que quedaron muy chistosos y tiernos💕