For me it is a real pleasure to go through your blogs, because it fills me with motivation and enthusiasm to also create, recycle, transform and give good use to any material we have at home.Hello dear creative friends of this beautiful community @needleworkmonday.
This time I want to share with you a cute fabric hat that I made for my middle daughter, with a dress that I had saved a long time ago from when she was a little girl.
Although for me she is still my little girl 😍☺☺.
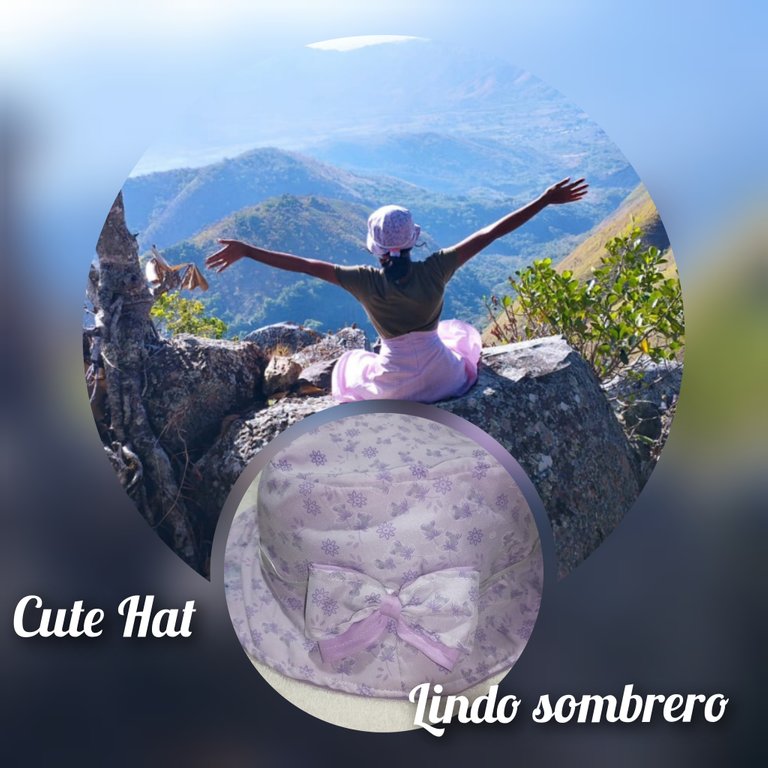
We live in the East of the country (Venezuela) and in this area the heat and the sun is really intense.
Hence my motivation to make her a hat, to protect her from the sun.
Especially because we are constantly doing volunteer biblical education service even in isolated areas of the territory and there are times when an umbrella or sunshade is not enough.
So, after watching a tutorial I decided to do it !!😉👍🏻
I show you how I did it
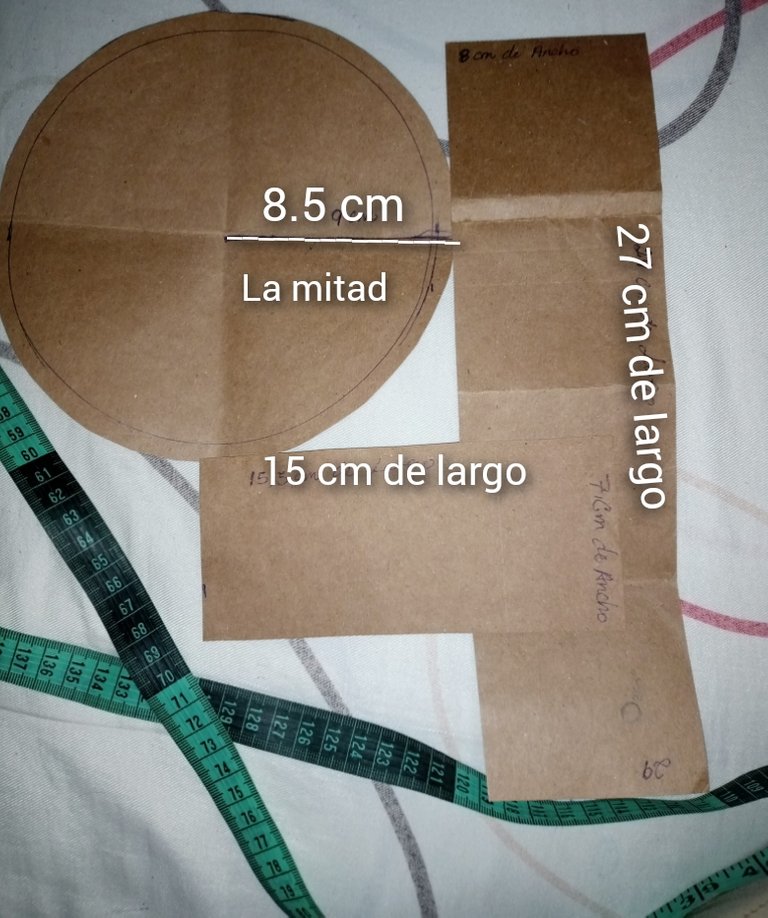
The first thing I made were the patterns.
1 piece) a Circumference of 8.5 cm (Half).
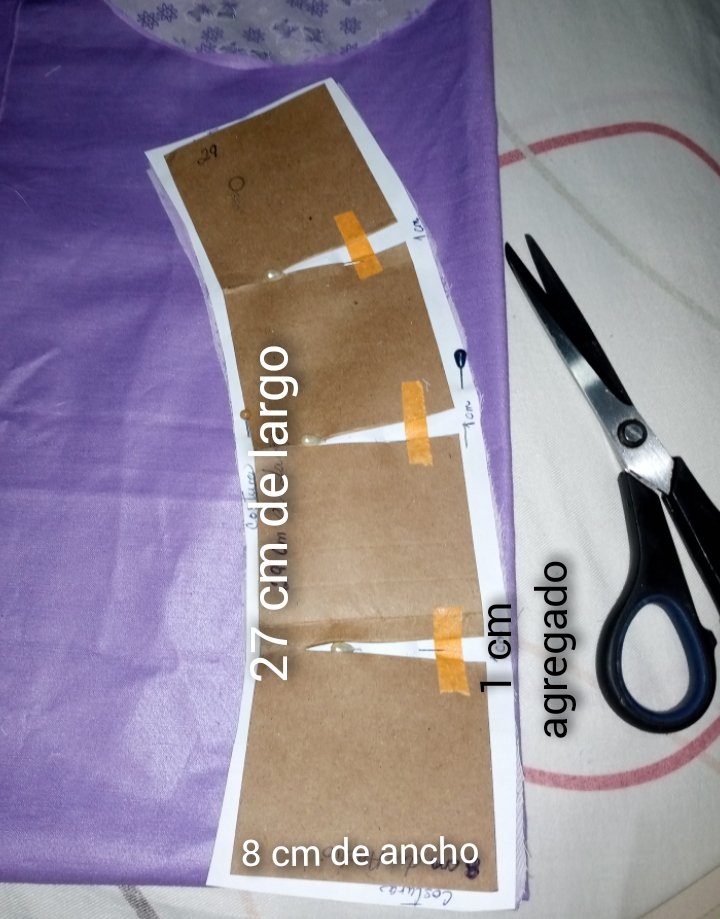
2 piece) a Rectangle 27 cm long by 8 cm wide.
This piece will be cut with the double fabric.
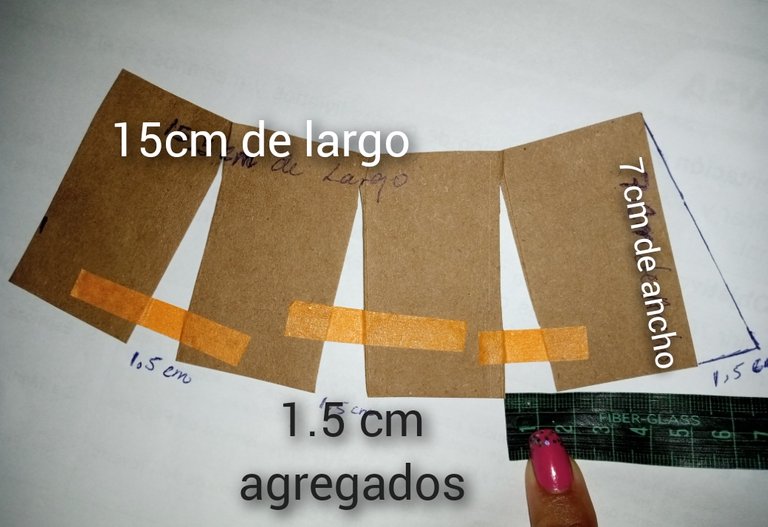
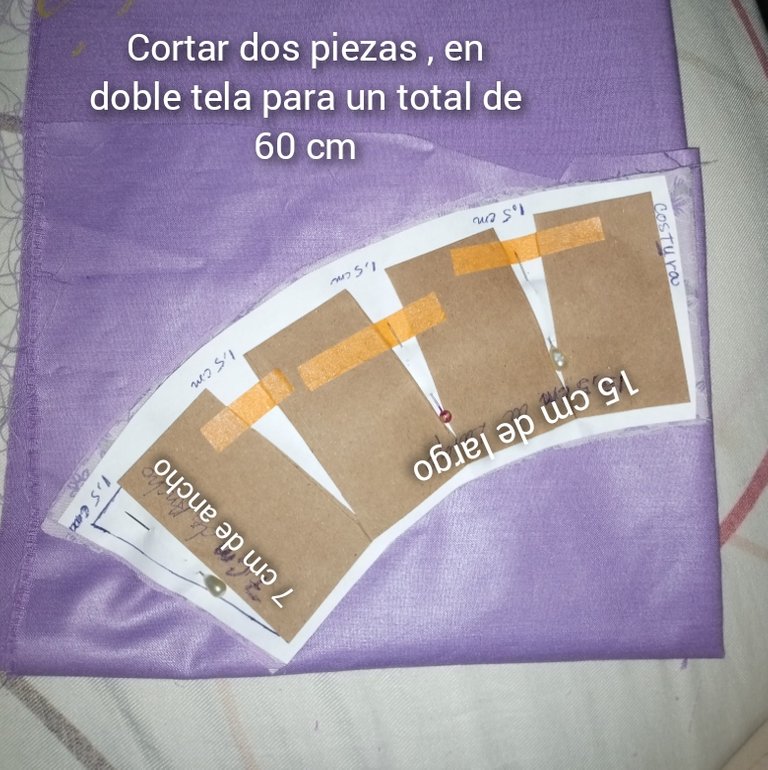
3 piece) a Rectangle of 15 cm long by 7 cm wide.
This 15 cm piece we will cut with the double fabric and double piece, that is to say, at the end we will have 60 cm.
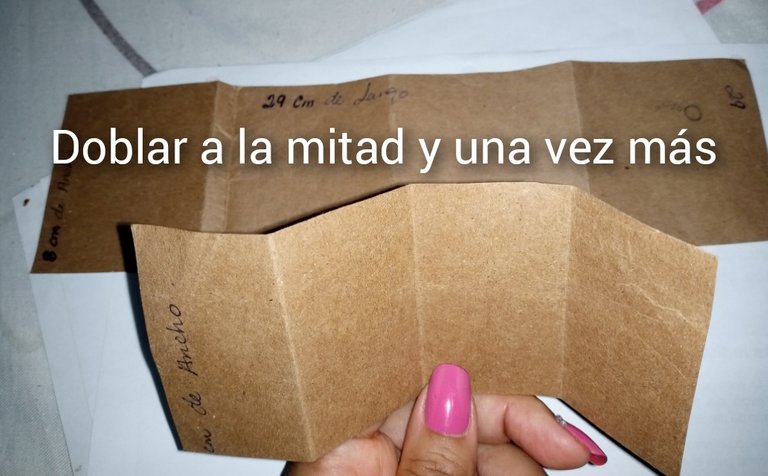
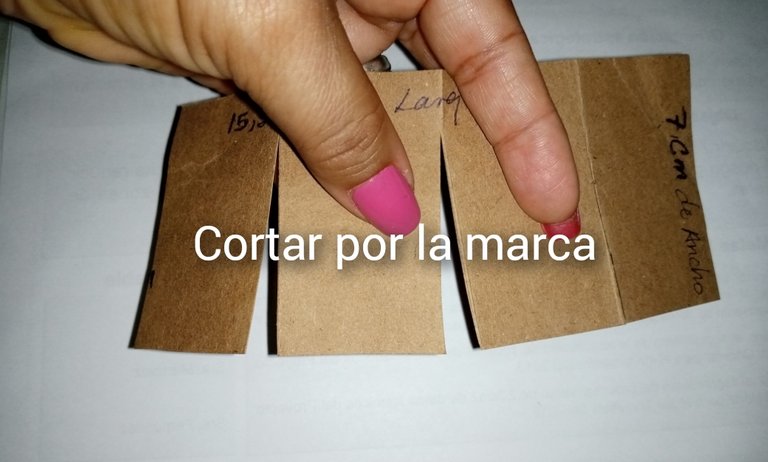
To the two rectangular patterns we are going to add 1 cm and 1.5 cm respectively, using the technique of cutting and opening the pattern. I show you a picture to give you an idea of how to do it.
To the 27 cm piece we will add 1 cm in each opening for a total of 3 cm added.
And to the 15 cm piece we will add 1.5 cm in each opening for a total of 6 cm added.
To know where we are going to cut, we will fold each piece in half and then once more.
By placing the pattern on a white sheet we can make these adjustments. 👍🏻
Para mí es un verdadero placer pasar por sus blogs, pues me llena de motivación y entusiasmo para también crear, reciclar, transformar y darle buen uso a cualquier material que tengamos en casa.Hola queridos amigos creativos de esta linda comunidad @needleworkmonday.
En esta oportunidad quiero compartirles un lindo sombrero de tela que le elabore a mi hija la del medio, con un vestido que tenía guardado hace mucho tiempo de cuando era niña pequeña.
Aunque para mí sigue siendo mi niña pequeña 😍☺☺
Vivimos en el Oriente del país (Venezuela) y hacia esta zona el calor y el sol está verdaderamente intenso.
De ahí mi motivación de hacerle un sombrero, para protegerla de tanto sol.
En especial porque constantemente estamos prestando servicio voluntario de educación bíblica hasta en zona aisladas del territorio y hay veces en que el paraguas o quitasol no son suficiente.
Así que, luego de ver un tutorial me animé a hacerlo !!😉👍🏻
Les muestro cómo lo hice
Lo primero que realicé fueron los patrones.
1pieza) una Circunferencia de 8,5 cm (La mitad).
2 pieza) un Rectángulo de 27 cm de largo por 8 de ancho.
Esta pieza la cortaremos con la tela doble.
3 pieza) un Rectángulo de 15 cm de largo por 7 cm de ancho.
Esta pieza de 15 cm la vamos a cortar con la tela doble y doble pieza, es decir, que al final tendremos 60 cm.
A las dos patrones rectangulares le vamos a agregar 1. y 1.5 cm respectivamente, utilizando la técnica de cortar y abrir el patrón. Les muestro una foto para que tengan la idea de cómo hacerlo.
A la pieza de 27 cm le agregaremos 1 cm en cada abertura para un total de 3 cm agregados.
Y a la pieza de 15 cm le agregaremos 1.5 en cada abertura para un total de 6 cm agregados.
Para saber dónde vamos a cortar, vamos a doblar cada pieza a la mitad y luego una vez más.
Colocando el patrón en una hoja blanca podremos hacer estos ajustes. 👍🏻

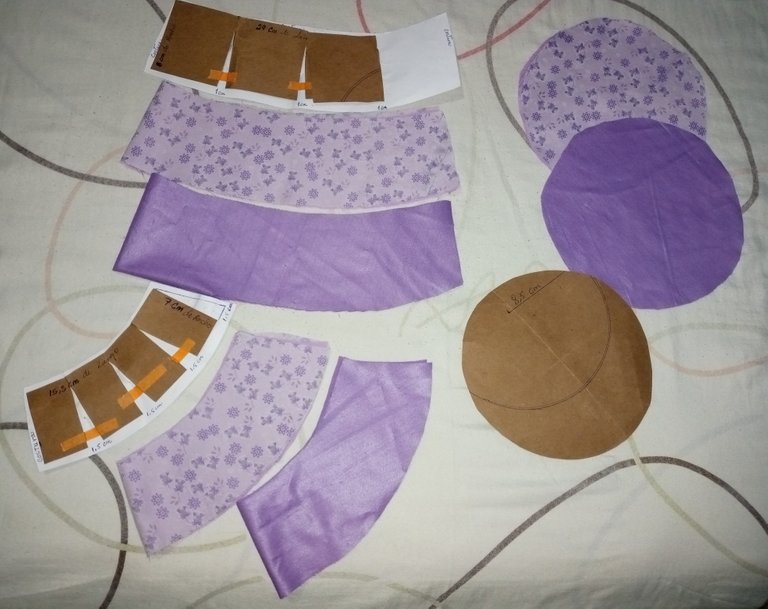
Once we have all our pieces cut we begin to bake.
To have a good fit or accuracy when joining the fabrics we can fold in half and mark so when we join it will be easier.
I do it myself because I don't have much experience with sewing or working tools. Even so, sewing is something that fascinates me so the little I can do I enjoy it to the fullest.
We started by joining the circumference piece with the 27 cm piece which became 30 cm after the added cm and then we joined the 27 cm piece to the 15 cm piece which became 60 cm.
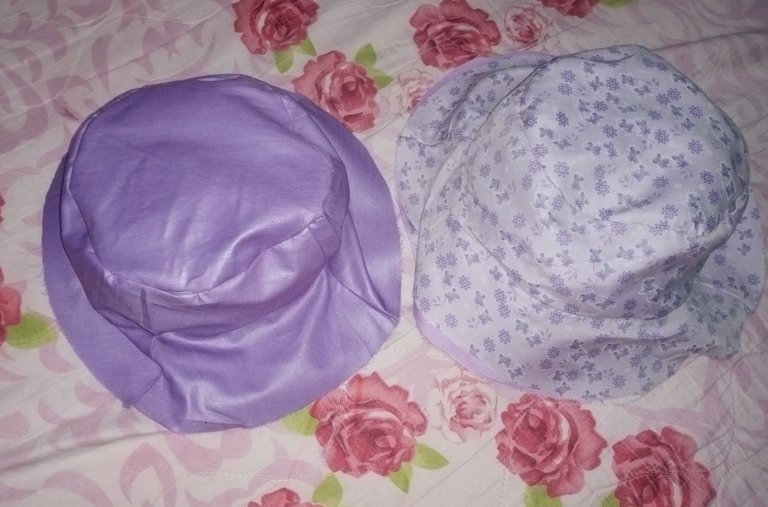
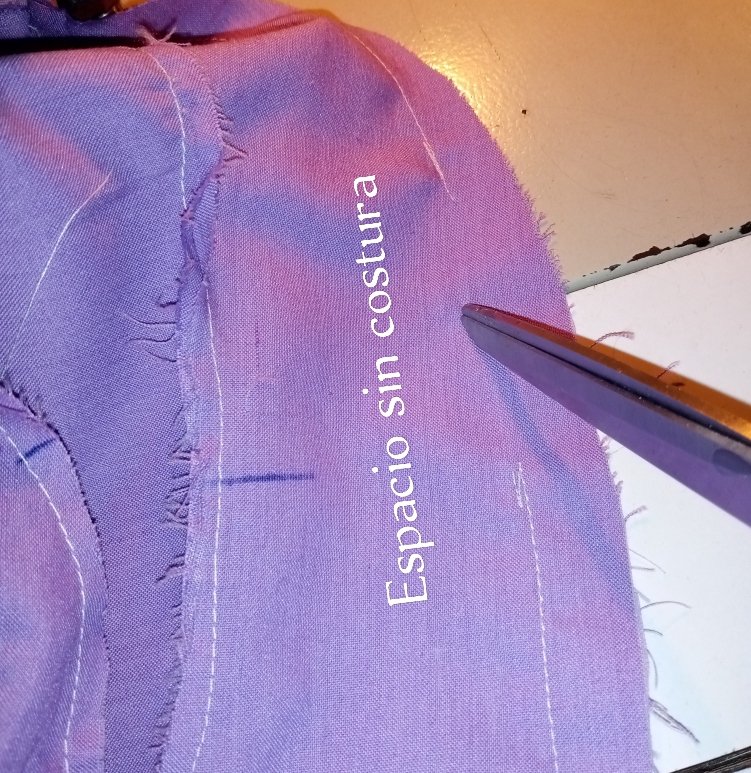
Once we have the two parts cooked both the outside and the lining, we join them facing the two right sides of the fabrics, making sure to leave a seamless opening to be able to turn it over.
And once it is ready we can decorate it as we wish.
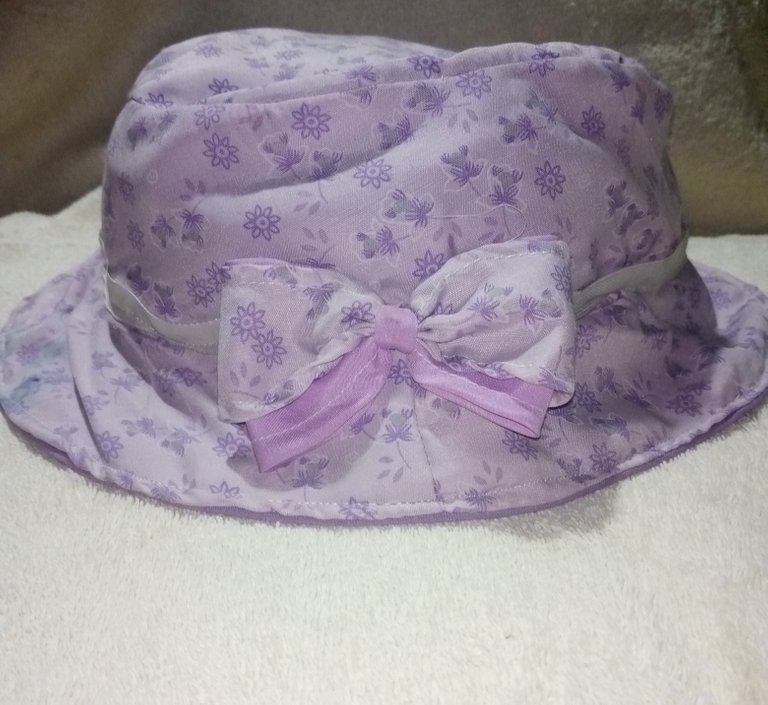
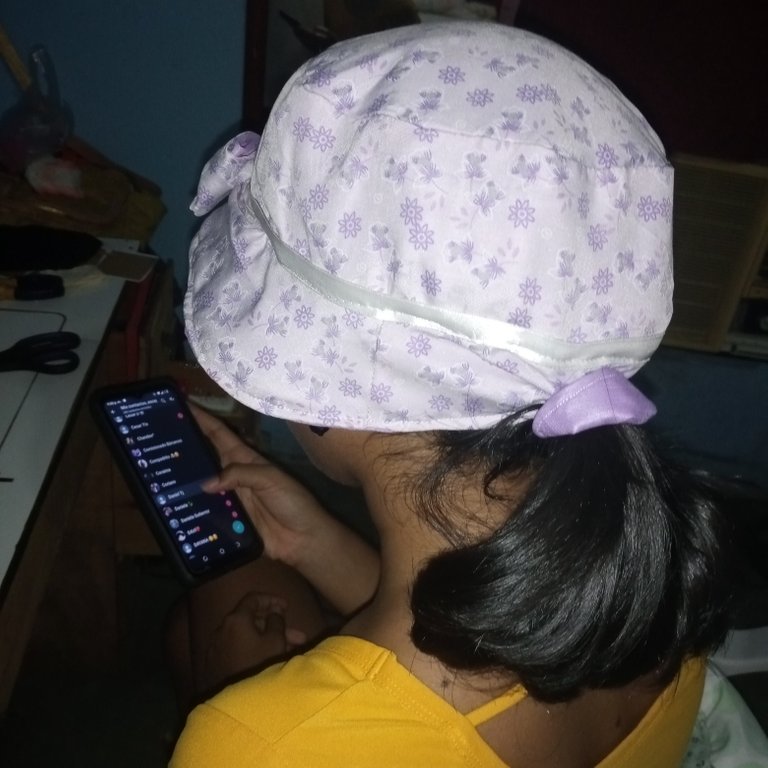
I attached a white ribbon and a bow that I made with scraps of the same fabric.
And that's how this cute hat turned out.
Una vez que tengamos todas nuestras piezas cortadas comenzamos a cocer.
Para tener un buen ajuste o exactitud al unir las telas podemos doblar a la mitad y marcar así a la hora de unir se nos hará más fácil.
Yo por mi parte lo hago porque no tengo mucha experiencia con la costura ni herramientas de trabajo. Aún así la costura es algo que me fascina así que lo poco que puedo hacer lo disfruto al máximo.
Comenzamos uniendo la pieza de circunferencia con la pieza de 27 cm que quedó en 30 cm luego del cm agregado y luego a la pieza de 27 cm le unimos a la de 15 cm que quedó en 60 cm .
Una vez tengamos las dos partes cocidas tanto la parte de afuera, como el forro, las unimos enfrentando los dos derechos de las telas asegurándonos de dejar una abertura sin costura para poder dar vuelta.
Y una vez que esté listo podemos adornarlo como mejor queramos.
Yo le coloqué una cinta blanca y un lazo que hice con retazos de la misma tela.
Y así quedó este lindo sombrero.

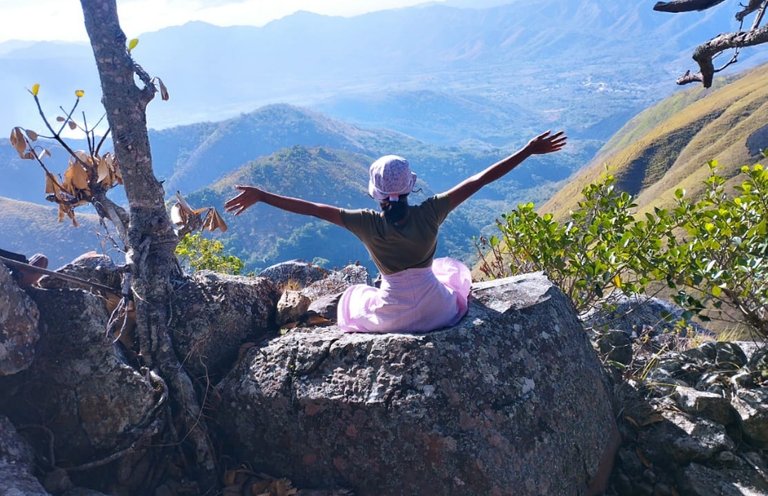
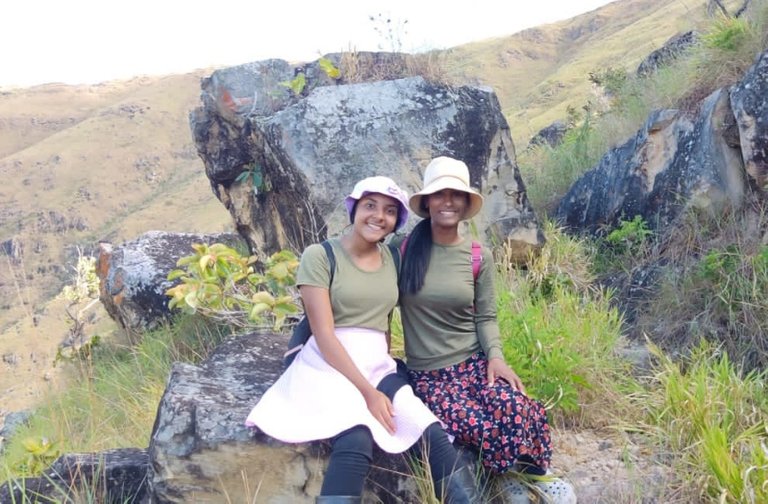
I hope you liked it
And, if you dare to make one, I hope you enjoy it as much as I did.
Ah... And always remember to recycle 😉👍🏻♻️
I will say goodbye to you until the next time, but not before telling you that the photos I used are my own and I edited them in GridArt.
The translation was done at DeepL.
Thank you for your visits and support Bye bye.
Espero que les haya gustado
Y, que si se animan a elaborar uno, lo disfruten tanto como lo disfruté yo.
Ah... Y recuerda siempre reciclar 😉👍🏻♻️
Me despido de ustedes hasta una próxima oportunidad no sin antes decirles que las fotos que utilicé son de mi propiedad y las edité en GridArt.
La traducción la realicé en DeepL.
Les doy las gracias por su visitas y apoyo Bye bye.

The rewards earned on this comment will go directly to the people( @semarekha ) sharing the post on Twitter as long as they are registered with @poshtoken. Sign up at https://hiveposh.com.
This is a really commendable idea, an idea to create something wonderful, I like it very much.
Glad you liked it and thanks for your support 😉😘.Thank you friend @semarekha.
Excellent work friend
Sabes que me estoy dando cuenta que en post en realidad no aparece la primera foto que yo coloqué .
Qué foto aparece cuando tú lo viste??.Hola amigo @ferbu gracias por tu apoyo.
No me di cuenta pero voy a revisar
Hermoso, muy delicado tu trabajo, felicidades.
😉😘Gracias amiga @afrikablr por tu visita y apoyo .
¡Que lindo sombrero amiga, felicidades!
Gracias 😉
Simoney, que bueno que hayas podido hacer este gorrito. El procedimiento no es complicado y la tela que elegiste se ve muy linda. ¡Felicitaciones!
Excelente trabajo 👌 felicidades ☺️☺️ quedó muy lindo!