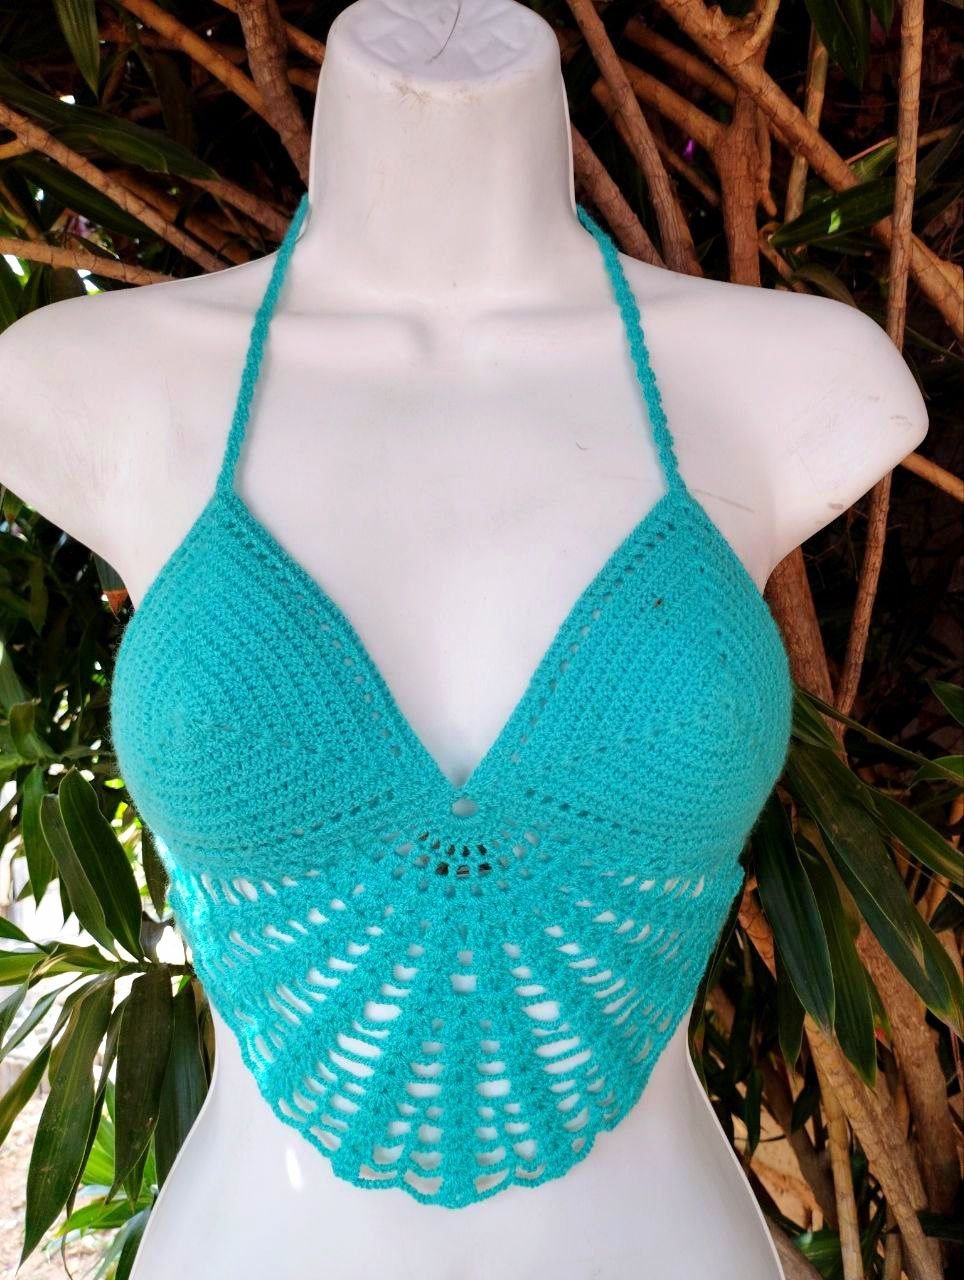
Hello my crochet friends, today I'm sharing a youthful crochet crop top from an order placed by a dear client.
Hola mis amigos crocheteros hoy les estoy compartiendo un crop top juvenil elaborado en crochet de un pedido que me realizo una querida clienta.
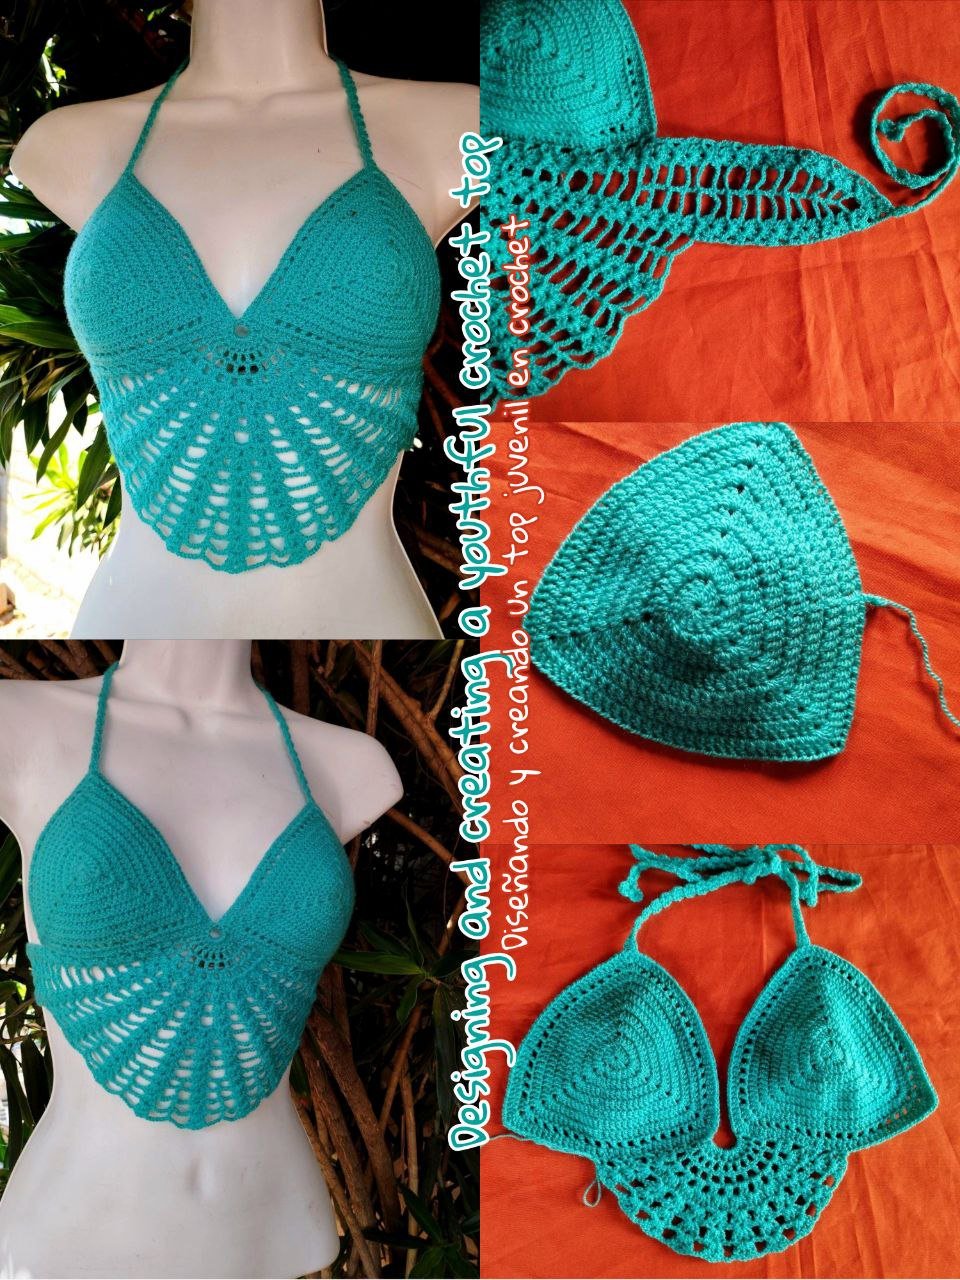
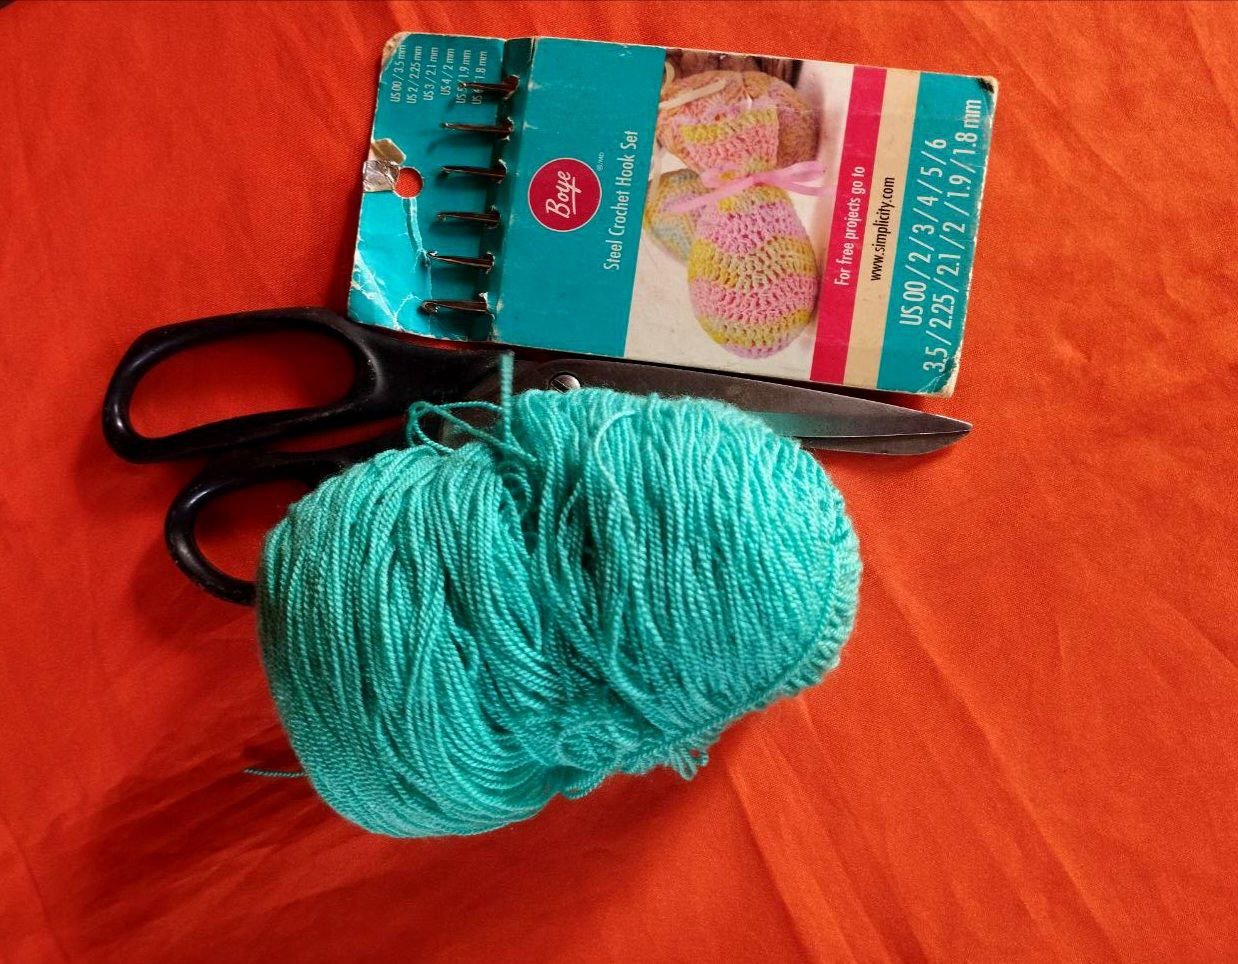
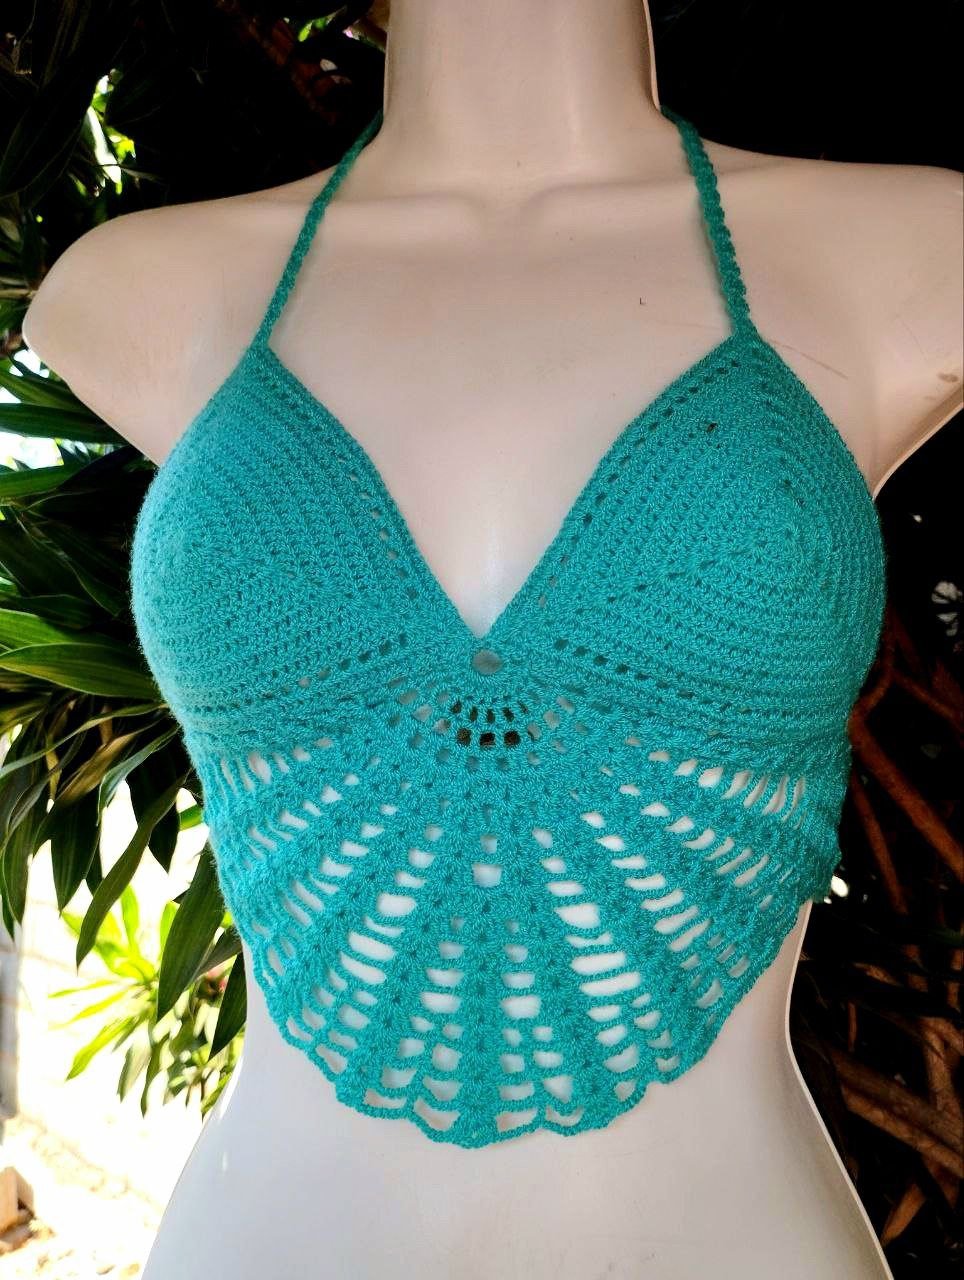
The materials used: Turquoise crochet thread, crochet hook number 6 and the stitches I used were: Normal double crochet and chain stitches.
Los materiales utilizados: Hilo de crochet color turquesa, aguja de crochet número 6 y los puntos que he usado han sido: Puntos altos normales y puntos de cadenas.
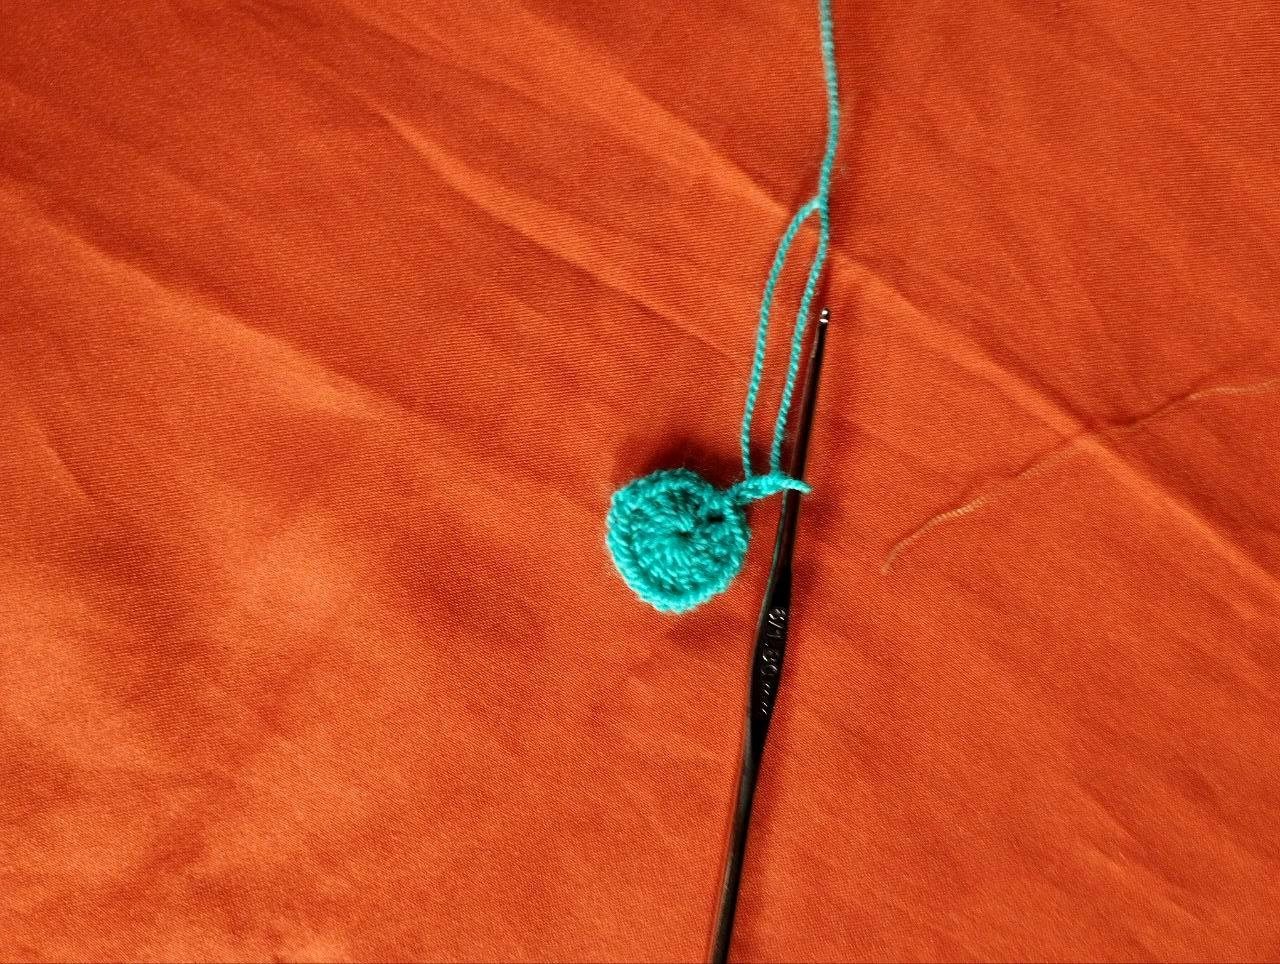
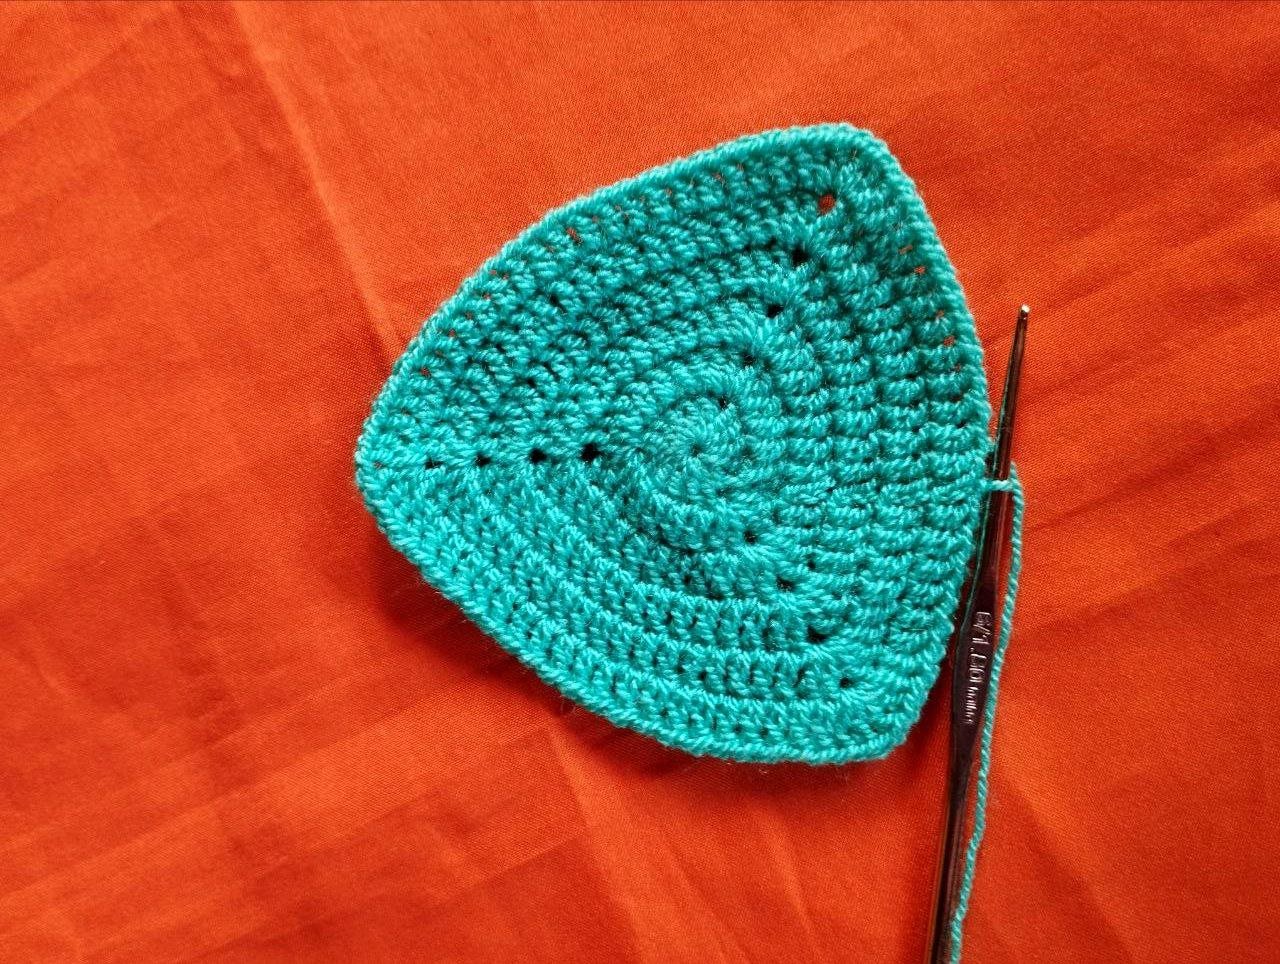
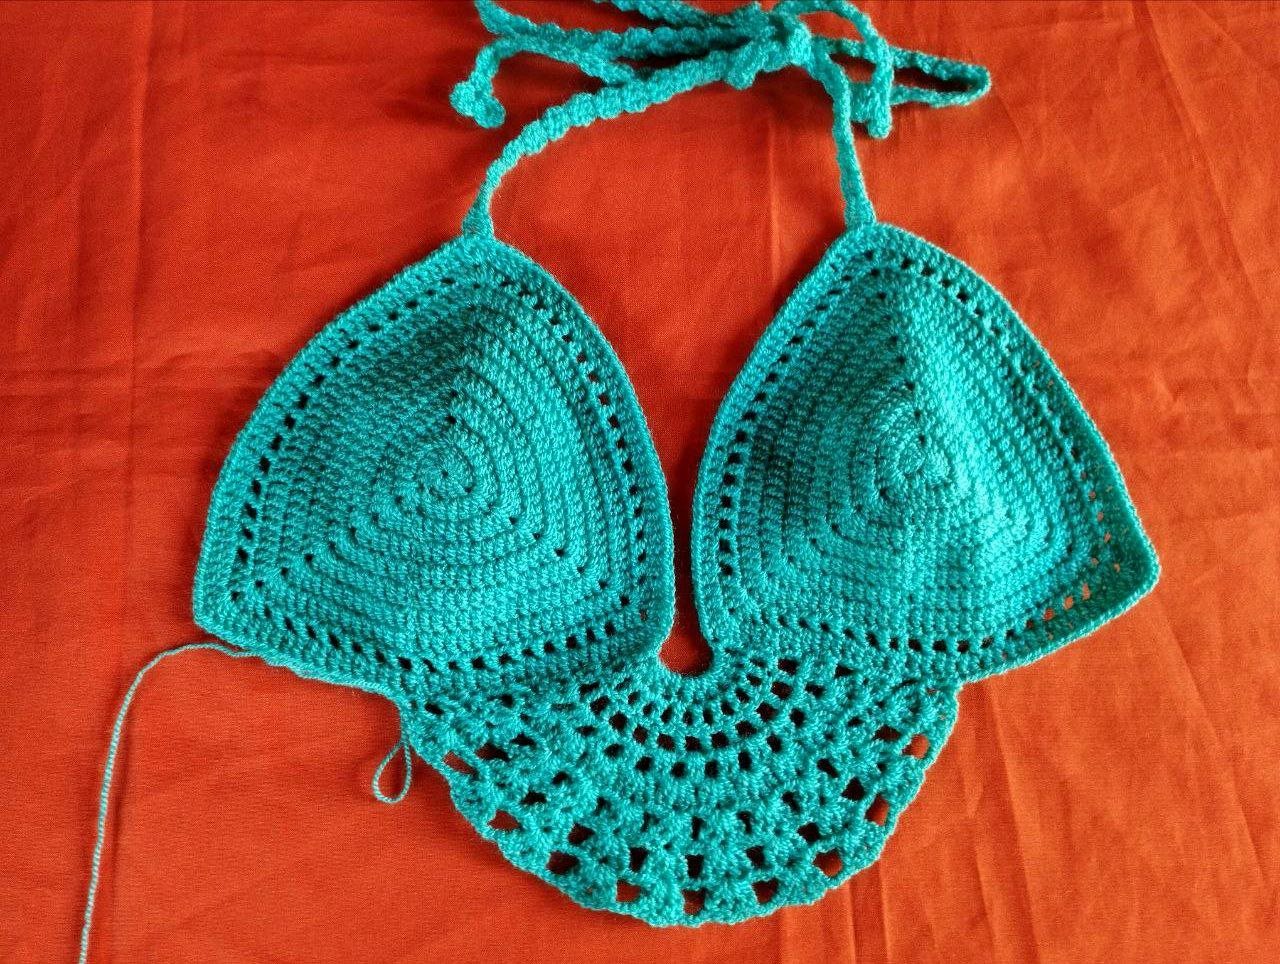
I'll start with the cups, making a magic ring. Inside it, we'll make 3 groups of 5 regular double crochets separated by 1 chain. In the next row, we'll make stitches over stitches, and in the chain space, we'll make 2 regular double crochets, 1 chain, 2 regular double crochets, and so on until the end of the row.
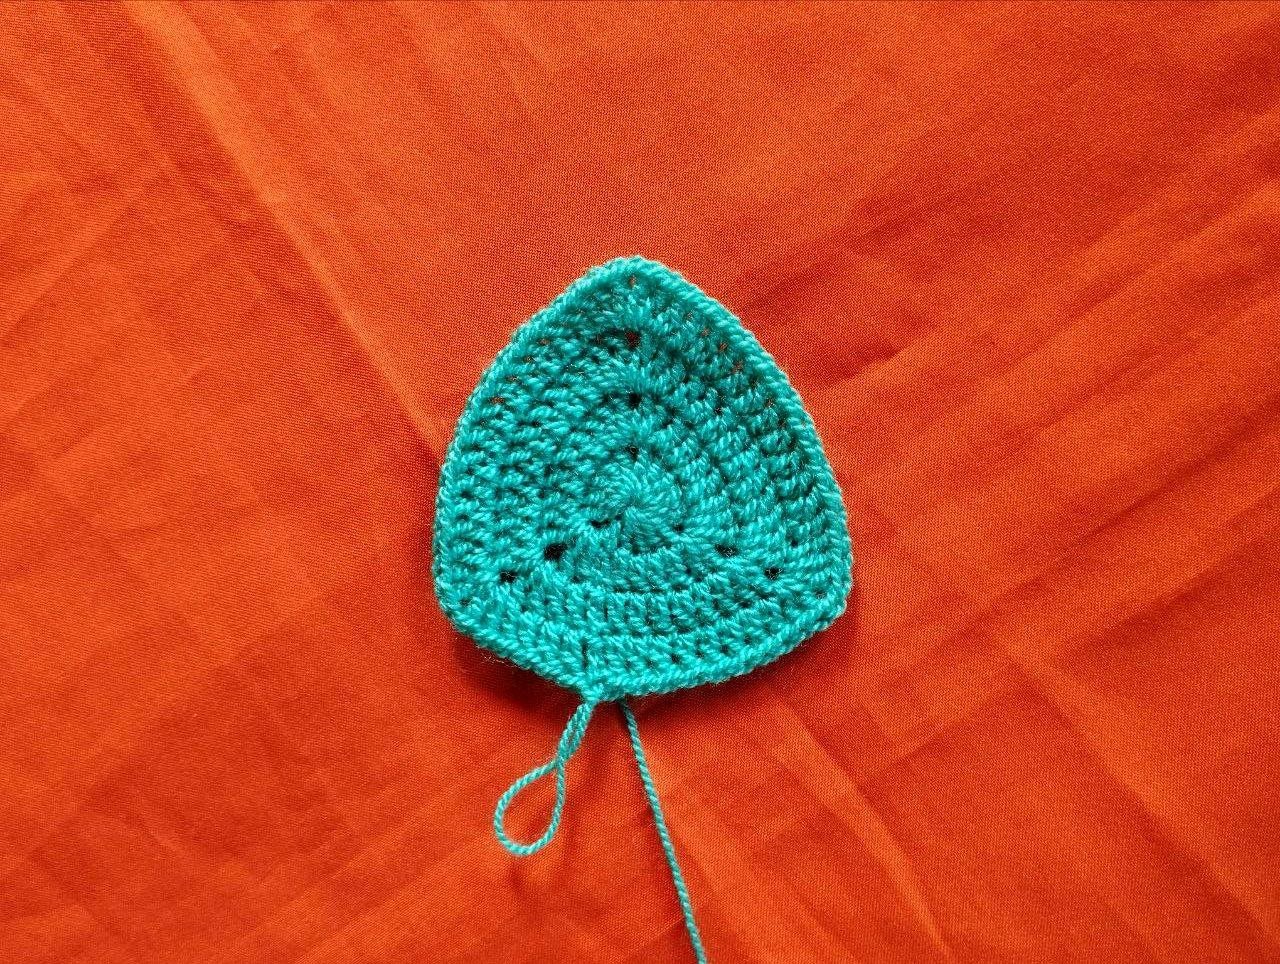
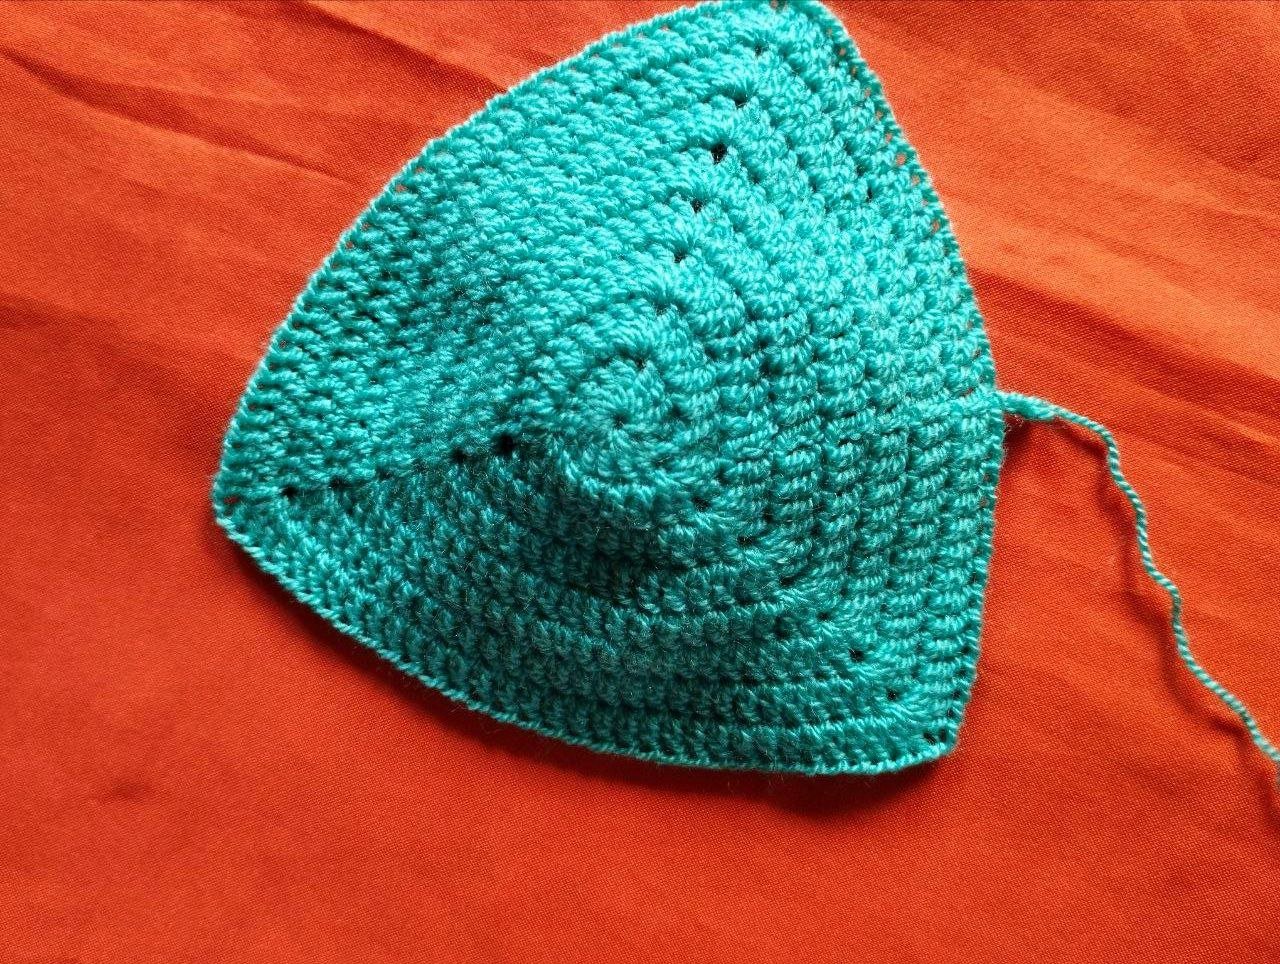
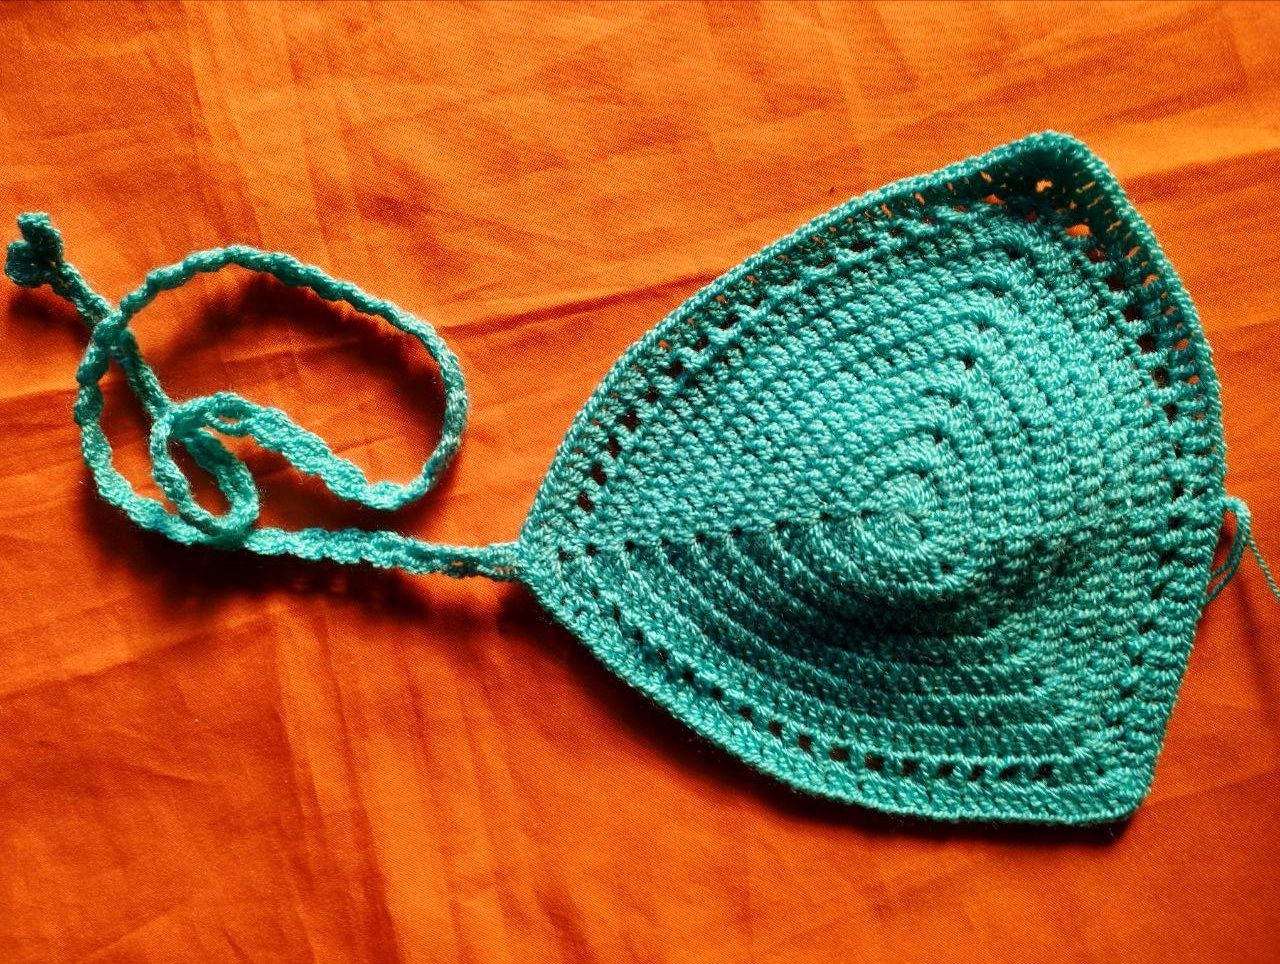
In rows 3 through 8, we work the same way. In row 9, we make 1 regular double crochet, 1 chain, skip 1 space, 1 regular double crochet, and so on until the end of the row. Row 10 is all in regular double crochets. In this row, we remove the straps at the top of the top. If you want, you can also add them after making the cups. This makes two cups.
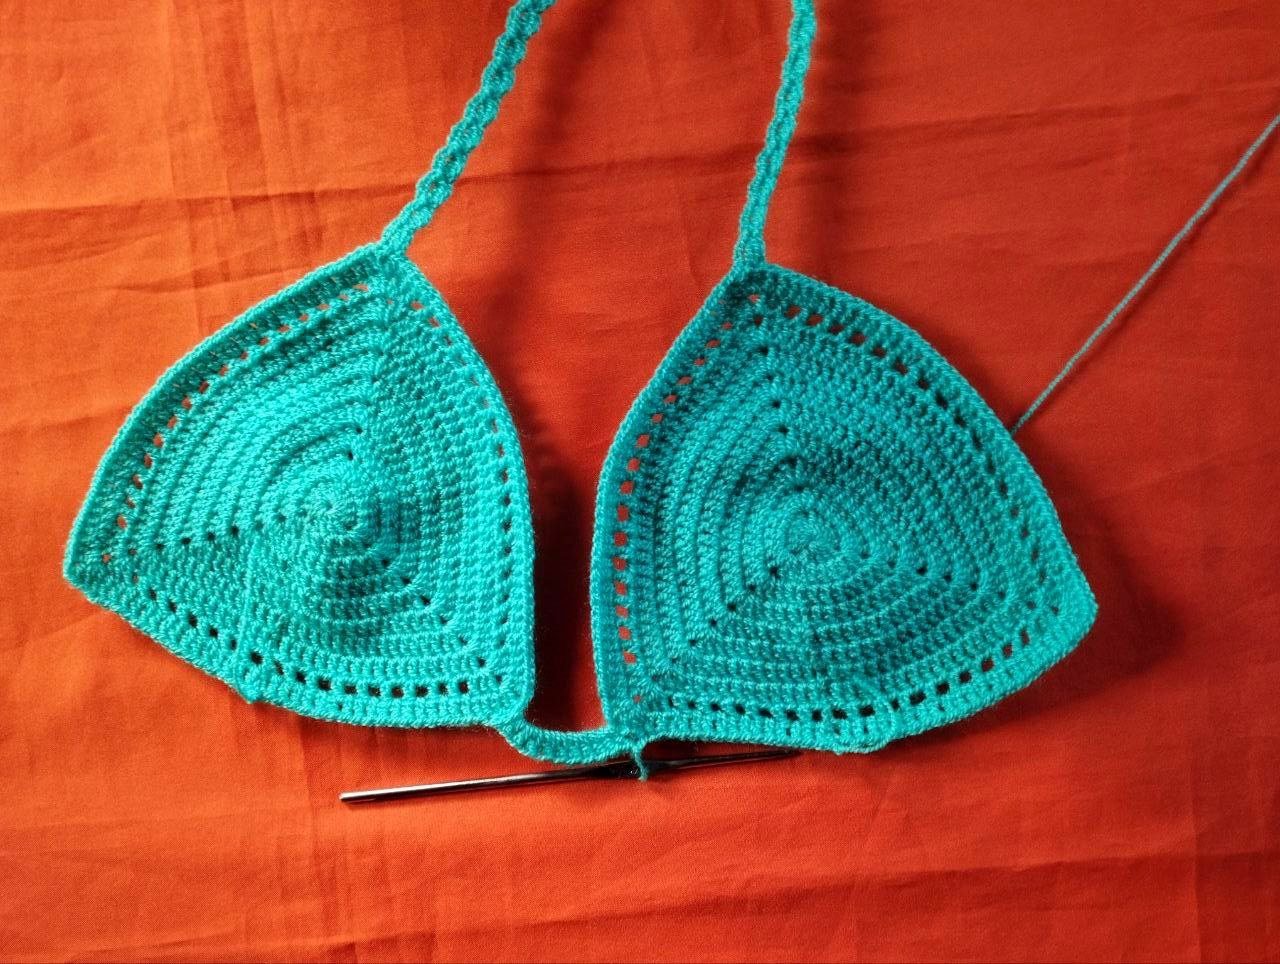
For the body of the top: We start by joining the two cups by the center, for this we place ourselves in the corner and make 1 slip stitch, 8 chains and we place ourselves in the same space of the other cup and join them with 1 slip stitch, on this chain we make 10 normal double crochets, in row 2 we go up 2 chains, skip two stitches and in the third we make a slip stitch, on the 10 stitches we make stitches over the over stitches separated by 1 chain when we reach the other end we count 3 stitches and make a slip stitch, this will be the sequence to go up in all the rows, in row 3 like the previous row, separated by 2 chains the stitches, row 4, in each chain space we make 2 normal double crochets separated by 1 chain, row 5, in each chain space we make 2 normal double crochets, 1 chain, 2 normal double crochets, and so on until we obtain 10 groups, row 6, we work on each fan and repeat the process separating the groups by 1 chain, until finished.
Rows 7, 8, and 9 work the same fans, but in each row we add 1 separating chain.
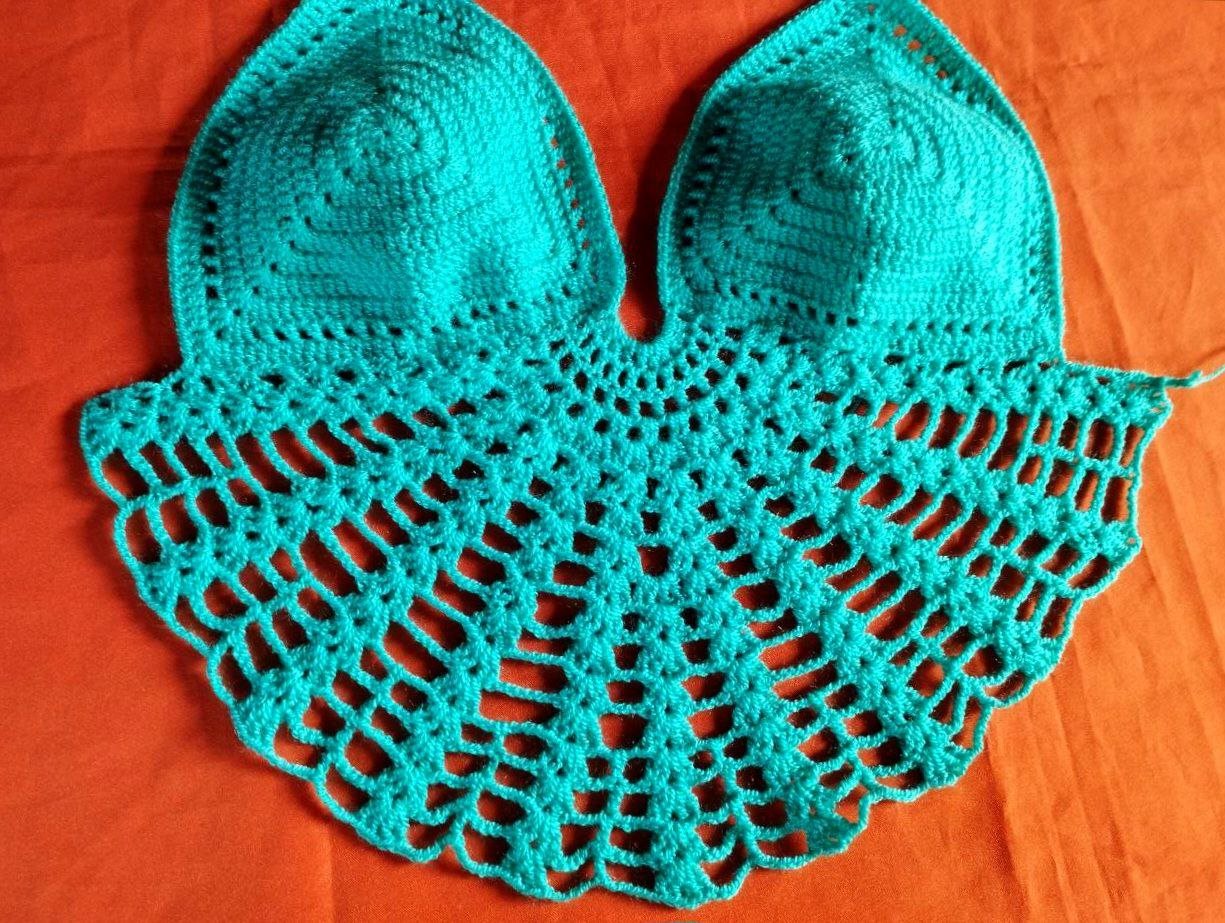
In row 10, we make the fan separated by 5 chains. In the center of the 10 fans, we make another fan, leaving 3 fans in a row without separation. In row 11, we make the initial 5 fans separated by 6 chains. We separate the central fans with 1 chain between them. We make the other 5 fans in the row. In row 12, in this row, the fan separations are 7 chains, and in the center, 2 chains. In row 13, we make a fan, 3 chains, and over the 7 chains, we make 1 regular double crochet, 3 chains, and so on for the entire sequence, with the exception of the central fans, which would have 2 separating chains.
Rows 14, 15, and 16 are worked in the same way, increasing 1 chain at each separation. To make the sides of the back, we work 1 fan, 6 chains, 1 regular double crochet, 6 chains, 1 fan, and continue in this way for 8 more rows. Then we begin decreasing the chains 2 by 2 until we reach 3 stitches together. There, we make the cord, just like the straps, to the required length. You can also leave it without the reduction, make a cord, and close it with a braid.
This operation is done on both sides of the piece. To close the small space between the two cups, we do it with a slip stitch, or alternatively, make a small cord and close it.
Comenzaré con las copas, haciendo un anillo mágico y dentro de este hacemos 3 grupos de 5 puntos altos normales separados por 1 cadena, en las siguiente fila haremos puntos sobre puntos y en el arco de la cadena hacemos 2 puntos altos normales, 1 cadena 2 puntos altos normales, así hasta finalizar la fila.
En las filas desde la 3 hasta la 8 trabajamos de igual forma, en la fila 9 hacemos 1 punto alto normal, 1 cadena, saltamos 1 espacio 1 punto alto normal, así sucesivamente hasta finalizar la fila, la fila 10 está toda en puntos altos normales, en esta fila sacamos los tirantes en la parte alta del top, si queremos también podemos agregarlos después de hechas las copas, se elaboran dos copas.
Para el cuerpo del top: Comenzamos uniendo las dos copas por el centro, para esto nos ubicamos en la esquina y hacemos 1 punto deslizado, 8 cadenas y nos colocamos en el mismo espacio de la otra copa y los unimos con 1 punto deslizado, sobre esta cadena hacemos 10 puntos altos normales, en la fila 2 subimos 2 cadenas saltamos dos puntos y en el tercero hacemos un punto deslizado, sobre los 10 puntos realizamos puntos sobre la sobre puntos separados por 1 cadena al llegar al.otro extremo contamos 3 puntos y hacemos un punto deslizado, está será la secuencia para subir en todas las filas, en la fila 3 como la fila anterior, separados por 2 cadenas los puntos, fila 4, en cada espacio de cadena hacemos 2 puntos altos normales separados por 1 cadena, fila 5, en cada espacio de cadena hacemos 2 puntos altos normales,1 cadena, 2 puntos altos normales, así hasta obtener 10 grupos, fila 6, trabajamos sobre cada abanico y repetimos el proceso separando los grupos por 1 cadena, hasta finalizar.
Las filas 7, 8, y 9 de trabajan los abanicos iguales pero en cada fila vamos agregando 1 cadena de separación.
En la fila 10, hacemos el abanico separado por 5 cadenas, en el centro de 10 abanicos hacemos otro abanico, quedando en el centro 3 abanicos seguidos sin separación, en la fila 11, hacemos los 5 abanicos iniciales separados por 6 cadenas y los abanicos centrales los separamos con 1 cadena entre si, y hacemos los otros 5 abanicos de la fila, en la fila 12, en esta fila las separaciones de los abanicos son 7 cadenas, y en el centro 2 cadenas, en la fila 13, hacemos un abanico, 3 cadenas y sobre las 7 cadenas hacemos 1 punto alto normal, 3 cadenas, así toda la secuencia, con la excepción de los abanicos centrales que serían 2 cadenas de separación.
Las filas 14, 15 y 16 se trabaja de igual manera aumentado 1 cadena en cada separación .para hacer los laterales de la espalda trabajamos 1 abanico, 6 cadenas, 1 punto alto normal, 6 cadenas, 1 abanico, así seguimos hasta obtener 8 filas más, luego empezamos a disminuir las cadenas de 2 en 2 hasta llegar a 3 puntos juntos, y allí elaboramos el cordón igual que los tirantes el largo necesario, también lo podemos dejar sin la reducción hacer un cordón y cerrarlo con un trensado.
Está operación la hacemos en ambos lados de la pieza, para cerrar el huequito entre las dos copas lo hacemos con punto deslizado o en su defecto hacemos un cordoncito y lo cerramos.


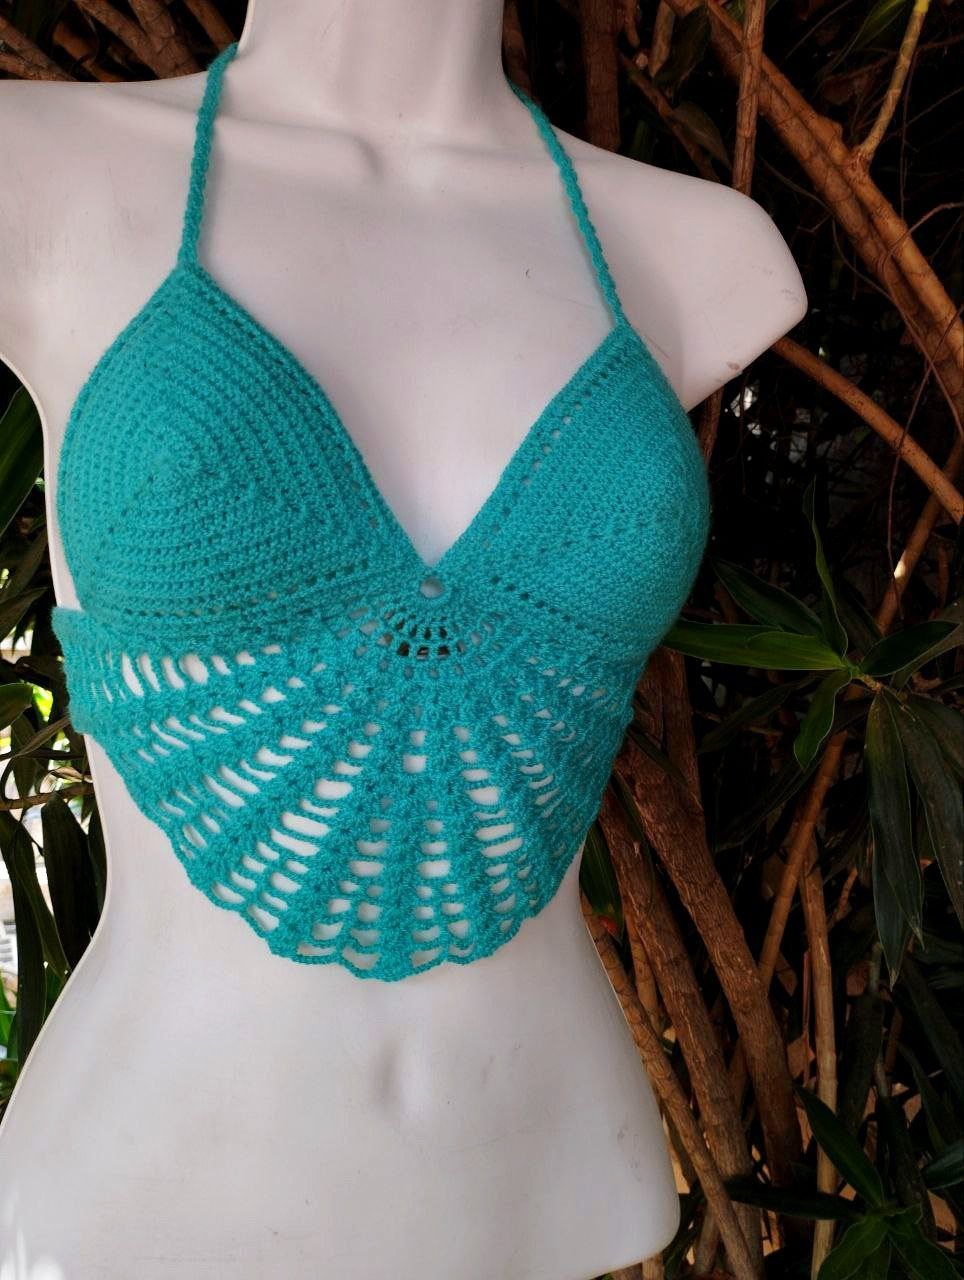
Dear fellow yarn and needle adventurers, this is a simple crop top to make. It's beautiful and quite seductive. I hope you love it as much as I do. This product was made through an order placed with my online store @siriuscrochet. Greetings 🫂🙏🏻
Estimados compañeros de aventuras con el hilo y las agujas este en un crop top sencillo de realizar es muy bello y bastante seductor, espero les encante como a mi, este producto lo ha realizado por un pedido hecho a mi tienda virtual @siriuscrochet. Saludos 🫂🙏🏻
The photographs are my own, taken with my Redmi Note 11 cell phone and edited with the Instagram application, the translation of the text was done using this means: Google.
My Instagram account and work venture is:
Siriuscrochet, the magic of knitting.
Las fotografías son de mi autoría tomadas con mi celular Redmi Note 11 y editadas con la aplicación Instagram la traducción del texto la realice utilizando este medio: Google.
Mi cuenta de Instagram y emprendimiento laboral es:
Siriuscrochet, la magia de tejer.
What a beautiful design! It looks amazing. It shows your creativity and skills. Great job! Keep it up!
Thanks You
Hermoso trabajo. Felicidades!!!
Muchas gracias 🫂
No le creo! este diseño de crochet está hermoso, se ve impecable y muy lindo, de verdad se nota que tiene talento para esto, hasta parece que no le ha costado nada, de verdad muy bonito como le quedó, un saludo gigante y siga asi <3
Muchas gracias saludos
Ohhh my friend, you started it that small and it got Soo big, that's so creative, I wish I can try a little, is Soo beautiful.
Perfect creation and so nice, good for the beach.
Tejer es un arte y requiere de mucho tiempo, cuidado y dedicación. Felicidades 😘🙏👏
Muchas gracias🫂
🙏😘🌹
This is really creative
Muchas gracias 🫂
Welcome 🤗
What a beautiful garment! I'm just learning how to crochet and haven't made any specific pieces, but seeing posts like yours motivates me to one day be able to make something so beautiful. 😳 Incredible work and beautiful color choice! 💚