Español
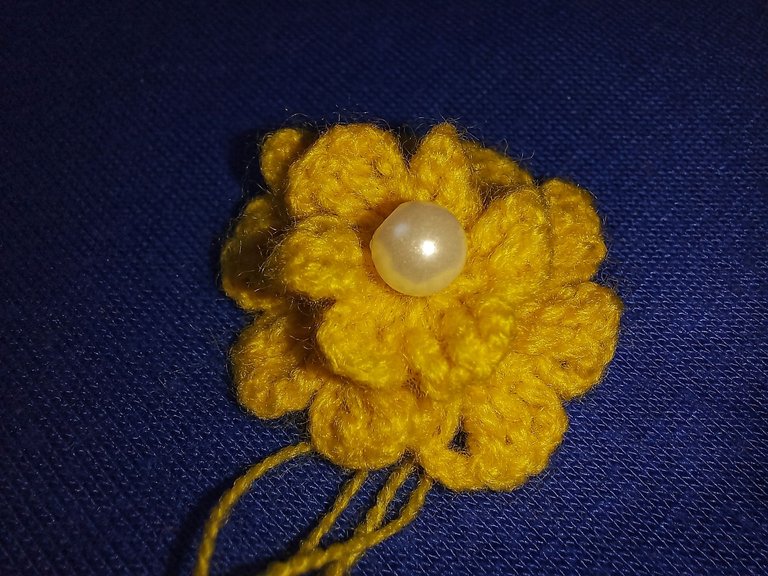
Un saludo cordial. Es para mi un placer volver a pasar por esta bonita y creativa comunidad #NeedleWorkMonday. En esta oportunidad quiero compartirles cómo tejí unas pequeñas flores que me gustaron mucho.
Después de algunos intentos buscando tutoriales para hacer unas florecillas que se adaptaran al proyecto de un vestido tejido a crochet para una bebé, mi suegra me orientó para realizar unas bellas rositas de doble pétalo que me encantaron.
Así que, aquí les detallo el proceso que seguí con las sugerencias que ella me dio. Acompañenme y aprendan conmigo a tejer estas bellas florecillas con pétalos dobles.
Materiales:
• Lana de dos hebras o el hilo de su preferencia
• Aguja para crochet acorde al hilo
• tijeras
Procedimiento:
Paso 1: tejer ocho cadenetas y formar con ellas un aro, uniendo ambos extremos con un punto deslizado.
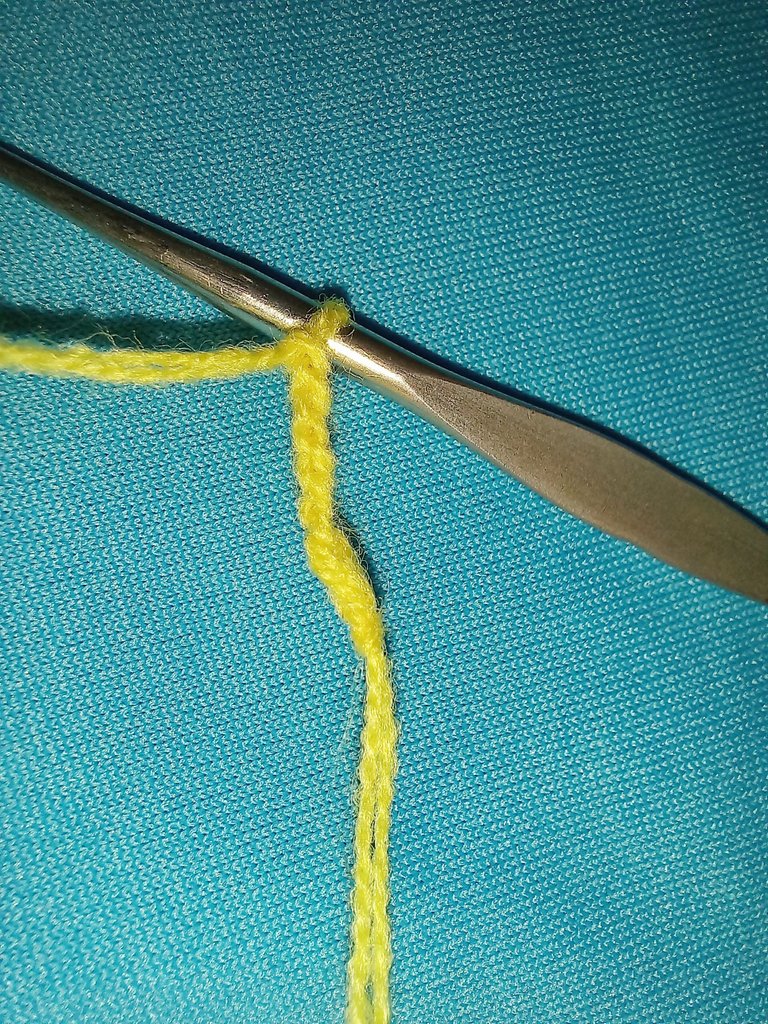
Paso 2: Una vez listo el anillo, tejer cuatro cadenas (equivalentes a un punto alto triple), tomar doble lazada en la aguja para hacer un punto alto triple. Tejer otro punto alto triple, luego agregar cuatro cadenas. Esto en total corresponde a cuatro puntos altos triples.
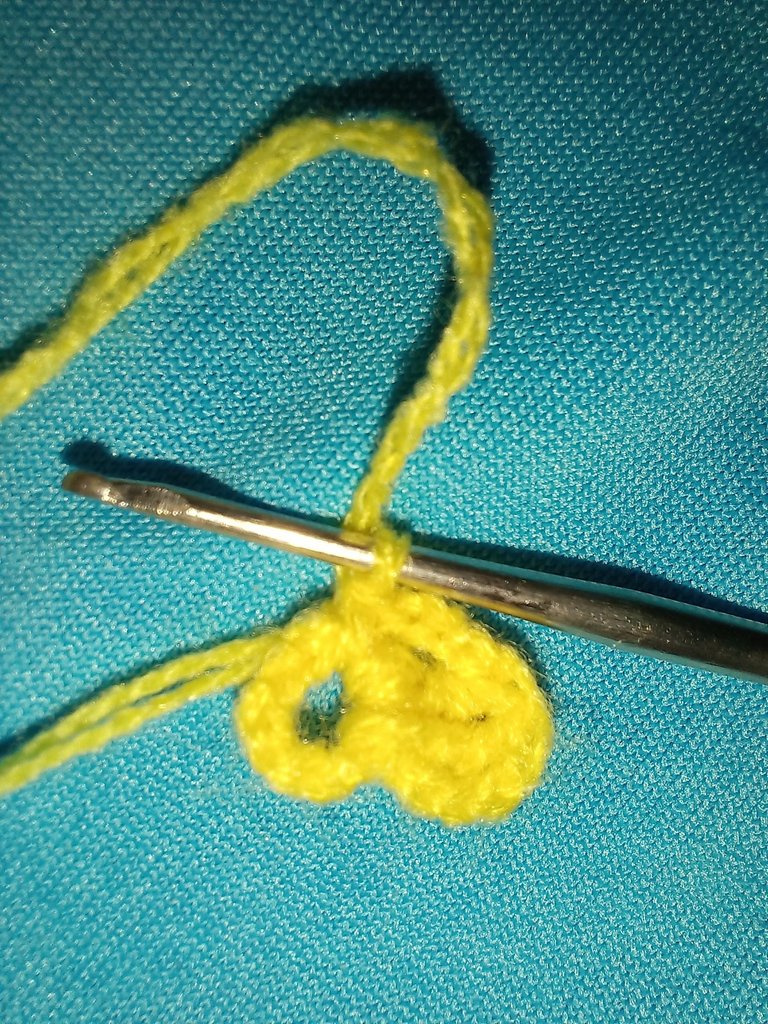
Paso 3: Los puntos corresponderán al primer pétalo. Para terminarlo debemos hacer un punto bajo en el anillo. Y listo, ya tenemos listo nuestro primer pétalo.
Paso 4: Para hacer el segundo pétalo debemos tejer las cuatro cadenas y repetir el resto de las instrucciones de los pasos 2 y 3.
Paso 5: Repetir el procedimiento hasta formar seis pétalos. Cerrar con el punto bajo y girar el tejido.
Paso 6: En la parte de atrás vamos a tejer cuatro cadenas. Con un punto bajo fijamos justo dos pétalos después. Agregamos cuatro cadenas más y fijamos con el punto bajo dos pétalos después. Por último otras cuatro cadenas y finalizamos con el punto bajo justo donde iniciamos la secuencia de las cadenas. De esa manera habremos formado un triángulo.
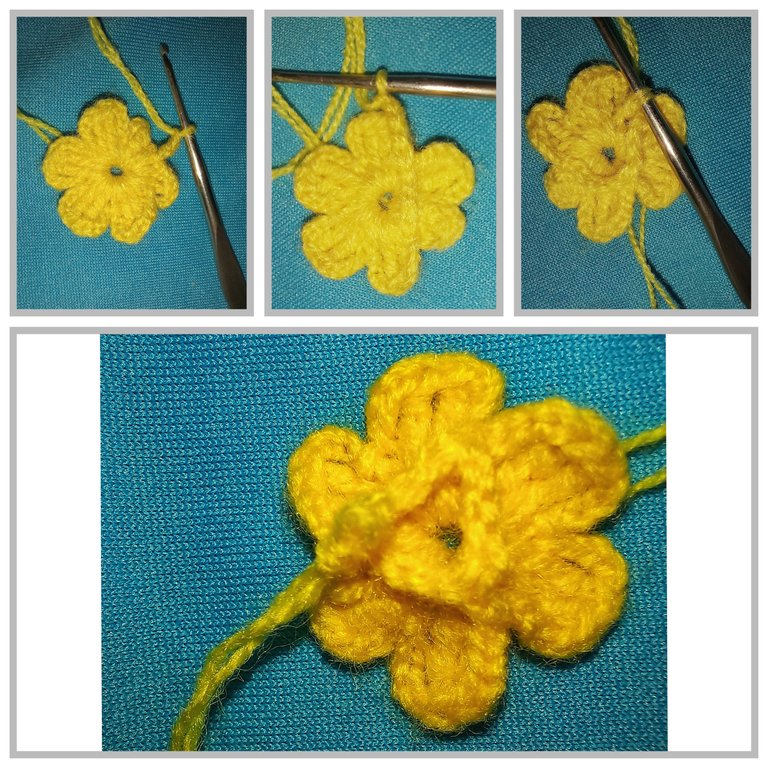
Paso 7: Ahora, en cada uno de los tres espacios vamos a tejer tres pétalos iguales a los que inicialmente hicimos. En total serán nueve pétalos.
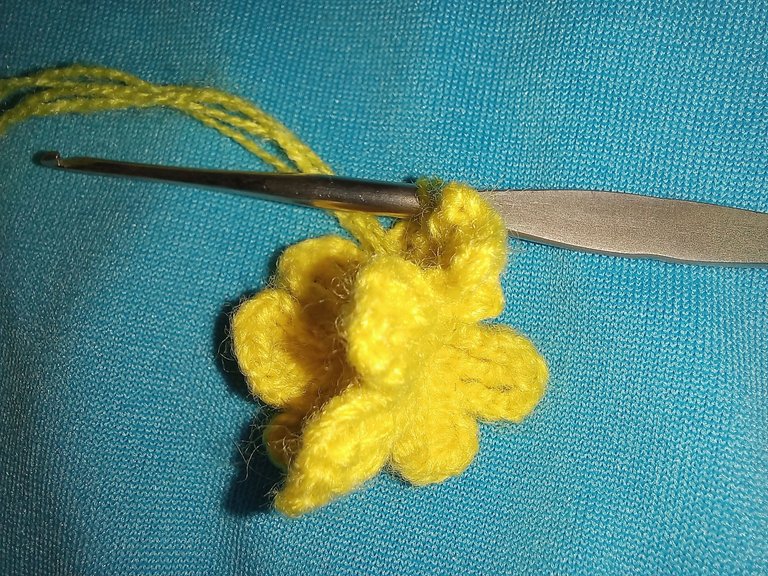
Paso 8: Siguiendo los pasos anteriores ya tendremos una florecilla formada por nueve pétalos en la parte inferior y otros seis en la parte superior. Podemos decorarla cosiendo una perla blanca en el centro. ¡Y listo! Una bonita flor para nuestro proyecto.
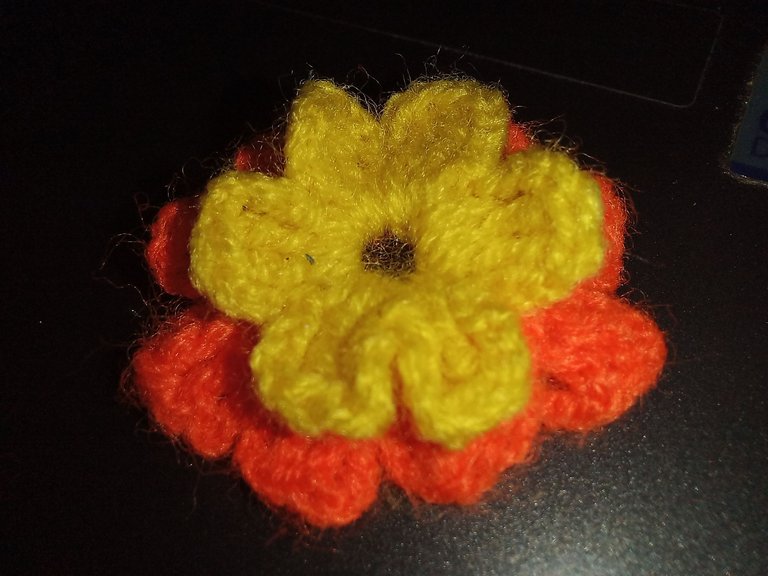
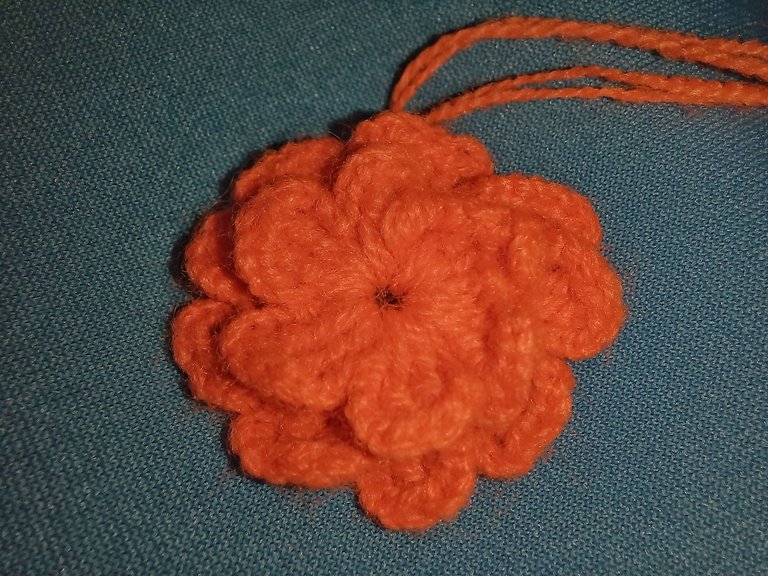
El tamaño de la flor dependerá del grosor del hilo que hayamos utilizado. La mía mide unos tres centímetros de diámetro aproximadamente. ¡Puedes combinarla como desees!

Espero que este post te sirva de guía y puedas aprovecharlo para algún proyecto creativo con aguja que tengas en mente. Un saludo cordial, agradecida por tu lectura, apoyo y sugerencias.
English
How to make a crochet flower with double petals?

Kind regards. It is a pleasure for me to come back to this beautiful and creative community #NeedleWorkMonday. This time I want to share with you how I crocheted some little flowers that I really liked.
After a few attempts looking for tutorials to make some little flowers that would fit the project of a crocheted dress for a baby, my mother-in-law guided me to make some beautiful double petal roses that I loved.
So, here I detail the process I followed with the suggestions she gave me. Join me and learn with me to knit these beautiful little flowers with double petals.
Materials:
- Two strand yarn or yarn of your choice.
- Crochet needle to match the yarn
- scissors
Procedure:
Step 1: Weave eight chains and form a ring with them, joining both ends with a slip stitch.

Step 2: Once the ring is ready, weave four chains (equivalent to a triple double crochet stitch), take a double loop on the needle to make a triple crochet stitch. Knit another triple double crochet, then add four chains. This in total corresponds to four triple double crochet stitches.

Step 3: The stitches will correspond to the first petal. To finish it we must knit a single crochet in the ring. And that's it, we have our first petal ready.
Step 4: To make the second petal we must knit the four chains and repeat the rest of the instructions of steps 2 and 3.
Step 5: Repeat the procedure until six petals are formed. Close with the single crochet and turn the fabric.
Step 6: On the back we are going to knit four chains. With a single crochet we fasten off just two petals later. Add four more chains and fasten off with the single crochet two petals later. Finally another four chains and finish with the single crochet just where we started the sequence of the chains. That way we will have formed a triangle.

Step 7: Now, in each of the three spaces we are going to knit three petals equal to the ones we initially made. In total there will be nine petals.
Step 8: Following the previous steps we will have a little flower formed by nine petals at the bottom and another six at the top. We can decorate it by sewing a white pearl in the center, and that's it! A beautiful flower for our project.
The size of the flower will depend on the thickness of the thread used. Mine measures about three centimeters in diameter approximately. You can combine it as you like!


I hope this post will serve as a guide and you can use it for any creative needlework project you have in mind. Kind regards, thank you for your reading, support and suggestions.
Traducido al inglés con Deepl // Translated to English with Deepl
Fotografías: fuente propia // Photography: source own
Edición de fotografías: Snapseed y GridArt // Photo editing: Snapseed and GridArt
Hola @mariavargas, hacer flores dobles a crochet es todo un reto, he visto muchos tutoriales pero siempre me quedo con los más sencillos, hace mucho tiempo aprendí a tejer una flor doble con un patrón tan sencillo que me quedé solo con ese modelo, pero creo que intentaré con el patrón que nos compartes. Saludos.
Gracias por compartir tu experiencia. 😊 En mi caso es la segunda vez tejiendo una flor doble, y me resultó bien este tutorial porque facilmente puedo combinar dos colores. La primera vez tejí una rosita, de hecho compartí aquí en Hive el tutorial
Así es.
Me gustaría ver cual es tu método 😊
Congratulations @mariavargas! You have completed the following achievement on the Hive blockchain And have been rewarded with New badge(s)
<table><tr><td><img src="https://images.hive.blog/60x70/http://hivebuzz.me/@mariavargas/posts.png?202305012258" /><td>You published more than 90 posts.<br />Your next target is to reach 100 posts. <p dir="auto"><sub><em>You can view your badges on <a href="https://hivebuzz.me/@mariavargas" target="_blank" rel="noreferrer noopener" title="This link will take you away from hive.blog" class="external_link">your board and compare yourself to others in the <a href="https://hivebuzz.me/ranking" target="_blank" rel="noreferrer noopener" title="This link will take you away from hive.blog" class="external_link">Ranking<br /> <sub><em>If you no longer want to receive notifications, reply to this comment with the word <code>STOP <p dir="auto">To support your work, I also upvoted your post! <p dir="auto"><strong>Check out our last posts: <table><tr><td><a href="/hive-122221/@hivebuzz/pum-202304-result"><img src="https://images.hive.blog/64x128/https://i.imgur.com/mzwqdSL.png" /><td><a href="/hive-122221/@hivebuzz/pum-202304-result">Hive Power Up Month Challenge - April 2023 Winners List<tr><td><a href="/hive-122221/@hivebuzz/pum-202305"><img src="https://images.hive.blog/64x128/https://i.imgur.com/M9RD8KS.png" /><td><a href="/hive-122221/@hivebuzz/pum-202305">Be ready for the May edition of the Hive Power Up Month!<tr><td><a href="/hive-122221/@hivebuzz/pud-202305"><img src="https://images.hive.blog/64x128/https://i.imgur.com/805FIIt.jpg" /><td><a href="/hive-122221/@hivebuzz/pud-202305">Hive Power Up Day - May 1st 2023<tr><td><a href="/hive-139531/@hivebuzz/proposal-2324"><img src="https://images.hive.blog/64x128/https://i.imgur.com/RNIZ1N6.png" /><td><a href="/hive-139531/@hivebuzz/proposal-2324">The Hive Gamification Proposal <h6>Support the HiveBuzz project. <a href="https://hivesigner.com/sign/update_proposal_votes?proposal_ids=%5B%22248%22%5D&approve=true" target="_blank" rel="noreferrer noopener" title="This link will take you away from hive.blog" class="external_link">Vote for <a href="https://peakd.com/me/proposals/248" target="_blank" rel="noreferrer noopener" title="This link will take you away from hive.blog" class="external_link">our proposal!very cute!!!!! 😀