Angular - InputMask
It's curios that angular has no built in input mask. I think everyone who is writing business software comes to the point where you have to add a pre or suffix to an string or int value.
The best example is any currency field which should look like a formated number (examples: $ 4.00 or 5,50€) and should be editable + bindable.
Now you have several options to accomplish this result.
You can use the suffix/prefix feature from matInput but I think you will run in some styling issues and you are not very flexible.
Maybe you are into pipes - why not use the angular built-in currency pipe? Try it.. you will run in some two way binding errors because the pipe transform the number into an string but doesn't translate it back..
I searched a lot and found some interesting npm packages like:
https://www.npmjs.com/package/ngx-currency
If it fits your needs - great - it's working very good and it helped me a lot understanding how directives are working.
Unfortunately I ran in some incompatibility and it all endet with building my own directive.
This post should give you the base for your own inputMask which is easy to use and extend for your special needs.
I will split this tutorial to several posts because free time is such a thing.. yeah you know.
First create a directive with the angular CLI:
ng g d <name> (i will use inputMask for this tutorial)
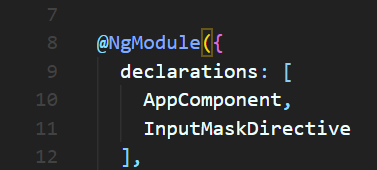
Dont forget to add it to the declarations section in your module if you didn't use angular CLI:
For testing just place an input anywhere in your html and add the directive:
<input inputMask value='14'>
Now we should care about the config/options for your inputMask. You can add every parameter as an input but I will go with an model. Just create a new file or add it to your directive.
I will go with this:
export interface IInputMaskOptions {
    prefix?: string;
    suffix?: string;
}
export class InputMaskOptions implements IInputMaskOptions {
    prefix?: string;
    suffix?: string;

    constructor(data?: IInputMaskOptions) {
        if (data) {
            for (var property in data) {
                if (data.hasOwnProperty(property))
                    (<any>this)[property] = (<any>data)[property];
            }
        }
    }
}
Add your options model with the @Input decorator to your directive:
export class InputMaskDirective implements OnInit {
  @Input() options: InputMaskOptions;
Now open the typescript file from the component you put your test input and create an options model for testing and bind it to the @Input from your decorator
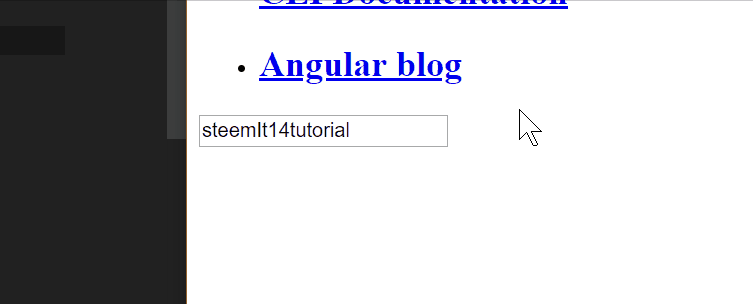
  options: InputMaskOptions = new InputMaskOptions({
    prefix: 'steemIt',
    suffix: 'tutorial'
  });

<input inputMask [options]="options" value='14'>
Now we are able to configurate our directive and can start with the real fun.
What we actually trying to achieve is that the input has 2 states.
-idle: just showing the formated value
-edit: if the input has focus - remove every suffix or prefix and let me just change the binded value.
We will start with the constructor - we will need access to the HTML Element so we have to inject Elementref:
constructor(private elementRef: ElementRef) { }
For easier access to the value of the input we will add getter and setter:
  get rawValue(): string {
    return this.elementRef.nativeElement.value;
  }
  set rawValue(value: string) {
    this.elementRef.nativeElement.value = value;
  }
To recognize the focus and blur event add 2 HostListener:
  @HostListener('focus') onFocus() {
  }

  @HostListener('blur') onBlur() {
  }
Now we need 2 methods to apply the mask and clear the mask:
  applyMask(value: string): string {
    return this.options.prefix + value + this.options.suffix;
  }

  clearMask(value: string): number {
    let regTextDec = "\\."; //decimal seperator
    let regTextThousand = "," //thousand seperator
    var regDec = new RegExp(regTextDec, "g");
    var regThousand = new RegExp(regTextThousand, "g");
    let regNotRelevant = new RegExp("[^0-9" + regTextDec + regTextThousand + "]", "g");

    let onlyNumber = value.replace(regNotRelevant, "");
    let parseableNumber = onlyNumber.replace(regThousand, "").replace(regDec, ".");
    return parseFloat(parseableNumber);
  }
and call it from our hostlisteners:
  @HostListener('focus') onFocus() {
    this.rawValue = this.clearMask(this.rawValue).toString();
  }

  @HostListener('blur') onBlur() {
    this.rawValue = this.applyMask(this.rawValue);
  }
The result should like:
If you have any questions just ask in the comments :-)
Greetings from Austria

Congratulations @geggi632! You received a personal award!
You can view your badges on your Steem Board and compare to others on the Steem Ranking
Vote for @Steemitboard as a witness to get one more award and increased upvotes!