Is it broke?
Worn out?
Need maintenance?
No
No
No
Then why on God’s green earth am I goin through the trouble to pull my turbo out if there isn’t anything wrong with it????

How To Remove and Install the Turbo on a 1994.5-1997 Ford F-350 7.3L Powerstroke Diesel
Tool List
- 1/4 inch drive ratchet with the following sockets
10mm-6 point
8mm-12 point
11mm deep well
3 inch extension
6 inch extension
Swivel or universal socket - 3/8 Drive Ratchet with all the same sockets as the 1/4 inch drive but add on a 13mm
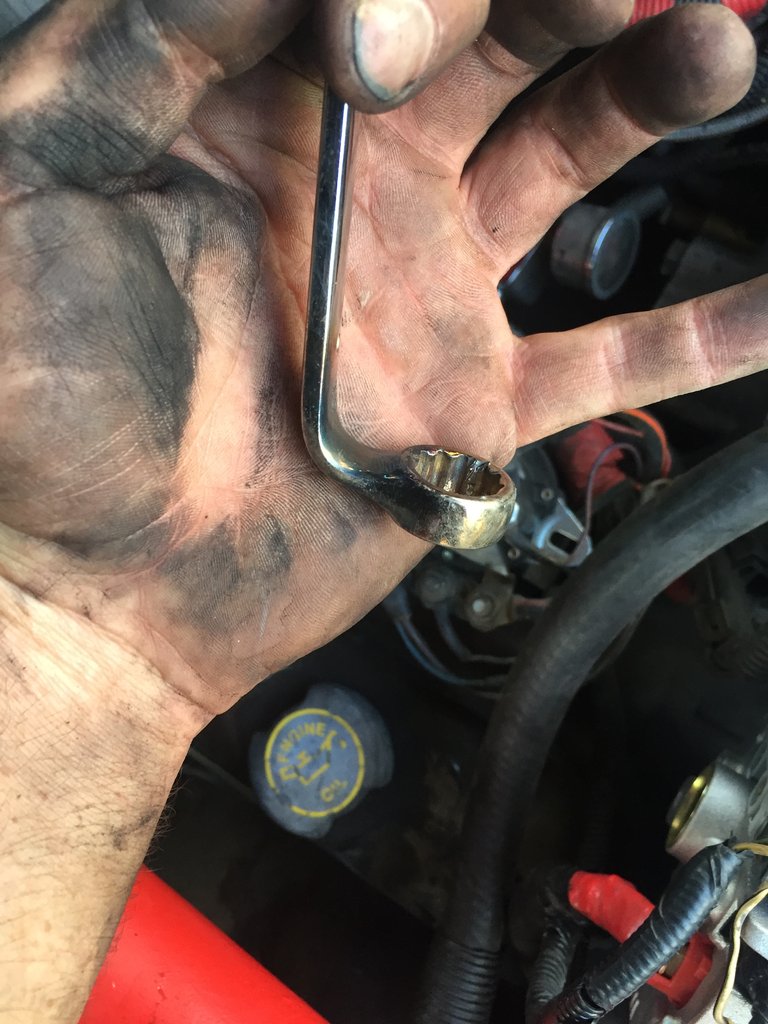
- 15mm box/open end wrench
- A crappy 15mm box end wrench (you will see why later
- 10mm box/open end wrench
- 12 in Cresent Wrench
- Extendable magnet for those oopsie moments.
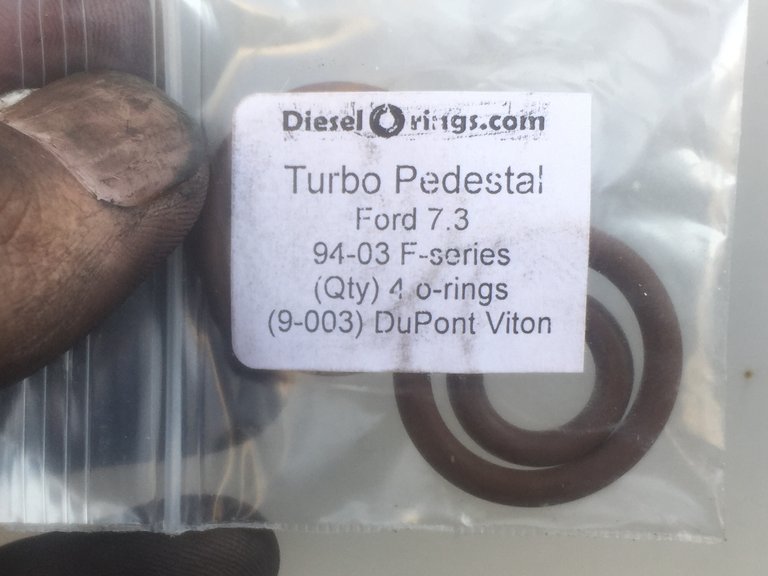
- Only part that needs to be ordered is new O-rings for the turbo pedestal
Optional tools but they sure do make life but easier
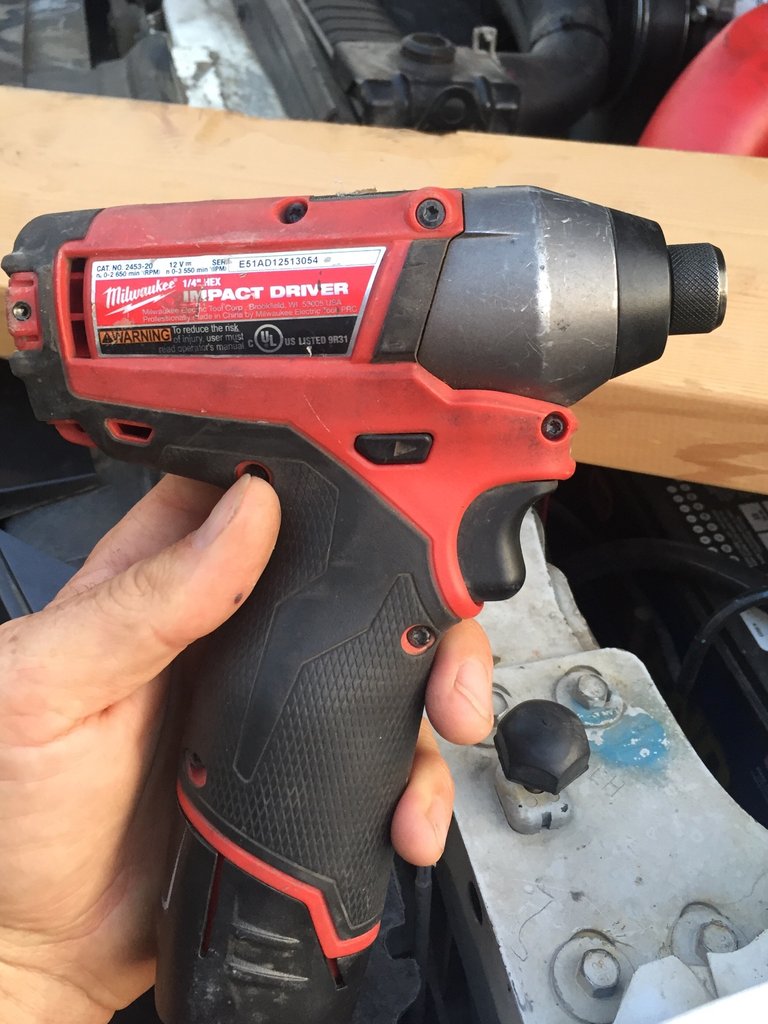
- cordless impact driver with 1/4 inch hex quick connect adapters to 1/4 inch drive sockets and 3/8 drive sockets
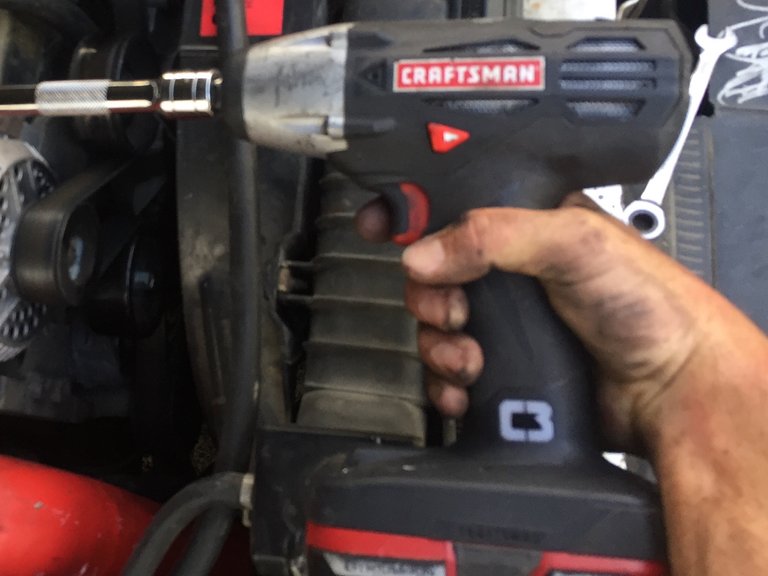
- 1/2 inch drive cordless impact drill with a 12 inch extension, swivel/universal socket and a 13mm socket
- PB Blaster - soak the bolts that connect the turbo to the up-pipe collector the day before
Here are the nuts and bolts I am talking about
Maybe hit them a few times the day before, give them a good soak. With the intense heating and cooling of the exhaust up-pipe collector, these can be a real pain to get off
Let’s Get Started

This brings good luck in hopes of everything running smoothly
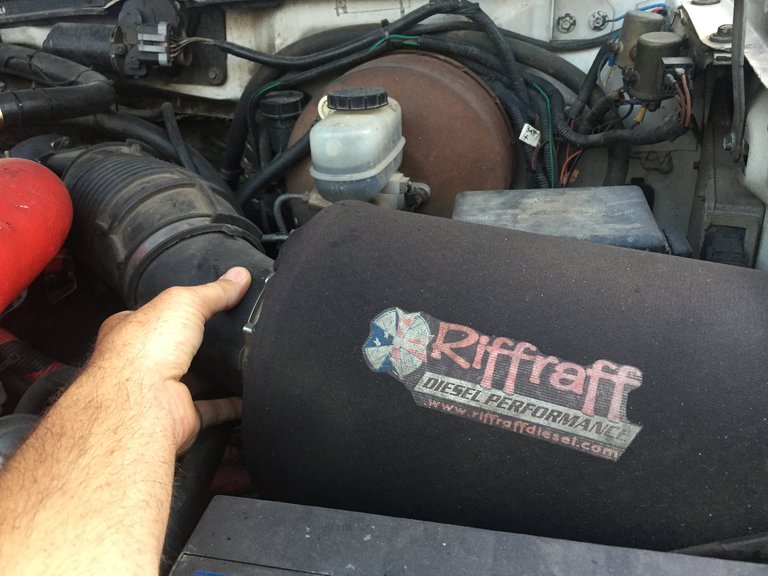
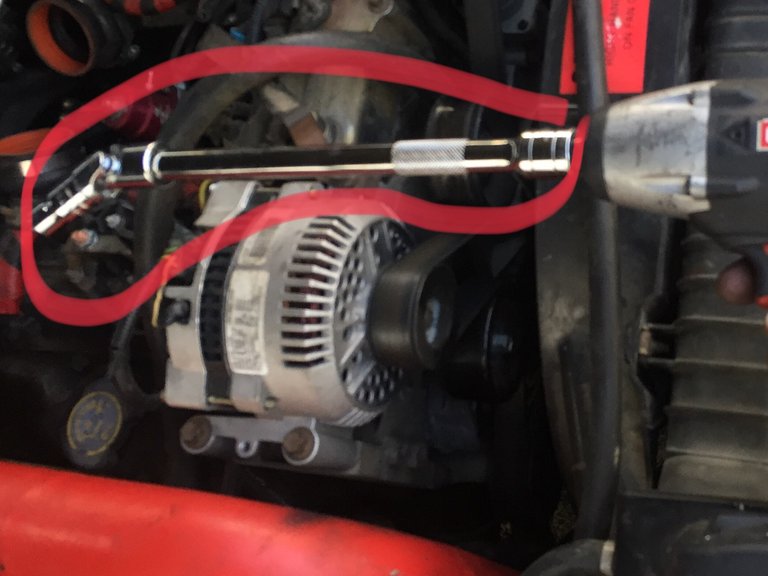
This is located on the far right side of the engine bay when standing infront of the truck. Most likely if you are going to be removing the turbo, you know where this is. Again this is an upgraded air intake, the stock one is just a bit different.
There are 2 - 10mm bolts that hold the intake tube in place.
Using a 6-inch extension and 10mm socket remove these 2 bolts
Then loosen the hose clamp that hold the intake tube to the turbo
Using that 1/4 hex drive impact gun is the best for this.
ZIP ZIP ZIP DONE
Just wiggle and slide the whole thing out all in one piece.
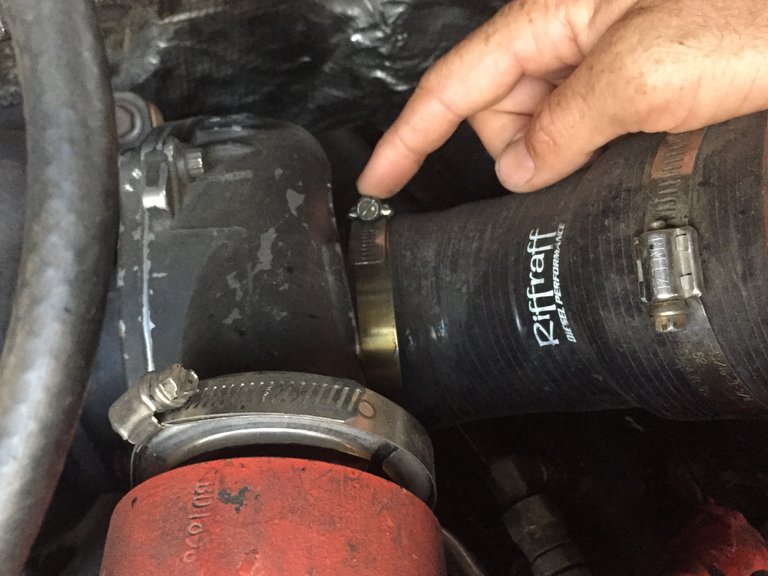
Next Remove the Y-Pipe or Spyder Pipe in my case
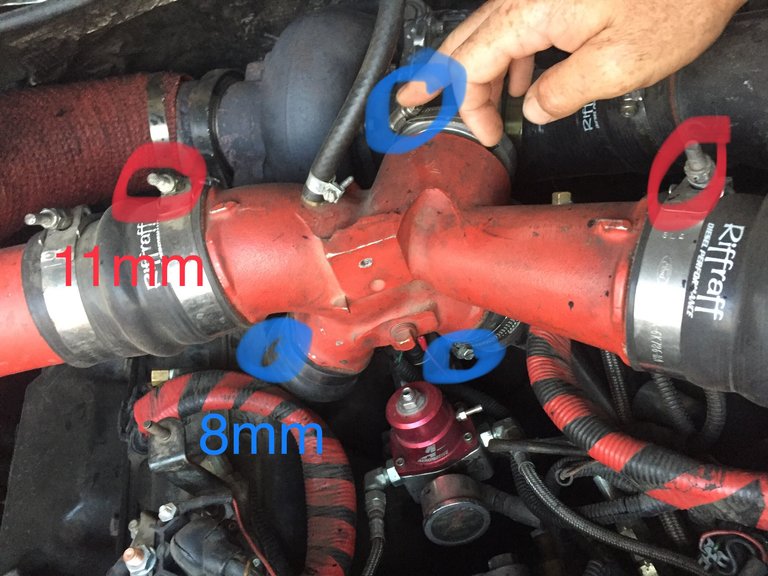
Using 8mm and 11mm sockets loosen all the hose clamps hold the Y-Pipe or Spyder Pipe in place.
Pull the intercooler pipes off first, they can’t just bend pushed out of the way. Then I found that by rolling the Spyder Pipe counter-clockwise it pops right out
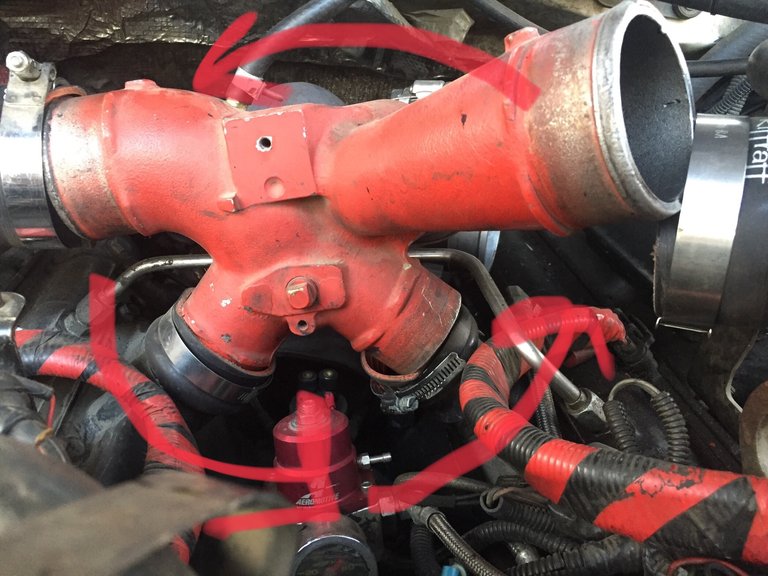
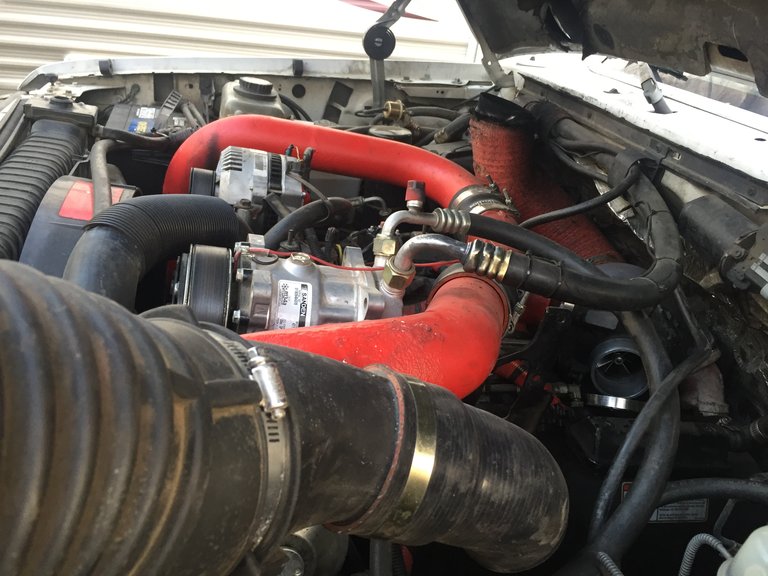
Remove Exhaust Downpipe from turbo
My exhaust is quite massive and 100% custom. Most will have to push theirs out of the way in hopes of having enough room.
Mine on the other hand, after loosening the v-band clamp with an 11mm socket, comes right out
Now that is a sophisticated exhaust system.
Now We Get Into The Fun Stuff
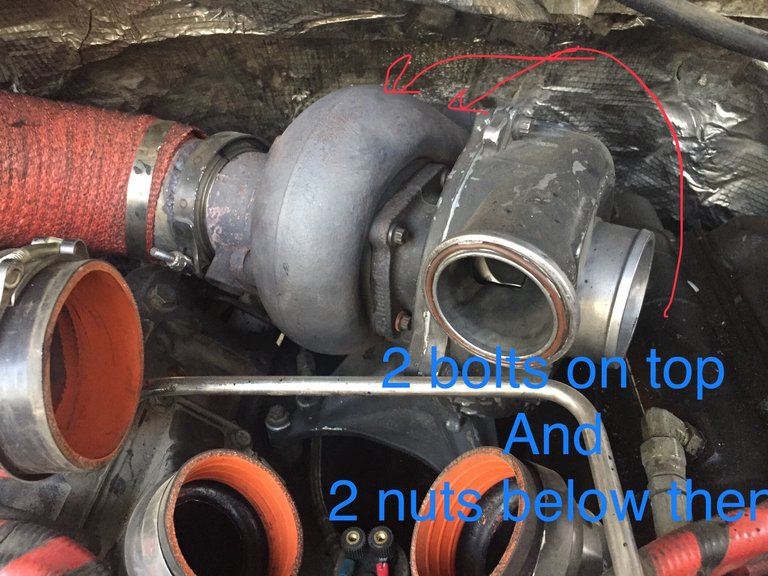
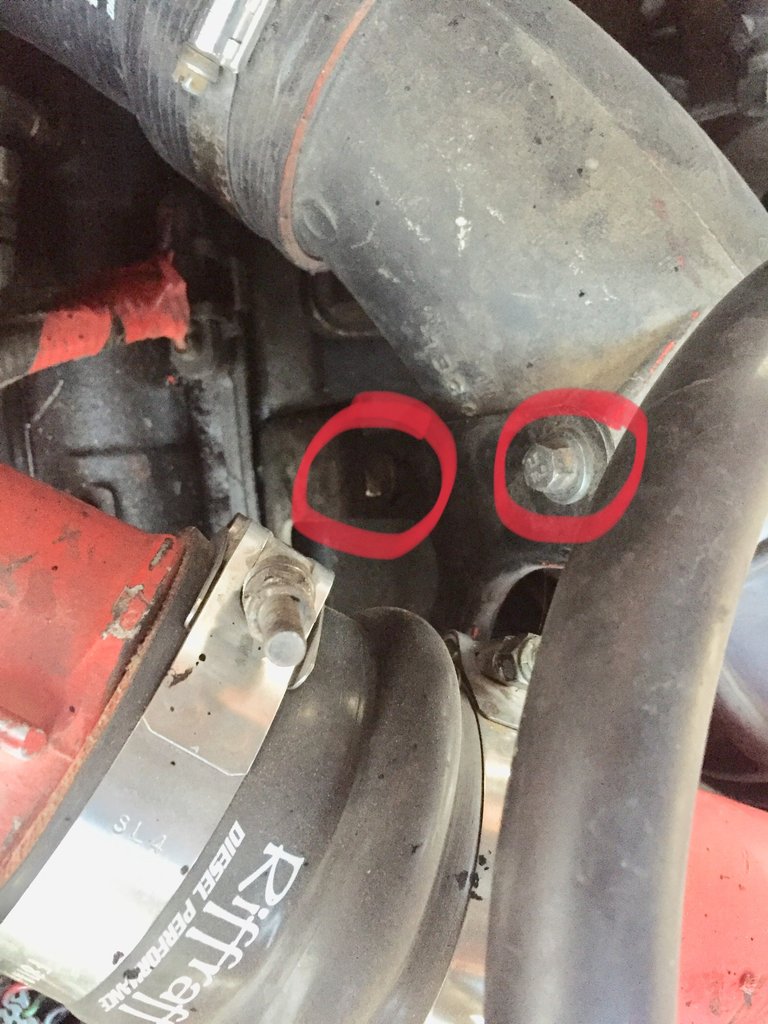
First let’s get those nuts and bolts we soaked with PB Blaster off.
With a 12 inch extension, swivel socket, and a 13mm socket attached to the 1/2 inch drive impact drill, hammer those top 2 bolts outta there!!
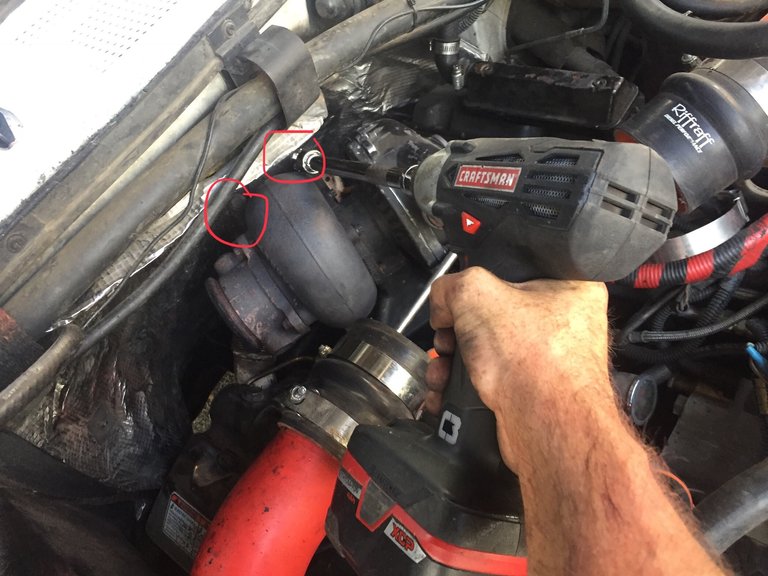
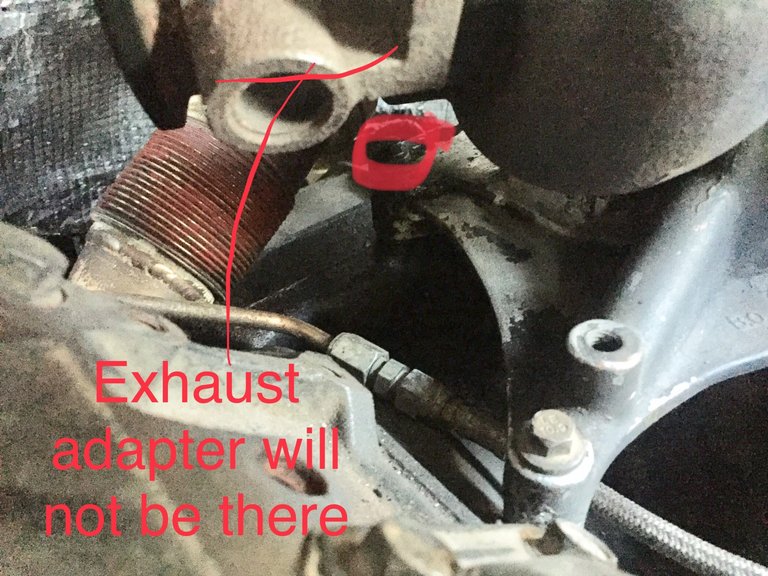
 Again, mine is a little different because I removed my Exhaust back-pressure butterfly valve. There is an actuator arm on the backside that need to be removed in order to completely remove the exhaust adapter.
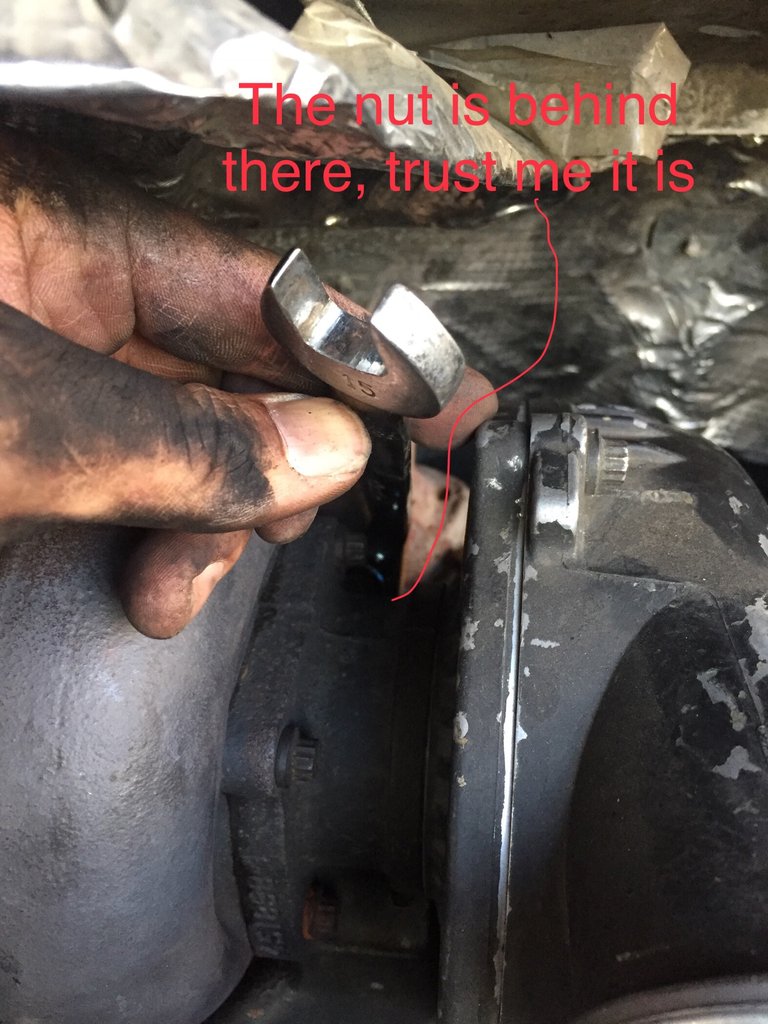
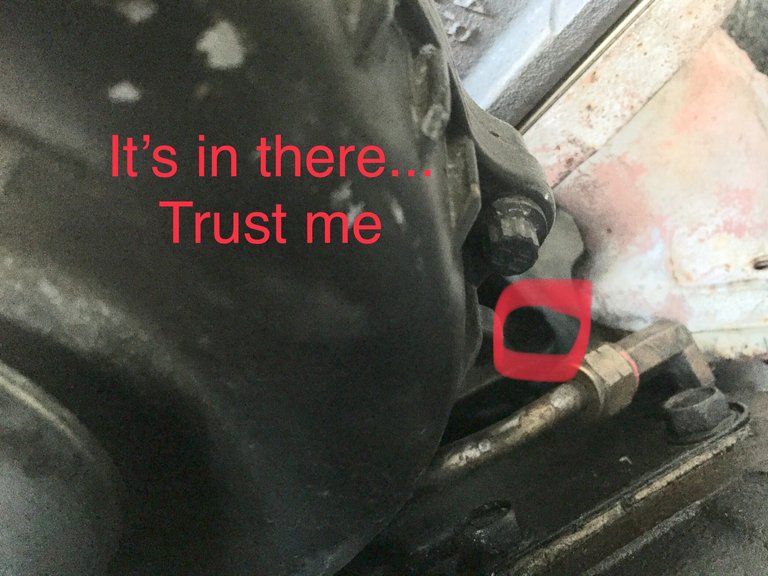
Now we need to get to that bottom driver side nut. It is in a real tight space and there is no way to get a socket or wrench on it. Trust me, I along with many others have tried too.
Remember I told you to get a crappy 15mm box end wrench? Ya your goin to take that wrench and using a propane torch heat it up and bend it like so.
Please be careful and don’t burn yourself. Have a bucket of water close by so after you bend it you can throw it in there to cool off. Use a set of vise-grips to hold it while you heat it up and put a screwdriver through the box end side to use as leverage to bend it. There now you have your very own custom made tool.
There is a perfect channel that this wrench now fits in to reach that lower driver side nut. Between the compressor and exhaust sides of the turbo
Once you get it secured on the nut in the furthest clockwise position as possible, use a 12 inch Crescent Wrench and tighten it around the end of your custom tool
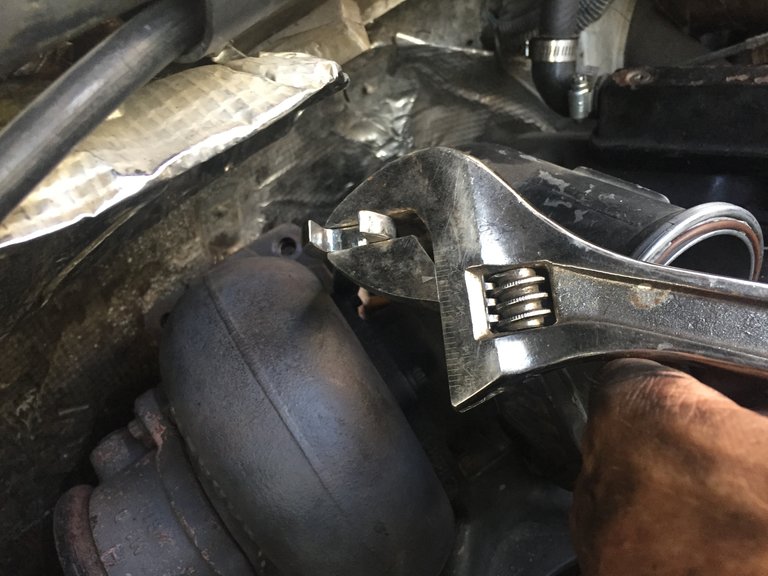
Using one hand to stabilize the point where the cresent wrench is hooked to your custom tool, turn it counter-clockwise and bust that nut free.
Sadly, this is another nut that takes patients because it is a quarter turn at a time.
This is where the extendable magnet comes in handy. It’s really tight quarters back there and chances are you are goin to drop one of those nuts. This thing is a life saver
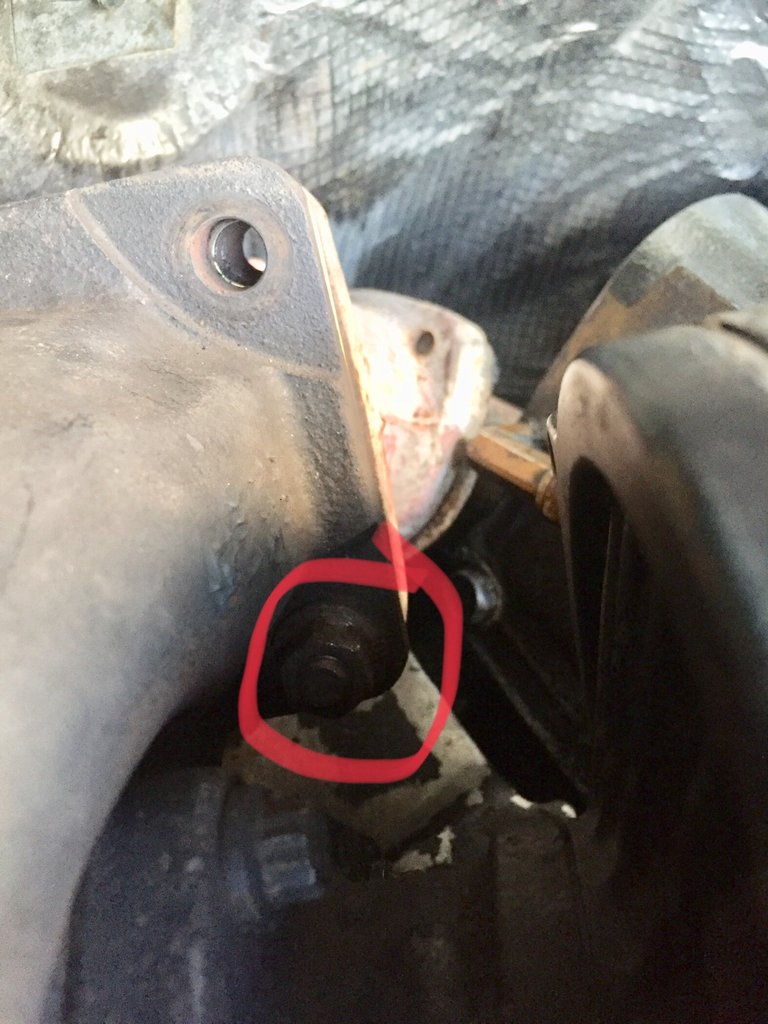
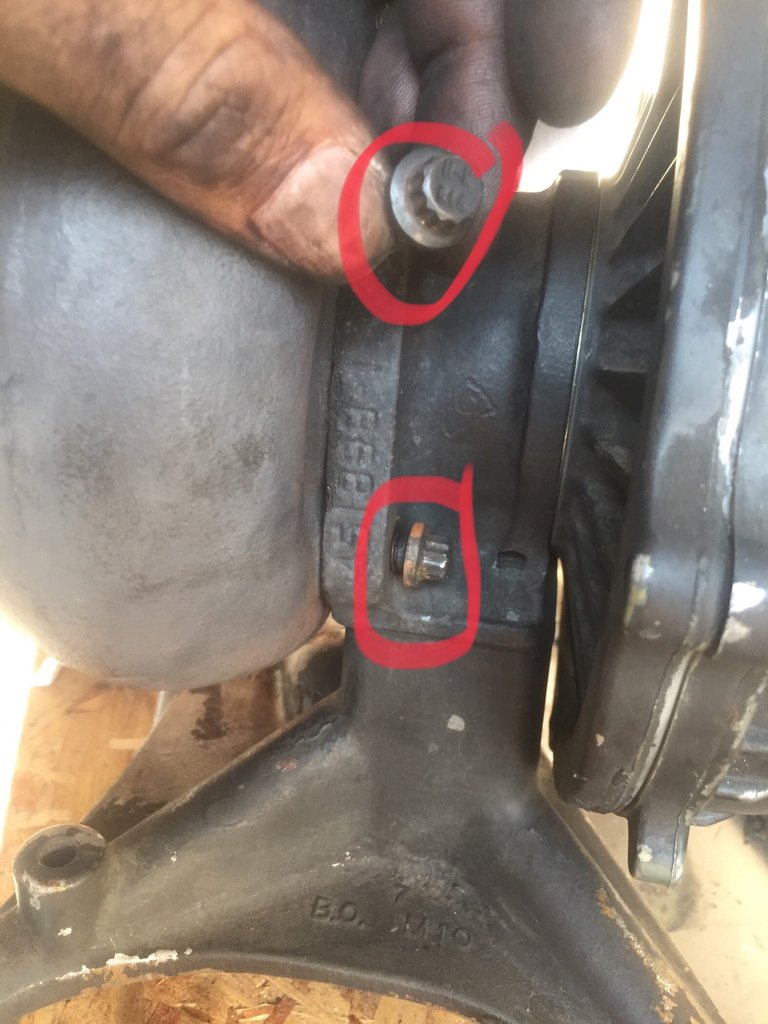
These 2 bolts and 2 nuts we just removed and the toughest ones to break free. If you have made it this far, your on the home stretch.
Are they easy to get to?
Well 2 of them are, they are right up front
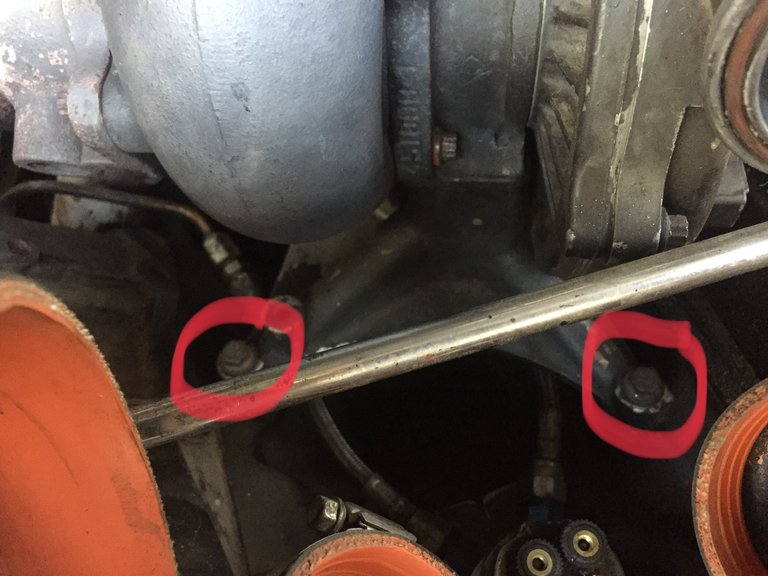
 It’s a tight fit and yet another bolt that is 1/4 turn at a time. Having patients when wrenching is a must. So get as comfortable as you canand just keep working at it. You won’t be able to completely remove the bolt. Once you have it where you can lift it up and down move to the other side.
At least this driver side on you can get a socket on, DANG!!
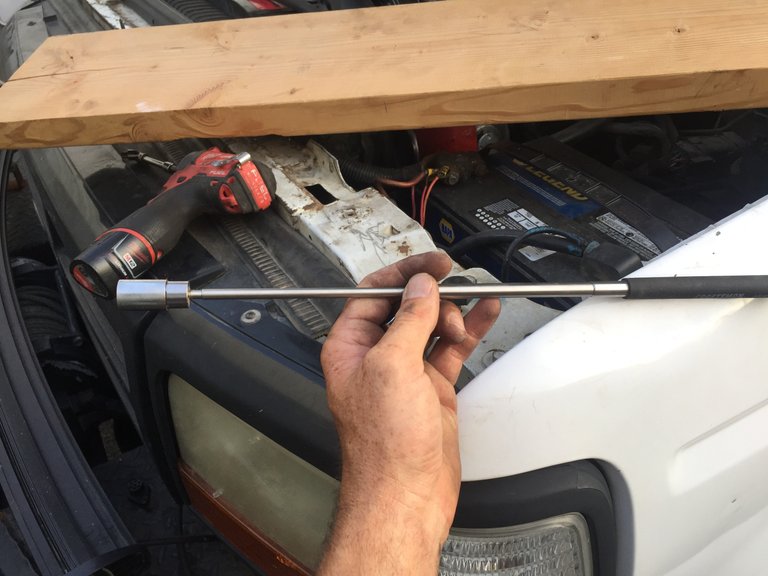
With your 6 inch 1/4 inch drive extension, place a swivel socket on with a 10mm 6-point socket of the end of that. This is another bolt you really don’t want to round off.
It’s a tight fit and yet another bolt that is 1/4 turn at a time. Having patients when wrenching is a must. So get as comfortable as you canand just keep working at it. You won’t be able to completely remove the bolt. Once you have it where you can lift it up and down move to the other side.
At least this driver side on you can get a socket on, DANG!!
With your 6 inch 1/4 inch drive extension, place a swivel socket on with a 10mm 6-point socket of the end of that. This is another bolt you really don’t want to round off.
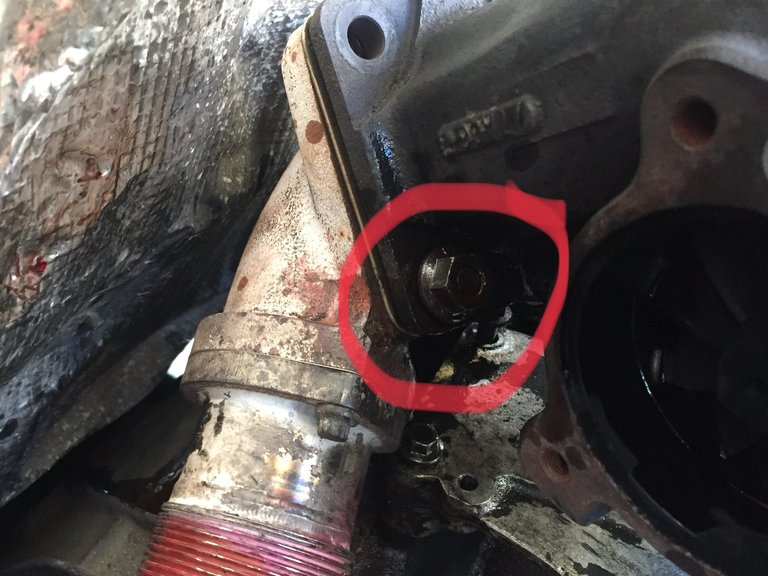
 Again my pedestal has been modified since I removed the Exhaust BackFlow Valve and the acuator. There is a half round cylinder on the back of the pedestal that makes it a little more difficult to get to this bolt. That is why mine is gone!! I cut it off and had the hole filled to make it just that much easier the next time I pulled the turbo.
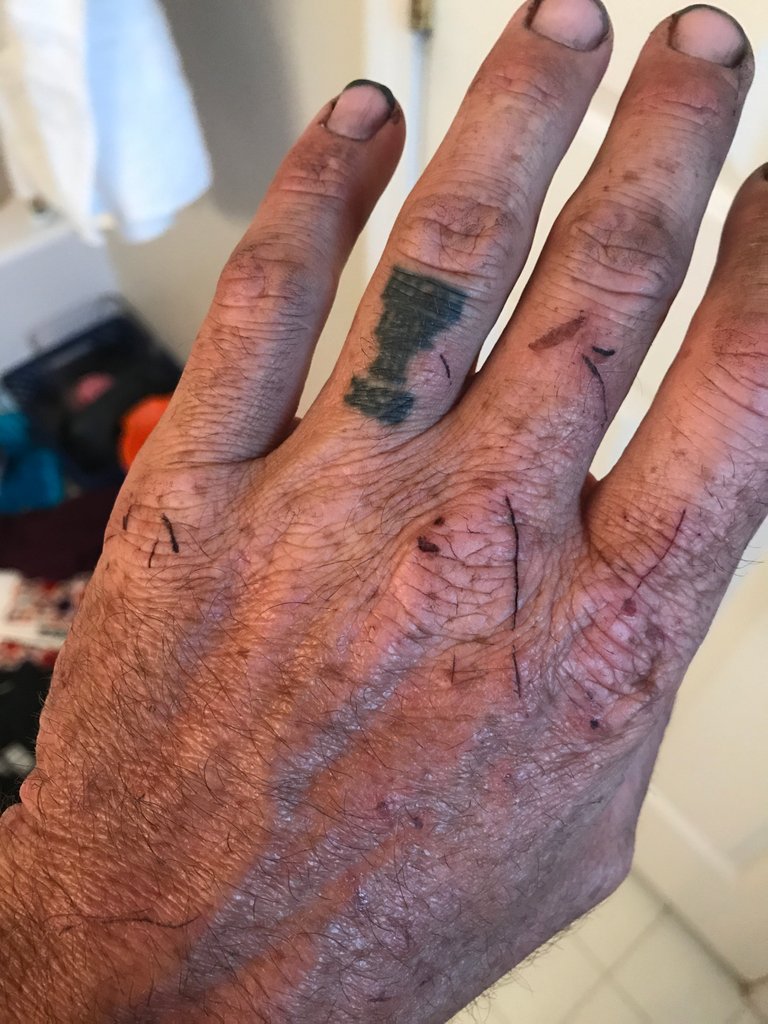
After you have cussed your brains out, and your hands are covering in grease and oil with a slight red tint in places due to the minor cuts received from cramming your hands in tight spaces. It’s time to wiggle and jiggle this turbo out of the vehicle.
Again my pedestal has been modified since I removed the Exhaust BackFlow Valve and the acuator. There is a half round cylinder on the back of the pedestal that makes it a little more difficult to get to this bolt. That is why mine is gone!! I cut it off and had the hole filled to make it just that much easier the next time I pulled the turbo.
After you have cussed your brains out, and your hands are covering in grease and oil with a slight red tint in places due to the minor cuts received from cramming your hands in tight spaces. It’s time to wiggle and jiggle this turbo out of the vehicle.

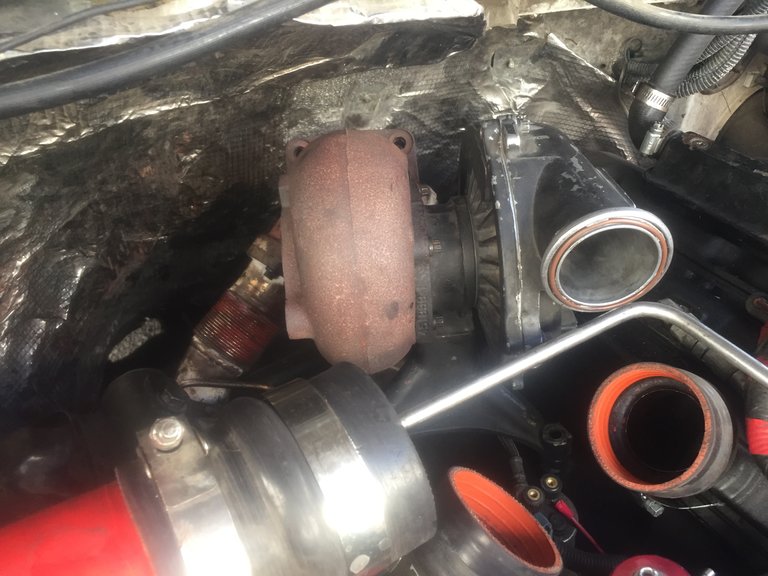
YAHOO IT’S OUTTA THERE!! 
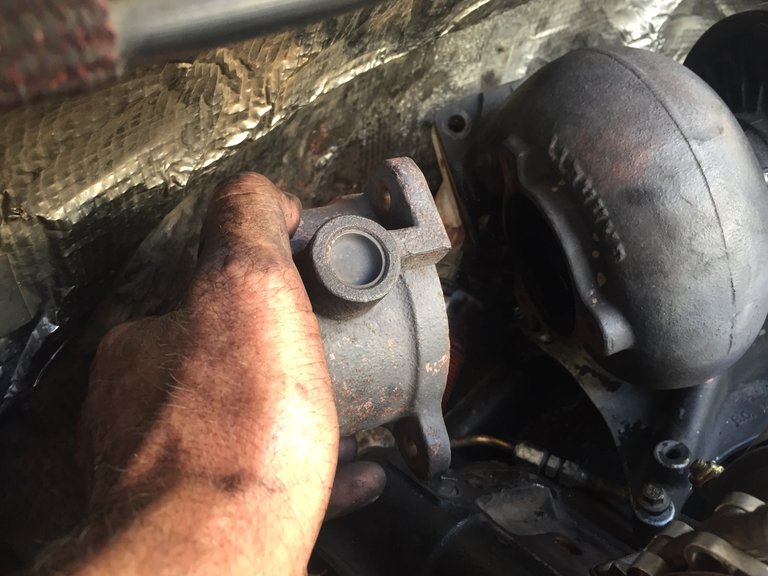
Swap the Exhaust Housing
Before re-installing the turbo make sure to remove the o-rings that are under the turbo pedestal and replace them with new the new ones. Once these have been squished they are no good anymore.
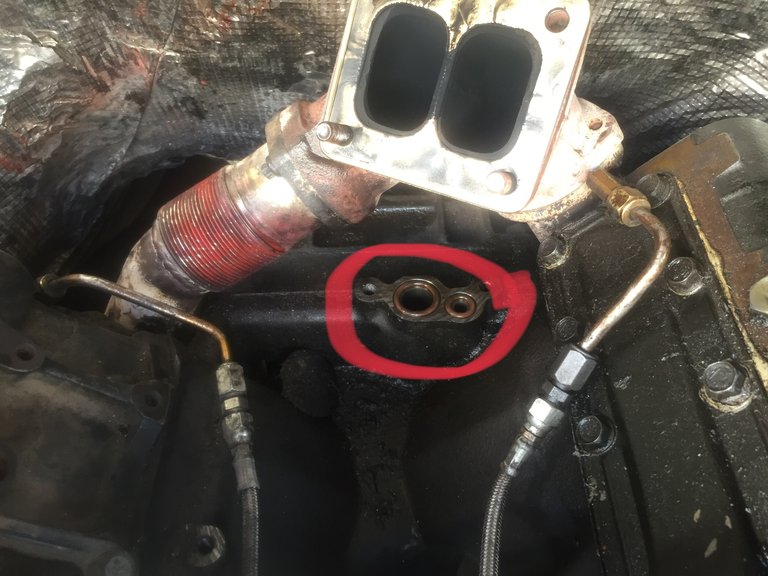
Place the 2 rear bolts in the pedestal because you can’t put them in after it is in place. Be really careful not to push those o-rings out of place. There is no real way of telling if you did or not, other than you will be leaking a oil everywhere hen you start the tuck up. Just try not to slide it around and into place. Slightly lift up if you need to reposition in order get the bolts to line up.
Well, now that you have it back in place, it’s as easy as bolting it back into place. Yeah... I wish!!!
Keep that magnet handy just In case you have a couple dropsies and make sure to double and triple check your nuts and bolts to ensure they are tight.
Same goes for all the clamps that hold your intercooler pipes together. I would hate to be pulling a hill with a trailer boosting at 30psi and have one of those rubber boots come off because I forgot to tighten a clamp.
Before taking it on a long trip I recommend doing a good test drive and build that turbo boost really good to ensure nothing comes apart.
The first time I did this it took me a very long time. I would say 6 hours maybe more. This go around I completed it in just over 2 hours. I have done this a time or 2 😉
Just take your time and be patient, crank up some tunes on the stereo and get after it. If you feel yourself getting frustrated, just walk away for a bit to clear your head.
Now this beast is ready to tow the camp trailer and do some camping.

Steem on
And
Do work!!

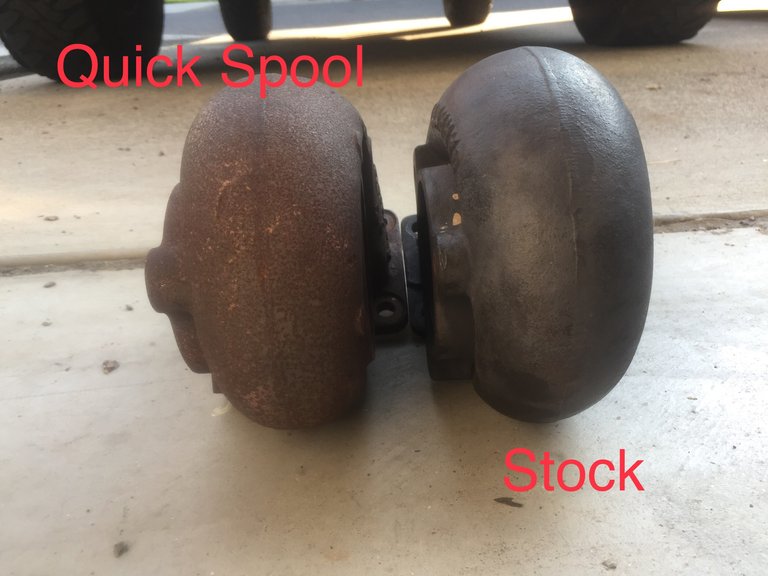
 Now you can see the comparison between the 2 exhaust housings.
 Now bolt the turbo back together and it is ready to go back into the truck. I know, I know, all that work just for that. It might seem like something small but when you can feel the difference in the seat of your pants... it’s totally worth it to me. I don’t feel that push back into the seat like I used too.
 Hopefully that PB blaster has done its job!!
How much extra time did it take because of taking pictures and thinking of this post?
The post took way longer than the actual work. I just had my phone handy and snapped shots as I went along. It didn’t take that much extra time. Just that one stupid nut that seemed to be cross threaded. Gee I wonder who did that?!?!
Took it for a short drive to the store for a cold one and no leaks. Winner winner chicken dinner.... wait that is what we are having tonight. 😉
Just wait till you see our deep fried chicken recipe. It will rock your chicken world! We have the content made just have not put it together. Its coming soon!
What a descriptive post. You’re the fixin’est, most tearin apart’est dude I know around here.
Swapping out turbos isn’t my thing, my idea of diesels are the kind that float but you spelled that whole thing out so well, I wouldn’t sweat having to do it.. ever. Just look up this post.
I really like your paragraphs aligning too dude! Great job all over the place here.
Thanks a bunch brother 👍🏻👍🏻👍🏻 Some guy shared a link with me on how to align the paragraphs like that 😉😉
Steem on
Now I gotta get my trailer ready to hit the road this weekend. I’m off work for the next 12 days. 😎😎 @dandays
Just in time for my recharged vote :). Yeah i was like didn't he already do this lol. Well done, bravo😜
Now I have all these little knicks and cuts on my hands and arms and I am goin to get into our saltwater pool. 😳😳
Lol, feel the burn 💪😜
Dude, it didn’t hurt getting in but after I got out all the cuts got all stiff.
You're always being that great handy-man I know. Great job guy, you sure don't pay for services, I know.
I am not sure how much a shop would charge to do this. I bet it would be around $1000 and that is a safe guess.
That's a HUGE saving man. You got so blessed.
Upvoted from themarkymark stream!
Awesome! 👍🏻👍🏻 I put a lot of time into this one. The actual job needed to be done but the post, I wanted to make it better than usual.
Congratulations @jlsplatts! You have completed the following achievement on Steemit and have been rewarded with new badge(s) :
<p dir="auto"><a href="http://steemitboard.com/@jlsplatts" target="_blank" rel="noreferrer noopener" title="This link will take you away from hive.blog" class="external_link"><img src="https://images.hive.blog/768x0/https://steemitimages.com/70x80/http://steemitboard.com/notifications/voted.png" srcset="https://images.hive.blog/768x0/https://steemitimages.com/70x80/http://steemitboard.com/notifications/voted.png 1x, https://images.hive.blog/1536x0/https://steemitimages.com/70x80/http://steemitboard.com/notifications/voted.png 2x" /> Award for the number of upvotes received <p dir="auto"><sub><em>Click on the badge to view your Board of Honor.<br /> <sub><em>If you no longer want to receive notifications, reply to this comment with the word <code>STOP <p dir="auto">To support your work, I also upvoted your post! <blockquote> <p dir="auto">Do you like <a href="https://steemit.com/@steemitboard" target="_blank" rel="noreferrer noopener" title="This link will take you away from hive.blog" class="external_link">SteemitBoard's project? Then <strong><a href="https://v2.steemconnect.com/sign/account-witness-vote?witness=steemitboard&approve=1" target="_blank" rel="noreferrer noopener" title="This link will take you away from hive.blog" class="external_link">Vote for its witness and <strong>get one more award!Excellent work young sir! Next time I'm having issues with my land rover can I send it your way?
Sure, how will you be sending it? By Air or by sea 😜😜
Well that would depend what goes wrong and what mood I'm in if it does! You might end up with one piece at a time haha. Still @lil-splatts is good at put bits together isn't he?! 🤣