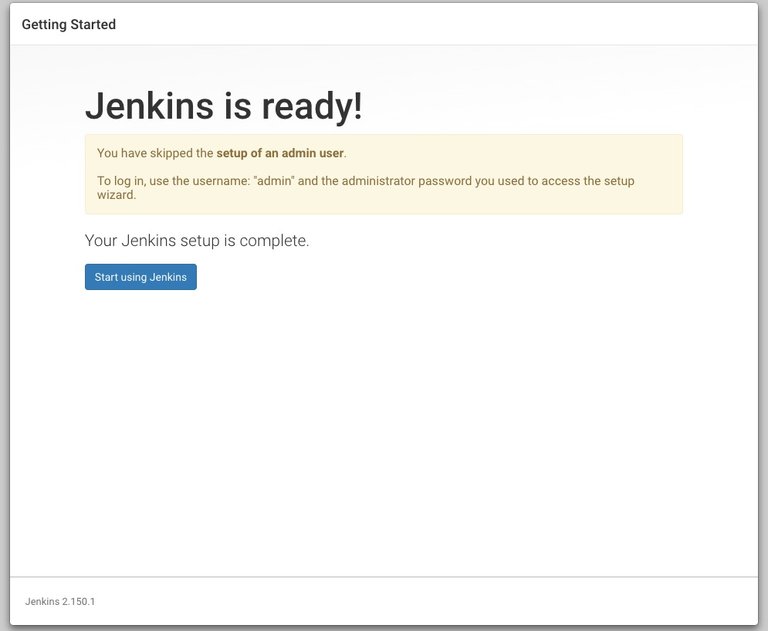
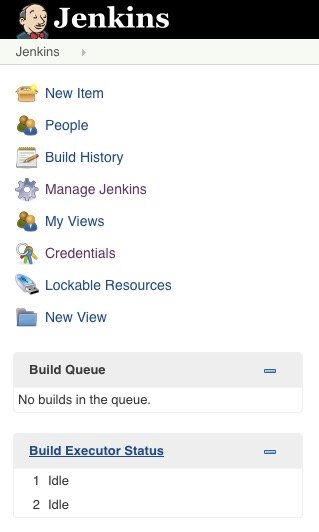
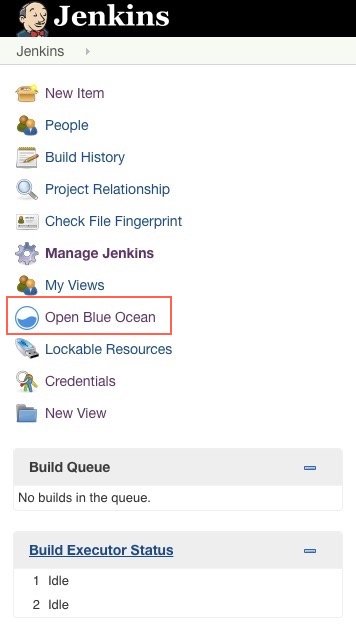
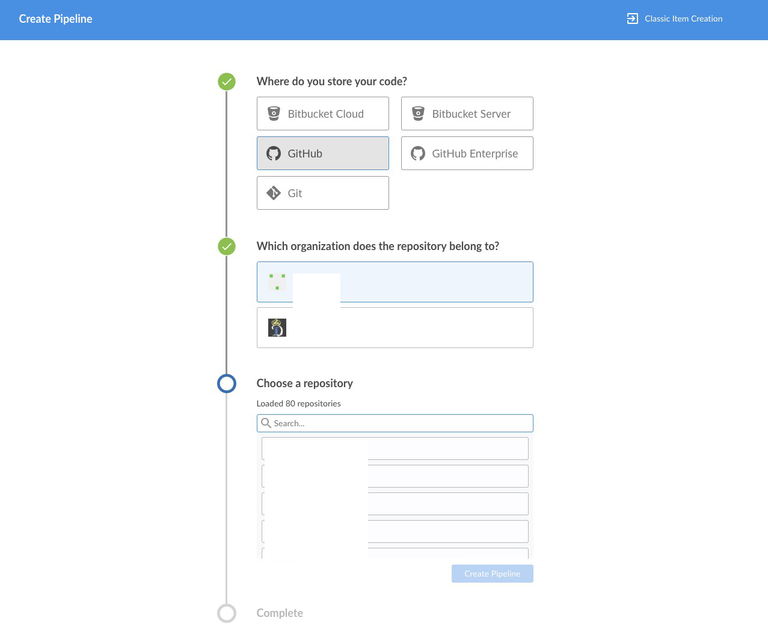
Jenkins is a great tool used to setup continuous integration and continuous deployment environments, Jenkins automation allows you to can create jobs to build, test, and deploy your applications.
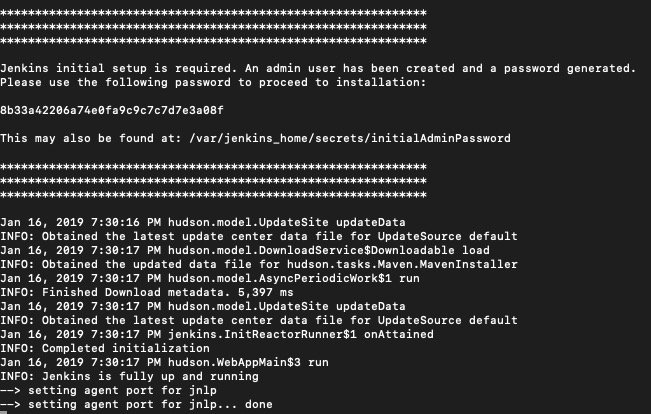
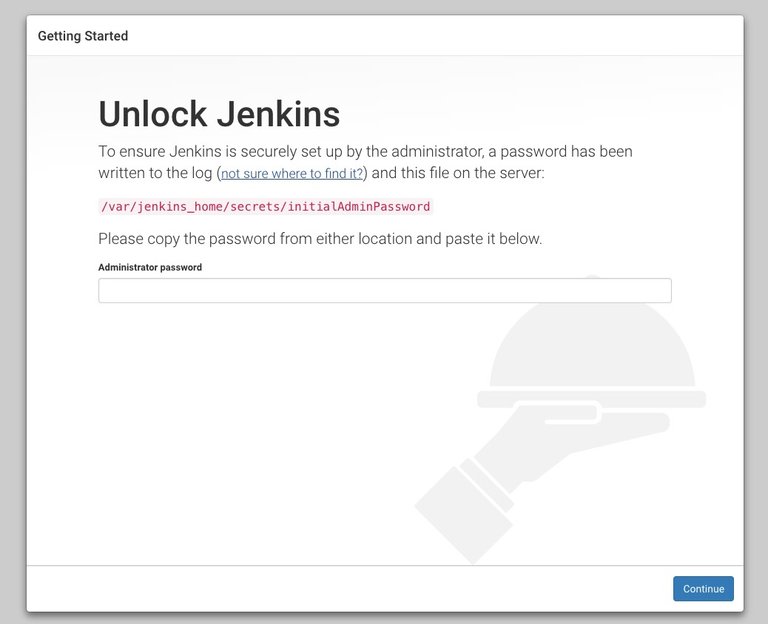
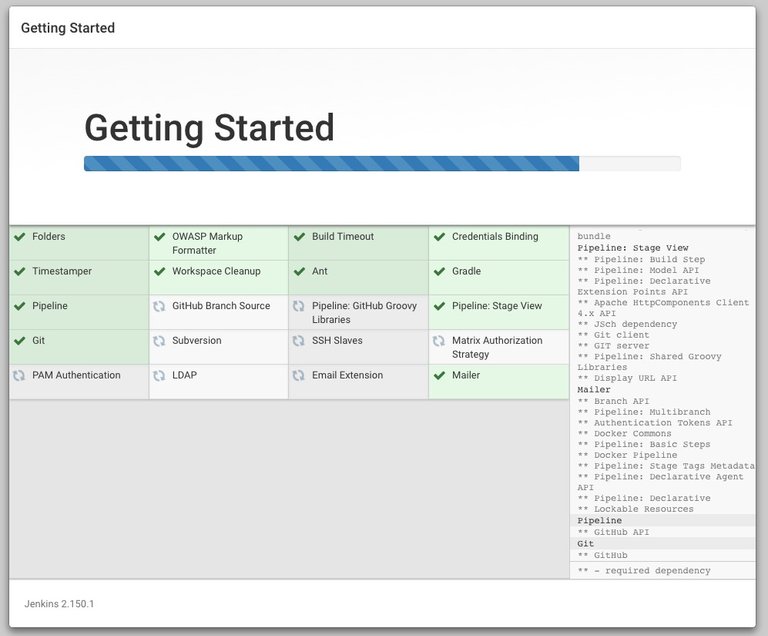
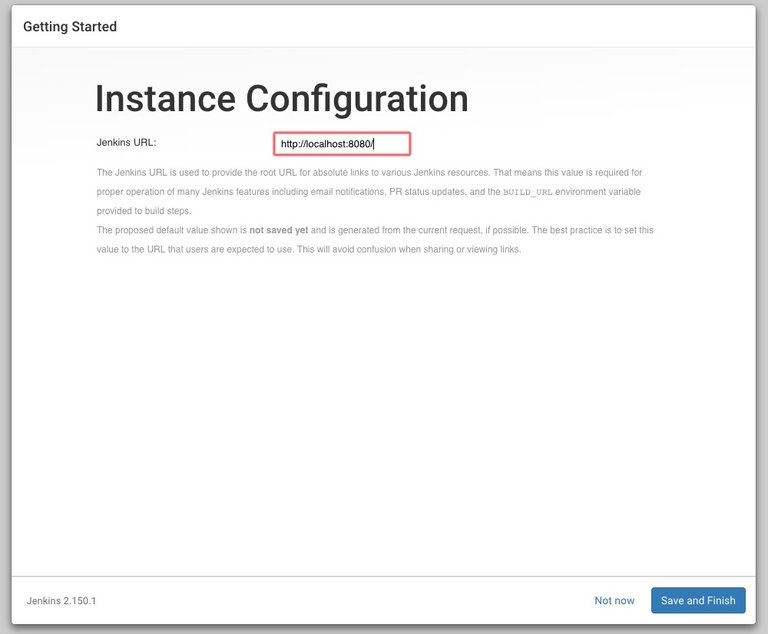
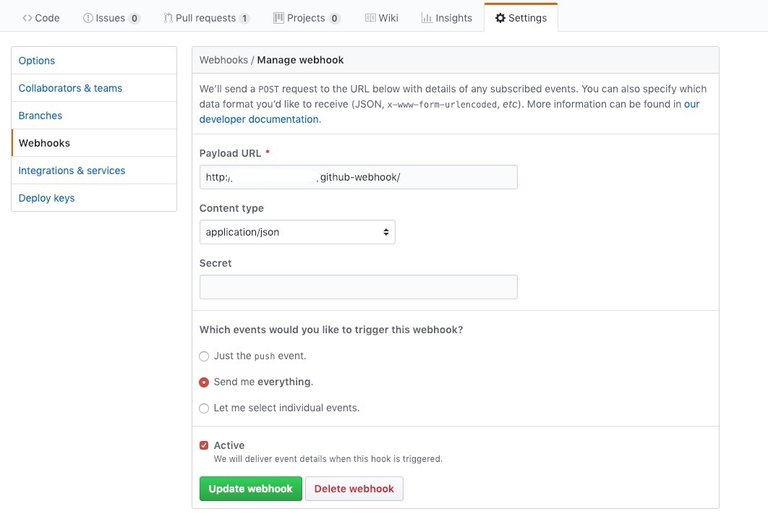
<p dir="auto"><img src="https://images.hive.blog/768x0/https://embeddednature.com/wp-content/uploads/2019/01/enJenkins.png" alt="Image of Jenkins" srcset="https://images.hive.blog/768x0/https://embeddednature.com/wp-content/uploads/2019/01/enJenkins.png 1x, https://images.hive.blog/1536x0/https://embeddednature.com/wp-content/uploads/2019/01/enJenkins.png 2x" /> <p dir="auto">To get Jenkins running on your machine you will need to create a container using docker. <p dir="auto">Assuming you have docker installed run the command: <p dir="auto"><code>docker run --name jenkinsci -p 8080:8080 jenkins/jenkins:lts <p dir="auto">Docker will execute the command and run Jenkins on your machine. <p dir="auto">Make sure to grab the admin key from the terminal <p dir="auto"><img src="https://images.hive.blog/768x0/https://embeddednature.com/wp-content/uploads/2019/01/Screen-Shot-2019-01-16-at-1.31.12-PM.jpeg" alt="docker jenkins" srcset="https://images.hive.blog/768x0/https://embeddednature.com/wp-content/uploads/2019/01/Screen-Shot-2019-01-16-at-1.31.12-PM.jpeg 1x, https://images.hive.blog/1536x0/https://embeddednature.com/wp-content/uploads/2019/01/Screen-Shot-2019-01-16-at-1.31.12-PM.jpeg 2x" /><br /> Don’t share passwords 😉 <p dir="auto">Navigate to <code>http://localhost:8080. You’ll see the “Getting Started” Jenkins page: <p dir="auto"><img src="https://images.hive.blog/768x0/https://embeddednature.com/wp-content/uploads/2019/01/Screen-Shot-2019-01-16-at-1.32.40-PM.jpeg" alt="Jenkins" srcset="https://images.hive.blog/768x0/https://embeddednature.com/wp-content/uploads/2019/01/Screen-Shot-2019-01-16-at-1.32.40-PM.jpeg 1x, https://images.hive.blog/1536x0/https://embeddednature.com/wp-content/uploads/2019/01/Screen-Shot-2019-01-16-at-1.32.40-PM.jpeg 2x" /> <p dir="auto">Enter the administrator password and press continue. <p dir="auto">On the following screen click “Install suggested plugins” <p dir="auto">Plugins will begin to install: <p dir="auto"><img src="https://images.hive.blog/768x0/https://embeddednature.com/wp-content/uploads/2019/01/Screen-Shot-2019-01-16-at-1.37.23-PM.jpeg" alt="plugins" srcset="https://images.hive.blog/768x0/https://embeddednature.com/wp-content/uploads/2019/01/Screen-Shot-2019-01-16-at-1.37.23-PM.jpeg 1x, https://images.hive.blog/1536x0/https://embeddednature.com/wp-content/uploads/2019/01/Screen-Shot-2019-01-16-at-1.37.23-PM.jpeg 2x" /> <p dir="auto">After the installation completes, create a user or continue as Admin. <p dir="auto">You will be asked to set your Jenkins URL: <p dir="auto"><img src="https://images.hive.blog/768x0/https://embeddednature.com/wp-content/uploads/2019/01/Screen-Shot-2019-01-16-at-1.38.55-PM.jpeg" srcset="https://images.hive.blog/768x0/https://embeddednature.com/wp-content/uploads/2019/01/Screen-Shot-2019-01-16-at-1.38.55-PM.jpeg 1x, https://images.hive.blog/1536x0/https://embeddednature.com/wp-content/uploads/2019/01/Screen-Shot-2019-01-16-at-1.38.55-PM.jpeg 2x" /> <p dir="auto">Once complete you can start using Jenkins. <p dir="auto"><img src="https://images.hive.blog/768x0/https://embeddednature.com/wp-content/uploads/2019/01/Screen-Shot-2019-01-16-at-1.40.24-PM.jpeg" srcset="https://images.hive.blog/768x0/https://embeddednature.com/wp-content/uploads/2019/01/Screen-Shot-2019-01-16-at-1.40.24-PM.jpeg 1x, https://images.hive.blog/1536x0/https://embeddednature.com/wp-content/uploads/2019/01/Screen-Shot-2019-01-16-at-1.40.24-PM.jpeg 2x" /> <p dir="auto">Now let’s install some plugins. <p dir="auto">In order to install the plugins you need, click on “Manage Jenkins” on the left hand side: <p dir="auto"><img src="https://images.hive.blog/768x0/https://embeddednature.com/wp-content/uploads/2019/01/Screen-Shot-2019-01-16-at-1.42.39-PM.jpeg" srcset="https://images.hive.blog/768x0/https://embeddednature.com/wp-content/uploads/2019/01/Screen-Shot-2019-01-16-at-1.42.39-PM.jpeg 1x, https://images.hive.blog/1536x0/https://embeddednature.com/wp-content/uploads/2019/01/Screen-Shot-2019-01-16-at-1.42.39-PM.jpeg 2x" /> <p dir="auto">You will see “Manage Plugins” button: <p dir="auto"><img src="https://images.hive.blog/768x0/https://embeddednature.com/wp-content/uploads/2019/01/Screen-Shot-2019-01-16-at-1.43.46-PM.jpeg" srcset="https://images.hive.blog/768x0/https://embeddednature.com/wp-content/uploads/2019/01/Screen-Shot-2019-01-16-at-1.43.46-PM.jpeg 1x, https://images.hive.blog/1536x0/https://embeddednature.com/wp-content/uploads/2019/01/Screen-Shot-2019-01-16-at-1.43.46-PM.jpeg 2x" /> <p dir="auto">On the “Installed” tab, you will see all of the default plugins that were installed. <p dir="auto">Sometimes when you go to install a plugin it will fail, this can happen when a plugin has a missing dependency. If this happens, head over to the <a href="https://updates.jenkins-ci.org/download/plugins/" target="_blank" rel="nofollow noreferrer noopener" title="This link will take you away from hive.blog" class="external_link">Jenkins plugin library and find the required plugins <p dir="auto">Click on the “Available” tab and then search for "Blue Ocean" in the filter: <p dir="auto"><img src="https://images.hive.blog/768x0/https://embeddednature.com/wp-content/uploads/2019/01/Screen-Shot-2019-01-16-at-1.45.37-PM.jpeg" alt="plugin search" srcset="https://images.hive.blog/768x0/https://embeddednature.com/wp-content/uploads/2019/01/Screen-Shot-2019-01-16-at-1.45.37-PM.jpeg 1x, https://images.hive.blog/1536x0/https://embeddednature.com/wp-content/uploads/2019/01/Screen-Shot-2019-01-16-at-1.45.37-PM.jpeg 2x" /> <p dir="auto">Click the checkbox for blue ocean then press the “Download now and install after restart” button <p dir="auto">You will see a “Open Blue Ocean” tab once you restart and login to Jenkins: <p dir="auto"><img src="https://images.hive.blog/768x0/https://embeddednature.com/wp-content/uploads/2019/01/Jenkins-Blue-Ocean-.jpeg" srcset="https://images.hive.blog/768x0/https://embeddednature.com/wp-content/uploads/2019/01/Jenkins-Blue-Ocean-.jpeg 1x, https://images.hive.blog/1536x0/https://embeddednature.com/wp-content/uploads/2019/01/Jenkins-Blue-Ocean-.jpeg 2x" /> <p dir="auto">So at this point Jenkins is installed with the blue ocean plugin, now we need to connect Jenkins to your Github Repository so it can trigger on a new build. <p dir="auto">You can provide Github with Jenkins access through SSH by generating a key, but Blue Ocean makes this easier by allowing Jenkins to access Github via webhooks. <p dir="auto">In Blue Ocean Click “New Pipeline” <p dir="auto"><img src="https://images.hive.blog/768x0/https://embeddednature.com/wp-content/uploads/2019/01/Blue-Ocean.png" srcset="https://images.hive.blog/768x0/https://embeddednature.com/wp-content/uploads/2019/01/Blue-Ocean.png 1x, https://images.hive.blog/1536x0/https://embeddednature.com/wp-content/uploads/2019/01/Blue-Ocean.png 2x" /> <p dir="auto">Choose Github as your store, pick an organization, and repository <p dir="auto"><img src="https://images.hive.blog/768x0/https://embeddednature.com/wp-content/uploads/2019/01/Blue-Ocean-Pipeline.png" srcset="https://images.hive.blog/768x0/https://embeddednature.com/wp-content/uploads/2019/01/Blue-Ocean-Pipeline.png 1x, https://images.hive.blog/1536x0/https://embeddednature.com/wp-content/uploads/2019/01/Blue-Ocean-Pipeline.png 2x" /> <p dir="auto">Click “Create Pipleline” and Jenkins will go to work <p dir="auto">As the pipeline is being created, lets head over to Github and setup our webhook <p dir="auto">In the settings of your repo you will need to add the payload URL for Jenkins Github webhook <p dir="auto"><img src="https://images.hive.blog/768x0/https://embeddednature.com/wp-content/uploads/2019/01/Github-Webhook-Page.jpeg" srcset="https://images.hive.blog/768x0/https://embeddednature.com/wp-content/uploads/2019/01/Github-Webhook-Page.jpeg 1x, https://images.hive.blog/1536x0/https://embeddednature.com/wp-content/uploads/2019/01/Github-Webhook-Page.jpeg 2x" /> <pre><code>//Add the ip and port for your Jenkins instance with /github-webhook http://ipAddress:port/github-webhook/ <p dir="auto">Hit save webhook and you are good to go! <p dir="auto">From here you will need to decide when you want Jenkins to trigger the pipeline based on branch PRs. The steps Jenkins will take in order to fulfill your automation needs depends on your Jenkinsfile script. You can learn more about that <a href="https://jenkins.io/doc/book/pipeline/jenkinsfile/" target="_blank" rel="nofollow noreferrer noopener" title="This link will take you away from hive.blog" class="external_link">here <p dir="auto">I hope this guide helped, I’d enjoy hearing about your experience in the comments below.