#Harvesting, Drying and Curing Cannabis: A Guide to Finishing Quality Bud Cannabis Harvesting One trichome at a time
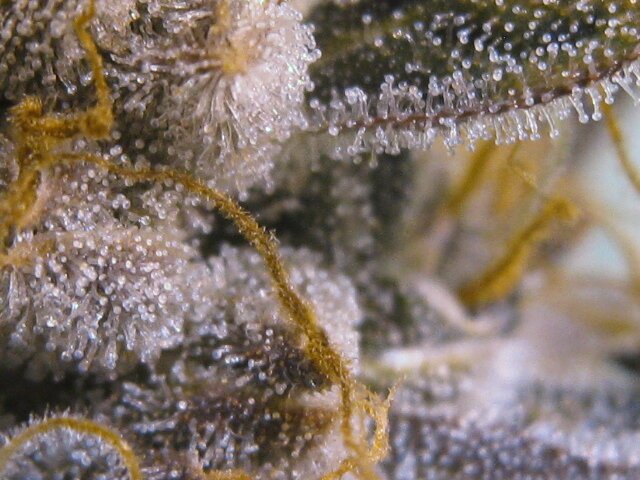
The time to harvest your cannabis plant is approaching....but when is it? The color of the trichome glands should be the ultimate indicator of when it's ready to harvest, although pistil color is also a fantastic indicator of a plant's life coming to a glorious finish.
Cannabis Pistils and Early Detection of Maturity
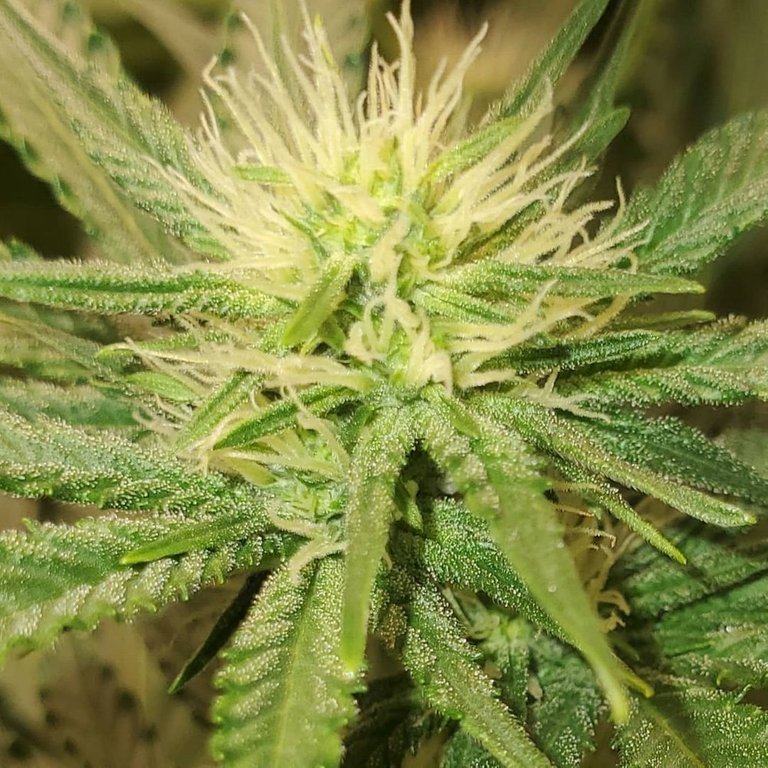
Some people believe that judging trichomes by the color of the pistils (also known as stigma or "hairs") is a mistake, but you can utilize pistil color long before we require a tool to examine trichome color up close. You shouldn’t even bother looking at the trichomes till 80-90% of the pistils are colored. When we see the top colas have primarily cloudy trichomes with 10-30 percent amber trichomes, we know it's time to harvest. Harvesting at this time ensures that we receive the highest production and potency before the trichome heads begin to decay.
Cannabis Pistils and their possible deception
One thing to keep in mind while utilizing cannabis pistils as a warning symbol. If you aren't attentive, they may fool you! If you are a "hands on" grower who likes to continually handle and squeeze your flowers, every bud that is treated in this way will have broken trichomes (which can fool you into believing they are amber naturally) and will also influence the pistil color, fooling you into thinking they are withering. Pistils are also affected by torrential rainstorms and severe weather, particularly extended cold temperatures.
In addition, certain strains go through flowering maturity waves. We've had plants that we thought were done based on the Pistil color (95 percent colored), only to find 50 percent clouded with 50 percent clear trichomes under the jeweler's loupe. After a day, ten percent of the White Pistils began to come out. After another two days, the plant was back to 30% White Pistils, and she lasted almost another two weeks before being harvested with a good 10-20% amber trichome density. The color of the pistils is a good indicator of when to examine the color of the trichomes, but it should not be used alone to harvest a plant.
#Cannabis Trichome Color and Effect
Harvesting cannabis buds can have a wide range of effects depending on when it is done. The color of the trichomes within the bud should be visually identified on various areas of the plant, but ideally on the Calyxs .
Clear Cannabis Trichomes
Clear trichomes often give a stronger up high, especially in Indica dominating strains, though it may occasionally be a restless buzz that many people dislike. A "racy" high is another name for this effect. Some people enjoy the more energetic up-high impact of a clear trichome harvest, so if you're not sure, try a few buds early on and see what you like. It could set the tone for future harvest periods for you. "On this plant, there are around 50 percent clear and 50 percent foggy trichomes."
Amber Cannabis Trichomes
Amber trichomes "generally" carry a sedative couch lock or sleep-inducing narcotic stone, making it feel like it takes all of your energy just to sit up and fetch a drink or snack that seems so far away at 2 feet away.
Cloudy Cannabis Trichomes
The hazy or "milky" trichome stage of maturity is the most balanced of the three trichome forms. This is the stage that trichomes go through after the clear stage, before turning to the Amber color, which is the trichomes' final stage before degrading and losing their potency. This is the time to harvest your plants. We prefer a trichome that is primarily hazy with 10-30% amber trichomes. If you chop a whole plant at once, there will be some obvious trichomes present, and they will be concentrated on lower buds that don't get as much light as upper buds, which leads to the next step, selective harvesting.
Selective Harvesting Maximizing Cannabis Yield and Effect
This is a fantastic strategy to maximize yields and the effect of lower, typically underdeveloped buds. When it comes time to harvest your plant, you'll notice a significant difference between the buds that have been exposed to the best light and those that have been exposed to less acceptable light. This variation can be seen both indoors and outdoors. You'll also notice a change in trichome color on lower buds, which are frequently a clear cloudy mix, versus cloudy with some amber on upper buds. You should clip the colas off when the density begins to decline to the point that you think to yourself ? "Hmmm, is this even worth trimming?"
Taking the top buds or colas in one stage and then leaving the lower buds to finish for another 7-14 days can result in a much better harvest, and you'll discover that a lot of the under formed bud that wouldn't be worth the work cutting will really become bud worth trimming. We’ve improved the amount of "trim worthy" bud on outdoor photoperiod plants. As this technique can be high stress (cutting all of the branches in half in a single day), always make sure you look at your remaining cannabis plant watching close for stress induced hermaphroditic traits to appear. If you see some, either keep an eye on them and pinch the male pollen sacs as they appear (if there are only just a few), or simply cut the plant down.
Selective harvesting is, in my opinion, one of the best strategies for increasing cannabis yields on any plant or strain, whether indoors or out. Only a small fraction of the plants on which We’ve tried this had a marginally beneficial effect on yield. This is highly recommended if you have the time and space.
Cannabis Trichome’s Tools of the Trade
To see your trichomes, you can utilize one of three tools.
A jeweler's loupe is one of them. These may be purchased for a very low price on ebay or Amazon. You can typically pay around $6 with free delivery for a 60-100X led battery backlight driven item, and it works fine.
A USB microscope is the second tool. I have a high-end one of these microscopes (almost $30), but the learning curve was excruciating. If you want to do this, make sure you do your homework and select one that is simple to use. They have USB microscopes that are much more powerful than the magnification required to see trichomes. Don't overpay on a magnifier that has too much magnification for what you want to do with it!
A macro lens for a digital camera or a macro app for a smart phone is another tool for studying trichomes up close. If you're looking for a good camera, keep in mind that it doesn't have to be expensive. I've been using a Canon SD790IS with digital macro mode, and guess what? You can acquire one new for approximately $80 on ebay, or used for around $40. It's a dependable camera that captures great macro images. You're fully ready if you get a cheap flex tripod for $10 and a quality SD card for another $10.
The Art of Drying your Cannabis Bud
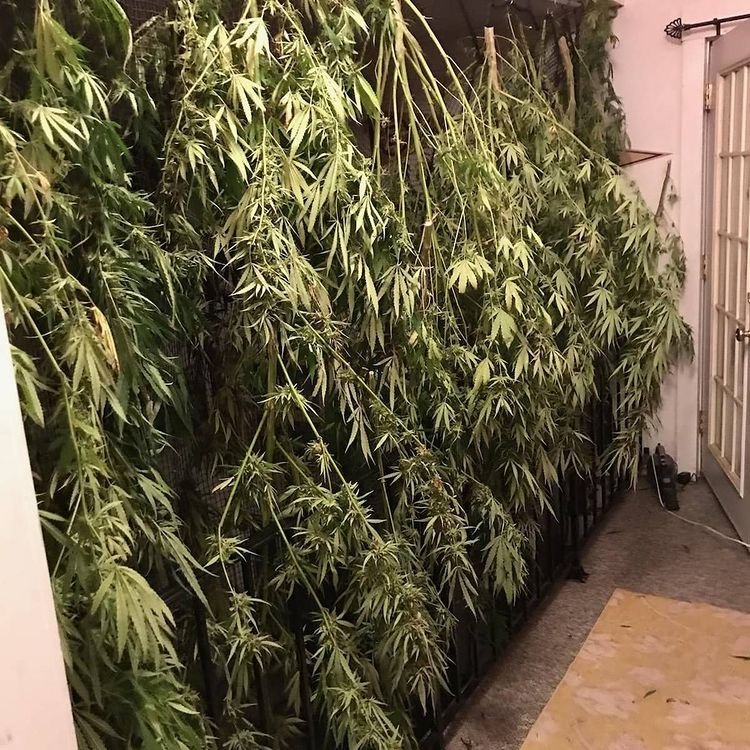
If you mess up the drying and curing procedure, all of your hard work growing the buds to perfection can be wasted, or at the the least, the smell, taste, and potency will be lessened to some degree. Getting the maximum potency, tastiest, and stinkiest buds possible requires proper drying and curing.
It can be difficult, and in some cases impossible, to provide the ideal drying environment without the use of climate control devices such as dehumidifiers, heaters, humidifiers, air conditioners, and evaporative coolers. Take it as far as you want, based on your finances and circumstances, as well as your needs and desires.
The optimal drying climate - If you're lucky enough to have a temperature-controlled drying place, you're a lucky devil! In an ideal situation, you'd have a dark environment (no daylight/sun) with 45-55 percent relative humidity, a temperature of 60-70F(15-21C), and a gently breeze. In the drying area, fresh air should be circulated.
Many even most growers will not have a perfect climate controlled drying area to dry in, so we have to work around different challenges.
Drying Cannabis in Cold, Damp Conditions
When the humidity in the drying room is 70%+, how do we get our bud to a flawless 62 percent dryness? The simple answer is that you don't; it just doesn't dry correctly, and if the air is stagnant, you'll have to deal with the bud curer's greatest nightmare: mold.
We've dried in this environment for many years and can attest that it can be done while still producing a high-quality toke. I've done full branch hanging, defoliated leaf branch hanging, and huge paper bags on wire racks without mold forming...as long as you have a good moderate breeze flowing across buds for hanging methods, or strong circulation from an oscillating fan for paper bag drying, mold isn't an issue.
If necessary, you may need to build up a backup drying room in the moist fall months, where you can control the humidity better than the rest of the house. You may need to set up a tiny chamber or a tent with a dehumidifier. It's a pain in the neck to dry in an environment with a RH of more than 80%!!
Drying Cannabis in Hot, Humid Conditions
This is another difficult environment to deal with. Excessive heat degrades delicate Terpenoids and destroys fragile Cannabinoids, resulting in a diminished smell.
When combined with exceptionally high humidity (60 percent minimum to 70 percent +), this climate is exceedingly tough to dry in (close proximity to very large inland lakes, near oceans, or swamps causes extremely high humidity when it's super hot). You may need to add a carbon filter and a fan for odor control.
When dried in a heat wave, some types appear to maintain their aromas better than others, but all cannabis varieties that are dried in the heat seem to lose a considerable amount of smell to some degree. Fortunately, after a few weeks to months of curing, several of our cultivars saw considerable improvements in aromas return.
Different Cannabis Drying Methods
Whole Plant Hang
This is about as old school as you can get. Plants should be chopped and hung upside down, preferably with an oscillating fan blowing gently across them. The amount of time required will vary greatly based on the size of the plant, relative humidity, temperature, bud density, and circulation..
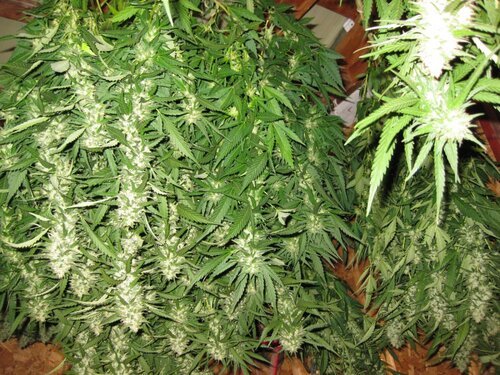
Defoliated Fan Hang
Full plant hanging that has been modified. If you live in a humid area, this will assist speed up the drying process by enabling more air to circulate around the buds. Remove all leaves from the plant that have an exposed stalk, then hang it upside down.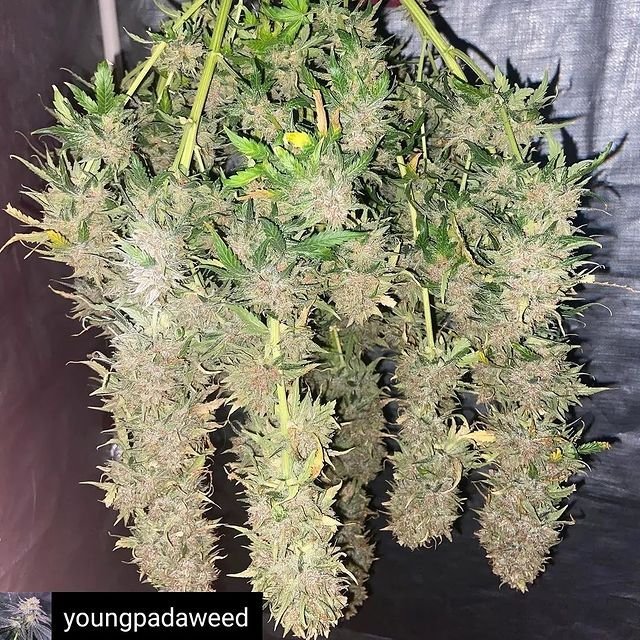
Wet Trimmed Hang
There are a few advantages to wet trimming: you can cut much more in a day than you can once it has dried out. Wet trimming will certainly assist shorten drying periods and reduce the risk of mold in a humid drying environment. The bud will dry faster if you break it down into smaller branches.
Inverted Wet Trim
This is a wonderful technique to dry certain samples quickly without sacrificing quality. Take a huge cardboard box and place it on the table. Fold the flaps in and use a screwdriver to make a series of holes about 4" apart. Trim a few smaller branches that have some decent bud on them to complete. Placing it in close proximity to a fan is a good idea. If you're in a rush or there's a lot of humidity, cut the bottom out of the box and place it on top of a running dehumidifier to speed up the drying process. This is a good procedure to rapidly test a few buds so you can get an early taste a couple of days before the remainder of your cannabis is ready.
Paper bag/Cardboard Box Dry
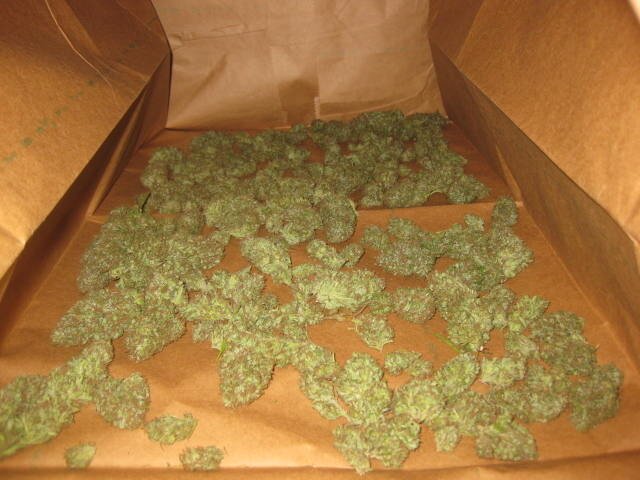
With this method, mold growth is more likely, especially in areas with high relative humidity (RH) or poor circulation. For this, use huge double-walled yard waste paper bags. Final trim (new wet trim) into golf ball sized location equally spaced with 1/2" between buds. In humid climates, open the bag and circulate the air with a fan blowing across the open end. Close the bag and blow a fan across it if you live in a dry climate. Every 24 hours, double-check. After the first 24 hours have passed, go over the larger buds and flip them to promote even drying. Dry until a stalk snaps rather than folding over.
Mold is less likely to form in locations with lower RH, however We feel that movement across the bags is necessary for this type of drying. Single walled paper "lunch sack" bags maintained totally closed for several days have worked well for those drying lesser quantities.
Overdried Cannabis Buds
Don't be alarmed!! By no means is this the end of the world, and while it may appear that you are doomed, you are not. There is a solution to fix your 55 percent RH bud in the jars (also known as "duster" pot). It's a really easy remedy if you have a pretty fresh bud of another type that isn't entirely dry(68-70 percent RH), that isn't completely dry(do not use a completely new cut bud, better to use one that has dried a couple of days and is in the 85 percent RH range). Simply place a fresh bud in the jar with the over-dried bud and let it there for 12 hours, then allow it to breathe every 12 hours while keeping an eye on the hygrometer. Remove the hydration bud and let the hygrometer in the jar for 6-8 hours before repeating the process. The moisture from the not-quite-dry bud will be drawn out and spread among the over-dried buds. Some gardeners have done the same thing with lettuce, orange peels, and potato peels. Make sure you remember to remove your hydration item (whether it's a fresh bud or a veggie) once you've reached your rehydration target!
Cannabis Rehydration
If you don't (or don't vent properly), white surface mold can emerge in a matter of days. Boveda 62 percent packs are also used by some guys for this purpose. Boveda climate control packs are a one-of-a-kind device designed to regulate the relative humidity of a sealed container at 62 percent while preserving costly cigars. For those who prefer a slightly damper or drier bud, Boveda now offers additional percent climate control packs. I'm not an expert in rehydration; I've done it a few of times, but I rarely overdry any buds, so I haven't had to utilize these approaches, including boveda climate control packets, too frequently.
Cannabis Trimming Methods
Depending on the drying process, one of two trimming processes should be utilized.
Method 1 "Wet Trimming Cannabis"
This kind of trimming will result in perfectly trimmed buds. Trimming while the leaves are still springy and full of life (up to 24 hours after the cut) is incredibly effective, and when done correctly, the finished buds are often quite clean. First, get a top cola . Break off all of the fan leaves with no visible trichomes from the entire cola. You should pick almost every leaf that has a visible leaf stalk and few to no trichomes. Remove the fan leaves and toss them out. Working from the bottom to the top of the branch, snip off the leaves with visible trichomes into a box using a pair of fine-tipped scissors. These leaves will be used to make hash and edibles.
If you're using a paper bag to dry, clip the buds off the stem, or trim the cola as best you can if you're using a defoliating fan hang drying method. If you're doing a thorough wet trim, keep going and finish clipping the buds, removing almost all of the leaf and leaving only a lovely flower.
Extending the wet trim duration
If you've ever tried to wet trim a massive cannabis plant by yourself, you know it's difficult to do it in a single day. When it's first cut fresh, you may get a lot more trimmed in a day. The trimming goes okay on day two, but your daily output decreases, and by day three after the cut, it's a trimmers nightmare till it's practically dry. This is something you should experiment with to find your desired “trime time”. Trim the branches into manageable length stalks (4 foot branches or less ) and fill a 5 gallon pail with 4" of water when you first sliced the plant. Link thinner branches together in bunches of 6-8 branches with plastic coated wire. Put the branches in the water for at least another 24 hours and they'll stay lovely and fresh. They may drooping a little after 72 hours, but the contrast is incredible.
The disadvantage of this method is that it will significantly alter your drying time, especially if you are approaching 3 days after chopping.
Method 2 “Dry Trimming Cannabis”
The dry trim is a pain. If you've ever tried to dry trim a giant plant, you'll understand why I dislike this procedure! You'll need large containers that you can seal airtight if you don't want your stash to dry out before you finish the job. Dry trimming is the most time-consuming form of cutting for most people. The procedure is straightforward. Allow your bud to dry (either with or without fan leaves, depending on which method you're using) until there's just enough moisture remaining in them that when you flex the stem of a larger bud, it barely bends instead of breaking.
Method 3 “Machinery Trimming Cannabis”
The Wet Cannabis Trimmer
We conducted a lot of research on several power and manual trimmers, and the variety and effectiveness of what I found on these machines is nearly as large as the price variances. Some wet trimmers may be purchased for as little as $100 (manual bowl trimmers, or do-it-yourself blade trimmers comparable to Trim Pro), however customer reviews are varied, and they appear to destroy a lot of trichomes or don't obtain a very close trim! From there, there are a plethora of alternatives in various wet trimmers, all the way up to machines that cost $20,000 or more for large, intricate commercial machines.
The Dry Cannabis Trimmer
We conducted a lot of research on several machines, and based on what We've seen, dry trimmers perform a better job and are friendlier on trichomes than wet trimmers. Wet trimmers appear to have a larger variety of options than dry trimmers. Dry trimmers can be quite expensive, with prices ranging from $400 to $2000 for larger commercial models. Dry trimmers require a specific atmosphere to function properly. If you try to operate these machines at 60-70 percent relative humidity, the outer leaves you want to break off won't crisp up enough, and the machine won't work properly.
Tools of the Cannabis Drying Process
Dehumidifier
A dehumidifier will be quite useful for those who have humid drying environments. The dehumidifier will have an easier time removing moisture from the air in a smaller space. When the humidity is at its highest, You may place the dehumidifier in front of an oscillating fan to help disperse the dry air that comes out of it.
Humidifier
Humidifiers are useful in hot, arid locations, but unless you have a lot of weed to dry, drying in double-walled paper bags will slow down the drying process enough to get a reasonable result.
Air conditioner
If you live in a hot, humid area, you'll only need one of them. Some of the more volatile terpenes will start to vanish if your drying space is over 70F (21C). When the temperature reaches 80 degrees Fahrenheit (26 degrees Celsius), the drying time decreases, resulting in a harsh toke and a loss of terpenes. You'll lose a lot of your amazing fragrances and flavors if your drying room reaches temperatures of 90F (32C) or above. I believe that high temperatures are the most important component in losing fragrance and taste.
Heater
We hope you never have to use one of these in your drying area! Low temperatures, in my opinion, aren't a major concern as long as they don't come to freezing point, converting your half-wet buds into budcicles!! almost everyone prefers to have a slow drying procedure rather than a quick one! If you need to acquire some dry cannabis quickly and the weather is chilly, consider using a heater, but be careful! Heaters are known to ignite fires, so use caution when using one.
Evaporative Cooler
This appears to be the best answer for arid places with extremely low humidity. These units will raise the RH percentage while lowering the temperature. For individuals who live in hot, dry conditions, this is really handy. They don't appear to be too expensive, with prices in the $50-200 range for a 500+ square-foot model.
Oscillating Fan
This is essential for the drying process, particularly in humid conditions. It's best to choose one of the tall stand-up ones with many settings. Always use a fan on rotating (oscillating) mode, as you don't want it blowing in one region of hanging plants or bags of buds all of the time; instead, move the air every 10-15 seconds or so.
Thermometer/Hygrometer
Both the drying and curing processes rely on them. Feel free to stock up on little, inexpensive hygrometers. Some will be incorrect, which is perfectly acceptable. If you have a lot of spare cash, go ahead and pay $20 or more per hygrometer for one that can be calibrated, but I'm happy with the small, cheap $1.50 units bought from China. They're usually near enough to be accurate.
Tips for Drying Cannabis in Adverse Climates
Hot and dry
This is perhaps the most difficult climate to dry in if you want a truly good aroma and flavor. Heat and light degrade terpenes more quickly than anything else, and dry relative humidity speeds up the drying process, resulting in a harsh toke. - To speed up the process, do a full plant hanging with all of the fan leaves intact.
Dry in paper bags to slow down the drying process by leaving buds on thicker branches. - Invest in a evoprative cooler. It appears to be the ultimate solution for people dealing with hot and dry climates.
Get an Evaporative Cooler. It seems to be the best solution for people with hot and dry climatic challenges to overcome.
Cool and damp
Circulation is essential for success in this environment. In a humid, cool climate, a variety of drying methods can be utilized, but keep in mind that any approach that slows down the drying process increases the chance of mold growing. As a result, the trimmed wet hanging technique, or defoliated hanging technique, is the most recommended. It's critical to keep an eye on the buds at all times. It's also a good idea to use a dehumidifier, which will remove some of the moisture from the air while also providing some warm, dry air. The drying process will be aided by using an oscillating fan to blast the drier stream of air coming out of the top of the Dehumidifier across the buds.
To expedite the drying process, use the wet trim procedure.
Speed the drying process with the combined use of a fan and dehumidifier.
Jar Curing
It's now or never. Your buds are completely dry and ready to be placed in jars! When you grasp a larger bud and try to bend the main stalk over, it barely breaks instead of folding over, you know it's ready to put into jars. As you prepare to place the buds in the jar, make sure to inspect them for mold. Moldy bud in the jar can quickly spread and damage entire jars of bud.
After 12 hours in the jars, You will should be able to observe that buds with barely snapped stalks instead of folded stalks had a relative humidity of 65-68 percent. So, what exactly happened? When I put the buds in the container, they were dry, but now they're spongy and damp? The jar's steady atmosphere has pulled moisture from the inner stalks and distributed it evenly throughout the contents of the jar. This will achieve two goals. While waiting for the larger cannabis buds to dry out enough for the stems to snap instead of fold, it will suck moisture out of the largest buds with thick stalks and rehydrate the little buds with thin stalks that may have been somewhat over dried. After 12 hours in the jar, if the Hygrometer reads 70% RH or greater, remove the buds from the jar and spread them out in a paper bag or box to dry for 6 hours, then repeat the process.
After 12 hours, if the RH level is 68 percent or lower, you are ready to continue with the curing process. Each day, open your jars for one hour, then close them for another 12 hours...repeat this process until your jars have a 62 percent RH after 12 hours with the lid tightly closed.
Conclusion
What is excellent for one grower in one climate may not be ideal for another grower in a different climate. Try out a couple different drying processes to see which one you prefer. Consider one of the strategies to slow down the drying process if your buds are drying in less than 6 days, or one of the methods to speed the drying process if your buds are drying in more than 2 weeks. As always, try to make your drying room's temperature and relative humidity as near to optimal as feasible. Do everything you can to retain the amazing terpenes that you worked so hard to obtain through excellent growing techniques!! Make sure you try various methods and see what You like best! Personal preferences for drying and curing processes, as well as the conditions you're working with, are crucial to a fantastic harvest of high quality cannabis with great flavor and aroma.


)

This is probably the best drying guide I've ever seen. Really would have saved me some disappointment 25 years ago!
Lol you should give it another try if you currently are not growing! The blockchain can always use another grower onboard
I've always got something going on, been working on my own blend for a few years. I haven't really posted about it because my state just legalized a few months ago. Hopefully this coming year I can show off some of my grow experiments.
Posted via D.Buzz
Hell yeah!
So much information in this post. It is amazing. Thanks for sharing your knowledge to make the cannabis community here better.