
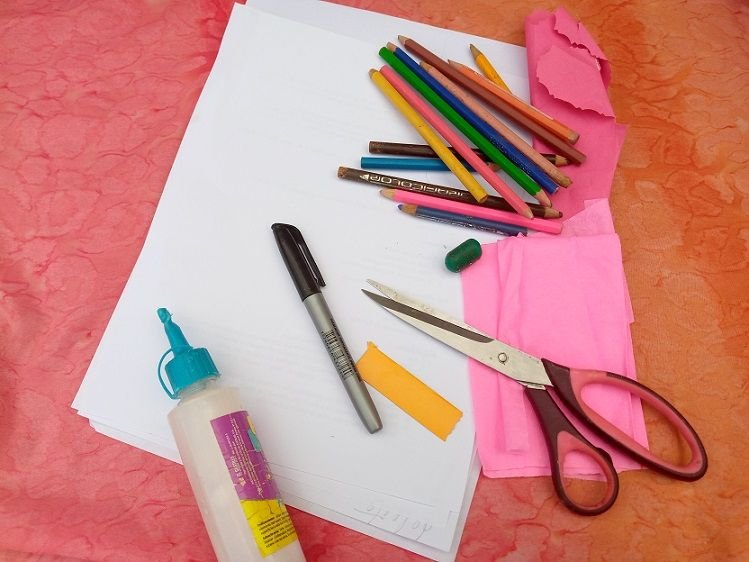
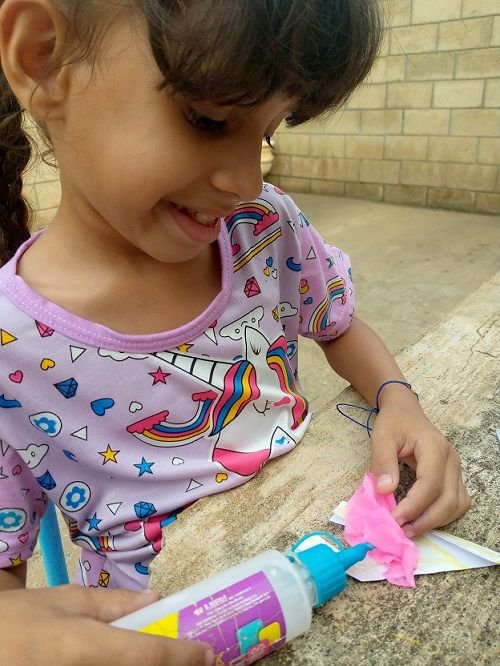
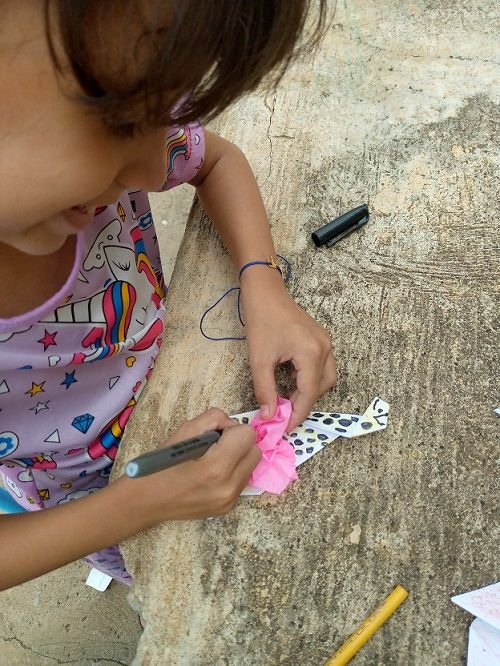
The materials are very simple: white recycling sheets, crayons, marker, as well as: crepe paper or any other to cut out some details, school glue and scissors.
Los materiales son muy sencillos: hojas blancas de reciclaje, creyones, marcador, además de: papel crepe o cualquier otro para recortar algunos detalles, pega escolar y tijera.

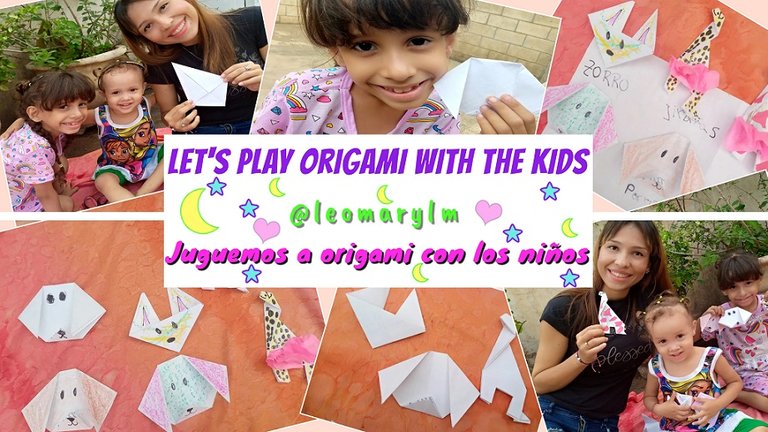
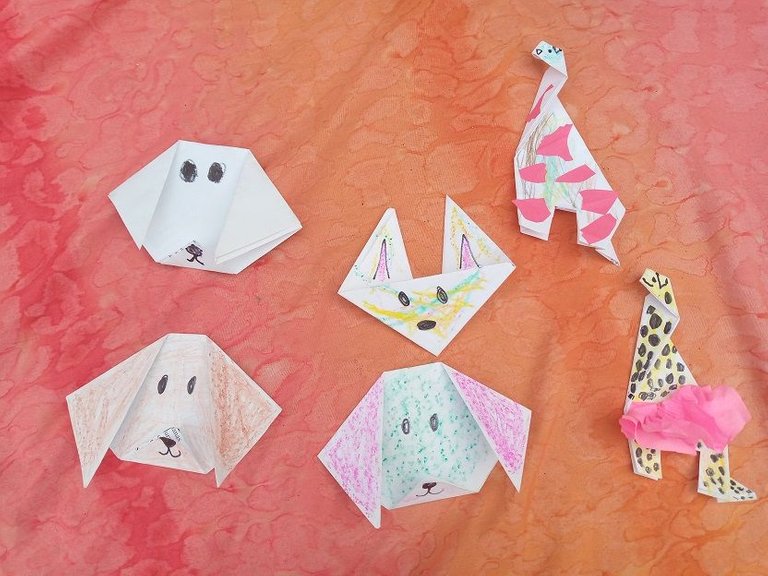
1- Select which figures you are going to make that are easy so that your little ones can also learn to make some of them (on the Internet there are many steps and figures to put into practice). In my case select: dog, fox, giraffe. Next, a little of the steps by steps photographically:
1- Selecciona cuales figuras vas a realizar que sean fáciles para que tus pequeños puedan aprender también a hacer alguna de ellas (en Internet aparecen muchísimos pasos y figuras para poner en práctica). En mi caso seleccione: perro, zorro, jirafa. A continuación, un poco de los pasos a pasos fotográficamente:

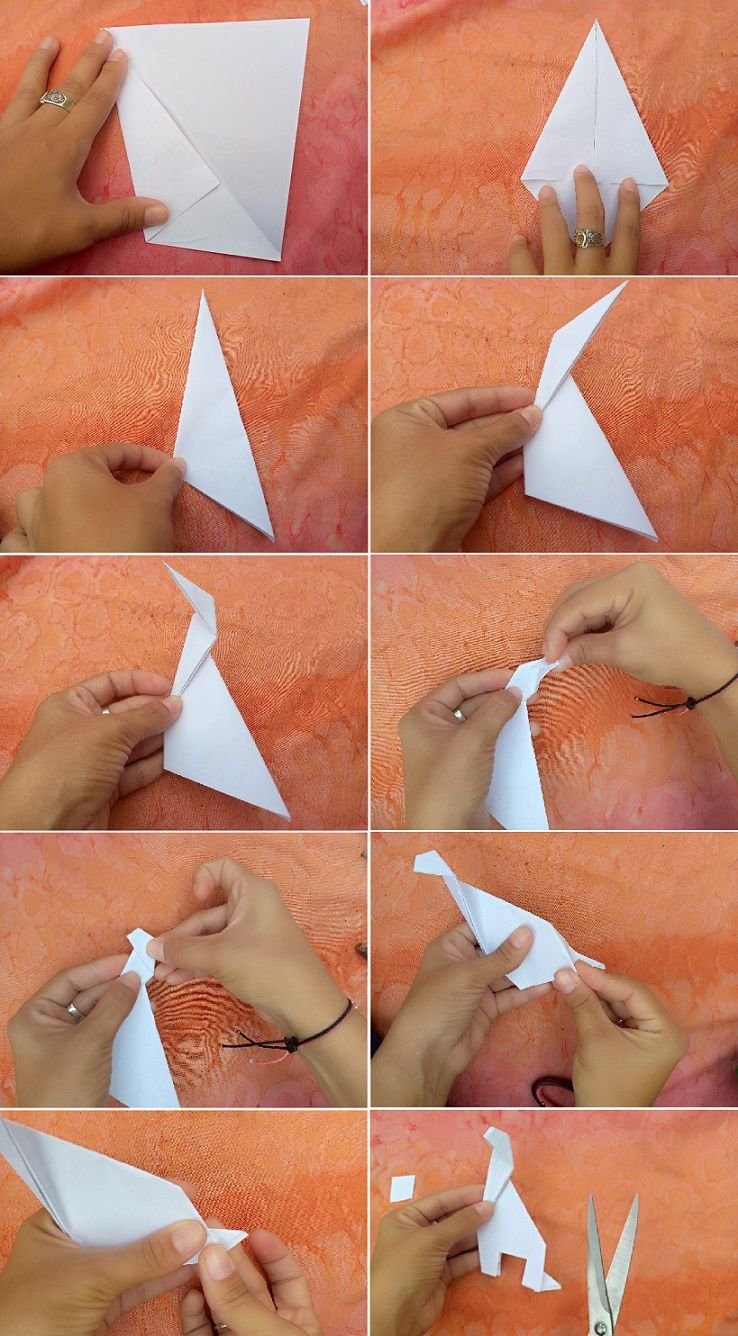
First, fold the sheet in half, then bring one of the corners towards the center, and then cut around it to obtain a small square. From a sheet we have two small squares to work two figures.
Primeramente, doblar la hoja a la mitad, luego hacia el centro llevar una de las esquinas, para luego alrededor recortar y obtener como resultado un cuadro pequeño. De una hoja tenemos dos cuadrados pequeños para trabajar dos figuras.
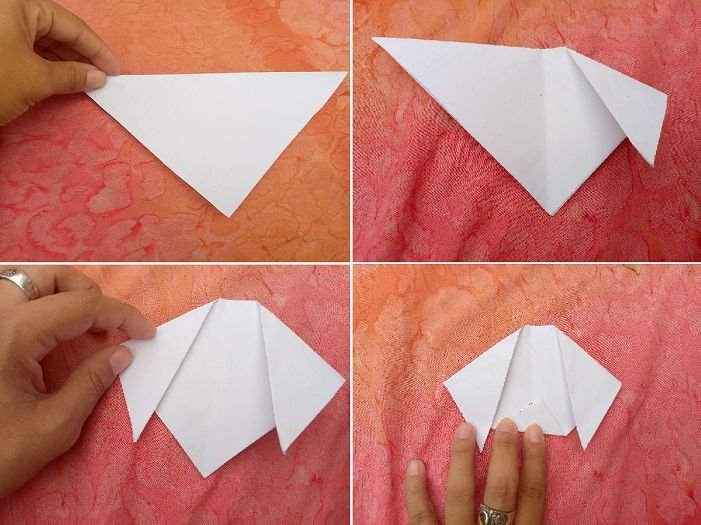
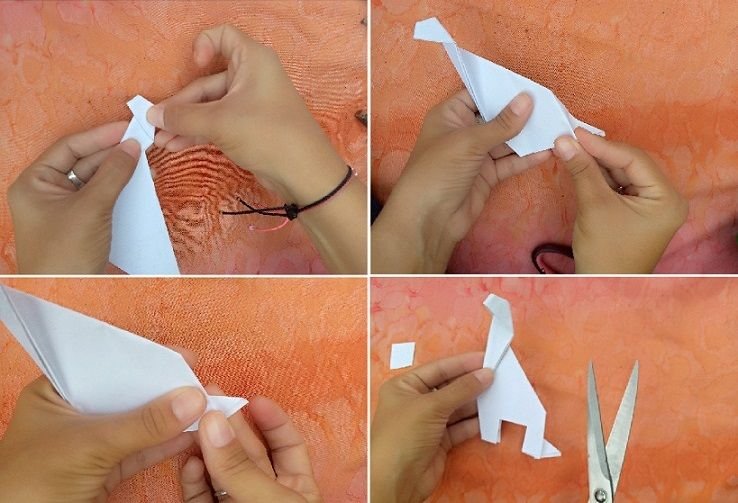
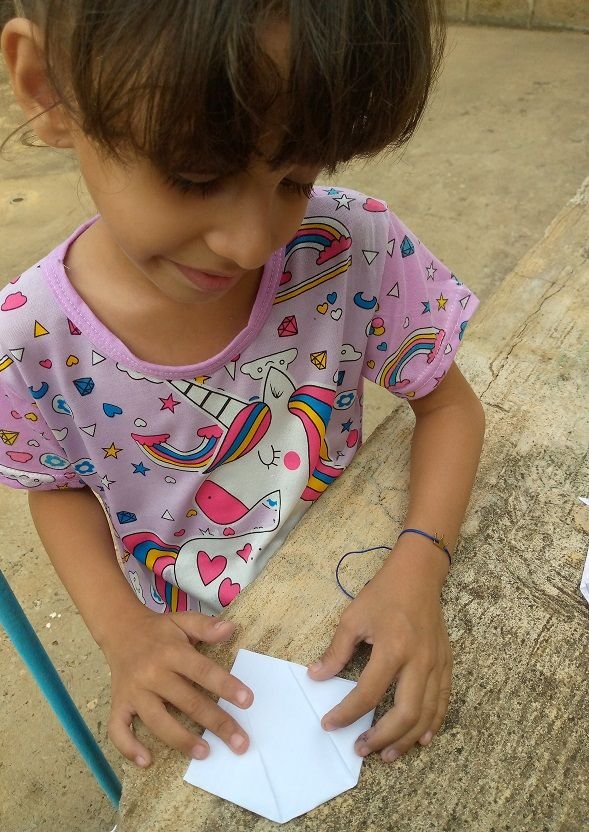
2- Take one of the paper squares, fold it in half, leaving a triangle. Fold one of the corners inwards and then the other, forming the little dog's ears. The lower part of the chin (so to speak) bring it in a little to form its snout.
2- Toma uno de los cuadros de papel, dobla a la mitad quedando un triángulo. Dobla una de las esquinas hacia el interior y luego la otra formando las orejitas del perrito. La parte inferior la barbilla (por así decir) llévala un poco hacia dentro para formar su hocico.
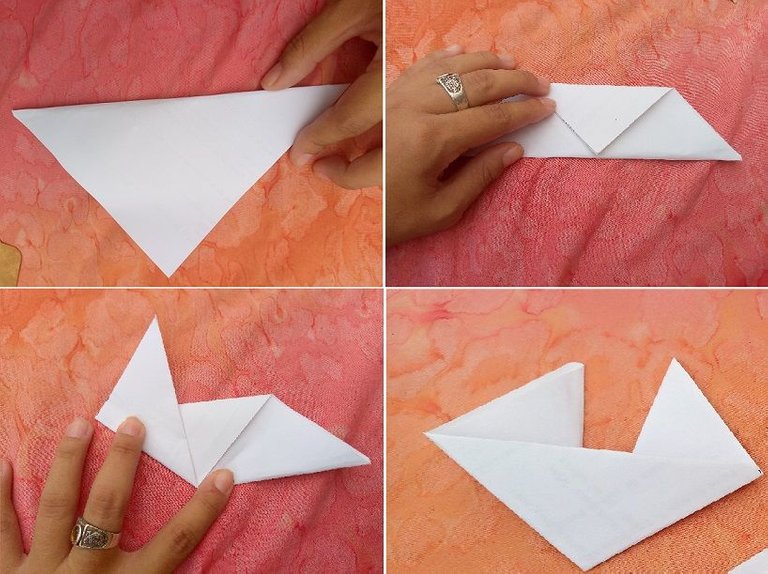
3- Fold the paper from end to end to form a triangle, then fold one of its ends towards the center and then the other, so that there are pointed ears protruding from the back, forming your fox.
3- Dobla el papel de punta a punta hasta formar un triangulo, luego dobla una de sus extremos hacia el centro y luego el otro, para que queden unas orejas picudas que sobresalgan desde la parte trasera, formando tu zorro.
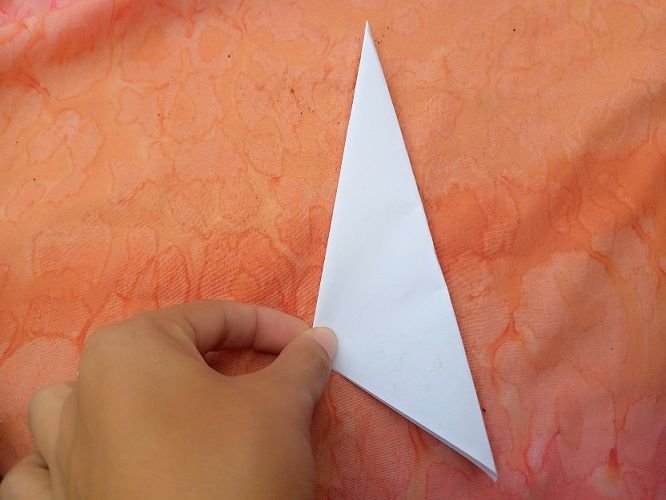
4- To make the giraffe, we need to fold again in the form of a triangle in the middle of the paper, so that the line that is marked is your guide. Open the paper and bring one of the corners to the center, then the next and fold in half along the line that we started with as a guide.
4- Para elaborar la jirafa, necesitamos doblar nuevamente en forma de un triángulo a la mitad del papel, para que la línea que quede marcada sea tu guía. Abre el papel y trae una de las esquinas al centro, luego la siguiente y doblar a la mitad por la línea que nos fue en un inicio de guía.

Carry the upper part by folding to the right side, then the part of it that is protruding, fold a little to the left.
Llevar la parte superior doblando hacia el lado derecho, luego la parte de esta que queda sobresaliente doblar un poco hacia la izquierda.
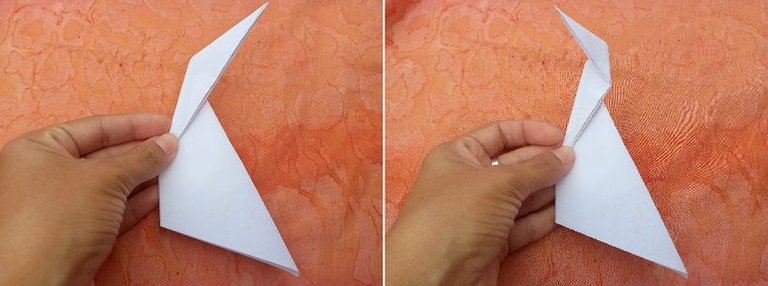
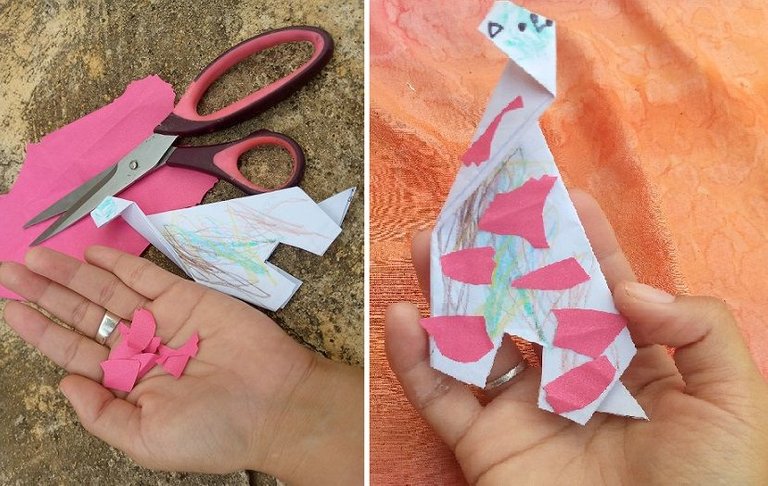
The protruding peak bend inward. At the bottom, bend a little towards the back and stick out a small point that will be the tail of your giraffe. Finally, with scissors cut as shown in the photo to make its legs.
El pico que sobresale doblar hacia dentro. En la parte inferior dobla un poco hacia la parte de atrás y haz sobresalir una pequeña punta que será la cola de tu jirafa. Por último, con tijera recorta como se muestra en la fotografía para hacer sus patas.
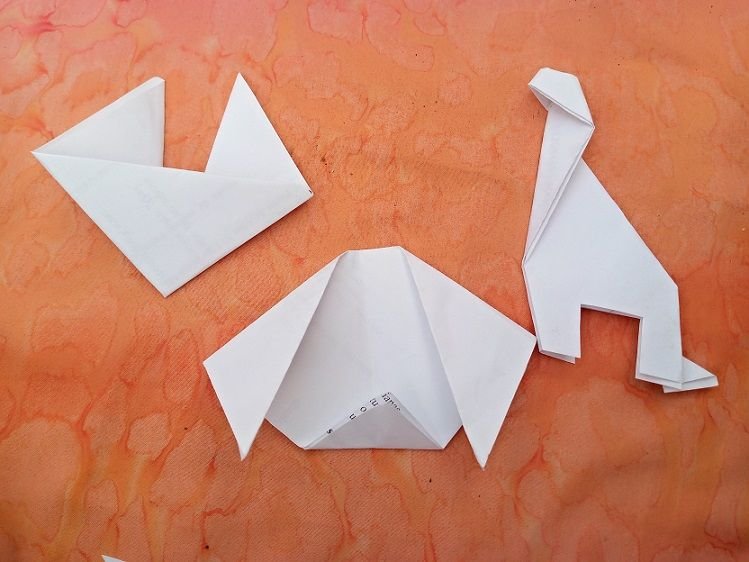
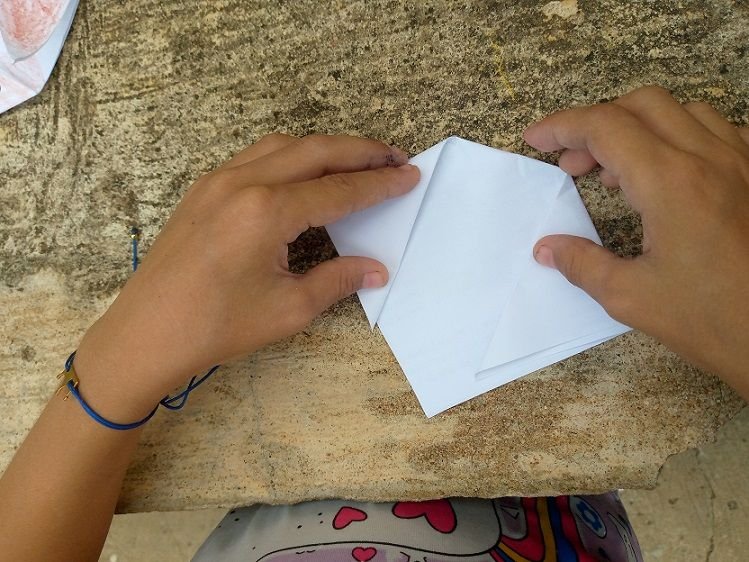
the steps together / Todos los pasos juntos
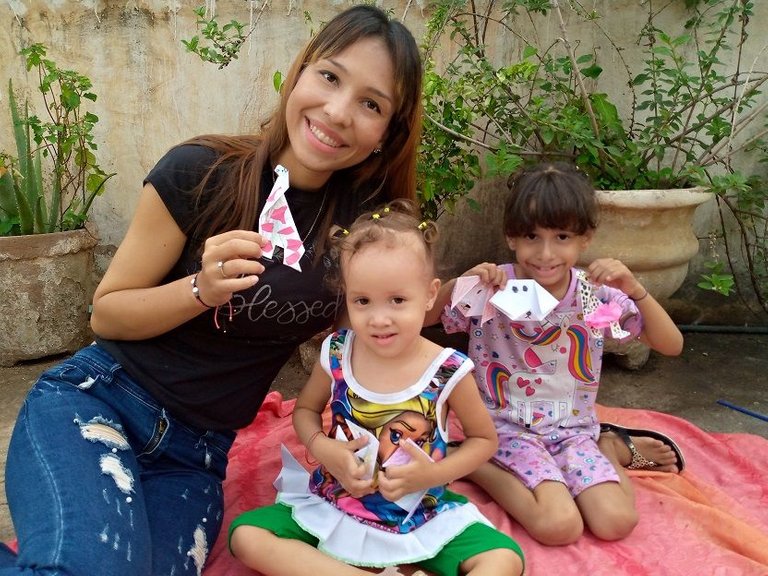
Result/ Resultado:
¿How to apply this activity? / ¿Cómo aplicar esta actividad?
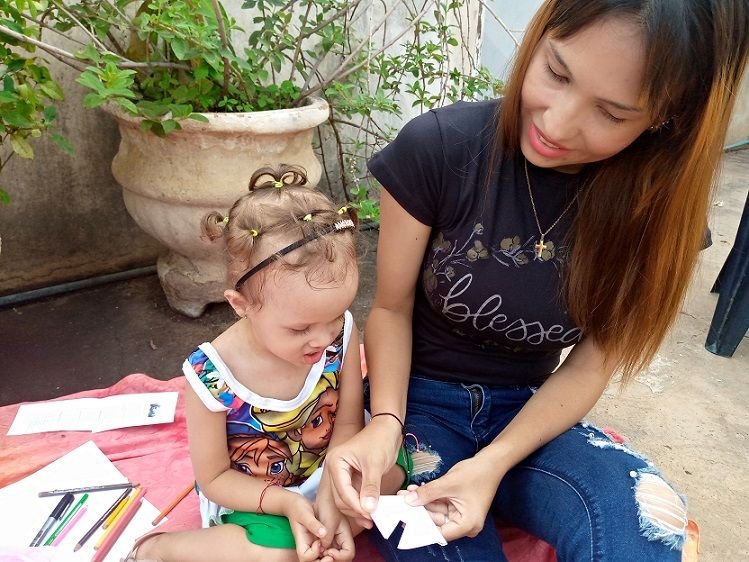
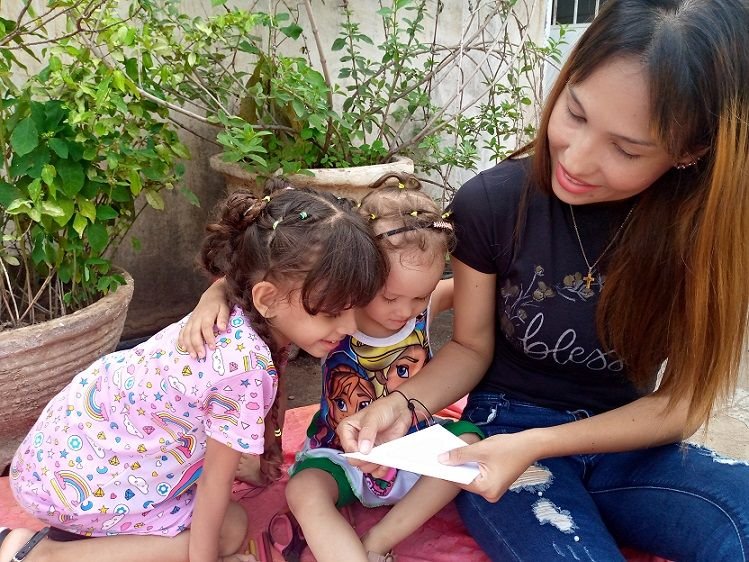
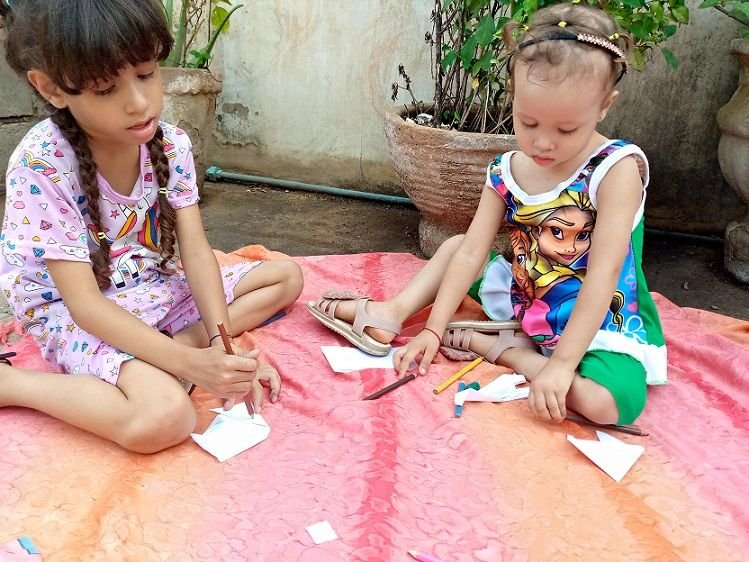

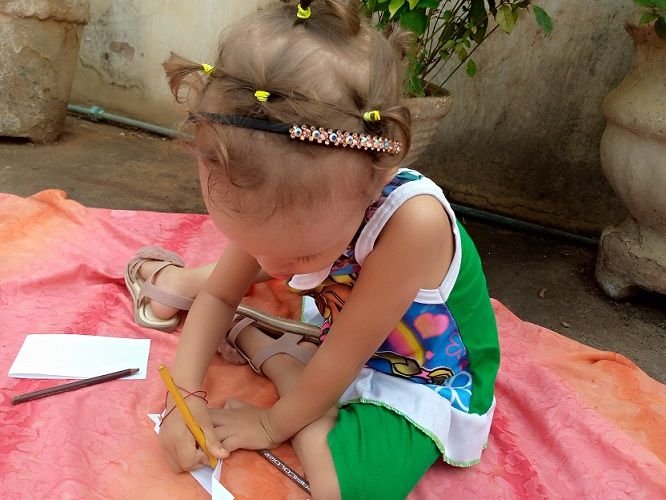
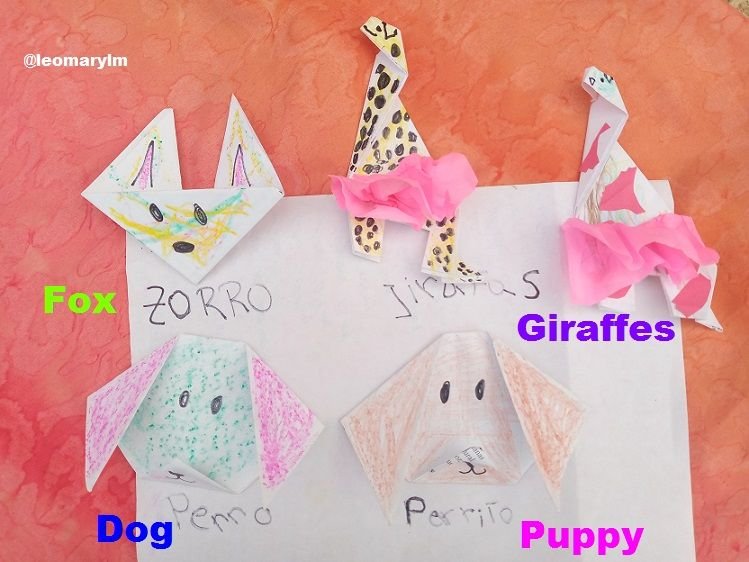
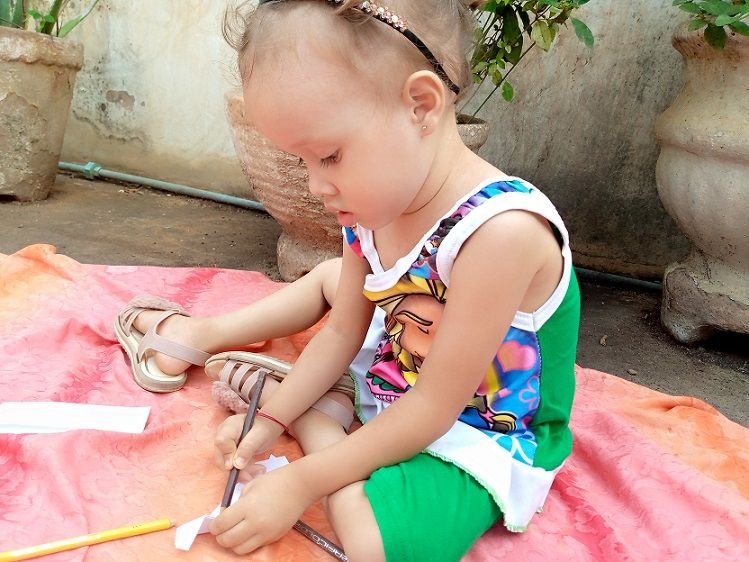
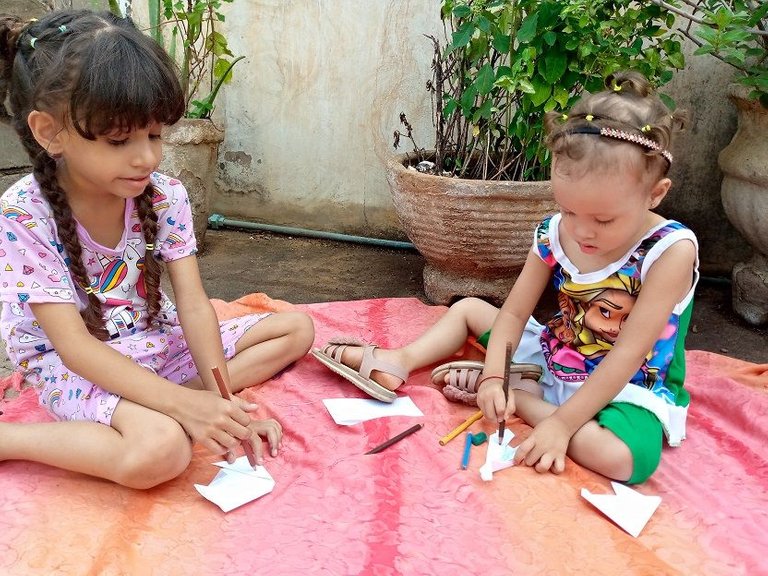
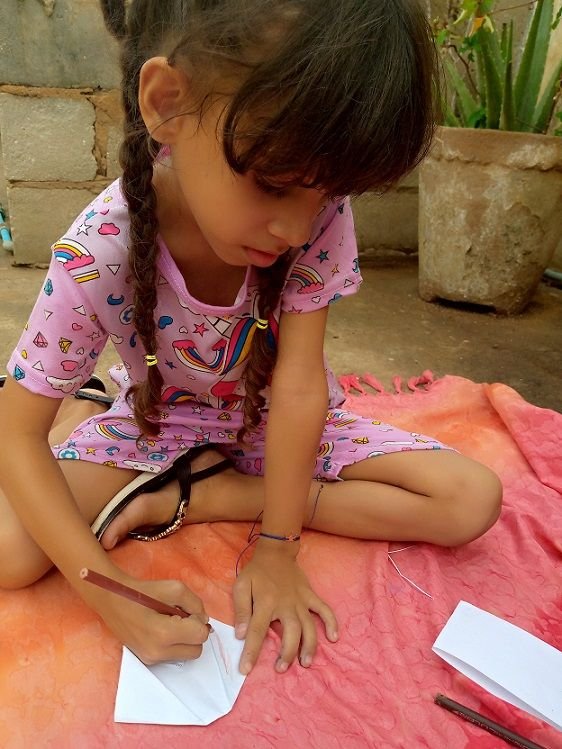
Once ready, hand out a blank sheet where they must write down the name of the animal, either in singular or plural, depending on the number of figures made and what they want to use and place at the top; as it's shown in the following:
Una vez listo, entrega una hoja en blanco donde deben anotar el nombre del animal, bien sea en singular o plural, dependiendo de la cantidad de figuras realizadas y que desee utilizar y ubicar en la parte superior; como se muestra a continuación:
Benefits and lessons learned from this activity:
We teach a Japanese art, from another culture, to put it into practice at home.
We develop their manual dexterity.
- He manages to acquire agility in his hands.
We develop and enhance the ability to observe.
We activate your brain in terms of awakening imagination and creativity, and developing concentration levels.
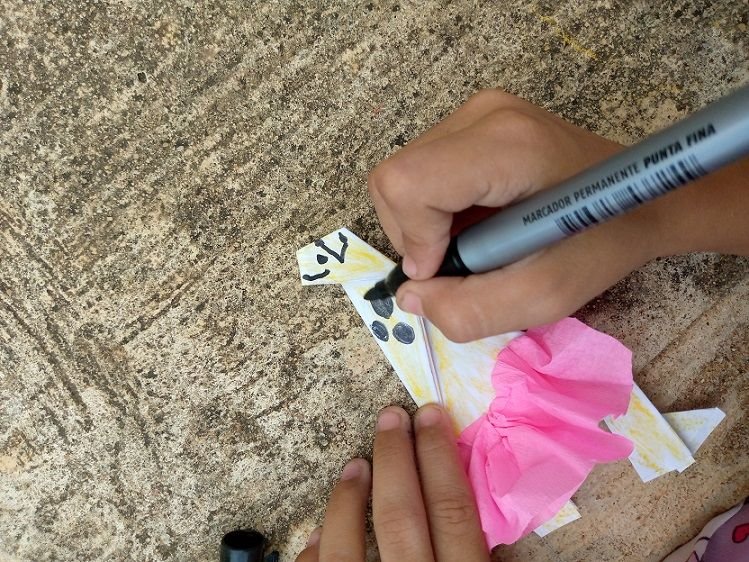
- It allows to develop fine motor skills and the coordination of eyes, hands and fingers in the fact of practicing this technique and paper art, as well as in the fact of colouring, cutting and gluing.
- We teach about animals to the smallest of the house.
- Literacy development; since they have to write at the end of the activity.
Beneficios y aprendizajes de esta actividad:
Enseñamos un arte japonés, de otra cultura, para ponerla en práctica en casa.
Desarrollamos su destreza manual.
- Logra adquirir agilidad en sus manos.
Desarrollamos y potenciamos la capacidad de observación.
Activamos su cerebro en cuanto a despertar la imaginación y creatividad, y desarrollar los niveles de concentración.
- Permite desarrollar la motricidad fina y la coordinación de ojos, manos y dedos en el hecho de practicar esta técnica y arte de papel, como en el hecho también de colorear, recortar y pegar.
- Enseñamos sobre animales a los más pequeños de la casa.
- Desarrollo de la lectoescritura; ya que tienen que escribir al final de la actividad.
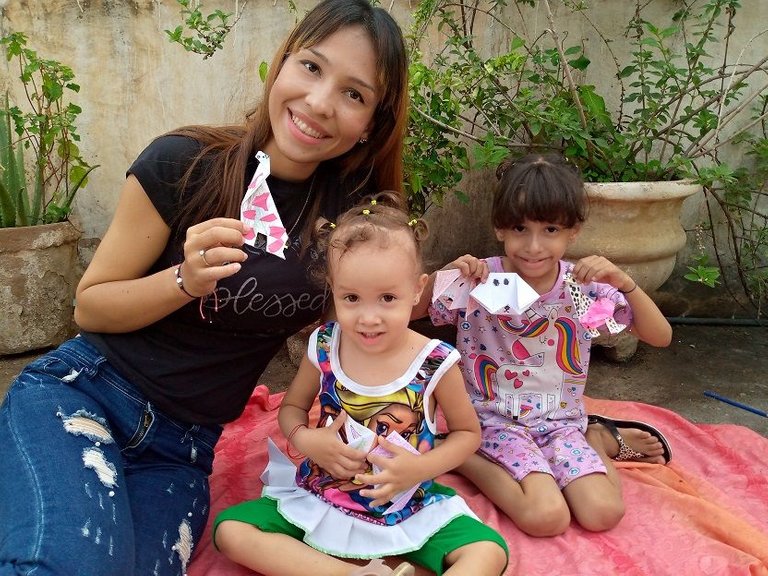
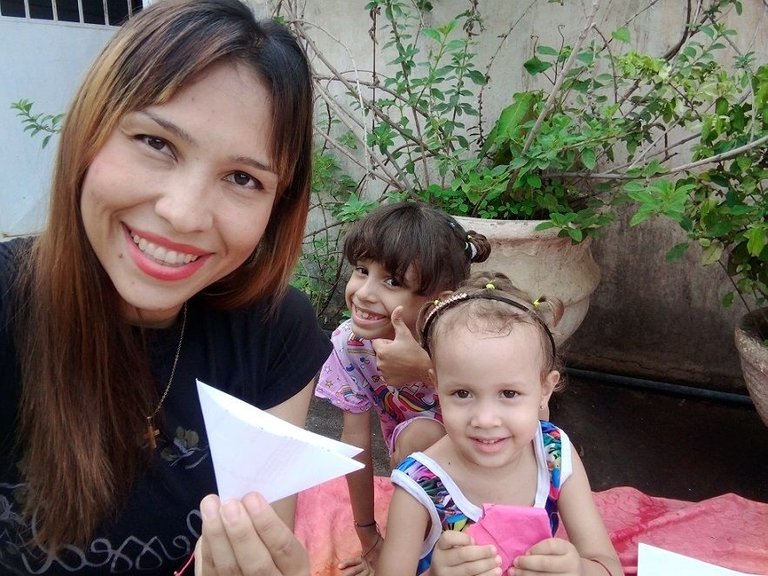
We spent a very entertaining afternoon creating these figures and giving each one that touch of color and creativity. I invite you at home with your little ones to do them, it is a pleasant moment where everyone can share with the family, strengthening ties of love, communication and teamwork, as well as bringing to light the artist that each one is with this technique hehe
Pasamos una tarde muy entretenida en la creación de estas figuras y dando a cada una ese toque de color y creatividad. Te invito en casa con tus pequeños a realizarlas, es un momento ameno donde pueden todos compartir en familia, fortaleciendo lazos de amor, comunicación y trabajo en equipo, así como también sacar a la luz en artista que es cada uno con esta técnica jeje


This has been the content of this creative mom today with love, I hope you liked it. Until next time
Este ha sido el contenido de esta mamá creativa en el día de hoy con mucho cariño, espero que les haya gustado. Hasta la próxima.

These are actually some nice simple origami pieces for children to start learning with. Thank you for sharing.
That's right, something very simple to take those first steps, those beginnings in this beautiful origami technique, which has so many benefits for them in its simplicity.
Thank you for the support and visit in this content.
Greetings and blessings my friends.
Thank you for sharing this, I have been looking for this type of origami to play with my son. Good evening!
I hope that each of the images will serve you with their respective step by step to put it into practice in your home friend.
Greetings, thank you for your visit in this content.
You're welcome (^_^)
I really love how they turned out! Really really really cute! For some reason, I'm not into origami but I'll give it a try some day! 😏
Thank you for your visit and support in this content. I invite you to put it into practice ... from the smallest to the largest in the house with this he entertains himself hehe
Cheers
My pleasure!
Maybe I will. It isnt my thing but maybe I'll try it! Thank you very much!
Hola @leomarylm 👋
También me gusta trabajar la técnica de origami con mis niños ya que es muy educativa y los beneficios son increíbles para su desarrollo.
Un gusto leerte, saludos 🤗
Que bueno saber que la pones en practica y realmente es así, cuenta con muchos beneficios y sumado que a los pequeños les llama mucho la atención las figuras de papel.
Saludos y bendiciones