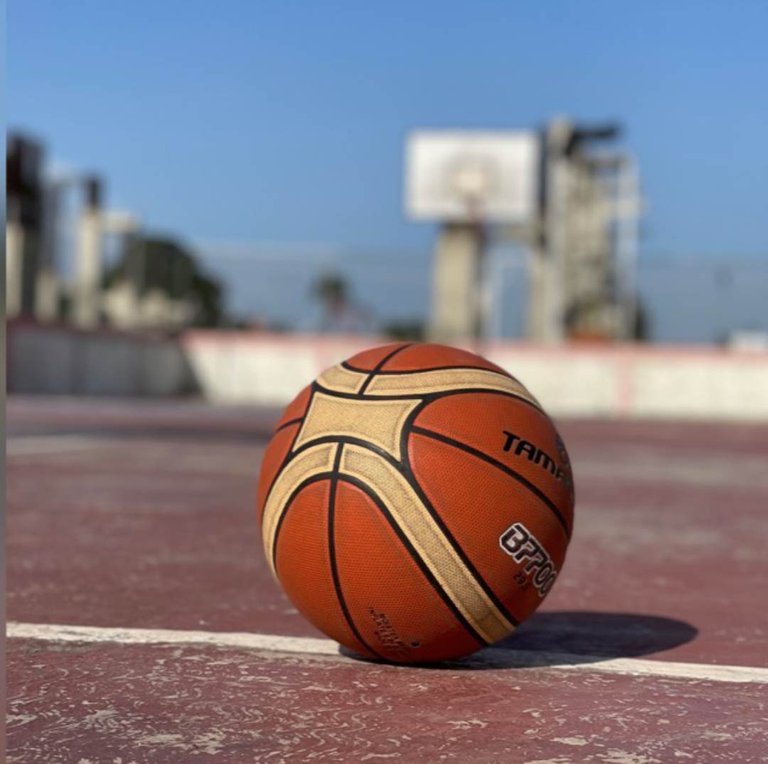
Hello friends, I hope you are very well, I am in this dear community with the desire to share with you a job I did for the community basketball court. I practice basketball, apart from cycling, the field where I play with my friends has been a bit deteriorated and we have been working together to restore it a bit and thus continue enjoying the games. This time I have decided to collaborate with 2 nets for the rings since I did not have them, the previous ones were destroyed over time. The process is short and simple, and it can not only be done with laces but also with chains and it is more stylish. I'll show you how it's done below.
Hola amigos, espero que se encuentren muy bien, me encuentro en esta querida comunidad con el deseo de compartir con ustedes un trabajo que hice para la cancha de basket de la comunidad. Yo practico baloncesto, a parte de ciclismo, la cancha donde juego con mis amigos ha estado un poco deteriorada y hemos estado trabajando entre todos para poder restaurarla un poco y así poder seguir disfrutando de los partidos. Esta vez he decidido colaborar con 2 redes para los aros ya que no tenía, las anteriores se destruyeron con el tiempo. El proceso es corto y sencillo, y no solo se puede hacer con cordones sino que tambien puede hacerse con cadenas y queda con más estilo. Les mostraré a continuación como se hace.

 |  |  c c |
|---|---|---|
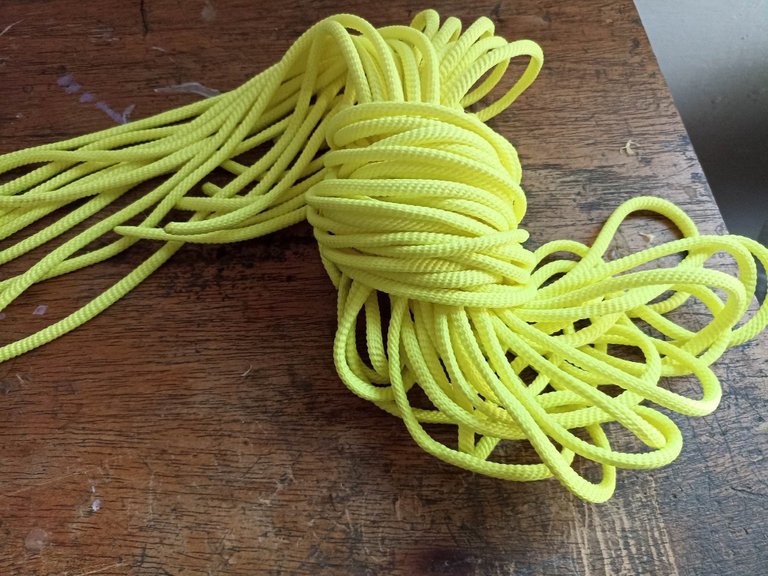 | 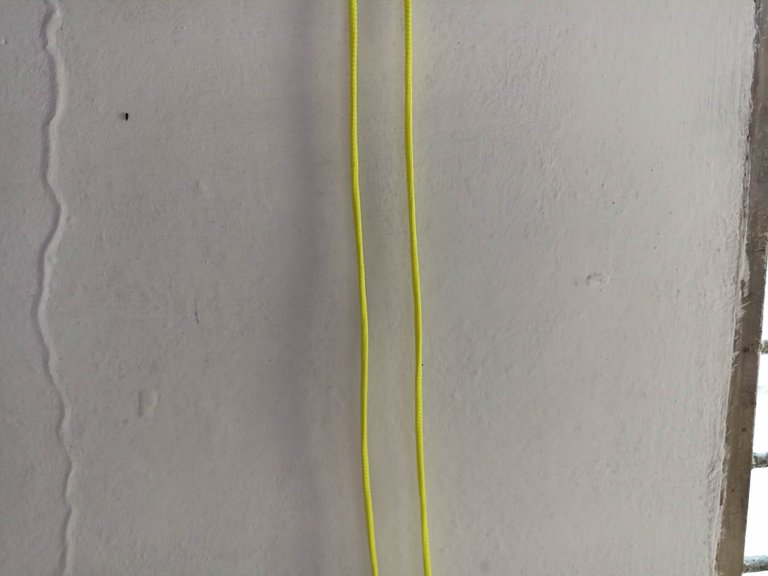 | 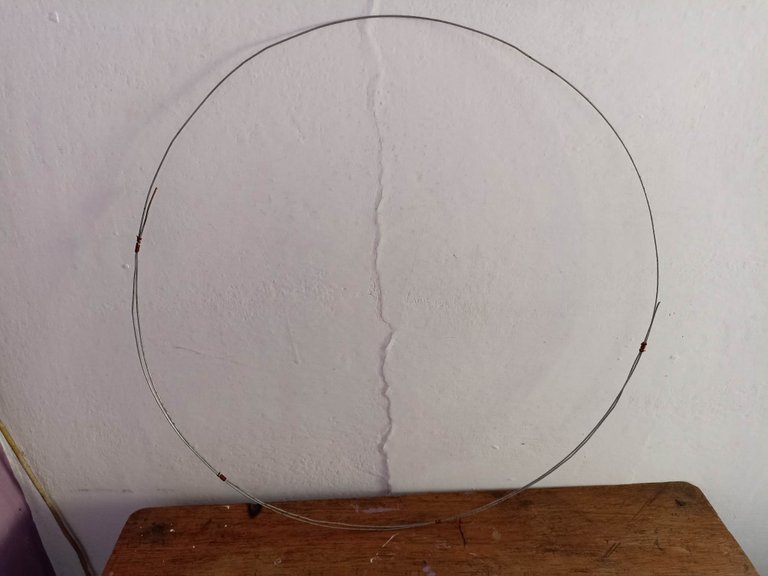 |
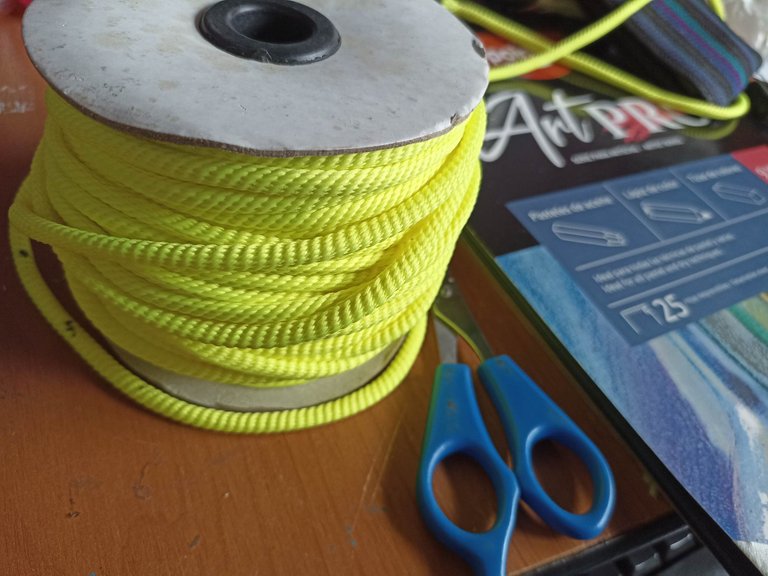
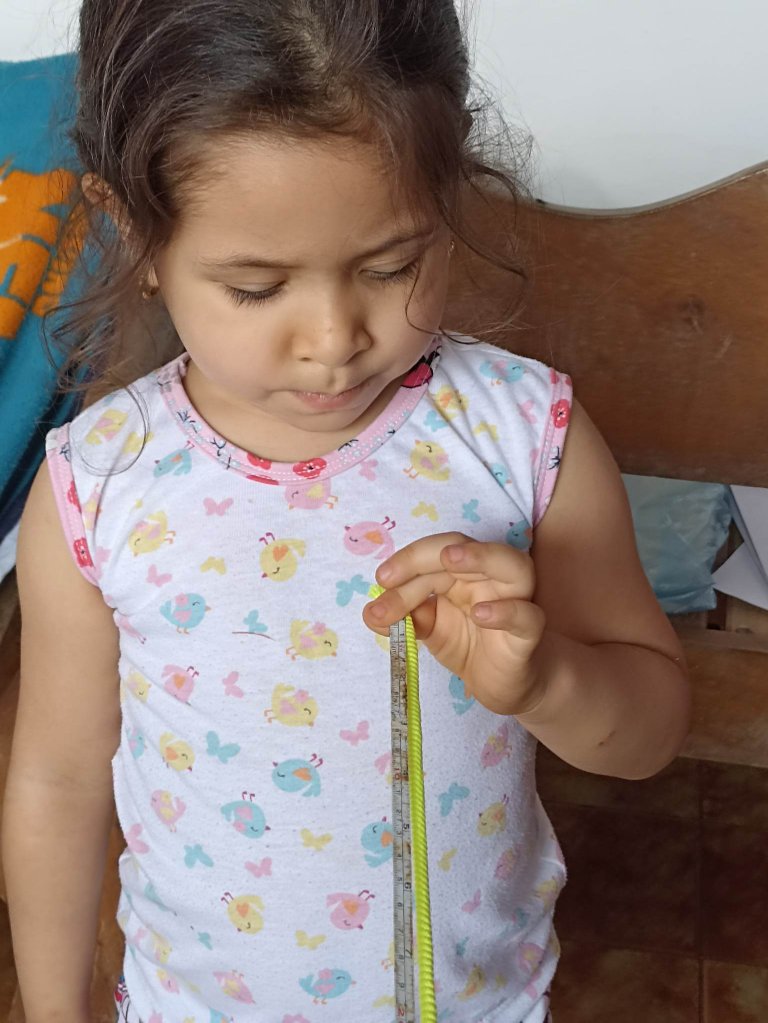
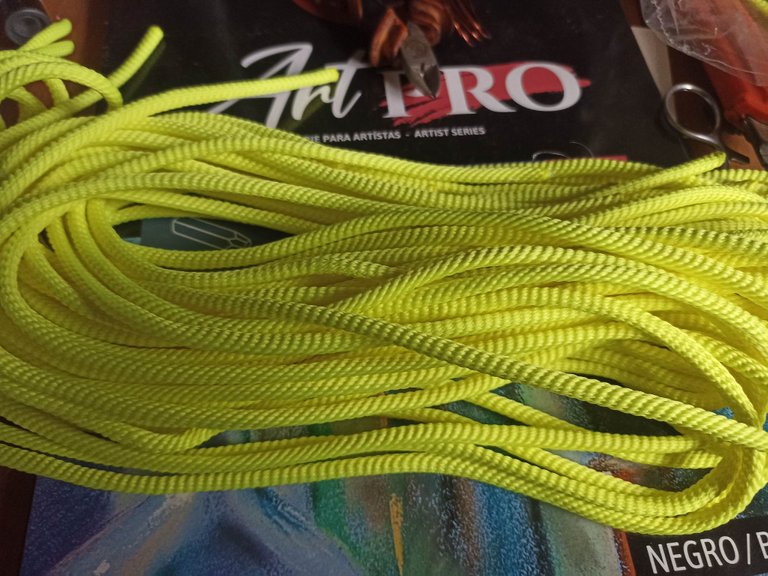
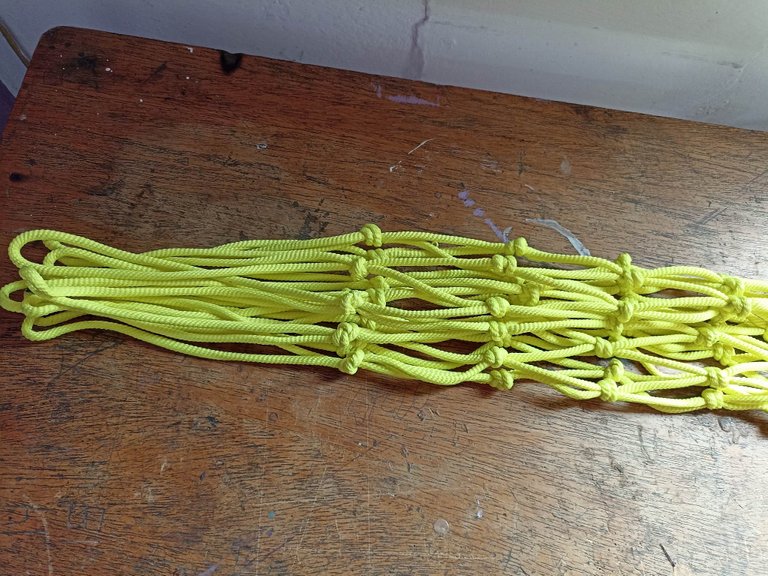
I used a roll of cord that measures 50 meters, it is the right measure to make both nets, the cord is double, and it is a small one covered with a larger one, this will give greater resistance over time, since the court is outdoors . My little daughter was helping me, she did not stop helping me for a second, so it was a joint effort hehe, I taught her how to handle scissors and how to measure the laces. Each one of the nets is made with 12 main cordons, each cord measures two meters, as the mesh must be hung in the middle, 1 meter would remain on both sides. I cut all the cords and out of 24 in total, 48 meters of cord were used, only one was left. As a mold I used a wire that I doubled myself and I put the measurements of professional basketball hoops, a diameter of 45 centimeters.
Utilicé un rollo de cordón que mide 50 metros, es la medida justa para hacer ambas redes, el cordón es doble, y es uno pequeño cubierto con uno más grande esto dará mayor resistencia con el tiempo, ya que la cancha se encuentra al aire libre. Mi pequeña hija fue mi ayudando, no dejó de prestarme su ayuda ni un segundo, así que fue un trabajo en conjunto jeje, le enseñe como debe manipularse unas tijeras y como se miden los cordones.. Cada una de las redes está hecha con 12 cordondes principales, cada cordón mide dos metros, como la maya debe colgarse por la mitad quedaría 1 metro para ambos lados. Corté todos los cordondes y de 24 en total se gastaron 48 metros de cordon, solo sobró uno. Como molde utilicé un alambre que yo mismo lo doble y le puse las medidas de los aros de basket profesionales, un diámetro de 45 centímetros.
 |  |  |
|---|---|---|
 |  | 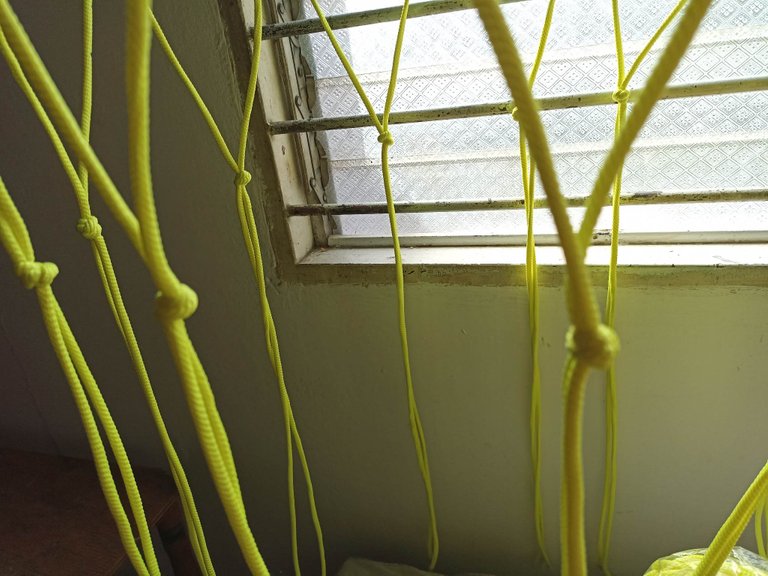 |
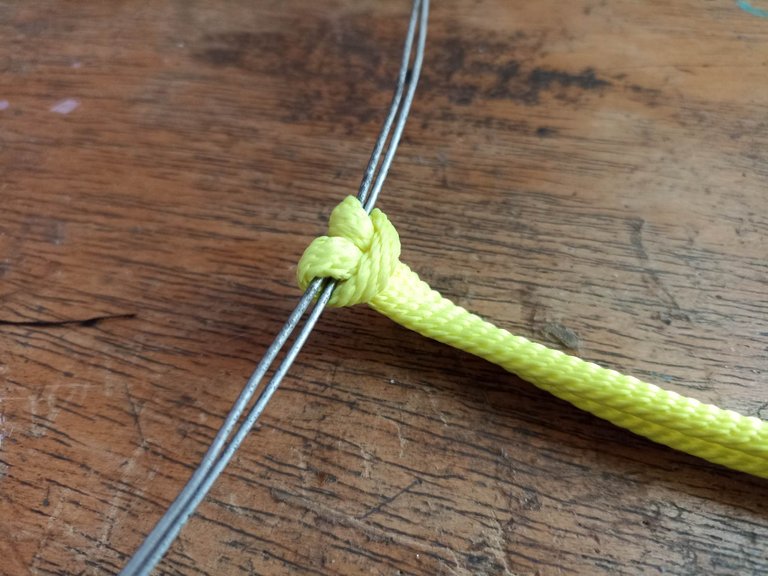
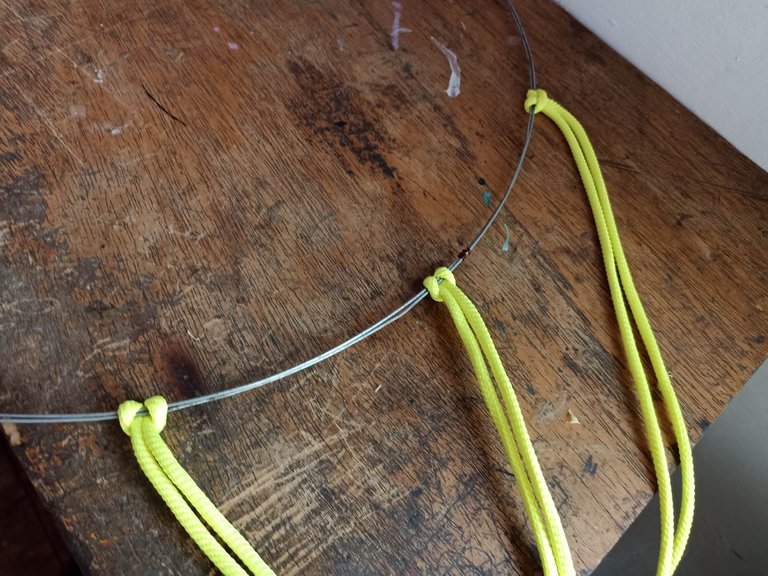
Now let's get to work, once each strip was cut I tied them to the diameter of the ring with an easy knot to make, I distributed the 12 strips around the ring until I completed them and thus began with the first level of knots. I made this first level of 20 centimeters, it is important not to make it too short because without the ball then it will be difficult for it to enter, with this measurement it looks very good, to make sure we can insert a ball to see how it looks. So this is how I make all the knots around the ring following the same measurement so that it doesn't come out crooked.
Ahora manos a a la obra, una vez cortado cada tira fui amarrandolas al diámetro del aro con un nudo facil de hacer, distribuí las 12 tiras alrededor del aro hasta completarlas y así comencé con el primer nivel de los nudos. Este primer nivel lo hice de 20 centímetros, es importante no hacerlo muy corto porque sinó el balón luego le costará entrar, con esta medida queda muy bien, para asegurarnos podemos introducir un balón para ver como queda. Entonces así voy haciendo todos los nudos alrededor del aro siguiendo la misma medida para que no salga torcido.
 |  |  |
|---|---|---|
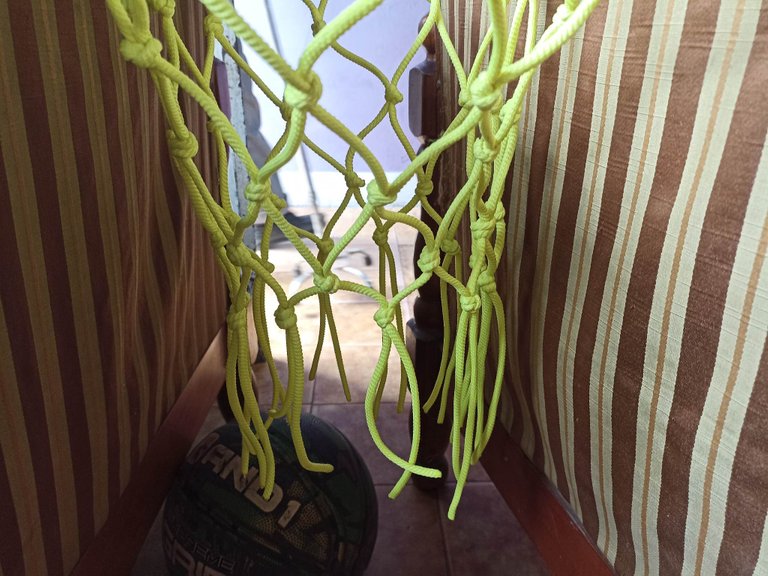 | 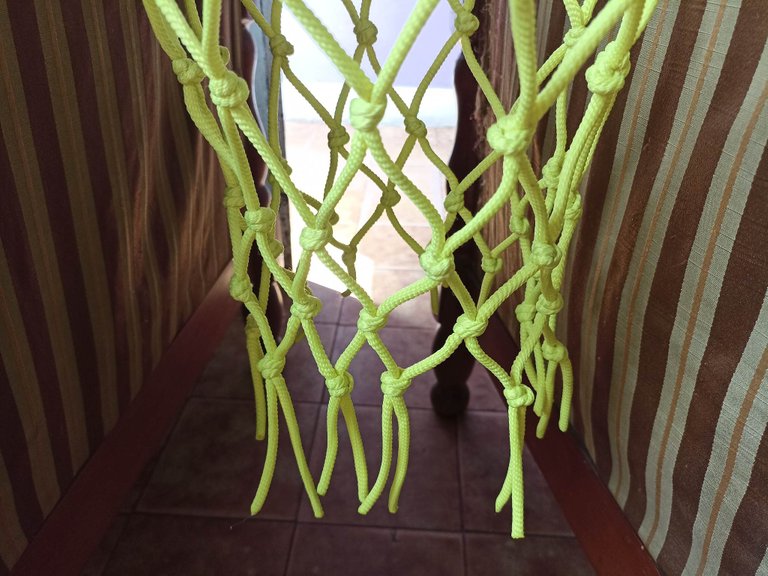 |  |
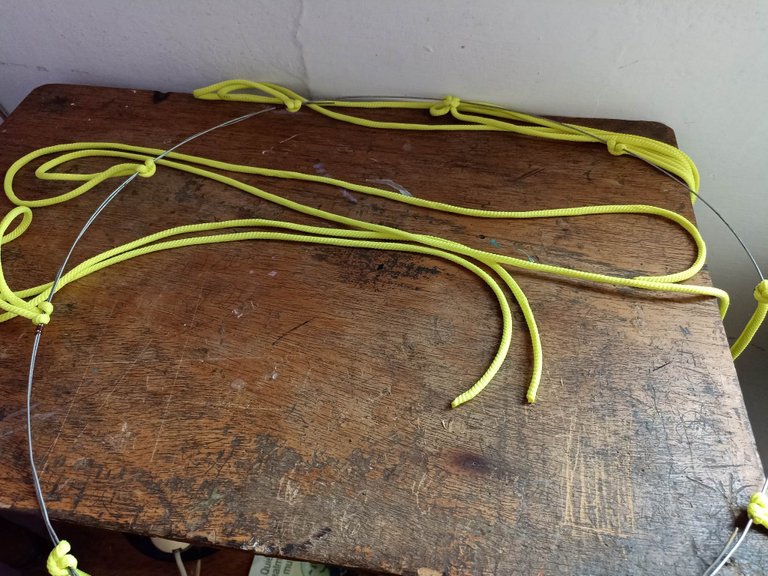
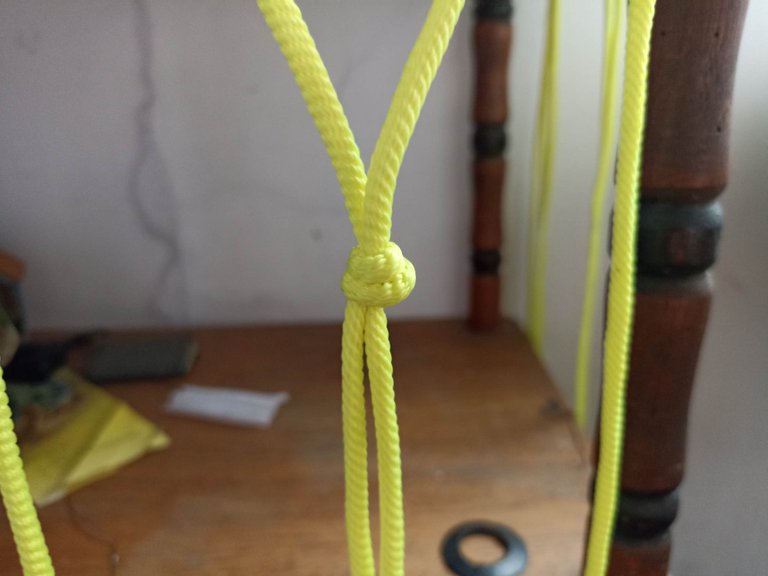
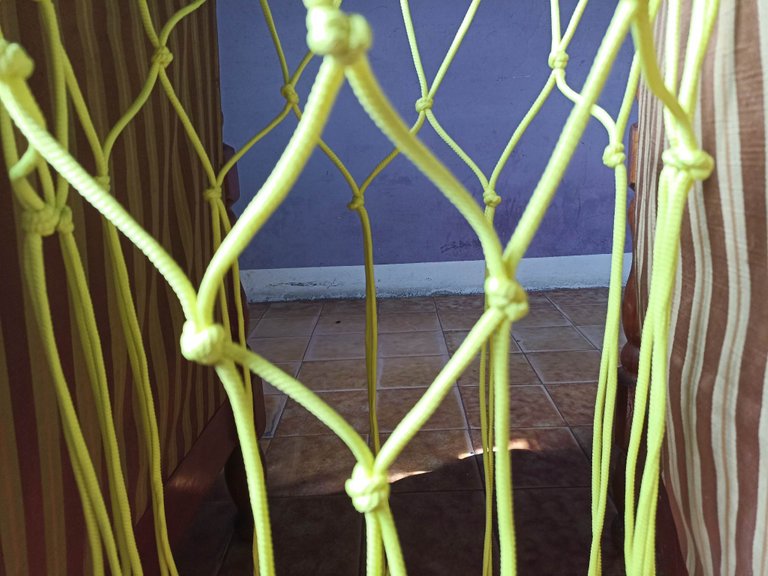
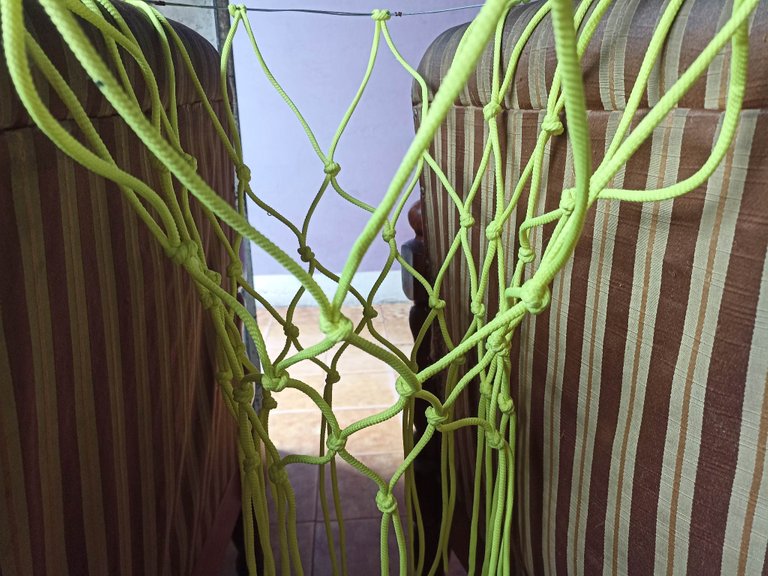
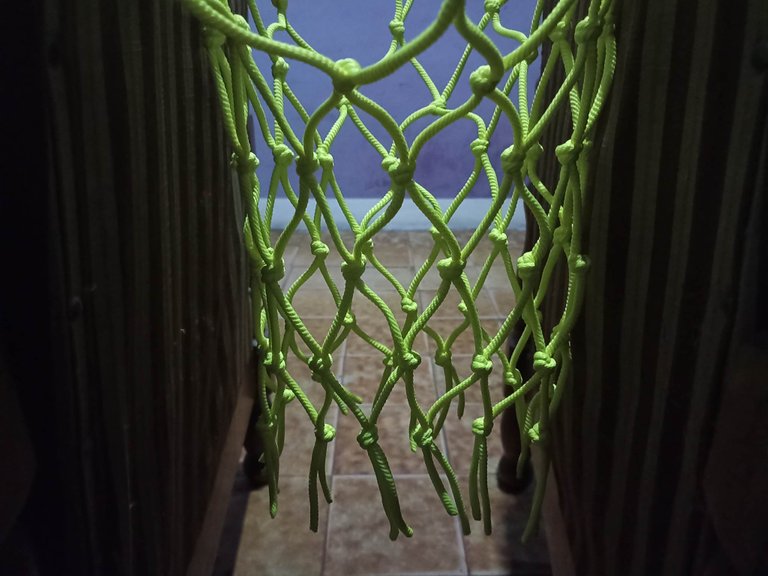
After making the first we must place the ring in a place where the free strips can remain and thus tie the knots, in this way you can see that the knots are in a straight line. The first level measures 20 centimeters, the second level I did with a measure of 8 centimeters to reduce the entry of the net, for the third, fourth and fifth level I reduced the knots to 5 centimeters so it will look like a professional net that they use in the NBA hehe. Reducing the length of the knot straps helps give the net that basket shape. In the end it can be seen how it remains, in what is left over we can cut them all in the same way and burn the ends so that the cord does not get damaged over time.
Después de hacer el primer debemos colocar el aro en un lugar donde puedan quedar las tiras libres y así hacer los nudos, de esta manera se puede ver que los nudos vayan quedando en linea recta. El primer nivel mide 20 centímetros, el segundo nivel lo hice de una medida de 8 centímetros para reducir la entrada de la red, para el tercer, cuarto y quinto nivel redujé los nudos a 5 céntimetros así quedará como una red profesional de las que usan en la NBA jeje. El reducir la medida de las tiras para los nudos ayuda a darle esa forma de cesta a la red. Al final puede verse como queda, en lo que sobra podemos cortarlas todas de la misma forma y quemar las puntas para que el cordon no se dañe con el tiempo.
 |  |
|---|
 |  |
|---|
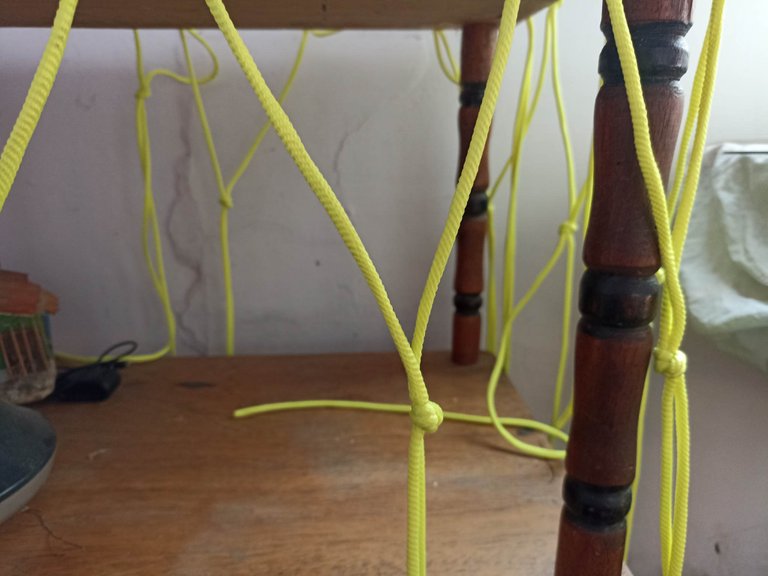
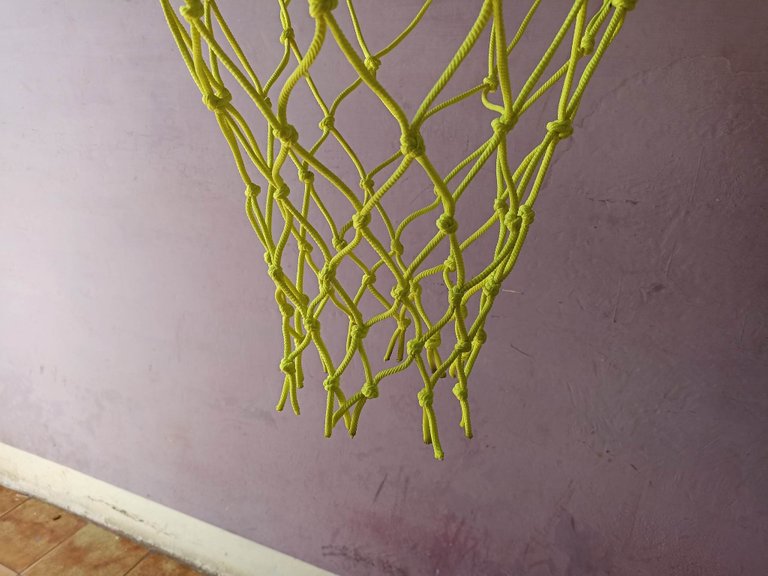
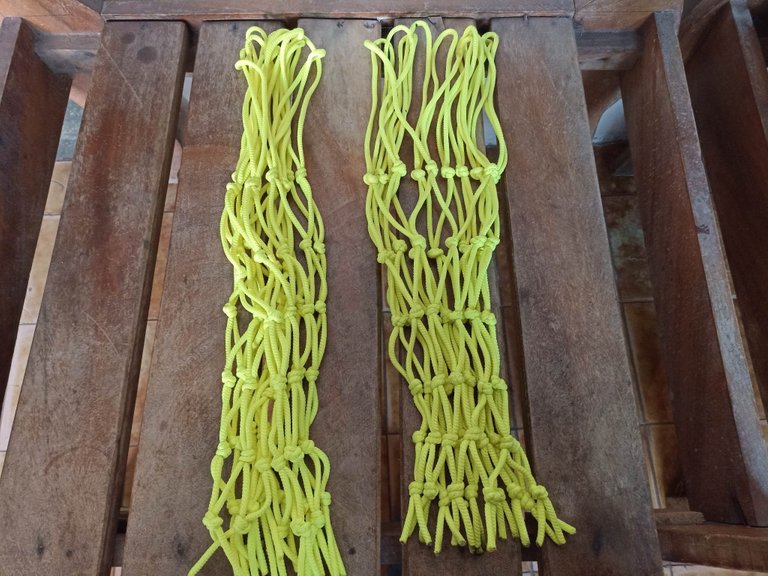
Finally I repeated the same process with the other 12 strings. I took apart the wire hoop that I made myself and pulled out the first net that I finished. Then I made the hoop again and put the other ropes on, I did the same process, with the knots and the measurements until the 2 nets were finally finished, ready to mount on the board and play a game of basketball on the court.
Por último repetí el mismo proceso con las otras 12 cuerdas. Desarmé el aro de alambre que yo mismo hice y saqué la primera red que terminé. Despues volví a hacer el aro y puse las otras cuerdas, hice todo el mismo proceso, con los nudos y las medidas hasta que por fin quedaron finalizadas las 2 redes listas para montar en el tablero y jugar en la cancha una partida de basket.
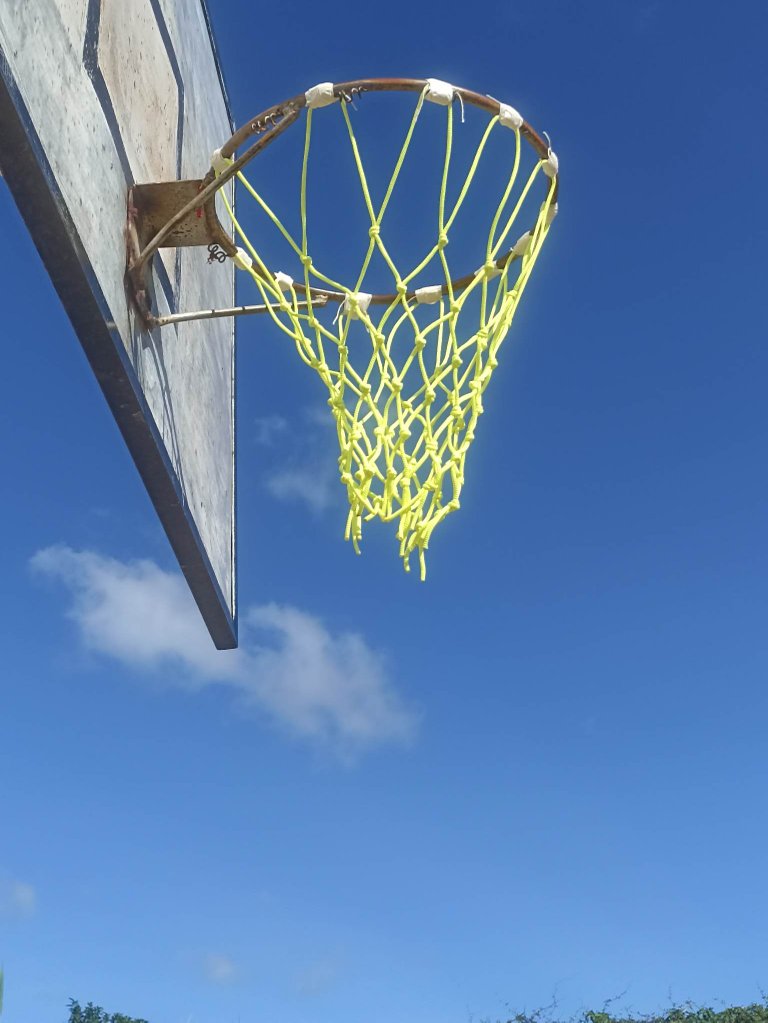

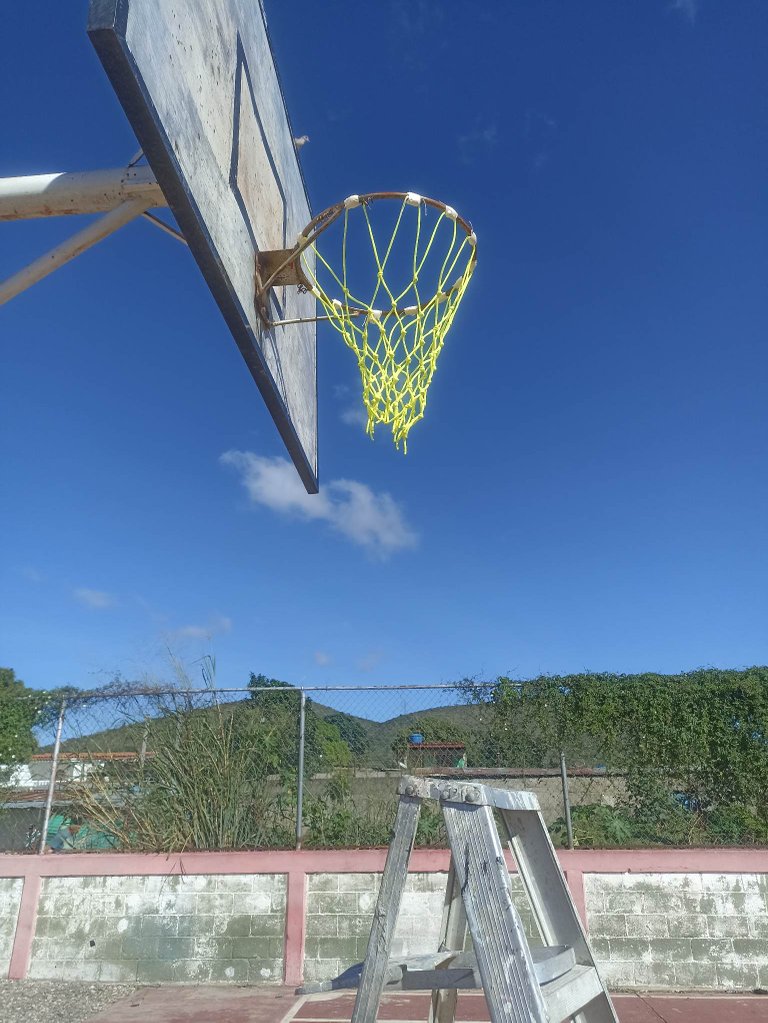
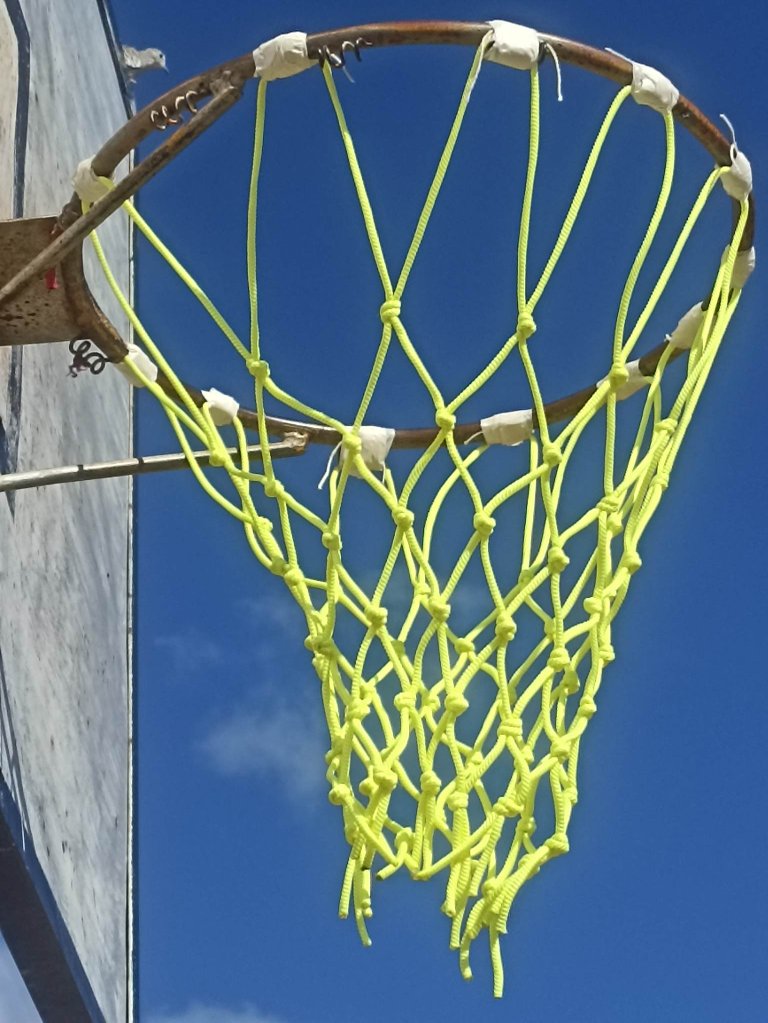
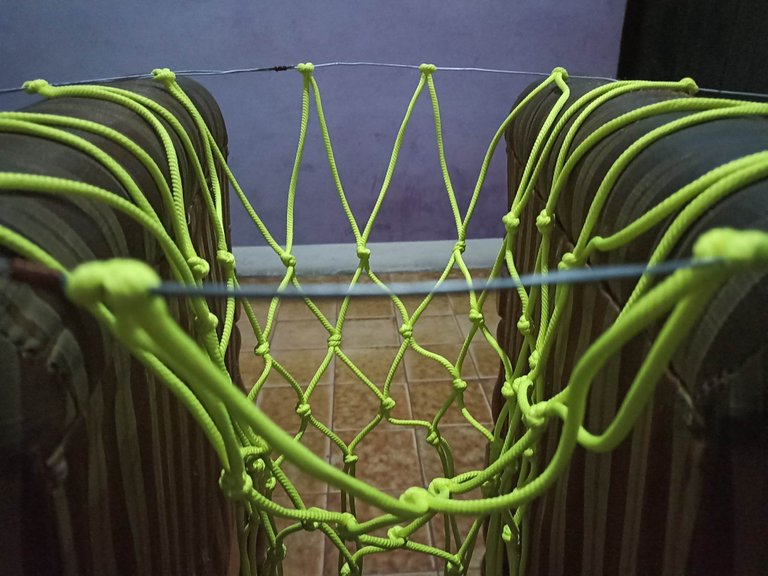
The last step of all was to find a ladder and go to the court and put the nets in the hoops. To place them I used nylon thread and adhesive tape since the rings are very old and the hooks they had to hold the nets fell off. It didn't take me long to do it, I also took the ball to play to prove that it looked good and the ball went in easily, the truth was that the result was the best in the world, just listening to the sound of the net when the ball went in gave me a lot pleasure, I really love this sport and there is not a day that I do not practice. My friends were happy and we agreed to soon paint the field and rescue other spaces, sport is the healthiest fun and helps keep youth out of the clutches of crime. I hope you liked this contribution, I wanted to share my passion for basketball by doing this little detail that will undoubtedly improve our game afternoons. I say goodbye until a new opportunity.
El último paso de todos fue buscar una escalera e ir a la cancha y poner las redes en los aros. Para colocarlas utilicé hilo de nylon y cinta adhesiva ya que los aros son muy antiguos y se les cayeron los ganchos que tenían para sostener las redes. No tardé mucho en hacerlo, también me lleve la pelóta de jugar para probar que haya quedado bien y el balón entre con facilidad, la verdad el resultado fue lo mejor del mundo, solo escuchar el sonido de la red al entrar el balón me produjo mucho placer, realmente amo este deporte y no hay día en el que no practique. Mis amigos quedaorn contentos y nos pusimos de acuerdo para pronto pintar la cancha y rescatar otros espacios, el deporte es la más sana diversión y ayuda a mantener a la juventud fuera de las garras de la delincuencia. Espero que les haya gustado este aporte, quise compartir mi pasión por el basket haciendo este pequeño detalle que mejorará sin duda alguna nuestras tardes de juegos. Me despido hasta una nueva oportunidad.
The rewards earned on this comment will go directly to the people( @fixie ) sharing the post on Twitter as long as they are registered with @poshtoken. Sign up at https://hiveposh.com.
Thank you for sharing this post in the DIYHUB Community!
Your content got selected by our fellow curator tibfox & you just received a little thank you upvote from us for your great work! Your post will be featured in one of our recurring compilations which are aiming to offer you a stage to widen your audience within the DIY scene of Hive. Stay creative & HIVE ON!
Please vote for our hive witness <3
Ha sido un gran gusto para mí poder compartirlo
Amigo tu idea es super creativa y original, muchas gracias por explicar el proceso de forma tan detallada... Si algún día tengo que realizar una "red de baloncesto", lo haré tomandno en cuenta éste tutorial.
Feliz semana, un abrazo! @fixie
Hola me alegra que te haya gustado, también esto puede usarse para otras cosas. No solo para balón estos. Si por ejemplo se le tapa el agujero de abajo puede quedar como.una cuesta para echar cosas, la forma de tejer puede hacerse del tamaño a gusto y con otro tipo de hilo según el propósito que uno quiera darle. Muchas gracias a ti pos pasar y comentar
Congratulations @fixie! You have completed the following achievement on the Hive blockchain And have been rewarded with New badge(s)
Your next target is to reach 75000 upvotes.
You can view your badges on your board and compare yourself to others in the Ranking
If you no longer want to receive notifications, reply to this comment with the word
STOPCheck out the last post from @hivebuzz:
Support the HiveBuzz project. Vote for our proposal!
Congratulations, your post has been upvoted by @dsc-r2cornell, which is the curating account for @R2cornell's Discord Community.
Enhorabuena, su "post" ha sido "up-voted" por @dsc-r2cornell, que es la "cuenta curating" de la Comunidad de la Discordia de @R2cornell.
Super agradecido con su apoyo para mi trabajo.
🏀 Excellent post, just what a baller needs. 👍🏻
Excellent work my friend and even better the purpose for which you made it, a valuable contribution to the people of your area and for yourself to enjoy healthy outdoor recreation.
So beautiful your doll helping you, a developing artist like her father.
Thank you for sharing your work.
Blessings @fixie ✨
Guardaré esto para ver si en algún momento me puedo hacer una por aqui, gracias por compartir!