A continución les muestro el paso a paso de la elaboracipon de las mismas aprtiendo de un croqui inicial para la plantilla de las mismas.
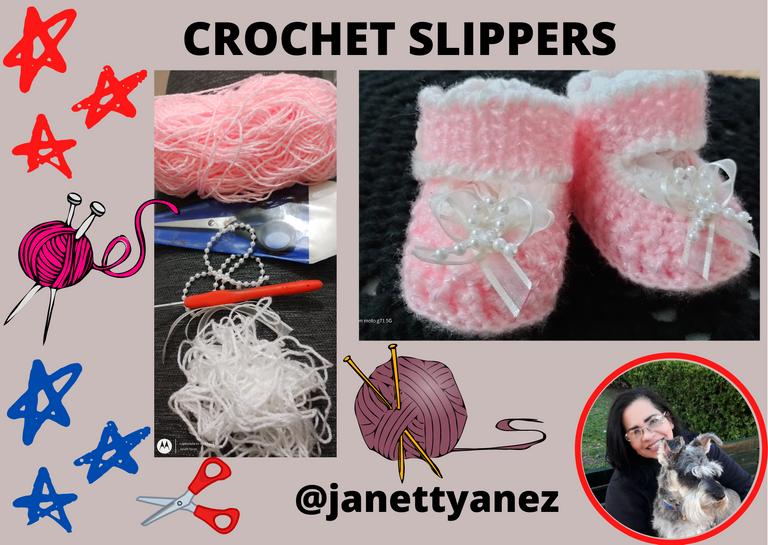
This is my first publication in this beautiful community, for which I prepared this initial project of making pink crochet slippers.
Here I show you the step by step of the elaboration of the slippers, starting from an initial crochet for the template of the slippers.

Es importante mencionar que estas zapatillas son una bebe 3 meses, por supuesto esto va a depender del tamaño.
It is important to mention that these slippers are a baby 3 months, of course this will depend on the size.

Procedimiento / Process
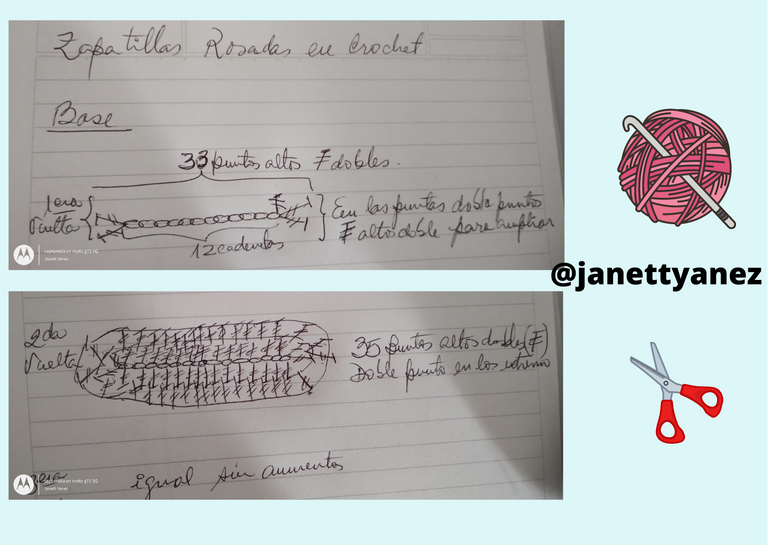
As a guide for the elaboration of the sole of the shoe, I present you a descriptive sketch that I have made myself.

Paso 1:
Basandonos en el criqui anterior se inicia con una cadeneta de 12 puntos, luego se hace dos puntos mas para iniciar la primera vuelta que consta de 33 puntos altos dobles.
En ambos extremos o esquinas se realizan dos puntos altos dobles en el mismo punto de la cadeneta.
Paso 2:
Se realiza dols vueltas mas con puntos altos dobles, como se visualiza en el croquis, siempre realizando en la esquinas un aumento de un punto para la segunda y tercera vuelta que conforman la plantilla.
Paso 3:
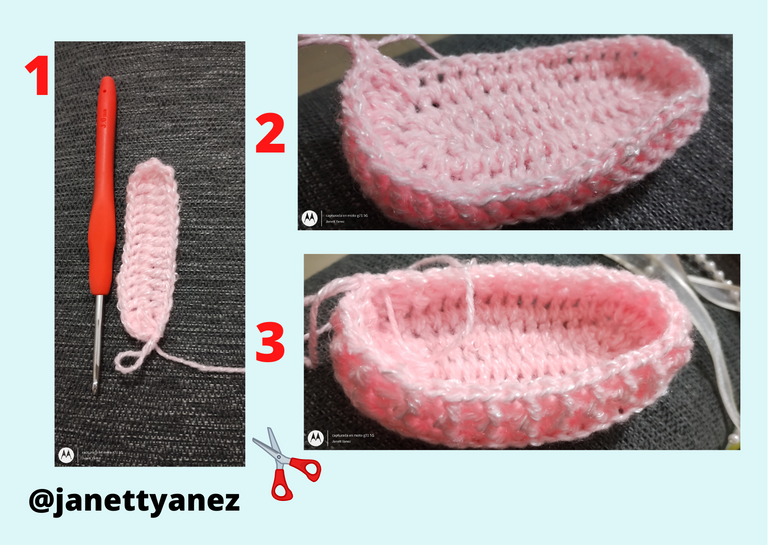
Para iniciar el levantamiento de la zapatilla se realiza con punto alto doble, el relieve que sirve de adorno, este se realiza tomando las puntadas por dentro y con una puntada interna y una externas alternadas durante toda la vuelta.
Step 1:
Based on the previous criqui start with a chain of 12 stitches, then make two more stitches to start the first round consisting of 33 double high stitches.
At both ends or corners you make two double high stitches in the same stitch of the chain stitch.
Step 2:
You make two more rounds with double crochet stitches, as shown in the sketch, always making an increase of one stitch in the corners for the second and third rounds that make up the template.
Step 3:
To start the lifting of the slipper, the relief that serves as an embellishment is made with double high stitch, this is done by taking the stitches on the inside and with an inner stitch and an outer stitch alternating during the whole round.

Paso 4:
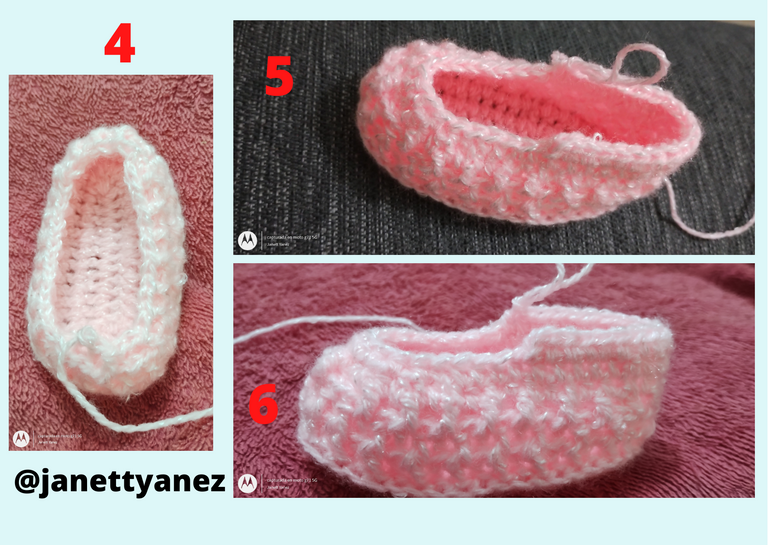
La segunda vuelta de la base de la zapatilla es igual a la primera con la diferencia que en la punta se realiza un punto de disminución alternado con un punto normal, hasta llegar a la curvatura de la zapatilla, como se visualiza en la imagen 4.
Paso 5:
Para iniciar el empeine del tobillo se inicia con punto simple doble desde la mitad de la zapatilla como se visualiza en la imagen 6, tejiendo 3-4 vueltas dependiendo de lo alto que quieran realizarla.
Paso 6:
La cuarta y quinta vuelta de la base de la zapatilla se realiza con punto bajo doble, mateniendo la disminución en uno en la curvatura de la zapatilla (Imagen 6).
Step 4:
The second round of the slipper base is the same as the first round with the difference that at the toe a decreasing stitch is made alternating with a normal stitch, until the curvature of the slipper is reached, as visualised in image 4.
Step 5:
To start the instep of the ankle start with double single knit from the middle of the slipper as visualised in image 6, knitting 3-4 rounds depending on how high you want to make it.
Step 6:
The fourth and fifth loops of the bottom of the slipper are knitted with double single crochet, keeping the decrease at one in the curvature of the slipper (Image 6).

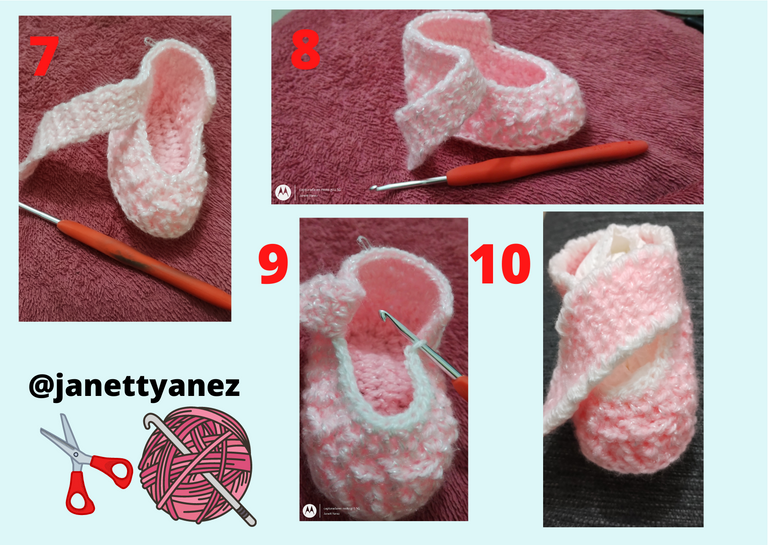
Paso 7 y 8:
Luego de terminado el empeine del tobillo, se procede a elaborar la cinta de ajuste, tejiendo con punto simple 18 vueltas del ancho de su preferencia.
La mostrada en el imagen es tejida con 4 puntos por solicitud de la madre de la beba.
Paso 9 y 10:
Para adornar se teje en el borde interno de la zapatilla con hilo blanco, en el borde interno con punto bao simple y alrededor de la base del tobillo y la cinta de ajuste con punto cangrejo.
Step 7 and 8:
After finishing the instep of the ankle, proceed to make the adjustment strap, knitting with single crochet 18 loops of the width of your choice.
The one shown in the image is knitted with 4 stitches at the request of the baby's mother.
Step 9 and 10:
To embellish knit around the inner edge of the slipper with white yarn, around the inner edge with single crochet and around the base of the ankle and the trim tape with crab stitch.

Accesorios y Adornos
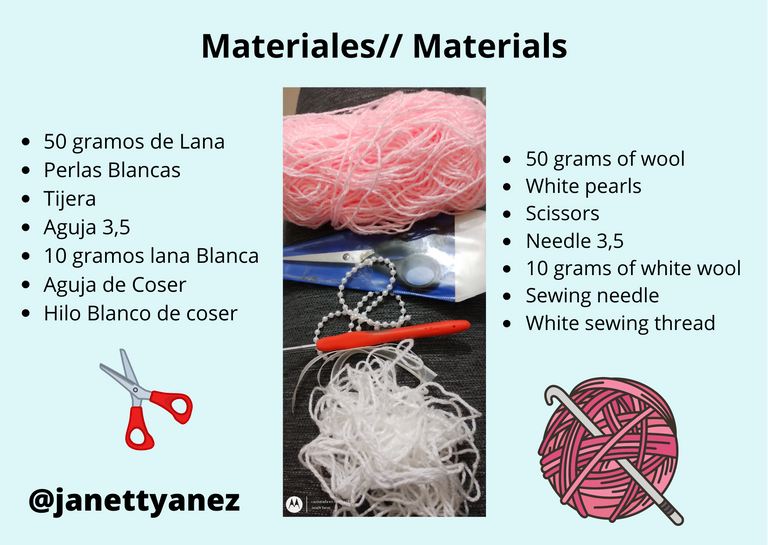
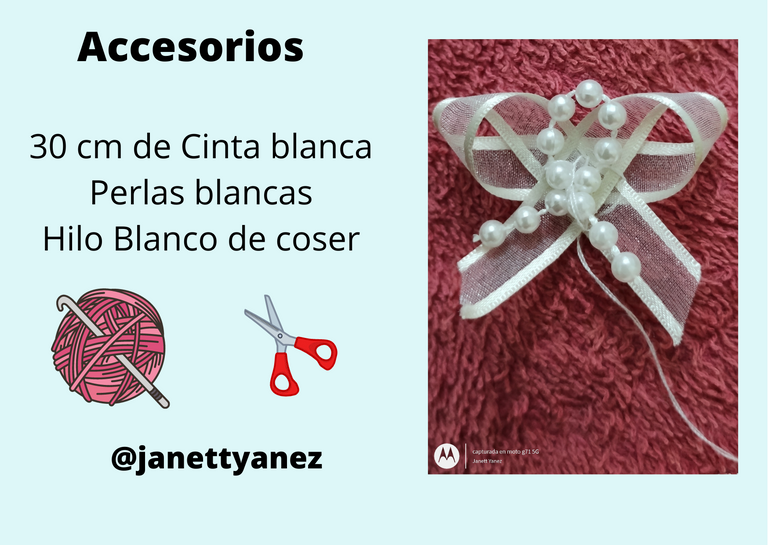
Para efecto de este primer proyecto le muestro la opción de lazo con perlas.
Se utiliza la mitad de la cinta para cada zapatilla y se doble en forma de lazo simple y las perlas se colocan en el medio dobladas en igual forma que la cinta.
Luego se dan algunas puntadas con hijo blanco, en la imagen a continuación se muestra el lazo con el hilo que se destaca para efecto de la explicación.
Finalmente se pega en la zapatilla con el mismo hilo que nos sobra, si como se coloca un botón a cada extremo de la zapatilla para ajustarla.
For the purpose of this first project I show you the option of lacing with pearls.
Half of the ribbon is used for each slipper and folded into a single loop and the pearls are placed in the middle folded in the same way as the ribbon.
Then a few stitches are given with white son, the picture below shows the loop with the thread highlighted for explanation effect.
Finally it is glued on the slipper with the same thread that we have left over, if as a button is placed at each end of the slipper to adjust it.
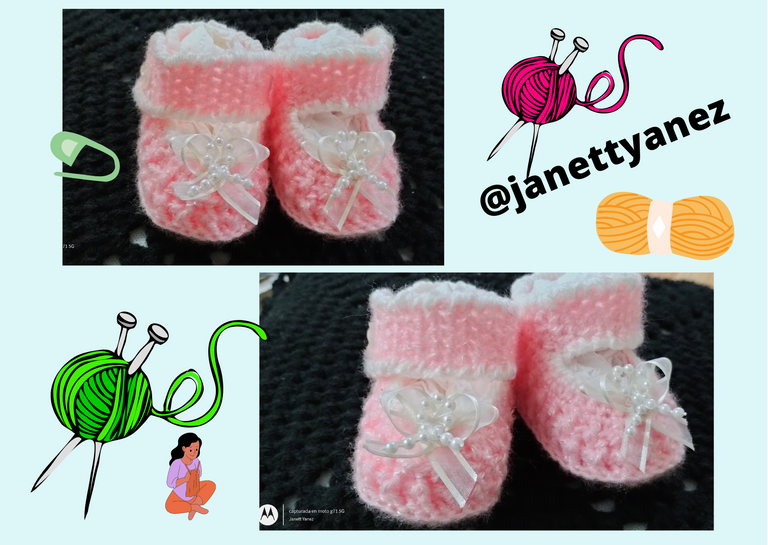
Finally, I would like to present the final result of this project.
Resultado Final

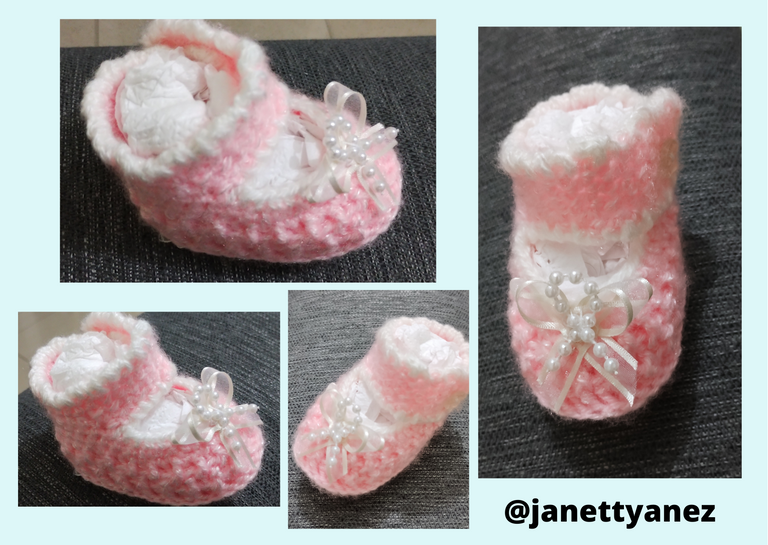

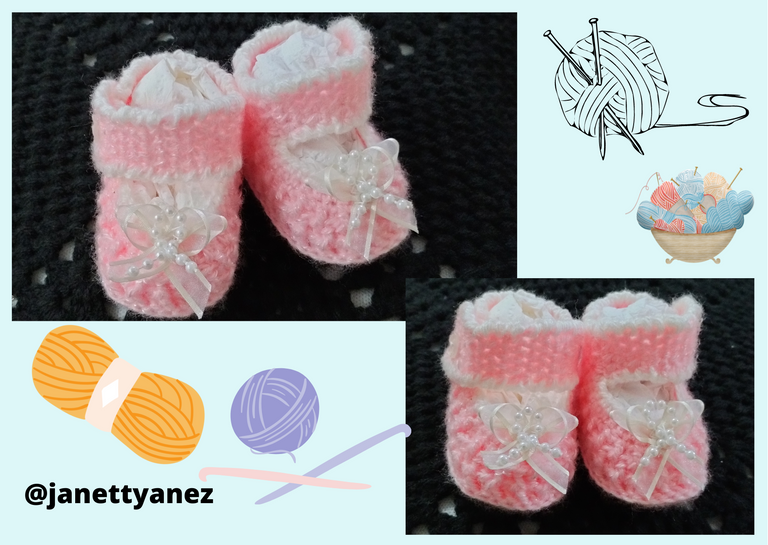

Espero que les guste este tutorial y le sea de ayuda para aquellos interesados en realizarlo.
Todas las imágenes son de mi propiedad, fueron tomadas con mi teléfono Motorola G71, los baner y collage fueron elaborados por mi con Canva.
I hope you like this tutorial and that it will be helpful for those interested in making it.
All the images are my property, they were taken with my Motorola G71 phone, the banner and collage were made by me with Canva.

The rewards earned on this comment will go directly to the person sharing the post on Twitter as long as they are registered with @poshtoken. Sign up at https://hiveposh.com.
Hola, tus zapatillas se ven tan hermosas, me gusta la combinación de colores. Creo que el paso a paso es muy fácil de seguir. gracias por compartir.
Gracias amiga por tu visita y comentario 🤗
Que preciosura. Un trabajo con mucho detalle y dedicación. Conozco mujeres que hacen estos trabajitos con mucha pasión y amor. Son hermosos. Y tuve la oportunidad de colocarles a mi princesa cuando estaba bebé. Se veía hermosa. Gran trabajo amiga @janettyanez
Gracias @natica83 por tu visita y hermoso comentario 🤗
Felicitaciones, preciosos los escarpines como le decimos en Venezuela.
Gracias por explicar detallademente cada paso para hacerlos.
Bendiciones. Feliz vida!
Gracias por tu visita y encanatdor comentario mi querida @raizayanez
Que cosita tan linda ❤ me encanta los zapatitos de bebe; bueno todas las ropas son bellas como ellos. Bendecido día amiga
Si asi es, todo lo de los bebes es hermoso.
Gracias por tu visita y comentario amiga @zullyarte 🤗